How to Make AI Characters Enter and Exit the Frame Cleanly
Create clean character entrances and exits by treating each crossing as a short, reference-first shot rather than asking one generation to handle an entire scene. Build a profile-safe identity sheet, place the character near the correct frame edge, describe one directional action, and cut only after the body has fully cleared the image.
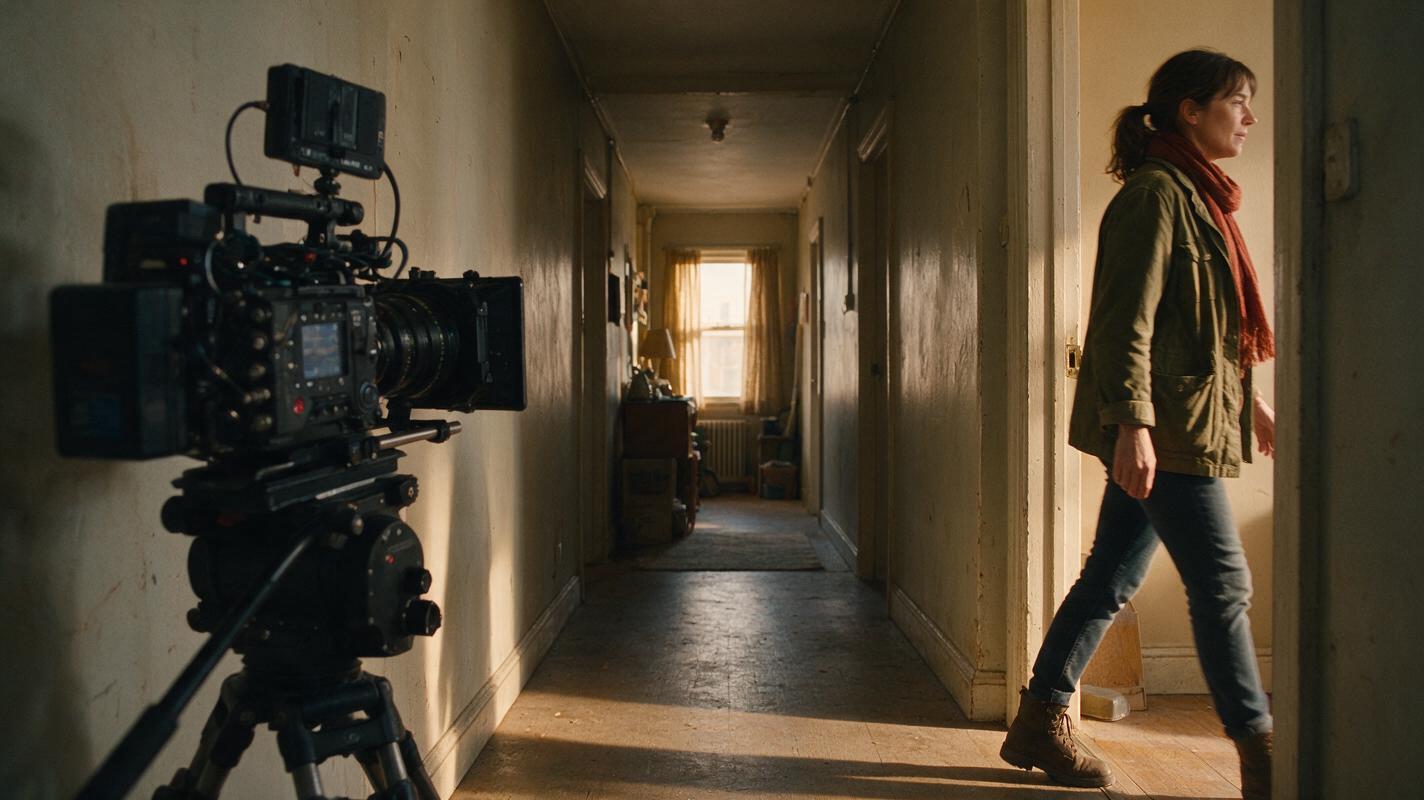
Table of contents
TL;DR
The fastest way to create a clean entrance or exit with image to video is to start with a deliberately blocked keyframe: place the character near the edge they will cross, preserve empty space in the direction of movement, and request one short action. Generate entrances and exits as separate clips, then cut on a fully empty frame or a frame in which the character is decisively inside the scene.
This avoids the usual failures: duplicated bodies at the edge, characters walking in the wrong direction, faces changing in profile, and limbs stretching as they leave the image.
Why frame crossings fail in AI video
An entrance looks simple to a viewer, but it asks a video model to solve several problems at once. The model must preserve identity while revealing a body that was previously outside the image, infer hidden limbs, maintain a coherent walking cycle, and understand exactly which border the character should cross.
Exits create the reverse problem. As less of the person remains visible, the model has fewer identity cues. It may compensate by inventing a second shoulder, leaving a ghost face near the border, bending a leg toward the camera, or pulling the subject back into the shot.
Common symptoms include:
- Direction reversal: the character begins moving right, hesitates, and drifts back toward the center.
- Edge duplication: a partial second person appears as the original body crosses the border.
- Profile drift: the face, haircut, or nose changes when the head turns sideways.
- Sticky framing: the camera follows a character that was supposed to leave a locked shot.
- Incomplete exit: a hand, foot, shadow, or piece of clothing remains unnaturally attached to the edge.
A reliable crossing is not a long acting scene. It is a short piece of screen choreography with one subject, one direction, one border, and one camera rule.
Three ways to stage a clean entrance or exit
- Edge-first image-to-video: create a still with the character already close to the relevant edge, then animate only the crossing.
- Empty-plate entrance: establish the location without a person, then create a second keyframe in which the character is partially entering from a specified border.
- Performance-led crossing: record a simple real-world walk-in or walk-out and use motion transfer when precise body timing matters more than fully generated movement.
The edge-first method is the best starting point because it minimizes the distance the model must invent. The empty-plate method is useful when the editor needs a clean establishing beat. Performance transfer is the practical fallback for difficult turns, stops, or interactions with doors.
How MagicBoat handles this workflow
MagicBoat brings image generation and video models into one free multi-model workflow. You can build identity references with image models such as Seedream, Flux, or GPT Image, then test the same keyframe through Seedance, Kling, or Veo without rebuilding the project around separate accounts.
For this tutorial, use MagicBoat’s text to video options for quick blocking tests, but switch to a reference-first image workflow for the final crossing. Text alone is useful for discovering a camera angle; an image anchor gives you much stronger control over wardrobe, location, starting position, and the edge being crossed.
| Task | Recommended input | Prompting emphasis |
|---|---|---|
| Explore the shot | Text description | Direction, border, camera lock |
| Protect identity | Character sheet | Profile features and wardrobe anchors |
| Generate the crossing | Blocked keyframe | One action in chronological order |
| Copy exact timing | Source performance | Readable silhouette and unobstructed limbs |
| Repair a good take | Finished clip plus identity reference | Localized facial correction only |
Step 1 — Build an identity sheet that survives profile views
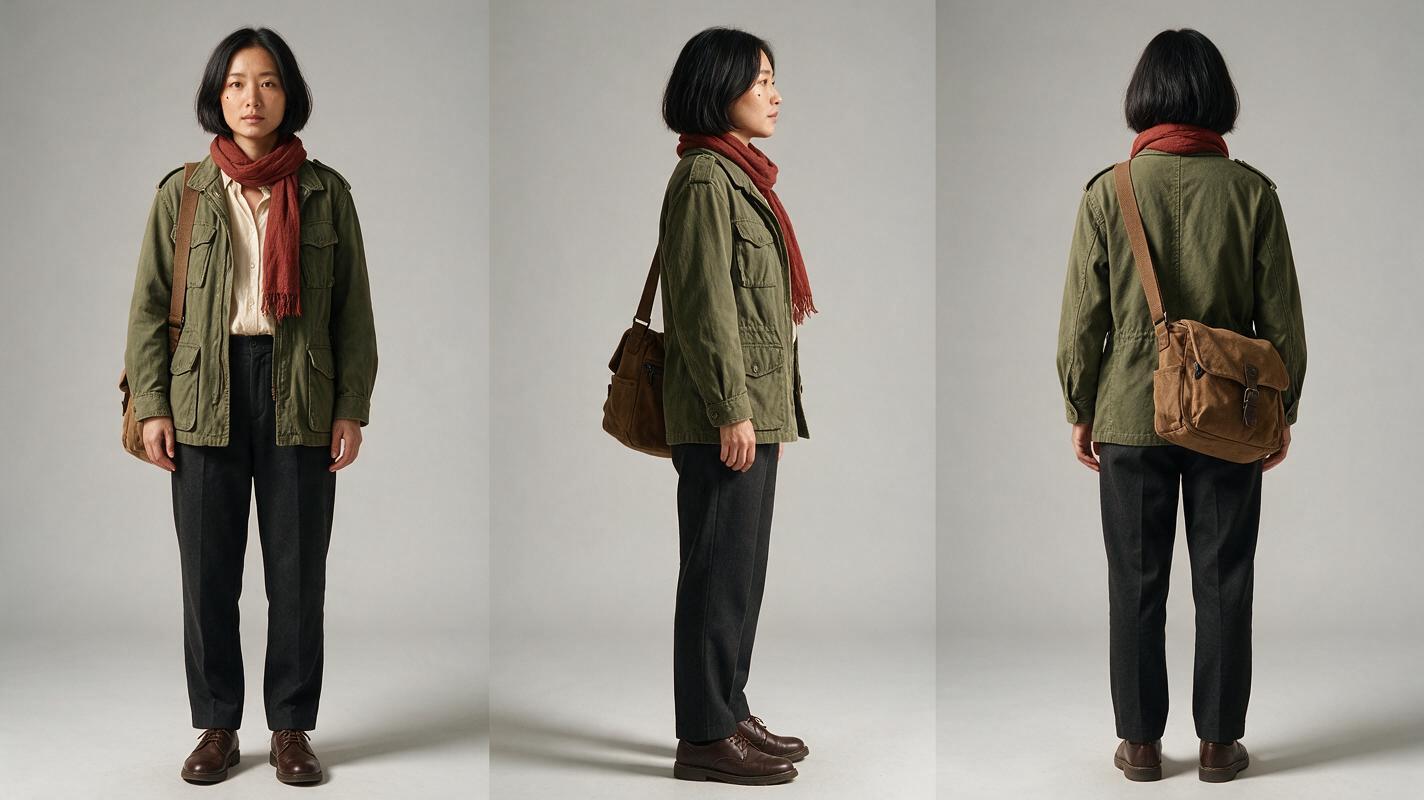
Create a three-panel sheet before staging the shot. A front portrait is not enough: entrances and exits frequently expose the side of the nose, jaw, ear, hairline, and coat silhouette. Those features must already exist in the reference.
Keep the outfit asymmetrical but simple. In this example, a rust-red scarf and a canvas messenger bag create readable identity anchors without adding small patterns that may flicker.
Photorealistic three-panel character reference sheet of the same 32-year-old East Asian woman in every panel, oval face, straight jaw-length black bob tucked behind the left ear, small beauty mark below the right eye, olive field jacket, cream crew-neck shirt, rust-red scarf, dark straight-leg trousers, worn brown canvas messenger bag crossing from right shoulder to left hip, realistic skin and fabric texture. PANEL LAYOUT: exactly three equal full-body panels arranged left to right, front view, left-side profile view, back view; no extra portraits, no overlapping bodies, no text, no labels. MANDATORY CAMERA: eye-level camera, 70mm portrait perspective, camera perpendicular to each view, identical subject scale in all panels. MANDATORY BACKGROUND: neutral light-gray seamless studio background with soft grounded shadows. MANDATORY FORMAT: landscape 16:9, editorial photography, neutral softbox lighting, anatomically correct hands, consistent clothing and facial structure across all three views.Expected result: one reusable identity sheet with a clear profile and back silhouette. Regenerate it if the panels show different bags, hair lengths, footwear, or facial proportions.
Step 2 — Draw the crossing as a blocking map
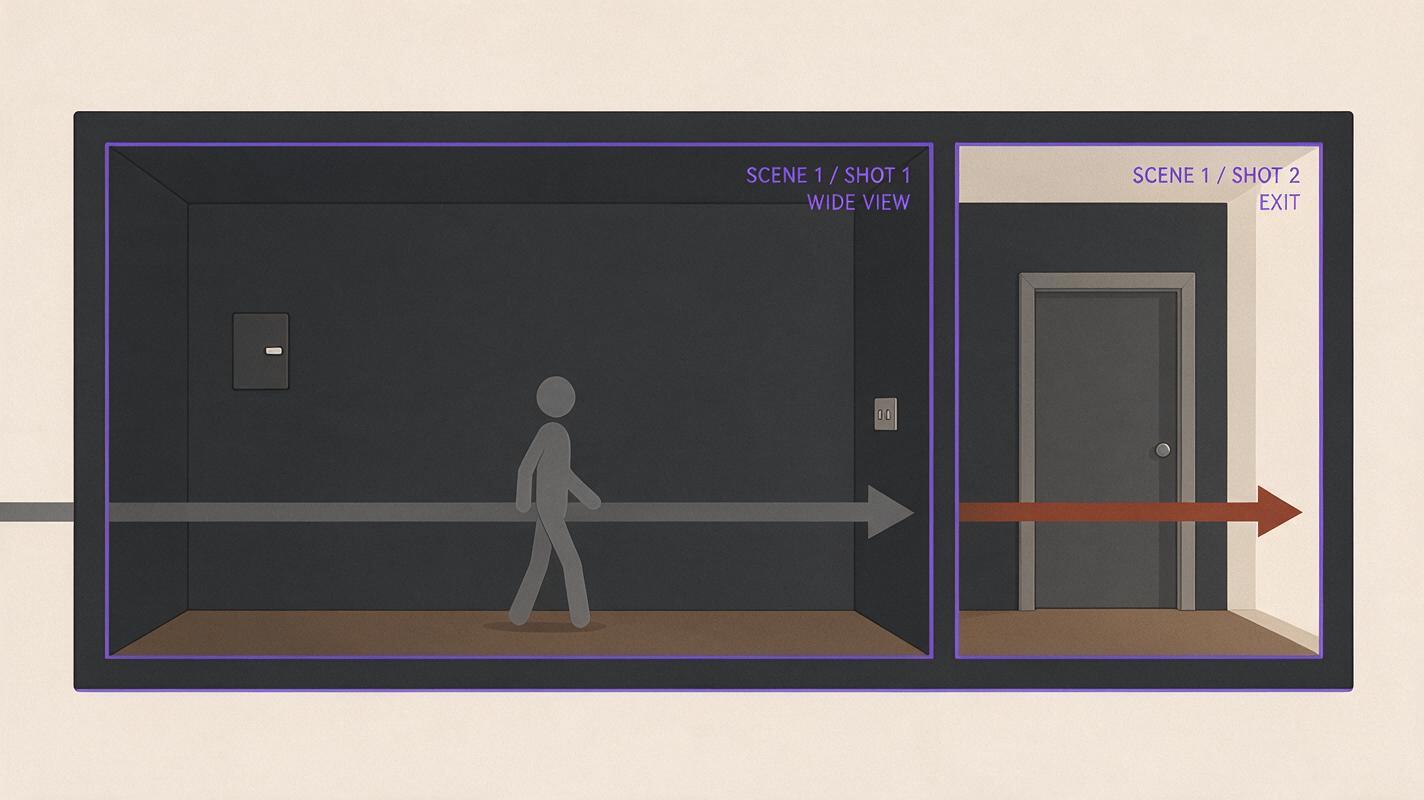
Decide the geometry before generating a cinematic frame. Mark the entrance edge, exit edge, walking line, final stopping point, and camera behavior. Use screen-relative language such as left edge of frame rather than vague scene-relative phrases such as “walks over there.”
Clean cinematic blocking diagram for a locked 16:9 camera frame in a modest apartment hallway, showing one character path only: the character begins just outside the left edge, enters screen-left, walks horizontally toward screen-right, pauses on a clearly marked stopping point at the right third, then exits through the right edge in a separate shot. MANDATORY LAYOUT: one large landscape frame, left and right borders clearly differentiated with simple arrows, walking path shown as one continuous line, no duplicate character figures, no software interface, no logos. MANDATORY CAMERA: static eye-level wide shot, perpendicular to the walking path, no pan, no zoom, no perspective ambiguity. Editorial production-planning diagram with restrained gray, black, and rust-red colors.A locked side-on camera is easier than a diagonal approach because the silhouette stays readable. If you need depth, use a shallow three-quarter path and specify the near edge precisely.
Expected result: a one-line movement plan that can be translated into a prompt without contradictory directions.
Step 3 — Generate the entrance keyframe near the border
Build a lived-in location, then place only part of the character inside the frame. Starting with the subject halfway through the doorway is more reliable than asking the video model to invent a complete person from an empty plate.
Use this still-image prompt with the character sheet as your identity reference where the selected model supports references:
Cinematic editorial-realism still inside a narrow lived-in apartment hallway at late afternoon, scuffed pale walls, dark wooden floor, coat hooks, a small framed print, warm daylight entering from a room at screen-right. The same woman from the identity reference is beginning to enter from the left edge of frame; her right foot and most of her torso are visible, her left shoulder remains just outside the image, rust-red scarf and brown messenger bag clearly visible, natural mid-step posture, looking toward screen-right. MANDATORY CAMERA: locked eye-level wide shot, 35mm lens, camera perpendicular to the hallway, no tilt, no camera movement, full doorway visible. MANDATORY COMPOSITION: character occupies the far-left quarter, generous empty space across the center and right side, one person only, no mirrors, no cropped head, landscape 16:9. Photorealistic film still, restrained contrast, believable skin and fabric texture.Avoid placing the face directly against the border. Keep enough of the head visible for the model to preserve identity, while leaving part of the trailing shoulder or bag outside the frame to communicate the entrance.
Expected result: a stable starting frame that already contains the difficult reveal geometry.
Step 4 — Animate one directional action
Keep the entrance clip short and stop the prompt after the character reaches a mark. Do not combine entering, speaking, turning, picking up an object, and leaving in one generation.
Seedance-style chronological prompt
The woman continues walking naturally into the hallway from the left edge of frame. First her trailing shoulder and messenger bag clear the left border. She takes two measured steps toward screen-right, the scarf and bag moving subtly with her stride, then stops on the right third of the frame and settles her weight. Her face, haircut, clothing, and body proportions remain unchanged. The camera stays completely locked at eye level. One woman only. No duplicate body at the border, no direction reversal, no camera tracking, no sudden turn toward the lens.Kling-style compact prompt
Locked eye-level wide shot. The referenced woman enters from screen-left, takes two natural steps toward screen-right, and stops at the right third. Preserve her black bob, beauty mark, olive jacket, rust-red scarf, and brown messenger bag. Subtle cloth motion, stable hallway geometry, one continuous walking cycle. Static camera; no pan, zoom, duplicate person, backward drift, body morphing, or border residue.Expected result: one complete entrance with a readable start, two-step crossing, and stable stopping pose. Compare outputs rather than assuming one model will be best for every location or character.
Step 5 — Generate the exit as a separate shot
For the exit, begin with the character already close to the destination border. Preserve negative space behind them so the movement has an obvious direction. If the character must leave through screen-right, place them in the right third and angle the torso slightly rightward.
The woman resumes walking toward screen-right and exits fully through the right edge of frame. Her face turns only slightly into profile; identity, hairstyle, scarf, jacket, messenger bag, and body proportions remain stable. Her front foot crosses the border first, followed by her torso, bag, trailing arm, and rear foot in natural order. After she leaves, the camera holds on the completely empty hallway for a brief beat. Locked camera, unchanged lighting and background. No return into frame, no duplicate limbs, no person remaining at the edge, no camera follow, no zoom.The phrase in natural order helps define the disappearance as a physical sequence. The empty hold is equally important: it provides an editable endpoint and makes border artifacts easy to spot.
Expected result: a clean empty plate at the end of the clip. If the model keeps following the subject, reinforce “locked camera” and remove any language suggesting a tracking shot.
Step 6 — Diagnose the four common edge failures
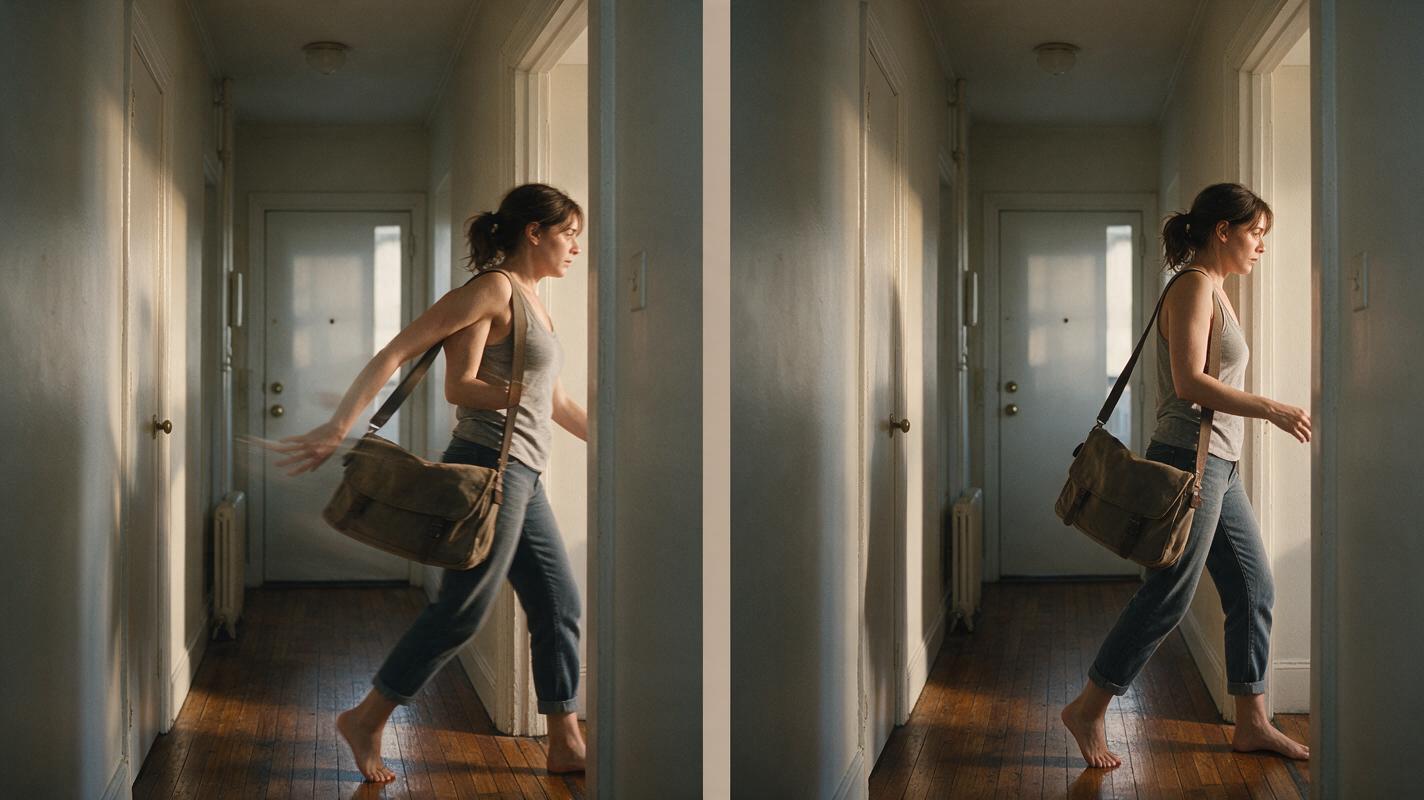
Review the crossing frame by frame, especially when the face, hips, bag, hands, and rear foot intersect the border. A clip can look convincing at normal speed while containing a one-frame duplicate that becomes visible after editing or compression.
Photorealistic editorial before-and-after comparison showing the same woman exiting a narrow apartment hallway through the right edge. LEFT PANEL, FAILURE: a duplicated shoulder and ghost hand remain attached to the border, the messenger bag stretches, and the camera begins panning right. RIGHT PANEL, CORRECTED: the woman exits in a natural anatomical sequence and the locked camera reveals a clean empty hallway with no body residue. MANDATORY LAYOUT: two equal side-by-side 16:9 film frames separated by a narrow neutral divider, same camera angle, same lighting, same location, no software interface, no text labels, no logos. MANDATORY CAMERA: eye-level locked 35mm wide shot, camera perpendicular to movement. Cinematic editorial realism, natural late-afternoon light, realistic anatomy and fabric.| Failure | Likely cause | Single-variable repair |
|---|---|---|
| Character reverses direction | Conflicting action or camera language | Repeat “toward screen-right” and remove secondary actions |
| Second body appears | Too much unseen anatomy is invented | Start with more of the original body visible |
| Face changes in profile | Reference lacks side-view information | Use the three-view identity sheet and reduce head rotation |
| Camera follows the exit | Movement is interpreted as a tracking shot | Specify a locked camera and an empty hold |
| Foot or bag sticks to edge | Exit ends before the crossing resolves | Request the rear foot and bag to clear before the hold |
Expected result: a diagnosis tied to one prompt change. Do not simultaneously change the camera, duration, path, wardrobe, and model, or you will not know which repair worked.
Step 7 — Edit around decisive frames
Trim an entrance after the newly visible anatomy has stabilized. For an exit, keep the first fully empty frame and a short empty hold. Avoid cutting while a foot or bag is still intersecting the border unless the cut itself hides the contact.
For consecutive shots, maintain screen direction. If the character leaves one room through screen-right, the next shot will usually read most clearly when they enter the new room from screen-left. Reversing that relationship can make the character appear to have turned around off-camera.
Expected result: an edit in which the viewer understands where the character came from, where they went, and whether the camera stayed in place.
Keep the same crossing logic across projects
Save a small continuity package rather than only saving the final video:
- The three-view identity sheet.
- A clean location plate.
- The entrance and exit keyframes.
- A one-line screen-direction rule.
- The successful motion prompt.
- Notes about the selected model and the type of failure rejected.
For a recurring series, assign stable movement rules to important locations. A character might always enter the apartment from screen-left and leave toward screen-right. Consistent geography reduces both model ambiguity and editing mistakes.
Alternative: use motion transfer for precise timing
Use motion transfer when the shot includes a turn, a sudden stop, a limp, a dance-like entrance, or contact with a real doorway. Record the performer from the same approximate camera angle as the generated location. Keep the entire body visible until the intended border crossing, use even lighting, and avoid loose garments that hide the knees or elbows.
The cleanest source performance contains one entrance or one exit, not both. A simple side-on phone clip often transfers more reliably than an elaborate cinematic move because the body landmarks remain readable.
Alternative: replace a drifting face with face swap
If the body motion, clothing, lighting, and camera are already successful, a localized face swap can repair identity drift. Use it only while enough of the face remains visible and avoid forcing a front-facing identity onto an extreme profile.
Regenerate instead when the head shape, hair silhouette, body, or bag has changed. Face replacement cannot fix broken anatomy or a duplicated character at the frame edge.
Where this workflow falls short
- Extreme close-ups: there may be too little visual context for the model to understand the border crossing.
- Busy doorways: glass, mirrors, hanging coats, and moving background people can produce duplicates or reflections.
- Long walks: identity and gait are more likely to drift when the model must sustain many steps.
- Heavy occlusion: entering from behind furniture requires the model to reconstruct hidden anatomy.
- Fast motion: running exits can distort hands, feet, bags, and trailing fabric.
When these conditions are unavoidable, split the action into shorter shots or use a recorded performance as the motion source.
FAQ
Should I generate the empty room first?
Yes, especially if you want an establishing beat or a clean endpoint. Keep the plate as a geography and lighting reference, then create a separate still with the character partially inside the frame.
Can text to video create a clean entrance without a reference?
It can work for exploration, but identity, wardrobe, and exact starting position are less constrained. Use a blocked reference image for a repeatable final shot.
How many steps should the character take?
Start with one to three visible steps. Longer crossings increase the chance of gait, face, wardrobe, and background drift.
Should the camera track the character?
Not for the first test. A locked camera makes direction and border behavior easier to diagnose. Add camera motion only after the crossing works.
Why does the model leave a ghost at the edge?
The model may be uncertain about how hidden body parts should disappear. Start closer to the border, define the order in which the body clears it, and request an empty hold afterward.
When should I use face swap instead of regenerating?
Use it when motion and anatomy are good but facial identity drifts slightly. Regenerate when the silhouette, hair, limbs, clothing, or number of people is wrong.
Create your first clean frame crossing
Start with one character, one border, and one locked camera. Build the profile-safe reference, generate the entrance and exit separately, and compare the same keyframe across MagicBoat models. Create your first AI video free and test the prompts above now.
Final checklist
- Use a front, side, and back character sheet.
- Name the exact screen edge and movement direction.
- Place the character close to the border in the keyframe.
- Keep the camera locked for the first generation.
- Animate only one entrance or exit per clip.
- Request a natural order for body parts crossing the edge.
- Hold briefly on the empty frame after an exit.
- Inspect the face, bag, hands, and feet frame by frame.
- Repair one variable at a time.
Keywords
image to video, character consistency, AI video tutorial, Seedance prompts, Kling prompts, motion transfer, AI video workflow