Why AI Comic Hands Lose Props—and the Prompt Fixes That Work
AI-generated comic hands often float around weapons, cups, phones, and tools because the prompt names the objects without defining their physical contact. This guide shows illustrators how to describe grip geometry, choose safer crops, preserve action clarity, and repair only the broken hand–prop region with Seedream 4.5.
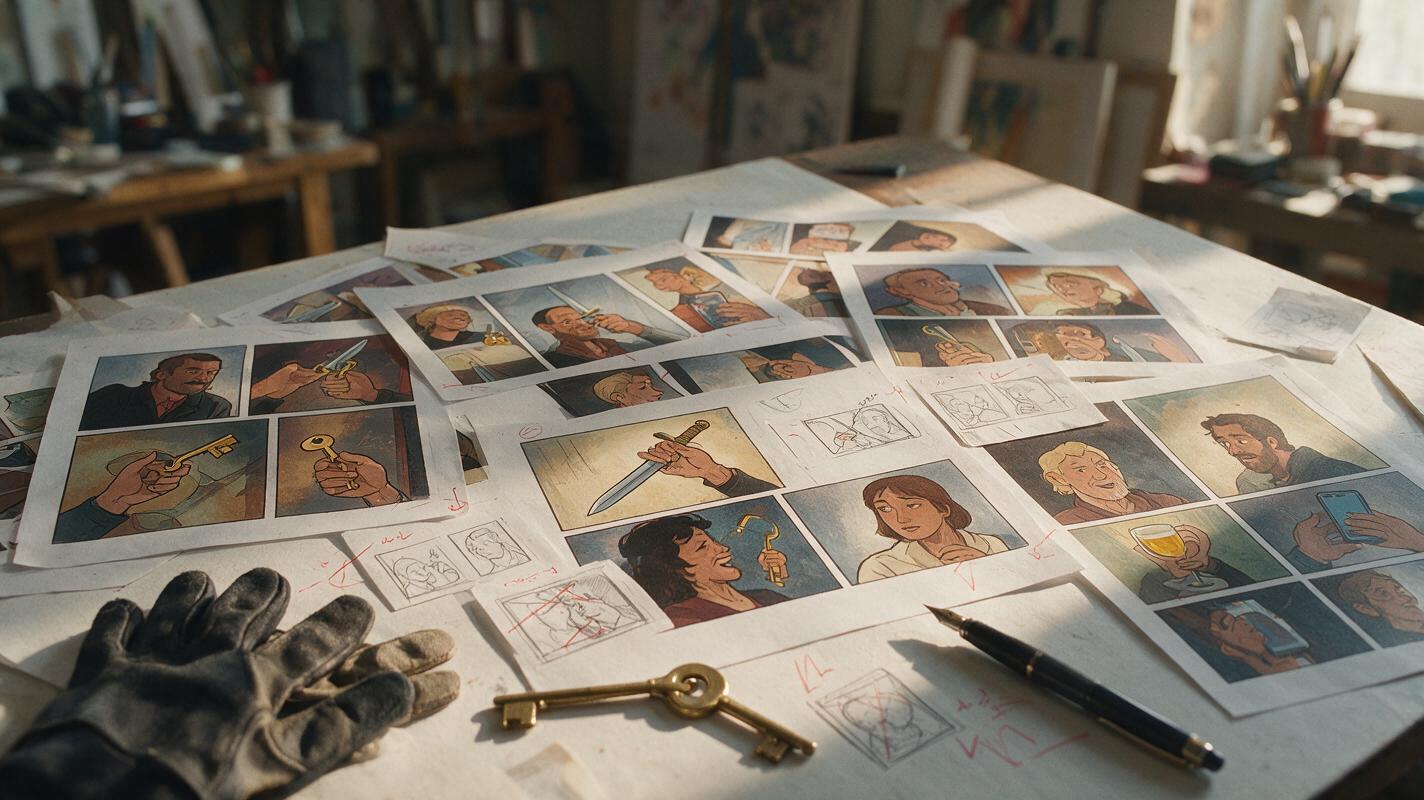
Table of contents
Keep the hand, prop, and pose connected
A comic character can have a convincing face, costume, and pose while still failing at the exact point that sells the action: the hand touching the prop. Swords hover beside palms, fingers pass through cups, and phones face the wrong direction. The practical fix is not adding more anatomy adjectives. It is defining the contact between the character and the object as a small, observable system.
This workflow uses seedream 4.5 for image generation and focused editing, but the prompt logic also applies to other reference-based illustration models. The goal is a readable comic panel rather than a medically exhaustive hand study.
Why hand–prop interactions break
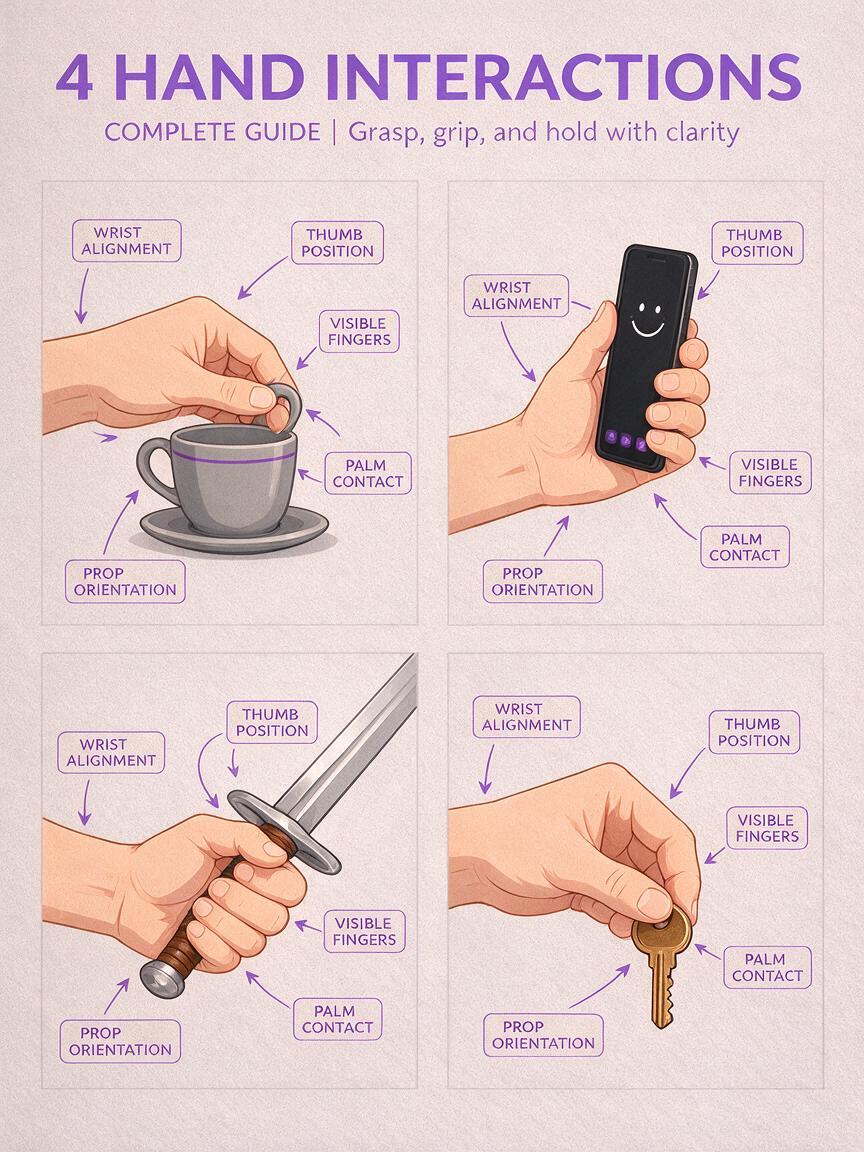
A prompt such as “a detective holding a flashlight” describes an idea, not a physical arrangement. The model still has to infer which hand is active, where the handle crosses the palm, how many fingers are visible, which way the light points, and whether the wrist is bent or straight.
Failures become more likely when the composition also contains:
- Two active hands performing different jobs.
- Small or intricate props such as scissors, keys, pens, or trigger guards.
- Strong foreshortening that hides finger attachment points.
- Overlapping costume details around cuffs, gloves, or sleeves.
- Ambiguous left and right directions from the viewer’s perspective.
- Several characters reaching toward the same object.
Prompt the contact first, the action second, and the visual style last. If the physical relationship is unclear, more style language will only decorate the error.
Define the hand–prop contact before style
Write the interaction as a contact map. Identify the active hand, the object’s orientation, the visible fingers, and the force being applied. Use concrete verbs such as pinches, hooks, supports, presses, or wraps around instead of relying only on holds.
| Weak instruction | Contact-focused instruction |
|---|---|
| Holding a coffee cup | Right hand wraps around the cup handle; thumb rests on top; three fingers are visible through and below the handle. |
| Using a phone | Left palm supports the back of a vertical phone; four fingertips curl around its right edge; screen faces the character. |
| Drawing a sword | Right hand closes around the hilt below the guard; knuckles face the viewer; blade continues in a straight line from the grip. |
| Opening a letter | Left thumb pins the envelope to the desk while the right hand guides a small opener beneath the flap. |
A reliable prompt can be assembled from five short components:
SUBJECT AND ACTION:
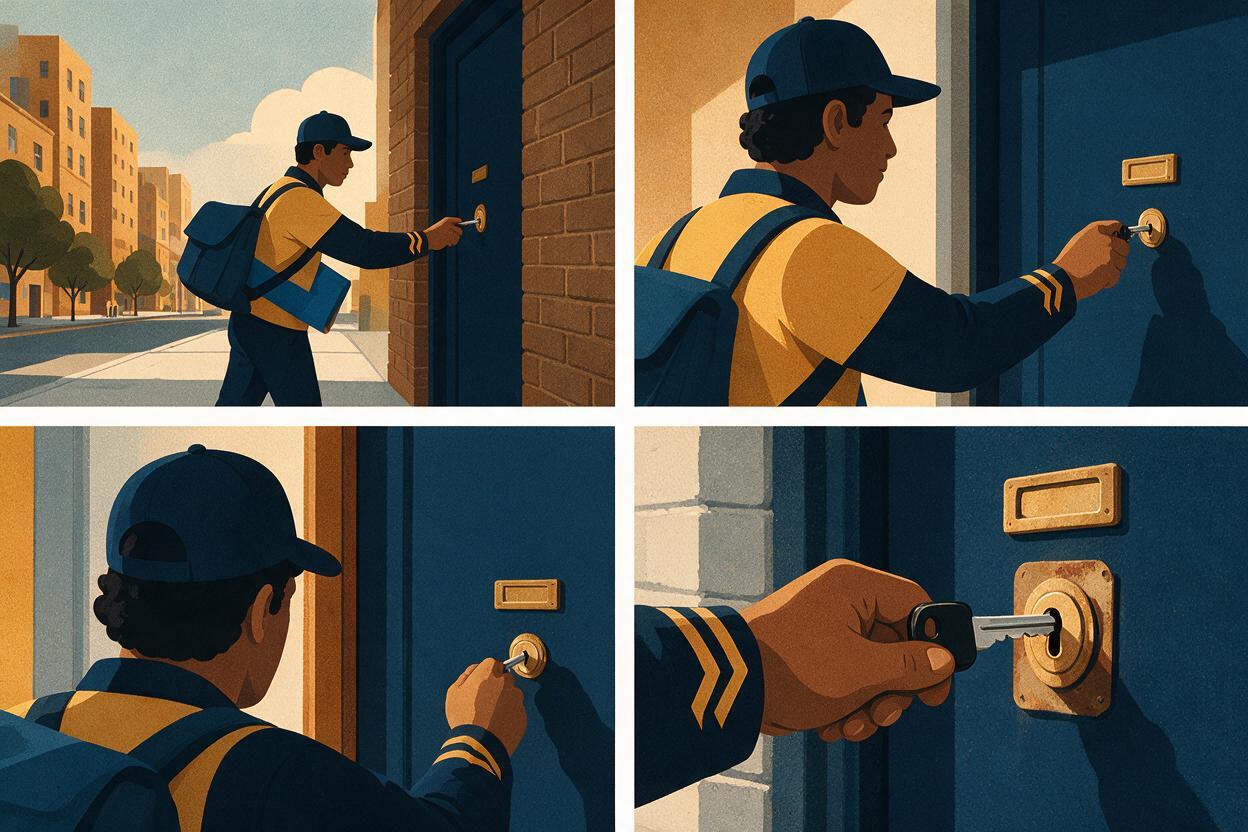
A courier unlocks a rain-soaked apartment door.

ACTIVE HAND:
Her right hand grips a brass key between thumb and curled index finger.

PROP ORIENTATION:
The key is horizontal and fully inserted into the lock.

VISIBLE CONTACT:
Thumb pad presses the key head; index finger hooks beneath it; other fingers curl toward the palm.

COMPOSITION AND STYLE:
Close comic panel, hand and lock clearly visible, clean ink contours, controlled cel shading, tense nighttime mood.
When using an ai image generator, keep this physical description close to the beginning of the prompt. Long atmosphere and rendering instructions can come afterward.
Assign each hand one readable job
Two-hand actions often collapse because both hands receive vague or competing instructions. Separate their roles. One hand should be the primary actor; the other should stabilize, support, or remain outside the crop.
For example, replace “a mechanic repairing a drone with both hands” with:
A mechanic tightens one exposed screw on a tabletop drone.
Her right hand turns a short screwdriver vertically.
Her left palm rests flat on the drone shell to stabilize it.
The hands do not overlap.
Medium close-up focused on the tool, screw, and contact points.
Graphic science-fiction comic style, crisp line art.
This division gives the image a clear action hierarchy. It also helps readers understand the panel immediately, which matters more than displaying every finger.
Use crops that reduce anatomical ambiguity
A wider frame is not always safer. Full-body action scenes make hands tiny, while extreme close-ups can demand more anatomical detail than the panel needs. Choose a crop based on the storytelling function of the prop.
- Insert shot: Best when turning a key, pressing a button, loading an object, or revealing evidence.
- Medium close-up: Best when the facial reaction and hand action must be read together.
- Over-the-shoulder view: Useful for phones, books, maps, and interfaces because it establishes what the character sees.
- Silhouette or distant shot: Appropriate when the prop’s outline matters more than finger anatomy.
Avoid hiding the wrist exactly behind the prop. Showing a short section of forearm gives the hand a plausible direction of travel. Likewise, leave negative space around the contact area instead of burying it beneath hair, sleeves, speed lines, or background clutter.
If a hand will occupy fewer than a few readable shapes at final panel size, simplify the grip rather than prompting every joint.
Match grip design to the emotional beat
Hands communicate intention. A relaxed grip, defensive grip, and desperate grip should not share the same geometry. Connect the contact language to the scene’s emotional pressure.
Controlled or careful action
A gloved hand delicately pinches the glass vial at its narrow neck,
thumb and index finger lightly touching opposite sides,
remaining fingers relaxed and separated,
wrist steady, no squeezing, laboratory comic panel.
Forceful action
Both hands lock around the heavy hammer handle,
upper hand below the hammer head, lower hand near the base,
tight overlapping grip, compressed finger shapes,
straight wrist alignment, strong diagonal action line.
Fear or hesitation
The character barely holds the torn photograph by one corner,
thumb touching the front, index finger supporting the back,
other fingers tense but not touching the paper,
subtle trembling gesture, intimate close-up panel.
The prop should also react to the grip. Paper bends, fabric compresses, handles disappear partly behind fingers, and a heavy object affects the shoulder and wrist. These secondary effects make contact feel intentional.
Preserve identity while changing the interaction
When a character reference is available, distinguish fixed identity traits from panel-specific hand action. Keep the face, hairstyle, costume, and body proportions stable, but describe the new grip independently.
Use the supplied character reference for facial identity, hairstyle,
red cropped jacket, black wristband, and body proportions.
Create a new waist-up comic panel.
The character catches a falling metal badge with her left hand:
palm faces upward, badge lands across the base of the fingers,
thumb remains visible at the side.
Do not redesign the glove, jacket cuff, or badge emblem.
If the reference image already contains a different object, explicitly state that the old pose is not being copied. Otherwise, visual features from the source interaction may leak into the new panel.
Repair the smallest broken region
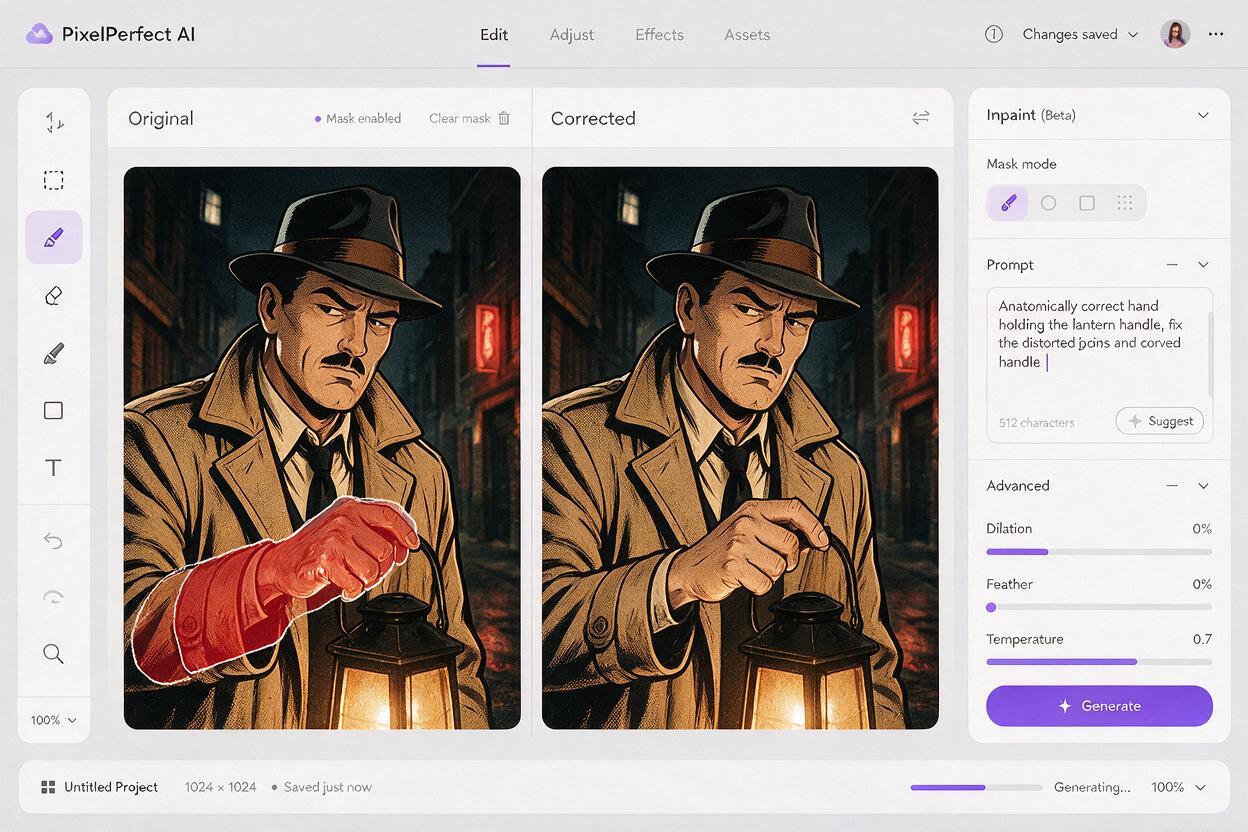
Do not regenerate a successful panel because one finger crosses a handle. A full reroll can change the face, costume, camera angle, lighting, and background. Instead, isolate the smallest region that contains the complete anatomical relationship: part of the forearm, the entire hand, and enough of the prop to show its orientation.
Use an editing instruction that describes what must remain fixed as clearly as what must change:
Repair only the right hand and the lantern handle.
Keep the character’s face, pose, sleeve design, lantern shape,
lighting, line weight, colors, and background unchanged.
Place all four fingers around the rear side of the curved handle.
Show the thumb crossing the front of the handle.
Maintain one continuous wrist and preserve the original comic style.
If the repair still fails, enlarge the editable area slightly to include the wrist. A model cannot resolve a hand convincingly when the surrounding forearm forces an impossible angle.
Inspect the panel at reading size
A hand can look anatomically acceptable when enlarged but become visually tangled in the finished comic. Reduce the panel to its expected reading size and check three questions:
- Can you identify the object without reading the dialogue?
- Can you tell what the character is doing in less than a second?
- Does the hand form one clear silhouette rather than a cluster of tiny lines?
Minor finger inaccuracies may be harmless if the action reads. By contrast, a perfectly rendered hand gripping the wrong side of a weapon can break the scene. Prioritize action continuity, silhouette, and object orientation over anatomical ornament.
Final checklist
- Name the active hand and describe directions from one consistent viewpoint.
- Define where the thumb, palm, and visible fingers contact the prop.
- Give each hand a separate role in two-handed actions.
- State the prop’s angle, facing direction, and alignment with the wrist.
- Choose a crop that keeps the contact readable at final panel size.
- Include physical reactions such as compression, bending, or weight.
- Repair only the hand–prop region when the rest of the panel works.
- Judge clarity before demanding perfect finger detail.
Use one of the contact-focused examples above and try this prompt for free on a prop interaction from your own comic.
Keywords
ai comic hands, comic prompts, seedream 4.5, manga panel generator, prop interaction, hand anatomy, comic ai generator