Why AI Comic Lighting Changes Between Panels—and How to Fix It
AI comic panels often change time of day, shadow direction, and color temperature even when the scene should remain continuous. This guide shows how to build a compact lighting key, prompt each shot from the same physical rules, and repair lighting drift without redesigning the characters or location.
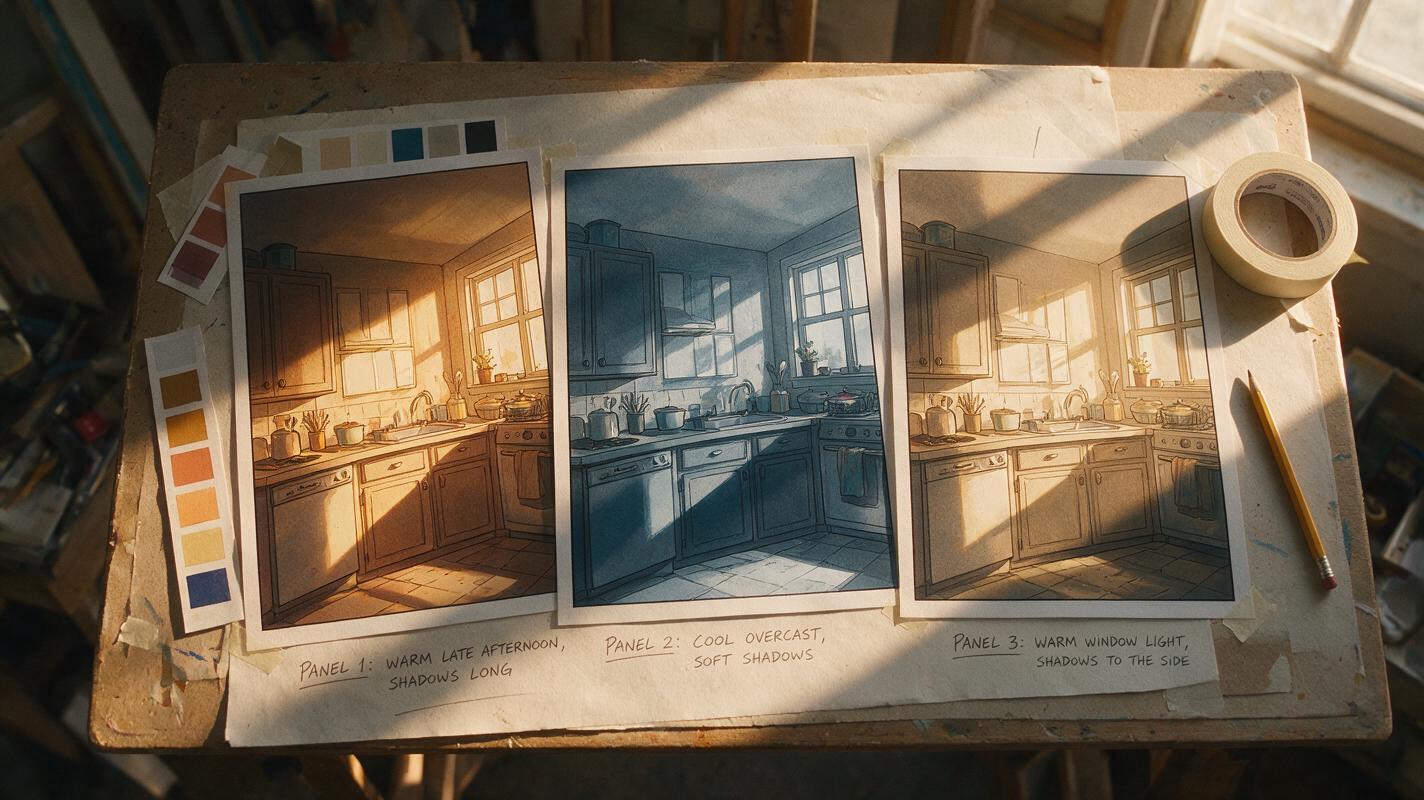
Table of contents
Keep one scene under one believable light
Your characters have not moved to a new location, but the window light suddenly changes sides, the room turns blue, and a soft sunset becomes harsh midday. This lighting drift makes adjacent AI comic panels feel as if they were assembled from unrelated scenes.
The reliable fix is not adding more atmospheric adjectives. Define a physical lighting system before generating the sequence, carry the same constraints into every shot, and edit only the illumination when a panel drifts. The goal is continuity, not identical exposure: close-ups, wide shots, and reaction panels can vary while still belonging to the same moment.
A continuous scene may change composition and emotional emphasis, but its light source, time of day, shadow logic, and dominant palette should remain explainable.
Why lighting continuity breaks
Image models usually interpret each prompt as a fresh composition. If one panel says “warm apartment at sunset” and another says “tense close-up by a window,” the model may invent a different sun position, window orientation, fill light, or white balance. Character and location references help with identity, but they do not automatically preserve illumination.
Four types of drift appear most often:
- Source drift: the key light switches from camera left to camera right.
- Time drift: golden-hour light becomes midday, dusk, or night.
- temperature drift: warm skin and amber walls become cool gray or cyan.
- shadow drift: cast shadows change direction, hardness, or length without a story reason.
The problem becomes more visible in vertical webtoons because readers encounter neighboring panels within the same screenful. Even subtle changes can resemble a continuity error rather than intentional mood design.
Build a lighting key before generating panels
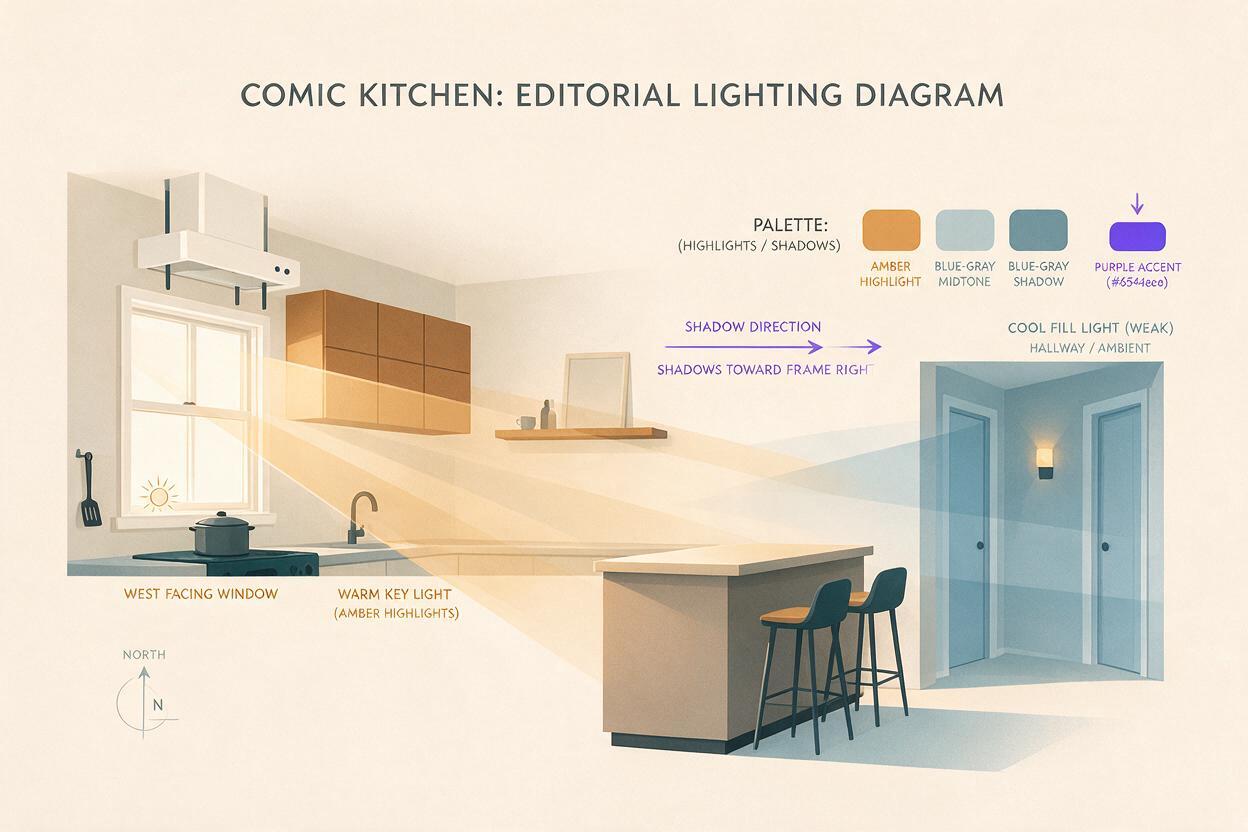
Start with a one-paragraph lighting key for the scene. It should describe physical facts rather than vague mood words. Record where the primary source sits, what provides fill, the approximate time, the dominant color relationship, and how hard the shadows should be.
SCENE LIGHTING KEY
Time: late afternoon, approximately one hour before sunset
Key source: one large west-facing window, frame left
Key quality: warm, low-angle, soft-edged sunlight
Fill: weak cool ambient light from the hallway
Shadow direction: cast toward frame right and slightly backward
Practical lights: switched off
Palette: amber highlights, neutral skin, muted blue-gray shadows
Exposure rule: preserve facial features; no silhouette unless specified
This key is compact enough to paste into every panel prompt. It also gives you a standard for judging results. “Looks atmospheric” is subjective; “the nose shadow falls away from the frame-left window” is testable.
For a recurring location, make a small lighting reference board containing a wide shot, a face close-up, and a neutral object such as a chair or table. These references reveal how the same illumination behaves on architecture, skin, hair, and props.
Translate the key into panel-specific prompts
Keep the lighting block unchanged while replacing only the shot, action, and emotional emphasis. A wide shot needs readable spatial falloff; a close-up needs facial modeling; an insert panel needs a clear cast shadow or reflection that connects it to the room.
| Panel type | What may change | What should stay fixed |
|---|---|---|
| Establishing shot | Visible light path and room exposure | Source side, time, palette, shadow direction |
| Character close-up | Face exposure and eye highlights | Key-light side and warm-to-cool relationship |
| Reaction panel | Contrast for emotional emphasis | Source position and environmental color |
| Object insert | Focus and crop | Reflection color and cast-shadow direction |
A reusable close-up prompt might read:
Close-up comic panel of Mina pausing beside the kitchen table,
restrained worried expression, eyes directed off-panel right.
Preserve her established face, hairstyle, clothing, and ink style.

LIGHTING CONTINUITY:
Late-afternoon light from one west-facing window at frame left.
Warm soft key light strikes the left side of her face.
Weak cool hallway fill reaches the shadow side.
Nose and chin shadows fall toward frame right.
Amber highlights, muted blue-gray shadows, practical lights off.

Do not add a second window, overhead lamp, rim light, neon light,
night lighting, or a new color grade.
Notice that the prompt does not merely repeat “cinematic sunset.” It explains which side of the face receives light and where the shadows travel. Those relationships survive shot changes better than atmosphere alone.
Use a color script to separate continuity from mood
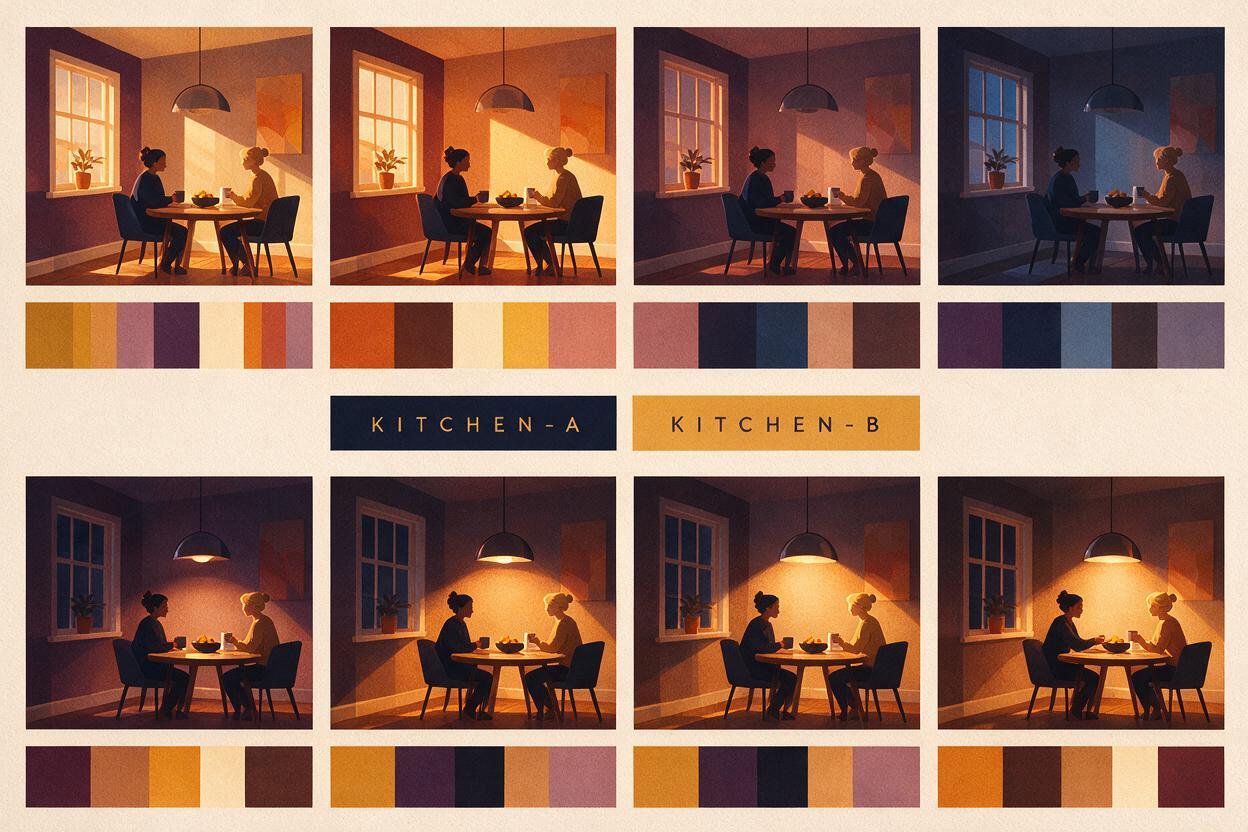
A color script maps planned lighting changes across story beats. It prevents accidental drift while leaving room for intentional transitions. Create one swatch strip for each scene, not each panel. Mark any transition caused by a door opening, a lamp switching on, a passing train, a magical effect, or the movement from sunset into night.
This can sit beside an ai storyboard so composition and illumination are reviewed together. If five consecutive panels belong to the same conversational beat, assign all five the same lighting ID, such as KITCHEN-A. When the character turns on the pendant lamp, change the ID to KITCHEN-B and define the new source explicitly.
KITCHEN-A: window key left, warm sun, cool weak fill, lamps off
KITCHEN-B: sun nearly gone, pendant lamp overhead, warmer faces
HALL-A: cool ceiling practicals, no direct sunset, soft shadows
Do not use color grading to conceal contradictory light. Applying the same orange overlay to two panels will not fix shadows that point in opposite directions.
Repair the light without regenerating the panel
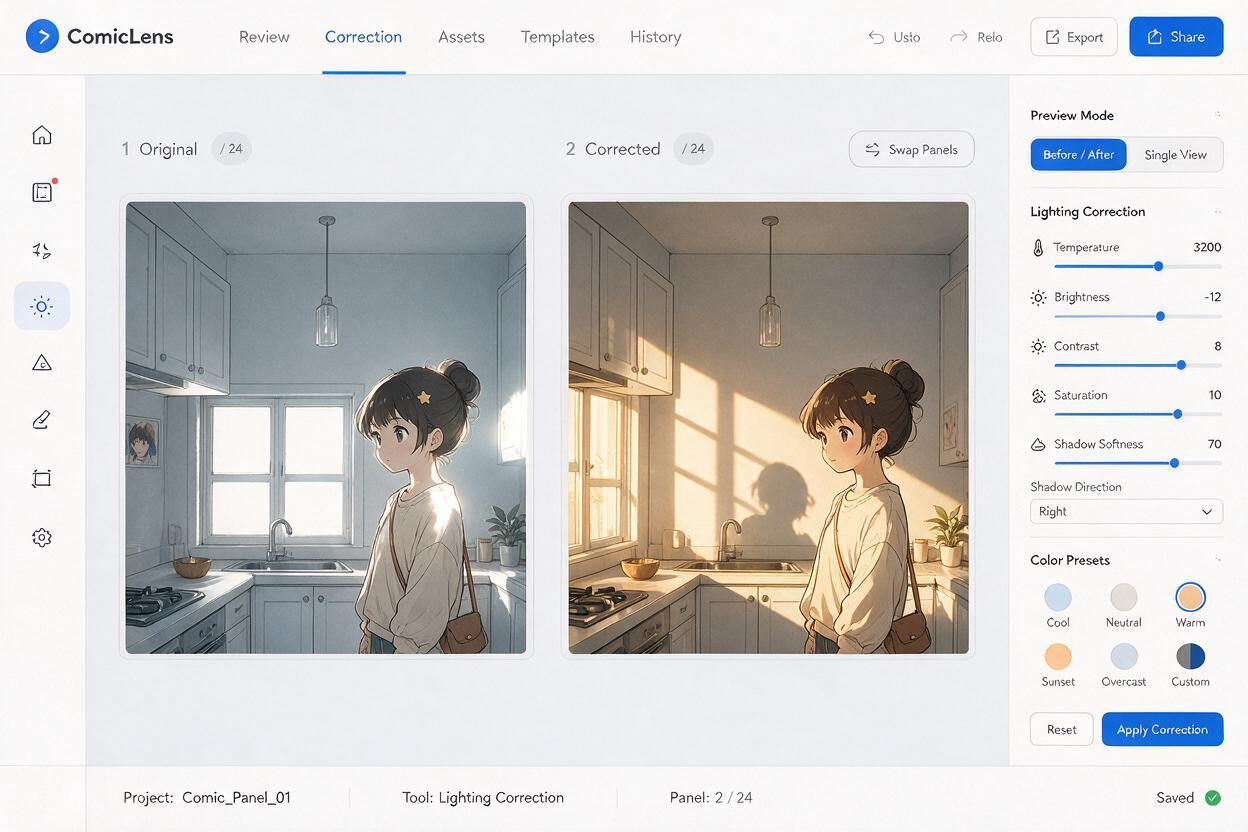
If the composition, acting, and character design are already correct, a full regeneration creates unnecessary risk. Use MagicBoat’s nano banana pro workflow to request a constrained lighting edit while preserving the panel’s underlying content.
Mask or target the smallest useful region. If only the face is wrong, edit the face and nearby shadow transition. If the whole room has changed from warm to blue, adjust the illumination across the panel but explicitly lock the drawing, objects, costume, and camera.
Edit lighting only. Preserve the exact character identity, pose,
facial expression, anatomy, costume, line art, background geometry,
object placement, crop, and camera angle.

Match the established scene lighting: warm late-afternoon sunlight
enters from frame left, with weak cool ambient fill. Move facial and
object shadows toward frame right. Keep practical lamps switched off.
Remove the cool overhead illumination and the bright right-side rim.
Do not redraw, add, remove, or reposition any scene element.
Compare the edit against both adjacent panels rather than inspecting it alone. A repaired image can look attractive in isolation and still be too bright, too saturated, or too dramatic for the sequence.
Check continuity with a three-panel strip
Place the previous panel, target panel, and following panel side by side at reading size. This simple strip exposes errors that disappear when panels are viewed individually.
Inspect the sequence in this order:
- Source: can you identify the same primary light in all three panels?
- Direction: do face and object shadows fall consistently?
- Temperature: do highlights and shadows retain the same color relationship?
- Intensity: is any panel inexplicably brighter or more contrasty?
- Story logic: did an on-page event justify every planned change?
For grayscale manga, replace the temperature check with a value and screentone check. The same method still applies: preserve the light side, shadow family, edge hardness, and black-area distribution across the scene.
Common fixes that make the problem worse
Adding more mood adjectives
“Beautiful, cinematic, emotional, dramatic lighting” gives the model more freedom rather than more continuity. Replace broad adjectives with source position, direction, quality, and color.
Describing light relative to the character
“Light from her left” becomes ambiguous when the character turns. Prefer stable scene coordinates such as “window at frame left” or “lamp above the table.” Then explain which facial plane receives the key light for that particular shot.
Using a different lighting style for every emotion
A sad reaction does not require the room to become blue. Change framing, facial acting, negative space, or local contrast first. Reserve a major lighting transition for moments when the story world supports it.
Regenerating all neighboring panels
Repairing one mismatch by rerolling an entire sequence often creates new costume, prop, and composition errors. Keep approved panels fixed and revise the smallest inconsistent area.
Final checklist
- Write one physical lighting key for each continuous scene.
- Keep source position, time, shadow direction, and palette fixed.
- Change shot language without rewriting the lighting rules.
- Give intentional lighting transitions new scene IDs.
- Edit illumination locally instead of regenerating approved artwork.
- Review every result inside a three-panel continuity strip.
- Reject attractive panels when their light cannot be explained by the scene.
When your reference strip and lighting key are ready, test this prompt yourself on one wide shot, one close-up, and one insert before producing the full sequence.
Keywords
ai comic lighting, comic lighting continuity, nano banana pro, webtoon ai, comic prompts, visual storytelling ai, ai storyboard