Why AI Comic Pages Break—and the Single-Panel Workflow That Fixes Them
Generating an entire comic page in one prompt often produces inconsistent characters, broken gutters, unreadable action, and unusable lettering. This guide shows how to use Seedream 4.5 to generate panels separately, assemble them inside a fixed page layout, and preserve a clear reading path.
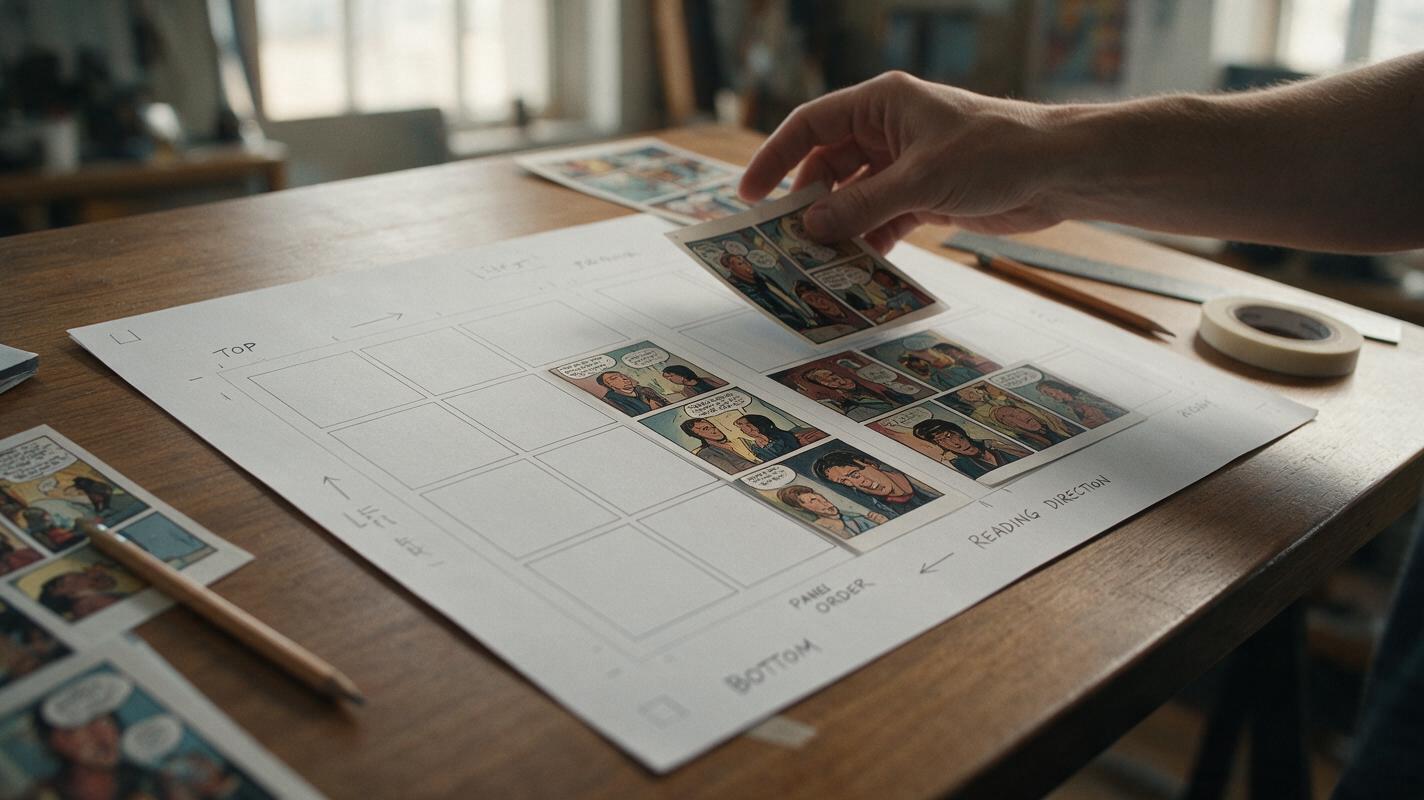
Table of contents
Generate panels, not finished pages
An AI-generated comic page can look convincing at thumbnail size while falling apart on inspection: gutters merge into the artwork, the protagonist changes between panels, close-ups appear in the wrong place, and dialogue becomes decorative noise.
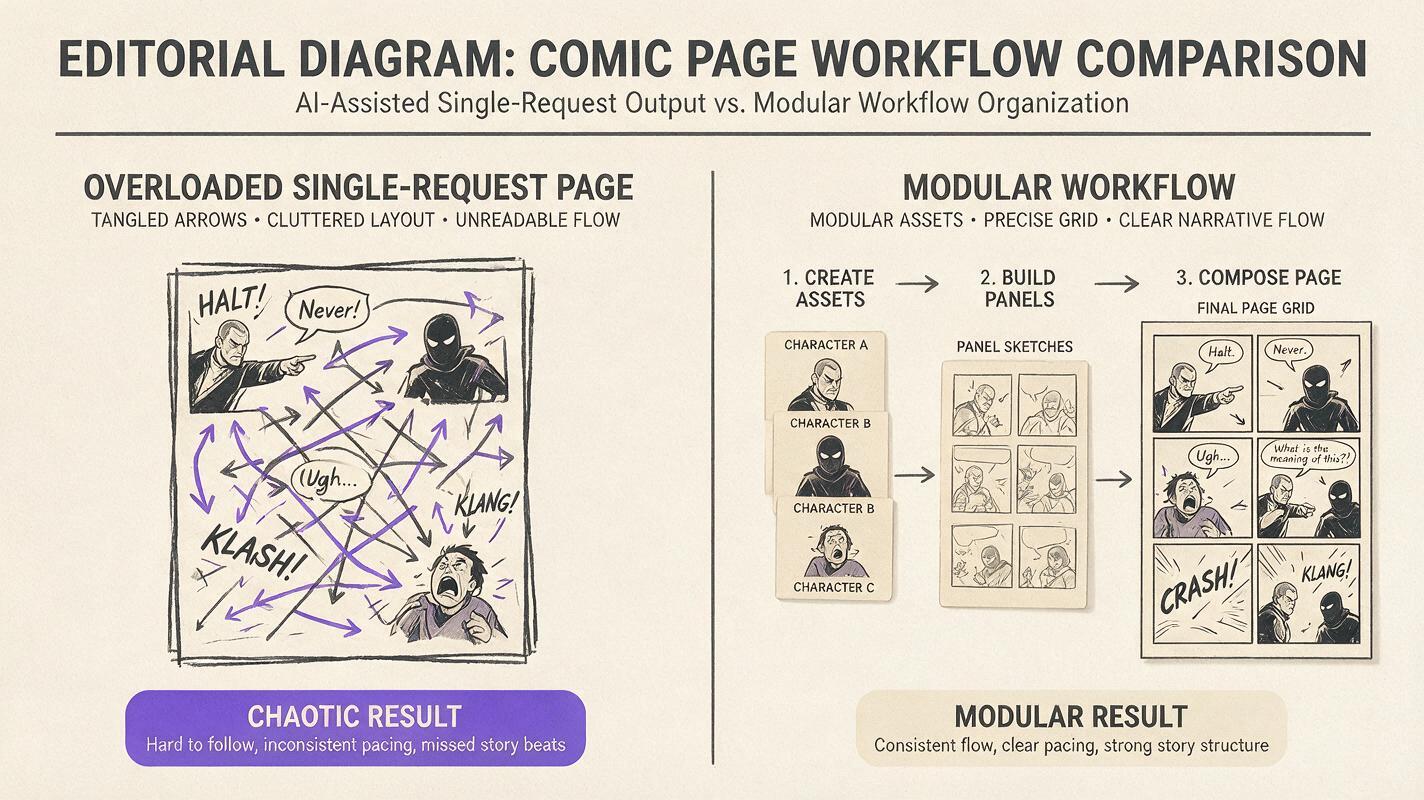
The practical fix is to stop asking one generation to solve the entire page. Use Seedream 4.5 to create each illustration as an independent panel, then crop and arrange those panels inside a layout you control. This separates two different jobs: generating strong artwork and designing a readable page.
Core rule: the image model creates panel content; the artist controls panel order, dimensions, gutters, lettering, and final pacing.
Why full-page generation collapses
A complete comic page contains several simultaneous systems. It needs recurring characters, multiple camera positions, chronological events, stable costumes, deliberate panel borders, accurate reading order, and space for lettering. A single image prompt may describe all of them, but that does not guarantee that each instruction will be assigned to the correct panel.
The model may treat the page as one decorative composition rather than a sequence of separate moments. Common symptoms include:
- Panel leakage: a character, prop, or background crosses an unintended border.
- False continuity: adjacent panels blend into one large scene instead of showing different beats.
- Identity drift: facial features or clothing change because every panel requires a new pose and viewpoint.
- Weak hierarchy: an unimportant reaction receives more space than the story’s main reveal.
- Invented lettering: speech balloons contain distorted marks that compete with the artwork.
- Broken reading order: poses and sightlines pull the eye away from the next panel.
These are not merely prompt-writing mistakes. They come from combining illustration generation and page construction in one overloaded request. Even a capable ai image generator becomes easier to direct when each output has one dramatic purpose.
Build the page as a layout system
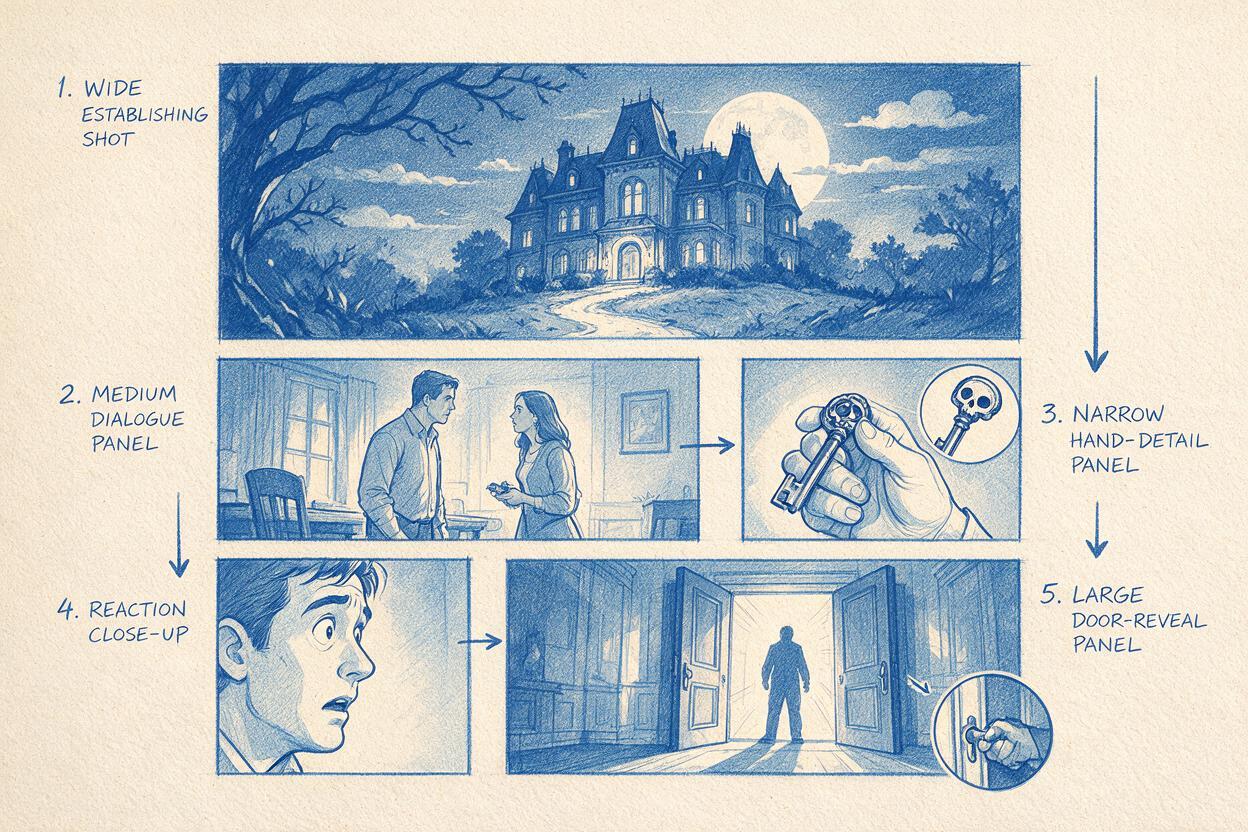
Start with a blank page and divide it into panels before generating finished art. The layout should reflect the emotional weight and duration of each beat, not simply create a symmetrical grid.
| Panel function | Useful shape | Typical visual treatment |
|---|---|---|
| Establish the location | Wide horizontal panel | Readable environment with a small character silhouette |
| Deliver information | Medium rectangle | Clear gesture and reserved dialogue area |
| Show a quick reaction | Small inset | Face, hand, eye, or important object |
| Reveal or impact | Large panel | Strong focal point with reduced background competition |
| Pause or transition | Narrow panel | Quiet environmental detail or restrained expression |
Draw simple boxes and label each one with its narrative function. A five-panel page might contain an establishing shot, a two-character exchange, a hand reaching for a door, a reaction close-up, and a large reveal. These labels are more useful than detailed prose because they clarify what each image must accomplish.
Assign every panel a rough aspect ratio based on its destination. A wide panel should be generated with a landscape composition; a narrow vertical panel needs a tall composition with the subject placed deliberately. Avoid generating every image as a square and forcing aggressive crops later.
Write one prompt around one story beat
Each panel prompt should describe a single visible moment. Include the character reference, shot size, action, environment, composition, lighting, and the empty area required for dialogue. Do not include events that occur before or after that moment.
Use this reusable Seedream 4.5 prompt structure:
Single comic panel, [panel shape and shot size].
[Character description from the reference sheet] is [one visible action].
The scene takes place in [specific location].
Composition: [subject placement], [foreground element], [background landmark].
The character looks toward [screen direction or target].
Reserve clean low-detail space in [location] for later dialogue lettering.
[Line, color, shading, and rendering rules].
No text, no speech balloons, no panel border, no extra characters.
For example, a suspense panel could use:
Single vertical webcomic panel, medium close-up.
A young courier with short black curls, a mustard raincoat, and a red canvas bag
freezes while reaching toward an apartment door handle.
Dim residential hallway at night, door 307 visible behind the hand.
Composition: face in the upper-right third, reaching hand in the lower-left foreground,
strong diagonal created by the arm. She looks down and left toward the handle.
Reserve clean low-detail wall space above her shoulder for later dialogue lettering.
Crisp ink contours, restrained teal-and-amber palette, soft cel shading.
No text, no speech balloons, no panel border, no extra fingers, no extra people.
The negative instructions cannot guarantee a flawless result, but they clarify what does not belong in the panel. Generate a small group of alternatives and select for storytelling first. A beautiful expression is not useful if the gaze points out of the page or the hand covers the intended balloon area.
Keep continuity separate from composition
Character consistency and panel composition need different controls. The reference establishes identity; the prompt establishes the current shot. Upload the same clean character reference whenever the interface supports reference-guided creation, and repeat only the identity details that must remain visible.
- Keep the hairstyle silhouette and defining facial features stable.
- Name fixed costume colors instead of replacing them with vague phrases such as “same outfit.”
- Repeat distinctive accessories only when they should be visible in the shot.
- Describe temporary changes, such as wet clothing or a torn sleeve, as scene-specific state.
- Do not overload a close-up prompt with shoes, full-body proportions, or hidden props.
If a panel has the correct pose but one incorrect costume detail, edit that local area rather than regenerating the entire composition. Full regeneration can solve one continuity error while introducing three new ones.
Use screen direction to connect separate images
Separately generated panels still need to feel like one sequence. Screen direction provides that connection. If the protagonist moves from left to right in the first action panel, preserve that direction until the story intentionally reverses it. During conversations, keep each speaker on a stable side of the frame unless a clear camera move motivates the change.
Gaze direction is equally important. A character near the right edge should usually look inward, toward the next visual target, rather than out of the page. Props can also guide the reader: a pointing hand, corridor railing, sword, beam of light, or cast shadow can lead the eye toward the following panel.
Continuity test: hide the dialogue and view the page at thumbnail size. The panel order should still be understandable from poses, eyelines, value contrast, and repeated landmarks.
Assemble, crop, and check the reading flow
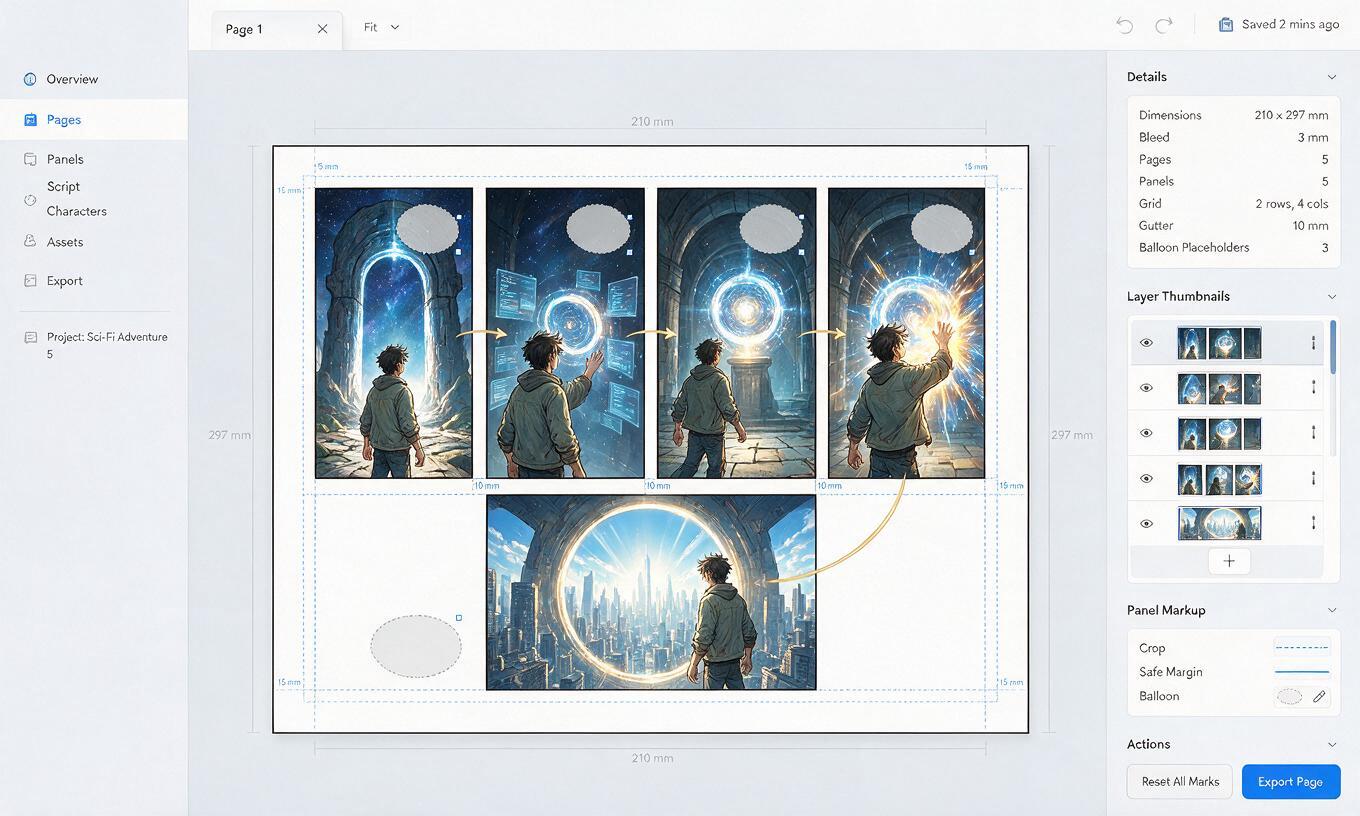
Place the selected Seedream 4.5 outputs beneath the layout boxes in an illustration or page-design application. Crop each image non-destructively so you can adjust its framing after seeing the complete page.
Start by locking the gutters. Consistent empty gaps tell the reader where one moment ends and the next begins. Intentional borderless images or bleeds can be effective, but they should be exceptions attached to major moments rather than accidental overflow.
Then inspect the page at three sizes:
- Thumbnail size: confirms hierarchy, pacing, and reading direction.
- Normal reading size: reveals whether faces, gestures, and environmental clues remain clear.
- Close inspection: catches malformed hands, broken linework, costume drift, and crop artifacts.
Add lettering only after the compositions are stable. Use editable text and hand-built balloons so dialogue remains readable and revisions do not require regenerating artwork. If a panel lacks enough quiet space, try a tighter crop, extend a simple background area, or locally reduce detail behind the balloon.
Finally, compare the visual weight of the panels. The largest or darkest image naturally attracts attention. If that image contains a minor beat, resize it or reduce its contrast so the intended climax remains dominant.
Repair the page without restarting it
When a page does not read clearly, identify whether the failure belongs to the artwork or the layout before generating anything again.
| Problem | Likely cause | Focused repair |
|---|---|---|
| The reveal feels weak | The earlier panels carry equal visual weight | Enlarge the reveal or simplify competing backgrounds |
| The action feels disconnected | Screen direction changes between panels | Flip or regenerate the least important panel |
| The page feels crowded | Every panel uses a medium shot | Replace one panel with a close detail or wider pause |
| A balloon covers the face | No low-detail area was reserved | Re-crop, extend the background, or edit the panel locally |
| The character appears inconsistent | The reference or visible identity traits changed | Repair only the drifting panel using the original reference |
| The reader skips a panel | Eyelines lead around it | Adjust subject placement, gaze, or contrast |
This modular approach makes revision affordable: one weak panel can be replaced without destroying the rest of the page. Once the layout skeleton is ready, create your own version with a short scene and test whether the sequence remains understandable without captions.
Final checklist
- Build the page grid before generating finished illustrations.
- Give every panel one narrative function and one visible moment.
- Match each generation’s aspect ratio to its destination panel.
- Use the same character reference and repeat fixed identity details.
- Reserve low-detail space for dialogue, but add lettering separately.
- Preserve screen direction, eyelines, and recurring environmental landmarks.
- Check the page at thumbnail, reading, and close-inspection sizes.
- Repair individual panels instead of regenerating the whole page.
Keywords
ai comic maker, comic page layout, Seedream 4.5, manga panel generator, comic panel prompts, visual storytelling AI, AI illustration generator