How to Create a Believable AI Dialogue Scene with Image to Video
Create a believable AI dialogue scene by designing one stable location, locking each character’s screen position and eyeline, then animating a master shot, close-ups, and reaction shots separately. This image-to-video workflow reduces identity drift, reversed eyelines, uncontrolled mouth movement, and continuity errors between cuts.
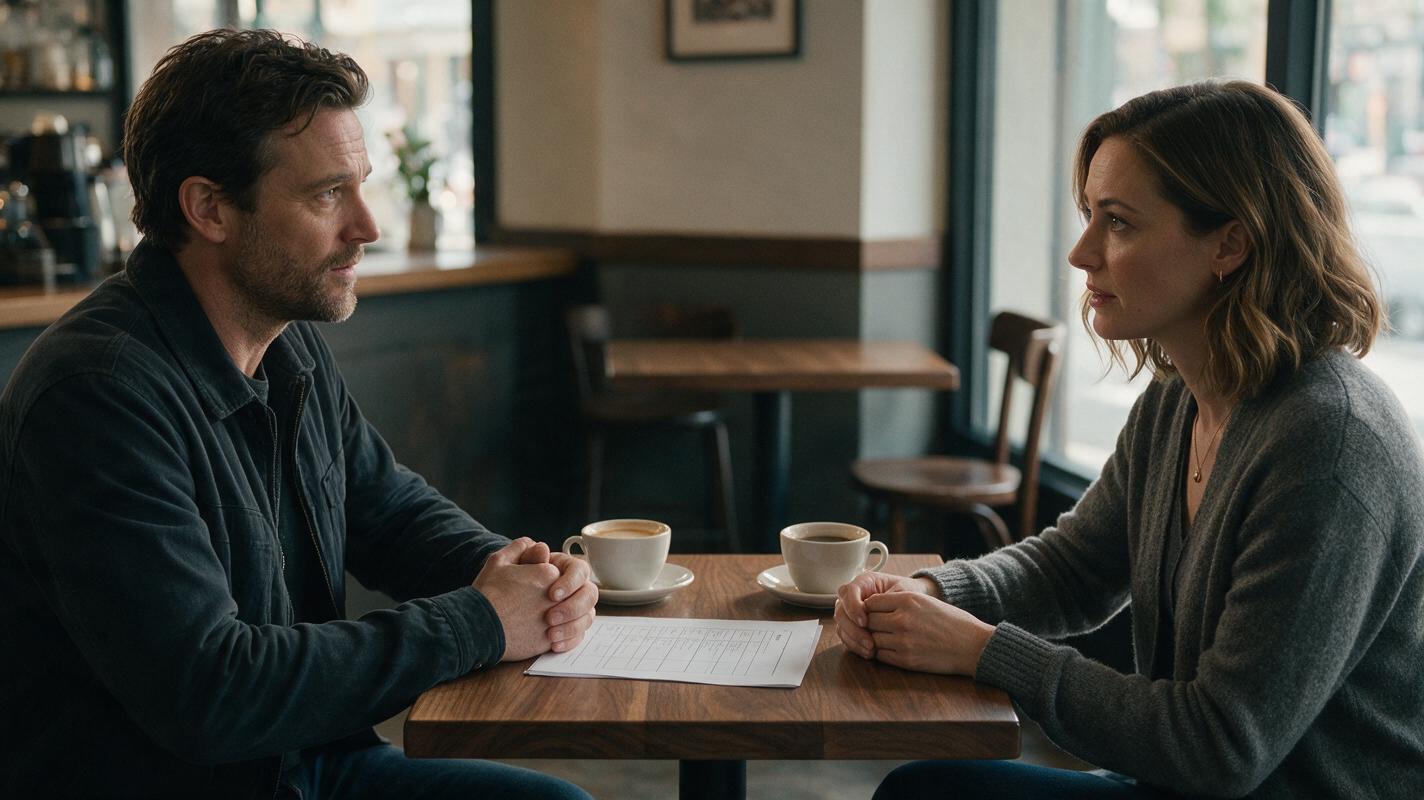
Table of contents
Turn static character frames into an editable conversation
TL;DR: The fastest way to create an AI dialogue scene is to establish both characters in one wide frame, derive matching close-ups from the same visual plan, and animate each shot independently with restrained performance prompts. Use image to video rather than asking one long text prompt to generate the entire exchange.
This workflow treats the scene like a conventional film sequence: a master shot establishes geography, over-the-shoulder shots preserve eyelines, close-ups carry important lines, and reaction shots hide difficult transitions. The result is easier to control and edit than a single clip containing two people, multiple lines, and several camera changes.
Why AI dialogue scenes lose spatial logic
A dialogue scene can contain attractive individual frames and still feel wrong. Viewers notice spatial mistakes immediately, even when they cannot name them. One character may look left in one shot and then inexplicably look right. A jacket changes color after a cut. The room rearranges itself, or the speaker’s face keeps moving after the dialogue beat should have ended.
The most common failures are:
- Reversed eyelines: both characters face the same direction, so they appear to be watching someone outside the scene.
- Broken screen direction: the characters swap sides of the frame between cuts.
- Identity blending: two faces become more alike when both people share a frame.
- Uncontrolled mouth motion: a model invents continuous talking instead of one short, editable speaking beat.
- Background drift: doors, windows, lamps, and furniture move between generated shots.
- Overacting: large head turns, hand gestures, or body movement make the next shot difficult to match.
The solution is not a longer prompt. It is a smaller generation task with clearer spatial constraints.
3 ways to construct the conversation
- Master-shot workflow: begin with both characters visible, then create matching coverage. This is the safest choice for spatial clarity.
- Portrait-first workflow: design each character separately, place them into coordinated backgrounds, and rely on close-ups. This gives stronger identity control but requires careful eyeline planning.
- Performance-first workflow: record simple human performances and apply motion transfer to character images. This is useful when gestures and timing matter more than spontaneous motion.
The main tutorial uses the master-shot workflow because it gives every later image a shared source of truth.
How MagicBoat handles a multi-shot dialogue workflow
MagicBoat brings image-generation and ai video models into one account, making it practical to test the same scene across different generators. You can develop anchor frames with image models such as Seedream, Flux, or GPT Image, then animate selected frames with available video models such as Seedance or Kling.
The important advantage is not choosing a supposedly universal best model. It is being able to keep the input frame and prompt structure constant while comparing how different models handle faces, subtle gestures, camera stability, and two-character compositions.
| Task | Recommended mode | Main control |
|---|---|---|
| Design the room and cast | Image generation | Composition and identity references |
| Establish scene geography | Image to video | Minimal camera and body motion |
| Generate a speaking close-up | Image to video | Small mouth, eye, and head movements |
| Preserve precise acting | Motion transfer | Short source performance |
| Repair residual identity drift | Face swap | Authorized reference portrait |
Step 1 — Write the exchange as visual beats
Do not begin with the full screenplay paragraph. Break the exchange into shots defined by one visible action. A short six-shot plan is enough for a convincing scene:
- Wide master: both characters sit across a café table.
- Close-up A: Character A asks a question.
- Reaction B: Character B pauses and looks down.
- Close-up B: Character B answers.
- Reaction A: Character A absorbs the answer.
- Wide exit beat: both remain silent as a server passes in the background.
Keep each generated shot focused on one performance change. If a shot requires speaking, standing, turning, picking up a cup, and moving the camera, divide it into separate clips.
Expected result: a coverage plan in which every clip has a single purpose and a clear edit point.
Step 2 — Build a continuity card for the whole scene
Create a compact specification that remains unchanged in every image prompt. Include the characters’ fixed traits, wardrobe, location, lighting, and screen positions. Do not mix temporary actions into this card.
CHARACTER A: woman in her early 30s, short dark wavy hair, oval face,
charcoal blazer over a cream shirt, seated on frame left

CHARACTER B: man in his late 30s, close-cropped auburn hair, narrow face,
navy overshirt over a gray T-shirt, seated on frame right

LOCATION: quiet neighborhood café, walnut table, pale plaster wall,
large window behind Character A, brass wall lamp behind Character B

LIGHT: soft overcast daylight from frame left, warm practical lamp,
natural skin texture, restrained cinematic color

SPATIAL RULE: Character A always looks toward frame right;
Character B always looks toward frame left
The spatial rule is essential. It establishes an imaginary line between the actors. Keep the camera on one side of that line throughout the basic coverage so screen direction remains stable.
Expected result: one reusable text block that prevents accidental changes from being introduced during prompt rewriting.
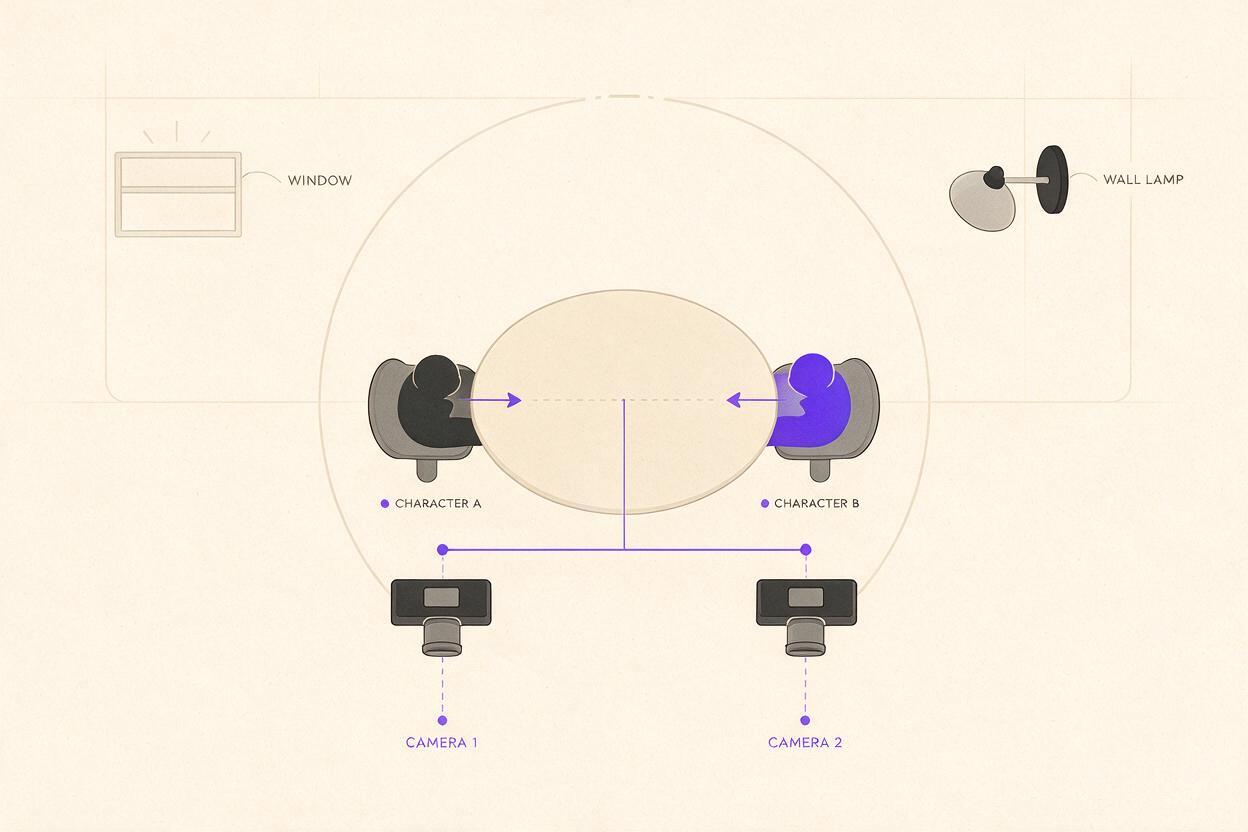
Step 3 — Generate the master anchor frame
Create a wide or medium-wide still showing both characters and the important landmarks in the room. Favor a simple composition with separated silhouettes. Avoid crossed arms, overlapping hands, reflective tables, and objects covering either face.
Cinematic medium-wide two-shot in a quiet neighborhood café.
Character A sits on frame left and looks across the table toward frame right.
Character B sits on frame right and looks toward frame left.
Both faces are clearly distinct and unobstructed. Their hands rest naturally
near separate coffee cups. Walnut table, pale plaster wall, window behind A,
brass wall lamp behind B. Eye-level camera, 50mm lens appearance,
soft overcast daylight, realistic skin texture, restrained natural color.
Inspect the still before animation. Confirm that the faces are distinct, the wardrobe matches the continuity card, the hands are plausible, and both characters occupy the correct sides. Regenerate the still rather than hoping video generation will repair a structural error.
Expected result: a clean reference image that establishes cast, location, lighting, and screen geography at once.
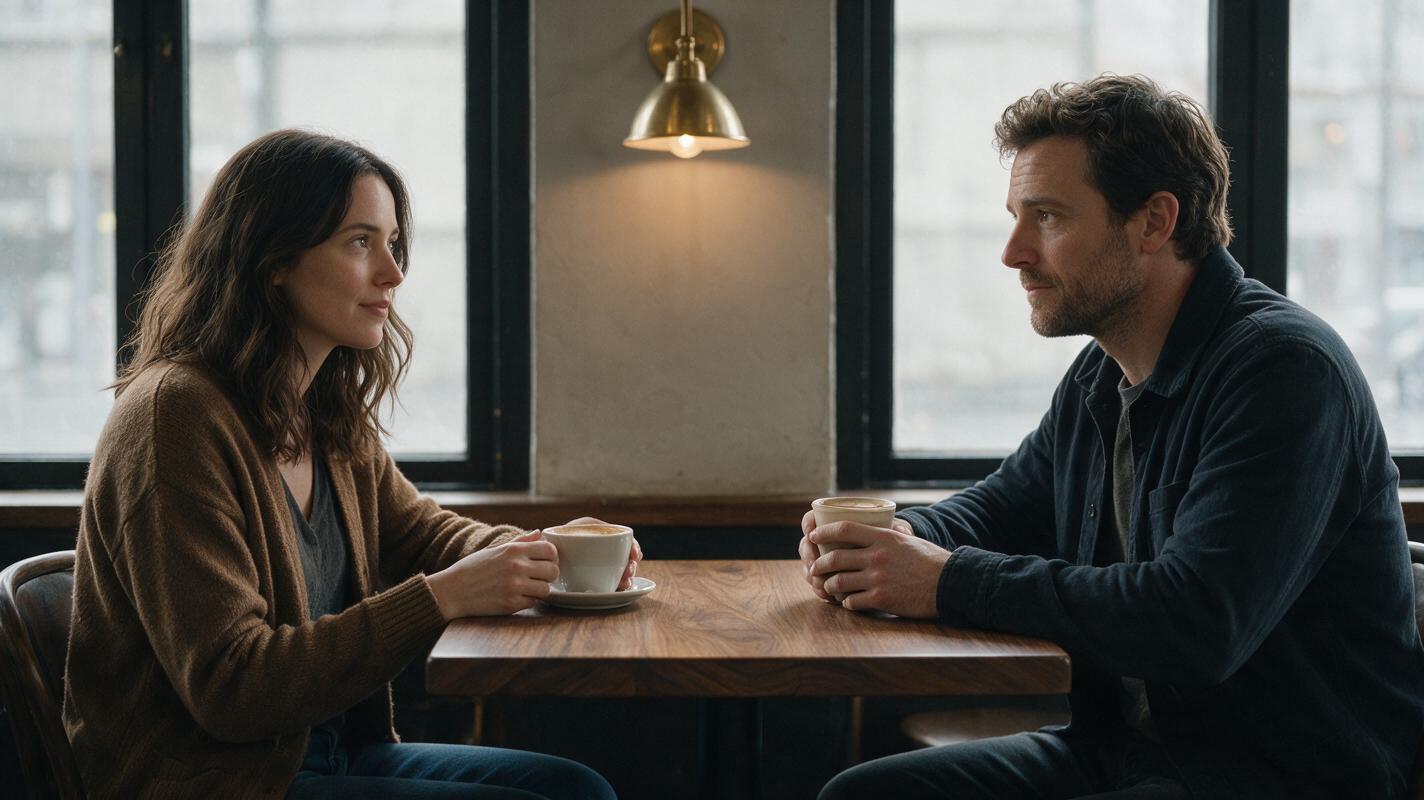
Step 4 — Animate the master shot with restrained motion
Use the master frame as the visual input. The prompt should describe only movements that can happen without changing the composition. A subtle establishing shot is more useful than an ambitious clip that breaks both faces.
Locked eye-level camera. Both characters remain seated in their established
positions. Character A breathes naturally and gives one small attentive nod.
Character B briefly glances at the coffee cup, then returns his gaze to A.
Subtle background café activity, stable faces, stable wardrobe, no camera orbit,
no large gestures, no one enters the foreground.
For a model comparison, keep the frame, duration, aspect ratio, and prompt unchanged. Judge outputs on identity stability, eye direction, hand behavior, and whether the table remains geometrically consistent.
Expected result: an establishing clip that can open the scene and cover later edits without drawing attention to generation artifacts.
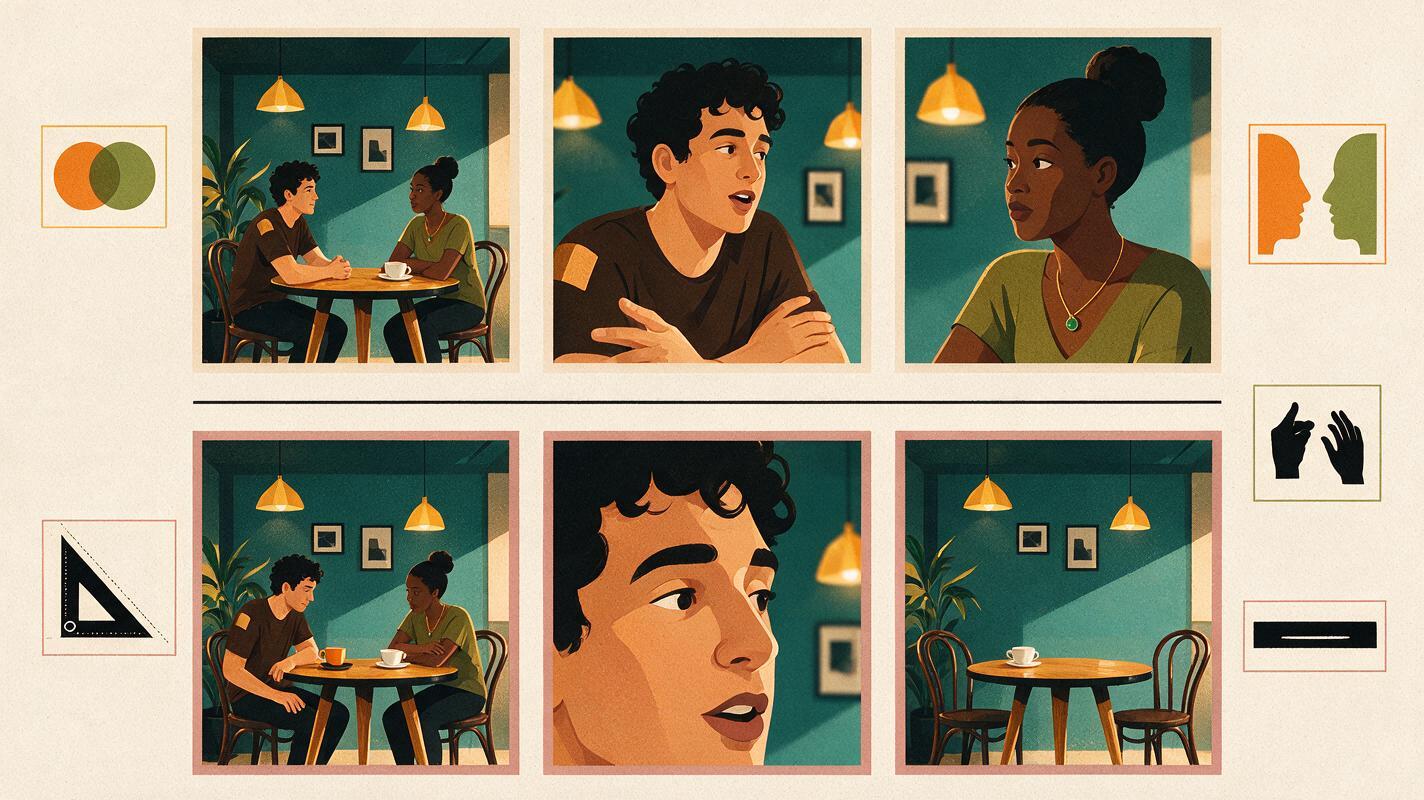
Step 5 — Derive close-ups without crossing the eyeline
Create separate stills for Character A and Character B, but derive their design from the master frame. Preserve wardrobe, light direction, background landmarks, and gaze direction. A should remain on the left side of the conversation looking right; B should remain on the right looking left.
For Character A:
Medium close-up of Character A from the established café scene,
positioned slightly left of center, looking just off-camera toward frame right.
Charcoal blazer, cream shirt, short dark wavy hair. The window remains softly
visible behind her. Same overcast side light and restrained cinematic color.
Attentive expression, closed mouth, relaxed shoulders, eye-level camera.
For Character B:
Medium close-up of Character B from the established café scene,
positioned slightly right of center, looking just off-camera toward frame left.
Navy overshirt, gray T-shirt, close-cropped auburn hair. The brass wall lamp
remains softly visible behind him. Same lighting and color treatment.
Uncertain expression, closed mouth, relaxed shoulders, eye-level camera.
A slightly off-camera gaze usually reads more naturally than staring directly into the lens. Keep the implied partner near the camera, not at the extreme edge of the frame.
Expected result: two close-up anchors that appear to face each other when placed consecutively in an edit.
Step 6 — Separate speaking shots from reaction shots
Generate speech and listening as different clips. For a speaking shot, request one restrained phrase-like mouth movement and a clear settling moment. For a reaction, explicitly keep the mouth closed.
Speaking prompt:
Character B delivers one short, calm sentence to the person off-camera left.
Subtle natural mouth articulation, one small inhale before speaking,
minimal head movement, steady eyeline, then the mouth closes and the expression
settles. Locked camera, stable facial proportions, no hand gestures.
Reaction prompt:
Character A listens silently with her mouth closed. Her eyes tighten slightly,
then she gives one restrained blink and a small exhale. She maintains the same
off-camera eyeline toward frame right. Locked camera, no speech, no head turn.
This does not guarantee phoneme-accurate lip synchronization. It creates visually plausible performance material that can be trimmed around recorded dialogue. When exact lip timing is required, use a dedicated lip-sync process after selecting the most stable shots.
Expected result: clean speaker and listener coverage that can be edited independently around the soundtrack.
Step 7 — Compare models with the same inputs
Run the master shot and at least one close-up through Seedance and Kling when both are available to you. Do not rewrite prompts to favor either model during the first comparison. Otherwise, you will be comparing prompt variations rather than model behavior.
| Review point | Question to ask | Reject when |
|---|---|---|
| Identity | Does the face remain recognizably the same? | Jaw, age, hairstyle, or eye spacing changes |
| Eyeline | Does the actor continue looking toward the partner? | The gaze drifts into camera or away from the scene |
| Performance | Is the movement small enough to edit? | The actor invents repeated nods or broad gestures |
| Environment | Do landmarks and furniture stay fixed? | Windows, lamps, cups, or table edges deform |
| End frame | Does the actor return to a usable resting state? | The clip ends mid-word or during a large turn |
Select models shot by shot if necessary. A stable master from one model can coexist with a stronger close-up from another when the anchor images, color, framing, and motion intensity remain coordinated.
Expected result: a set of clips chosen for editorial usefulness rather than a blanket preference for one generator.
Step 8 — Edit around the eyes, not the generated clip boundaries
Lay down the dialogue audio first, then place the master shot and close-ups above it. Cut to a listener shortly before the speaker finishes when you need to hide uncertain mouth motion. Hold reactions long enough for the expression to register, but remove unstable opening or closing frames.
- Open with the master shot to explain the geography.
- Use close-ups for emotionally important lines.
- Cut to reactions when speech animation becomes unreliable.
- Return to the master after a major pause or physical action.
- Add room tone across every cut so the location feels continuous.
- Match contrast and color only after the final shot order is chosen.
Watch the edit once with sound muted. The gaze directions should still make it obvious who is looking at whom. Then listen without watching. The pacing should work without depending on generated gestures.
Expected result: a coherent conversation assembled from short, controllable performances rather than one fragile long generation.
Keep the same dialogue setup across projects
Save the continuity card, clean reference portraits, master anchor, close-up anchors, and final animation prompts together. Name files by character, shot size, gaze direction, and take rather than by vague labels such as “final2.”
cafe_A_master_wide_take01
cafe_A_closeup_look-right_silent_take02
cafe_B_closeup_look-left_speaking_take03
cafe_AB_master_reaction_take01
For a later episode, change only the variable layer: dialogue, expression, props, or wardrobe. Preserve facial descriptors, location landmarks, light direction, lens language, and screen positions until the scene intentionally moves somewhere else.
Alternative: use motion transfer for precise acting
If the generated gestures feel random, record a short reference performance with one actor at a time. Keep the camera still, frame the performer similarly to the target image, and use modest facial and upper-body movement. Motion transfer is most reliable when the source and target share a compatible pose and framing.
Record separate source clips for the left-facing and right-facing characters. Do not mirror a performance casually: mirroring can reverse distinctive wardrobe details, hair parts, or motivated screen direction.
Alternative: repair a strong take with face swap
When motion, timing, and background are successful but a face drifts, a face-swap pass can be more efficient than regenerating the whole shot. Use only a reference you own or have permission to use, and choose a portrait with lighting and angle close to the target frame.
Face replacement cannot fix a reversed gaze, deformed head shape, hidden face, or broken scene geography. Treat it as an identity correction, not a substitute for a sound anchor frame.
Where the workflow falls short
- Exact lip synchronization remains a separate challenge. General image-to-video motion can suggest speech, but it may not match every syllable.
- Hands near faces increase risk. Drinking, whispering, smoking, or covering the mouth combines several difficult forms of motion.
- Profile angles provide less identity information. A three-quarter close-up is often more stable than a full profile.
- Long takes accumulate errors. Facial proportions, gaze, props, and backgrounds have more time to drift.
- Two moving people compete for attention. Keep one character relatively still when the other performs an important action.
- Model behavior can vary by scene. Test with your actual anchor frames instead of assuming one model will always handle every shot best.
FAQ
Can I generate the entire dialogue scene from one text prompt?
You can attempt it, but a prompt containing two characters, several lines, reactions, and camera cuts gives the model too many temporal decisions. Separate shots provide more control and make failed clips cheaper to replace.
Should both characters appear in every anchor image?
No. Use both in the master frame, then generate individual close-up anchors. A blurred shoulder in an over-the-shoulder composition can help geography, but it also introduces another element that may deform.
How do I stop both characters from looking in the same direction?
Write the direction in frame-relative language: “Character A looks toward frame right” and “Character B looks toward frame left.” Repeat it in every close-up prompt and reject frames that violate it.
Are Seedance prompts different from Kling prompts for dialogue?
The same structured prompt is a useful starting point for both: subject, one action, eyeline, camera behavior, and stability constraints. Compare identical inputs first, then simplify or adjust wording only after observing a repeatable problem.
What shot length is best?
Use the shortest clip that contains the complete visual beat plus a small resting moment at each end. Editorial flexibility matters more than maximizing generation length.
Can face swap rescue every inconsistent close-up?
No. It can repair residual identity drift when head shape, pose, lighting, and motion are already usable. It cannot reliably repair bad blocking, severe occlusion, or a character looking in the wrong direction.
Final checklist
- Write one visible action for every planned shot.
- Lock character traits, wardrobe, room landmarks, and light direction.
- Keep Character A looking right and Character B looking left.
- Approve the master still before generating motion.
- Create separate clips for speaking and listening.
- Compare models with identical frames and prompts.
- Use reaction shots to hide imperfect mouth animation.
- Apply motion transfer or face swap only when the base composition is sound.
- Ready to build the sequence? Create your first ai video free and test the master-shot prompt now.
Keywords
ai dialogue scene, image to video, ai video tutorial, shot reverse shot, character consistency, seedance prompts, kling prompts, ai video workflow