How to Preserve Action Continuity Across AI Video Cuts
Preserve action continuity by defining one cuttable movement, generating an end-state handoff frame, and using that frame to anchor the next shot. This workflow combines controlled image-to-video generation, structured Seedance or Kling prompts, and timeline trimming so a character’s direction, pose, and momentum remain believable across cuts.
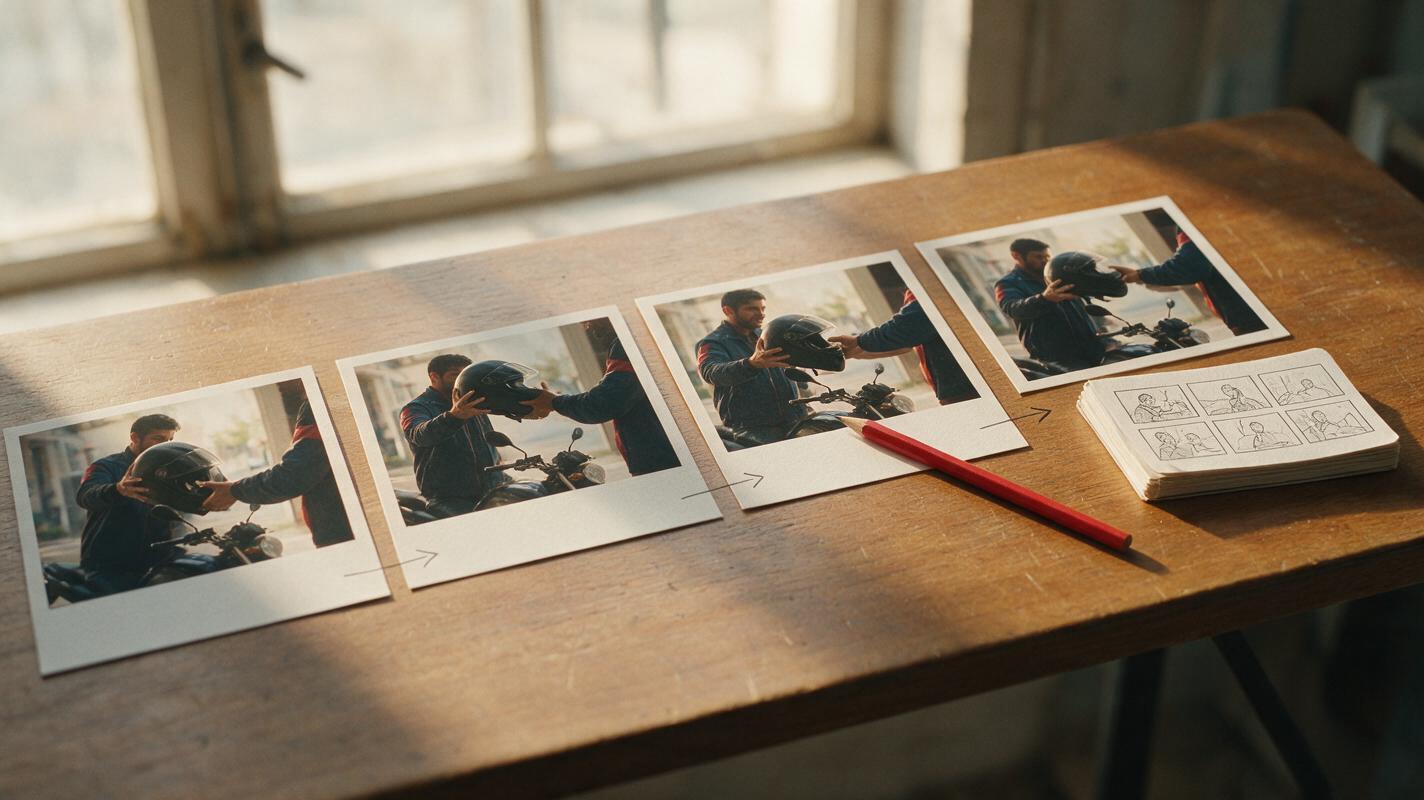
Table of contents
TL;DR: Build Every Cut Around a Visual Handoff
The fastest way to preserve action continuity is to stop generating adjacent shots independently. Design one clear movement, export or reconstruct its final pose as a handoff image, and use that image to begin the next image to video shot.
Keep the character’s screen direction, active limb, carried object, and stage of movement unchanged across the cut. Seedance and Kling can then reinterpret the camera angle without having to invent where the action resumed.
A continuity cut does not require two clips to contain identical motion. It requires the outgoing frame and incoming frame to describe the same moment clearly enough that the viewer mentally connects them.
Why AI-Generated Actions Often Break at the Cut
A single generated clip can look convincing while moving. Problems become obvious when it is placed beside another clip that supposedly continues the same action.
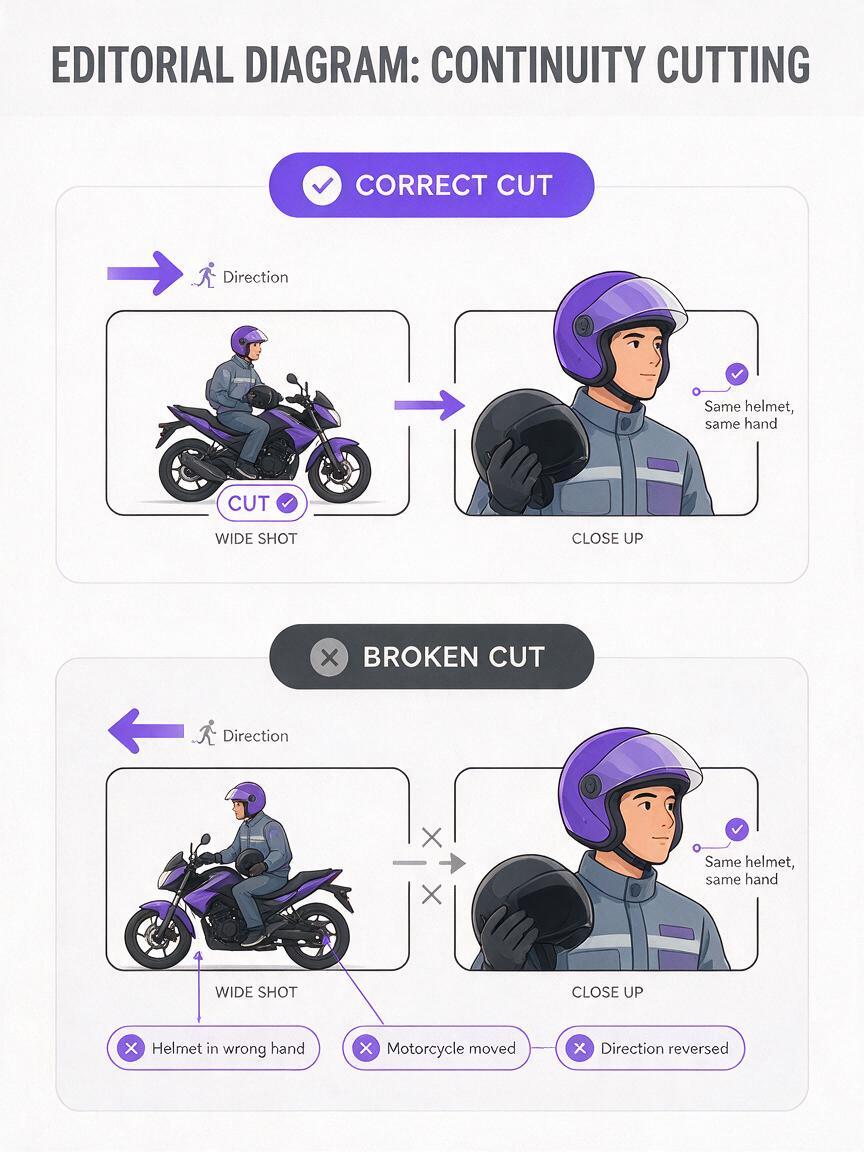
Imagine a courier walking toward a motorcycle, lifting a helmet, and putting it on. The wide shot may end with the helmet in the courier’s right hand, but the close-up may begin with it in the left. The character might walk from left to right in one shot and reverse direction in the next. A raised arm may reset to waist level, or the motorcycle may move from the character’s left side to the right.
Common continuity failures include:
- Screen-direction reversal: the subject travels rightward, then unexpectedly enters the next frame from the right and moves left.
- Pose reset: a hand reaching toward an object returns to a neutral position after the cut.
- Object teleportation: a cup, bag, phone, or tool changes hands, location, scale, or orientation.
- Action-stage mismatch: one clip ends halfway through sitting down, while the next begins after the character is already seated.
- Momentum loss: a fast turn or run becomes a static pose with no visible follow-through.
- Background inversion: doors, furniture, vehicles, and light sources switch sides between camera angles.
Longer prompts alone rarely solve these problems. The model needs a concrete spatial state at the transition, not simply another paragraph saying that the movement should be continuous.
Three Ways to Maintain Action Continuity
- End-frame handoff: use the final state of one shot as the visual reference for the next. This is the most reliable method for precise actions.
- Shared anchor-frame branching: generate two camera interpretations from the same action pose. This works well when cutting at a pause, glance, grip, or contact moment.
- Overlap and trim: generate both clips with extra motion around the intended edit, then find the pair of frames with the closest pose and momentum.
The workflow below combines all three. It uses an anchor image for structure, controlled motion prompts for performance, and overlapping handles for editorial flexibility.
How MagicBoat Handles a Multi-Shot Continuity Workflow
MagicBoat brings multiple generation models into one account, making it practical to test the same source frame and prompt across Seedance, Kling, and other available video models. You can use text to video for exploratory blocking, image generation models such as Seedream, Flux, or GPT Image for anchor-frame development, and image-led video generation for controlled shots.
| Production task | Useful approach | Continuity benefit |
|---|---|---|
| Explore the overall action | Text-led video draft | Reveals whether the movement is readable before detailed setup |
| Lock the cut moment | Generate or extract an anchor image | Defines pose, props, direction, and environment |
| Create adjacent shots | Image-led generation with Seedance or Kling | Reduces spatial reinvention between clips |
| Compare interpretations | Run the same input through multiple models | Lets you choose the best motion rather than rewriting blindly |
| Repair a successful performance | Authorized face replacement when necessary | Preserves motion while correcting residual identity drift |
Model availability and controls can change, so use the duration, aspect ratio, and reference options currently shown for the selected model. The important rule is to keep the input frame and core motion instruction consistent during comparison.
Step 1 — Write the Action as Observable Beats
Choose one short action and divide it by physical state rather than by camera shot. Each beat should describe something that can be verified in a still frame.
For a courier putting on a motorcycle helmet, the beats might be:
- The courier walks from left to right toward the parked motorcycle.
- The courier stops beside the seat and grips the helmet with the right hand.
- The helmet rises in front of the chest while the left hand reaches for its lower edge.
- Both hands guide the helmet over the head.
- The courier lowers both hands and looks toward the road.
Avoid vague beats such as “gets ready to leave.” They do not identify which hand is active, where the prop is located, or what pose must survive the cut.
Mark a cut opportunity where the body has a readable shape. Contact moments are particularly useful: a hand reaches a handle, a foot lands, a cup touches a table, or both hands settle on a prop.
ACTION CONSTANTS
Travel direction: left to right
Active prop: matte black motorcycle helmet
Primary hand: right hand
Motorcycle position: frame right
Body orientation: three-quarter profile facing right
Cut moment: right hand gripping helmet above the seat
Expected result: a miniature continuity specification that can be checked against every generated clip.
Step 2 — Create the Handoff Frame
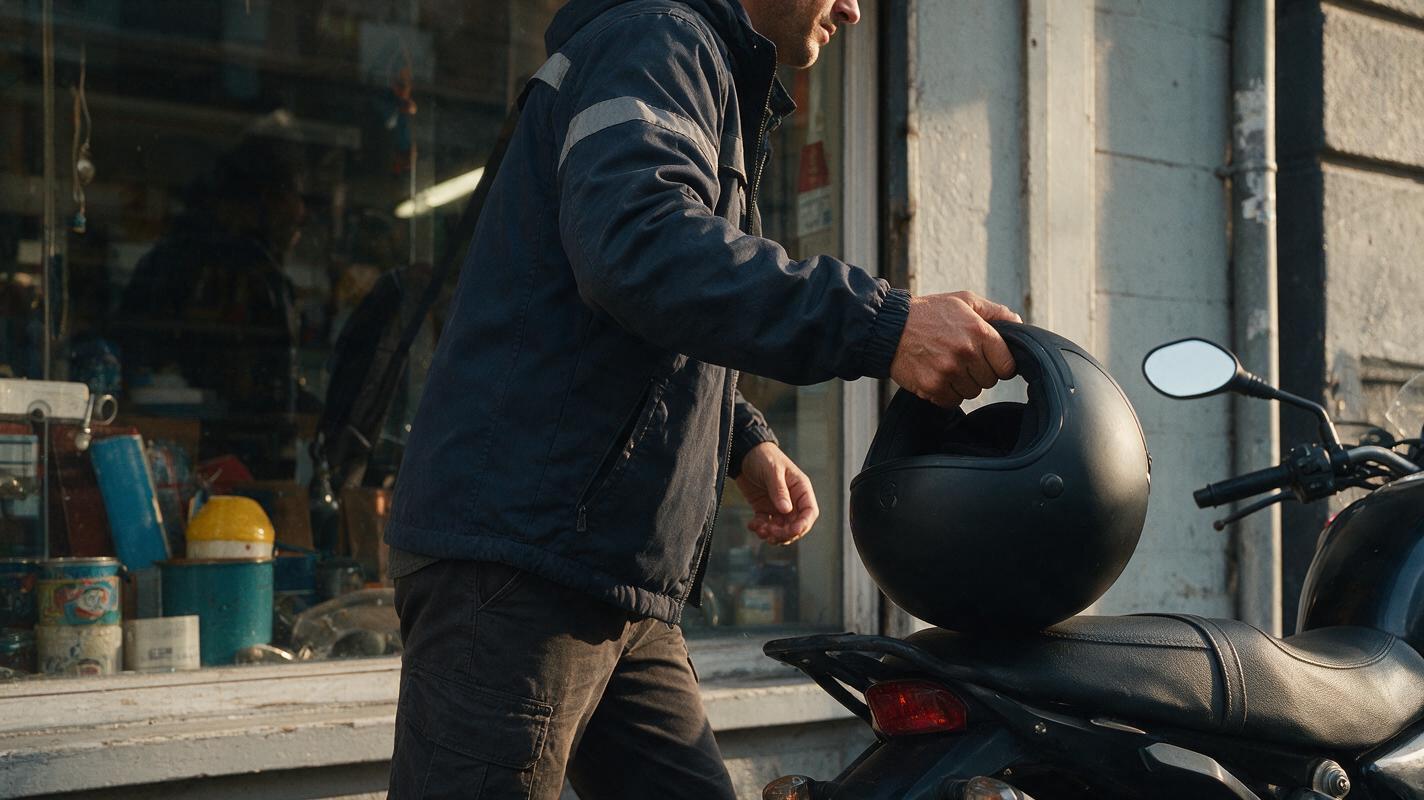
Generate a still image showing the exact moment where the cut will occur. This is not merely a character portrait. It must show the body, prop, environment, and screen direction needed by both shots.
Use a medium-wide composition first because it provides enough context to judge limb placement and object geography.
Cinematic medium-wide frame of an adult bicycle courier beside a parked motorcycle at the curb, three-quarter profile facing frame right. The courier's right hand grips a matte black helmet resting just above the motorcycle seat; the left arm hangs naturally. Motorcycle remains on frame right, storefront windows on frame left, late-afternoon natural light, realistic anatomy, grounded feet, documentary color, clear spatial layout.If the image model moves the prop to the wrong side, correct the frame before animation. Do not expect the video model to repair a structurally incorrect starting image.
Inspect these details at full size:
- The right hand visibly contacts the helmet.
- The helmet is separate from the motorcycle and body.
- The character faces the intended travel direction.
- Both feet have plausible support.
- The motorcycle and major background features occupy deliberate sides of the frame.
- No extra straps, fingers, handles, or duplicated objects appear near the contact point.
Expected result: one clean handoff frame that can end Shot A, begin Shot B, or guide both.
Step 3 — Generate the Outgoing Shot Backward from the Cut
Animate the approach to the handoff moment. The motion prompt should state where the character begins, what changes, and where the movement settles. Do not ask for the entire helmet action yet.
The courier takes two natural steps from left to right toward the motorcycle. The motorcycle stays fixed on frame right. The courier slows, extends the right hand, and firmly grips the black helmet above the seat. End with the right hand holding the helmet and the body facing right. Subtle handheld camera, no camera orbit, no direction reversal, no object switching hands.For a Seedance prompt, the chronological phrasing helps distinguish the beginning, middle, and final state. For a Kling prompt, keep the same physical constraints and avoid adding unrelated cinematic events.
If a model treats the input as the beginning rather than the desired end state, use a branching strategy: let the clip begin on the handoff pose, create a small settling movement, and plan to cut into it. Alternatively, generate a separate approach shot and trim before any incompatible contact occurs.
Expected result: an outgoing clip that establishes left-to-right travel and reaches a stable grip without completing the next action.
Step 4 — Generate the Incoming Shot from the Same State
Now create the closer angle from the handoff image. Crop or reconstruct the frame only if the same hand, prop position, facing direction, and environmental orientation remain unambiguous.
The incoming shot should begin with the known state and continue one action:
Begin with the courier's right hand already gripping the matte black helmet beside the motorcycle. The courier lifts the helmet smoothly from seat height to chest height. The left hand joins at the lower rim while the right hand remains the leading hand. Maintain three-quarter orientation facing frame right. Slow camera push-in, stable motorcycle position, continuous natural arm motion, no hand swap, no helmet duplication.Notice that the prompt does not repeat the walk or the reach. Repeating earlier beats encourages the model to reset the performance.
Preserve screen direction even in a close-up. If the wide shot shows the courier facing right, the close-up should not be horizontally flipped merely because the face looks better from the other side.
Expected result: a second clip that starts from an intelligible grip and advances the helmet to the next physical state.
Step 5 — Generate Overlap Around the Edit
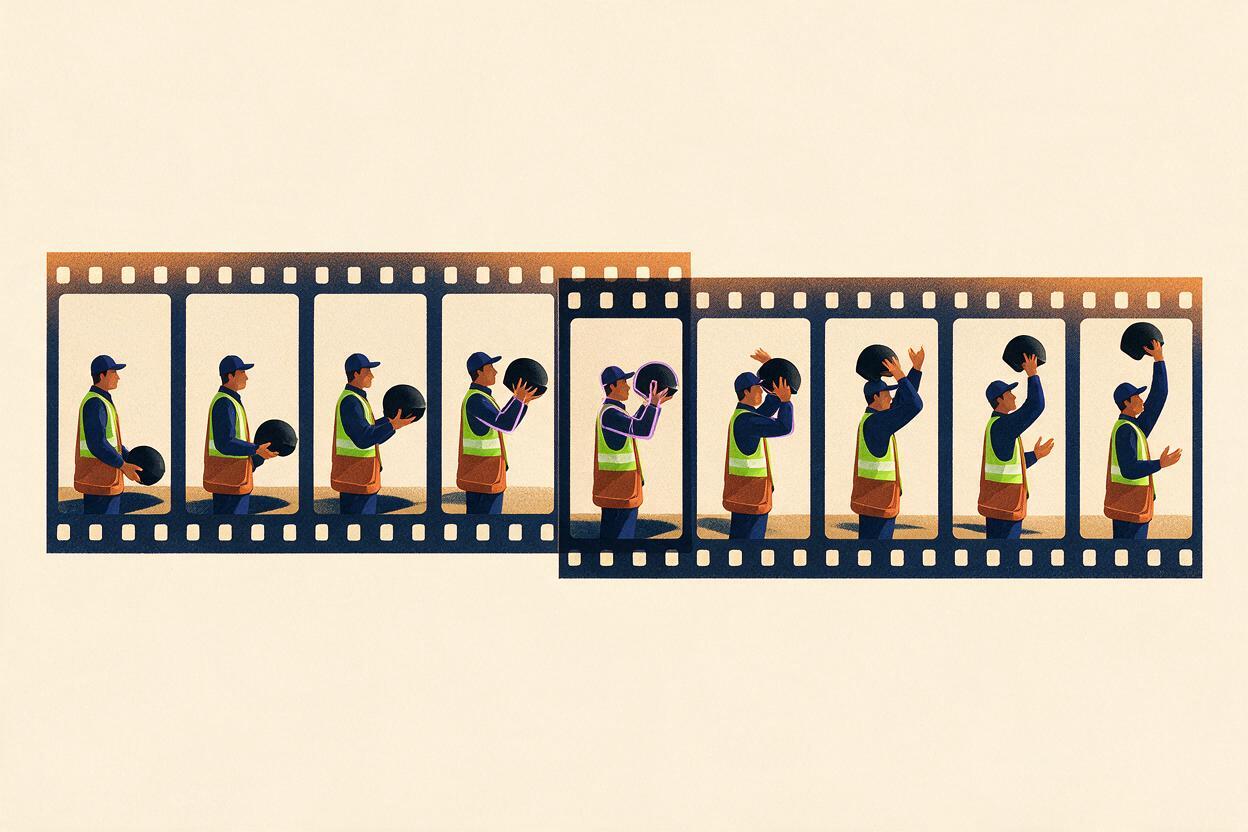
Do not assume the first or last generated frame will be the best cutting point. Create temporal overlap by allowing both clips to include a small version of the grip or lift.
- Shot A can end with the hand contacting and beginning to lift the helmet.
- Shot B can begin with the grip already formed before continuing the lift.
On the editing timeline, compare frames by silhouette rather than exact pixel similarity. Look for the same elbow angle, shoulder height, helmet position, gaze direction, and body lean. Then cut while the action is moving.
Cutting during motion hides small visual differences because the viewer follows the action path. Cutting after both clips become static makes mismatched hands, props, and posture easier to notice.
Keep a short handle before and after the chosen edit. A slightly later incoming frame may match better than the literal first frame.
Expected result: enough overlapping motion to choose the cut instead of accepting a model-selected transition frame.
Step 6 — Compare Seedance and Kling with Identical Inputs
Run the same handoff frame and motion prompt through both available model families rather than changing the prompt after every result. A controlled comparison tells you whether the issue comes from the instruction, source image, or model interpretation.
| Check | Pass condition | Reason to reject |
|---|---|---|
| Direction | Character remains oriented toward frame right | Horizontal reversal or turn toward the wrong side |
| Hand ownership | Right hand maintains the primary grip | Helmet jumps to left hand |
| Action stage | Shot begins at the grip and continues upward | Reach or walk restarts |
| Prop integrity | One rigid helmet retains its shape | Duplication, melting, or scale changes |
| Camera | Push-in remains subordinate to the action | Orbit exposes contradictory geography |
Select the output with the cleanest action path, not automatically the most dramatic camera movement. Complex camera motion can make a standalone clip impressive while making the edit harder to understand.
Expected result: a defensible model choice based on continuity rather than novelty.
Step 7 — Assemble and Audit the Sequence
Place the outgoing and incoming clips together, remove weak opening or closing frames, and watch the cut repeatedly at normal speed. Then inspect it frame by frame.
Use four audit passes:
- Silhouette pass: ignore facial detail and watch the outline of the body and prop.
- Screen-direction pass: confirm that travel, gaze, and body orientation do not reverse.
- Contact pass: inspect fingers, wrists, straps, handles, and the edge where the hand meets the object.
- Momentum pass: check whether movement speed changes plausibly through the edit.
If the handoff is structurally wrong, regenerate the affected shot. If the movement works but identity drifts slightly, preserve the successful motion and consider an authorized face-replacement pass instead of discarding the clip.
Expected result: a cut that reads as one continuous action even though its shots were generated separately.
Keep the Same Continuity Map Across a Longer Scene
For a multi-shot sequence, maintain a simple continuity map beside your prompts. Record character direction, camera side, active hand, prop state, and the completed action beat after each shot.
SHOT 01: walking right, helmet on motorcycle, hands free
SHOT 02: facing right, right hand grips helmet
SHOT 03: facing right, helmet at chest, both hands engaged
SHOT 04: facing right, helmet over head
SHOT 05: facing right, helmet worn, hands lowered
This record prevents later prompts from accidentally returning to an earlier state. It is especially useful when generations are produced on different days or tested with several models.
Alternative: Use Motion Transfer for Complex Body Mechanics
Some actions are too coordinated to describe reliably with text alone: putting on a coat, drawing a tool from a belt, dancing with a prop, or falling and recovering. In those cases, record a clean reference performance with the desired direction, timing, and limb sequence, then use motion transfer where an appropriate workflow is available.
Keep the reference camera stable, make the performer fully visible, avoid limb occlusion, and use a prop with approximately the same size and handling pattern as the target object. Motion transfer can preserve timing more directly, although appearance and prop interaction still require inspection.
Alternative: Hide the Handoff with an Insert Shot
If two hero shots cannot be joined cleanly, insert a close-up of the prop or environment between them. A helmet strap tightening, a motorcycle key turning, or a boot stepping beside the wheel can bridge a small pose mismatch.
The insert must advance the action rather than function as random decoration. Its outgoing state should still support the next shot: if the key has been turned, the following shot should not show the character reaching for an untouched key.
Where This Workflow Falls Short
- Fine hand-object interaction remains difficult. Thin straps, transparent containers, tools, and articulated objects can deform even when the starting frame is clean.
- Large angle changes expose missing information. A frontal anchor does not define the exact appearance of the character, prop, or room from behind.
- Fast motion reduces control. Running, impacts, and spins offer fewer readable handoff frames and amplify anatomy errors.
- Prompt constraints are not guarantees. Phrases such as “no hand swap” clarify intent but cannot force every generation to obey.
- Editing remains necessary. Generation creates candidate performances; trimming determines whether those performances connect.
When continuity errors affect scene geometry or action stage, fix the source frame or regenerate. Post-production repair is more appropriate for localized issues than for a fundamentally contradictory pose.
FAQ
Should adjacent shots use the exact same reference image?
Use the same image when it clearly represents the shared cut moment. For a substantial camera-angle change, create a compatible second anchor that preserves pose, hand ownership, prop state, and screen direction rather than stretching one image beyond the information it contains.
Is it better to cut on movement or on a static pose?
Movement usually hides small mismatches, while a brief static contact pose gives the generator a clearer state to reproduce. A strong method is to generate around a stable contact moment but place the final edit just as movement resumes.
Can negative prompts guarantee that an object stays in one hand?
No. They can reinforce the instruction, but a clear source image and one-action prompt are more important. If hand ownership is critical, show the grip visibly in the anchor frame.
How much action should one generated clip contain?
Usually one primary movement is easier to control than a chain of actions. Separate walking, gripping, lifting, wearing, and looking away into distinct beats with intentional overlap.
What if the second shot is horizontally reversed?
Regenerate it with explicit facing and frame-side instructions, or correct the anchor before animation. Flipping the finished clip may restore direction, but it can also reverse clothing details, text, asymmetrical props, and lighting.
Can this method work without a visible character?
Yes. The same principles apply to vehicles, product demonstrations, cooking actions, mechanical assembly, and moving objects. Track direction, orientation, contact state, and momentum at every cut.
Final Checklist
- Write the action as visible physical beats.
- Choose a clear contact or transition pose for the cut.
- Lock screen direction, active hand, prop state, and environment sides.
- Create a clean handoff frame before generating adjacent shots.
- Ask each clip to perform only one primary action.
- Generate overlap so the edit point remains flexible.
- Compare Seedance and Kling with identical inputs.
- Audit silhouette, direction, contact, and momentum separately.
- Regenerate structural failures instead of hiding them with face correction.
Ready to test the handoff-frame method? Create your first AI video free and compare the same continuity prompt across available models.
Keywords
ai video tutorial, action continuity, image to video, Seedance prompts, Kling prompts, prompt engineering, ai video workflow