How to Keep Action Continuity Across AI Video Cuts
Keep action continuous across AI video cuts by treating the last pose of one shot as the physical blueprint for the first pose of the next. This tutorial builds matched reference frames, preserves movement phase and screen direction, and animates each shot separately with image-to-video models.
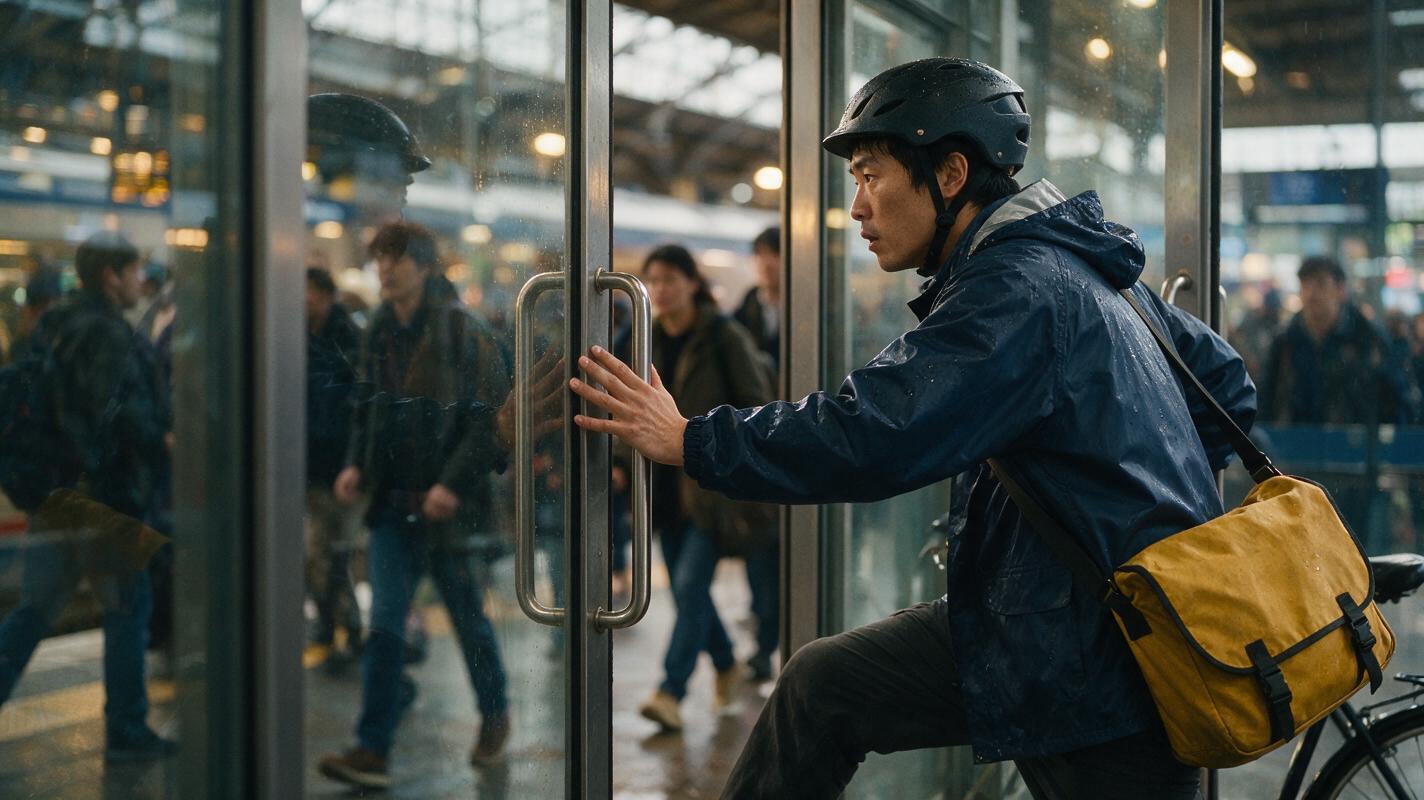
Table of contents
TL;DR: Match the pose before you animate the cut
To preserve action continuity across AI video cuts, design the final frame of Shot A and the opening frame of Shot B as a matched pair. Keep the character’s identity, movement phase, screen direction, carried objects, and environment geography consistent, then animate each shot independently with image to video.
The fastest workflow is to generate a stable character sheet, create a wide master frame, extract a clear transition pose, and rebuild that exact pose from the next camera angle. This gives the video model less freedom to reinterpret what the character is doing at the edit.
Why AI-generated action often breaks at a cut
A conventional film cut hides a camera change while preserving the action. If a courier reaches for a door handle in a wide shot, the close-up must show the same hand approaching the same handle at approximately the same moment. Viewers accept the new camera angle because the physical event remains continuous.
AI-generated shots are usually created as separate predictions. The second generation does not automatically know the body mechanics, timing, or spatial relationships established in the first. Common failures include:
- The left hand reaches in Shot A, but the right hand holds the object in Shot B.
- A forward-running character restarts from a neutral standing pose after the cut.
- A bent knee becomes a straight leg, making the character appear to skip forward in time.
- The character moves left to right before the cut and right to left afterward.
- A shoulder bag changes sides, disappears, or passes through the body.
- The door, table, vehicle, or other contact object moves to a different position.
- The face and clothing remain recognizable, but the character’s momentum resets.
Continuity is not just character consistency. A matching face cannot rescue a cut if the pose, motion phase, prop state, or screen direction contradicts the previous shot.
Three ways to build a continuous action cut
- Pose-matched cut: End and begin both shots on nearly the same body configuration. This is the most reliable method for running, turning, reaching, and sitting actions.
- Overlap cut: Repeat a short portion of the movement in both clips, then choose the cleanest matching frames during editing.
- Occlusion cut: Place the edit when the subject passes behind a pillar, door frame, foreground person, or other object. The brief visual interruption conceals small pose differences.
This tutorial uses a pose-matched cut with a small overlap. The example follows a bicycle courier running through a railway station, pushing open a glass door, and continuing into the concourse.
How MagicBoat handles a multi-shot action workflow
MagicBoat provides one account for testing multiple image and video generation models, so the same continuity plan can be evaluated without rebuilding the project around one model. Still-image options such as Seedream, Flux, or GPT Image can be used to develop reference frames, while Seedance, Kling, and Veo can be tested for shot animation when available in the platform.
The practical sequence is:
- Create the identity and costume reference as a still image.
- Generate the two camera angles with matching action poses.
- Animate each angle through the MagicBoat image to video workflow.
- Compare Seedance and Kling outputs using the same reference frames and action requirements.
- Repair only localized identity issues with face swap rather than regenerating an otherwise successful performance.
Do not ask one prompt to generate the complete multi-camera sequence. Separate clips provide more control over pose, timing, composition, and the exact position of the edit.
Step 1 — Build a three-view character reference
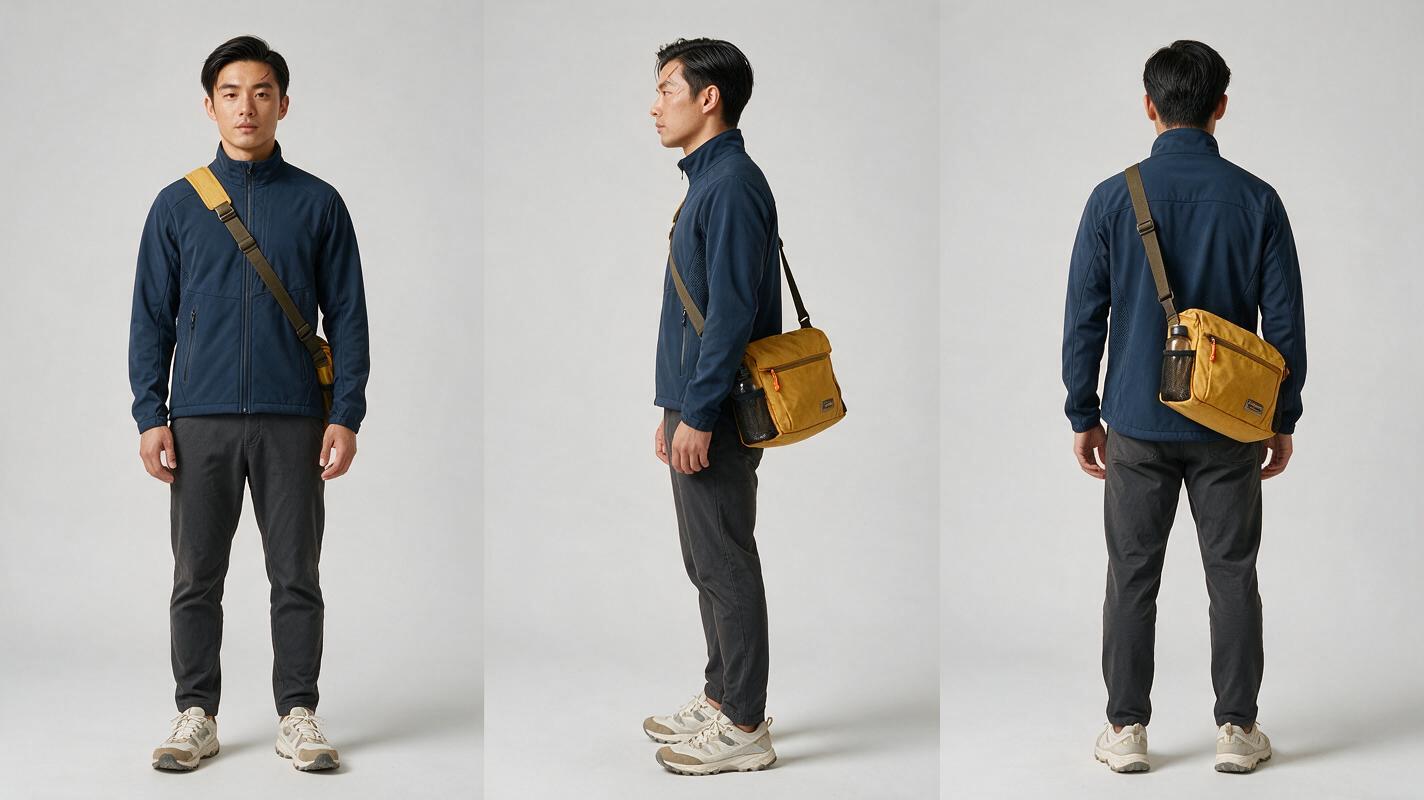
Create one photorealistic character sheet before generating any scene. The courier needs recognizable facial structure, a stable outfit, and an asymmetrical detail that makes continuity errors easy to detect. Here, the yellow shoulder strap must remain over the right shoulder in every shot.
Reusable visual prompt:
Photorealistic three-panel character reference sheet of the same 27-year-old East Asian bicycle courier in every panel, lean athletic build, oval face, short black hair swept slightly left, dark brown eyes, small scar through the left eyebrow, navy weatherproof cycling jacket with a narrow reflective silver stripe, charcoal trousers, worn white sneakers, mustard-yellow messenger bag with the strap crossing from the right shoulder to the left hip. PANEL 1: exact front view, relaxed neutral stance. PANEL 2: exact left-side profile, arms relaxed. PANEL 3: exact back view, messenger bag resting at the left hip and strap visibly anchored over the right shoulder. MANDATORY CAMERA AND LAYOUT: landscape 16:9, three equal full-body panels, camera at waist height, 70mm portrait-lens appearance, identical scale and lighting in all panels, neutral light-gray seamless studio background, soft editorial studio light, realistic skin and fabric texture. No action poses, no extra people, no text, no labels, no duplicated limbs, no costume changes.Expected result: One sheet showing the same person from front, side, and back, with the bag orientation and clothing construction clearly visible. Regenerate if the panels look like siblings rather than one individual.
Step 2 — Establish the action in a wide master frame
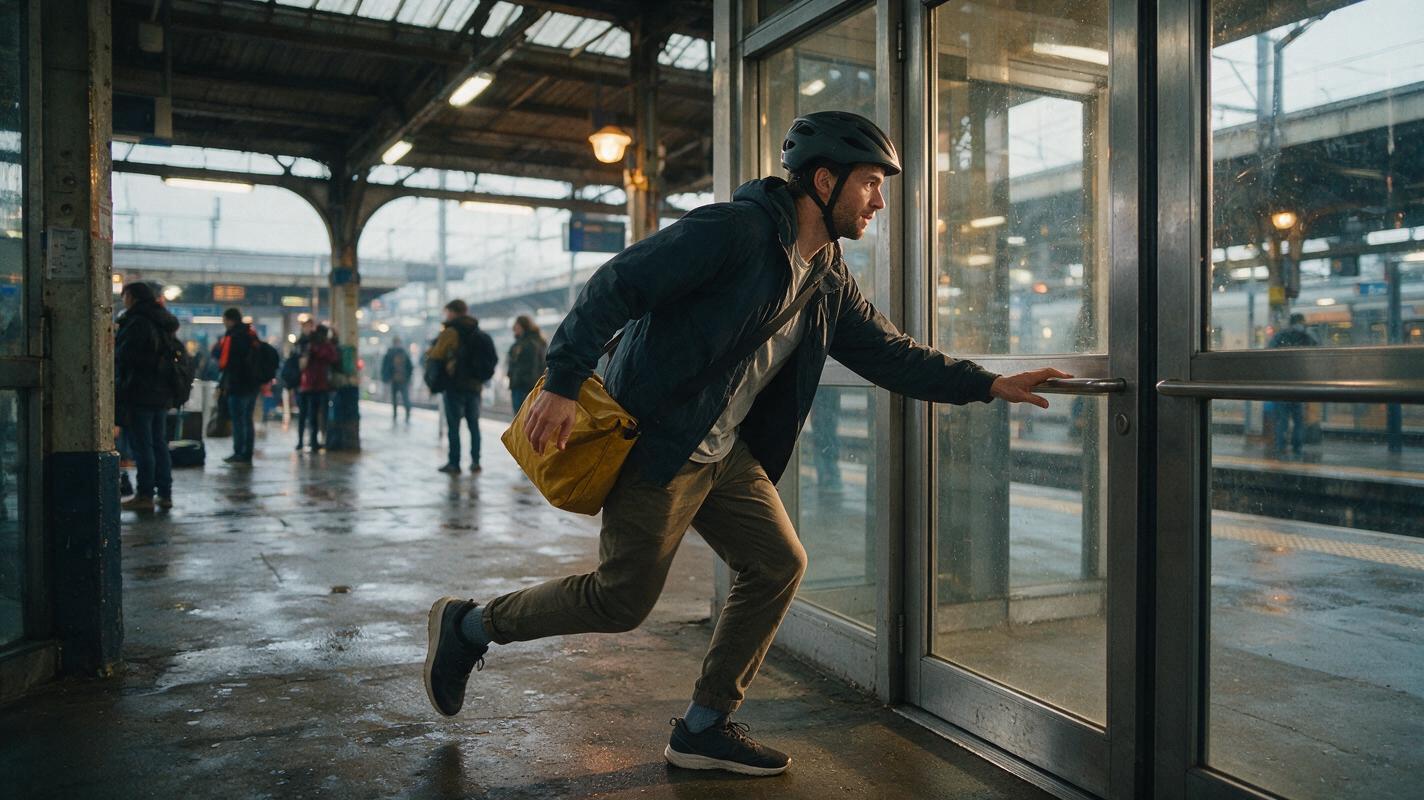
Generate the station entrance before creating close-ups. The wide frame establishes where the courier begins, which direction the person travels, which hand reaches for the door, and where the bag hangs. Keep the action readable rather than spectacular.
Use left-to-right travel throughout this example. Place the door ahead of the courier on the right side of the frame and reserve visible space for continued movement.
Reusable visual prompt:
Cinematic editorial-realism film still of the referenced bicycle courier running left to right through the covered entrance of a lived-in urban railway station on a rainy morning, body in true mid-stride, left foot planted under the center of mass, right knee moving forward, torso leaning slightly toward a glass swing door, right arm extending toward the horizontal metal door bar, left arm behind the torso, mustard-yellow messenger bag bouncing at the left hip with its strap crossing from the right shoulder. Wet concrete floor, believable ticket posters without readable brand names, commuters soft and distant in the background, cool daylight from outside mixed with warm practical station lights. MANDATORY CAMERA: wide three-quarter view from the courier's front-left, camera at chest height, 35mm lens appearance, locked horizon, full body and door visible, subject moving left to right, landscape 16:9. Preserve exact face, jacket, bag, hand choice, and station geometry. Natural motion posture, realistic hands, no duplicate person, no floating feet, no warped door.Expected result: A wide frame that functions as a spatial map. The right hand, right shoulder strap, planted left foot, door location, and left-to-right direction should all be unambiguous.
Step 3 — Choose the exact transition pose
Define the instant where the edit will occur before generating Shot B. A useful transition pose has a clear silhouette and limited ambiguity. For the door action, cut just after the right palm contacts the bar but before the arm fully extends.
| Continuity variable | State at the cut | What must not change |
|---|---|---|
| Right hand | Palm contacting door bar | Contact point and finger orientation |
| Feet | Left foot bearing weight; right foot passing | Lead leg and stride phase |
| Torso | Forward lean with slight right rotation | Lean angle and shoulder order |
| Bag | At left hip, moving slightly backward | Bag side and strap path |
| Travel | Left to right | Screen direction |
| Door | Beginning to rotate inward | Hinge side and opening direction |
Write this state down as a continuity specification. Avoid vague phrases such as “the courier opens the door.” Describe the contact, balance, limb positions, and object state instead.
Step 4 — Generate a matched frame from the second camera
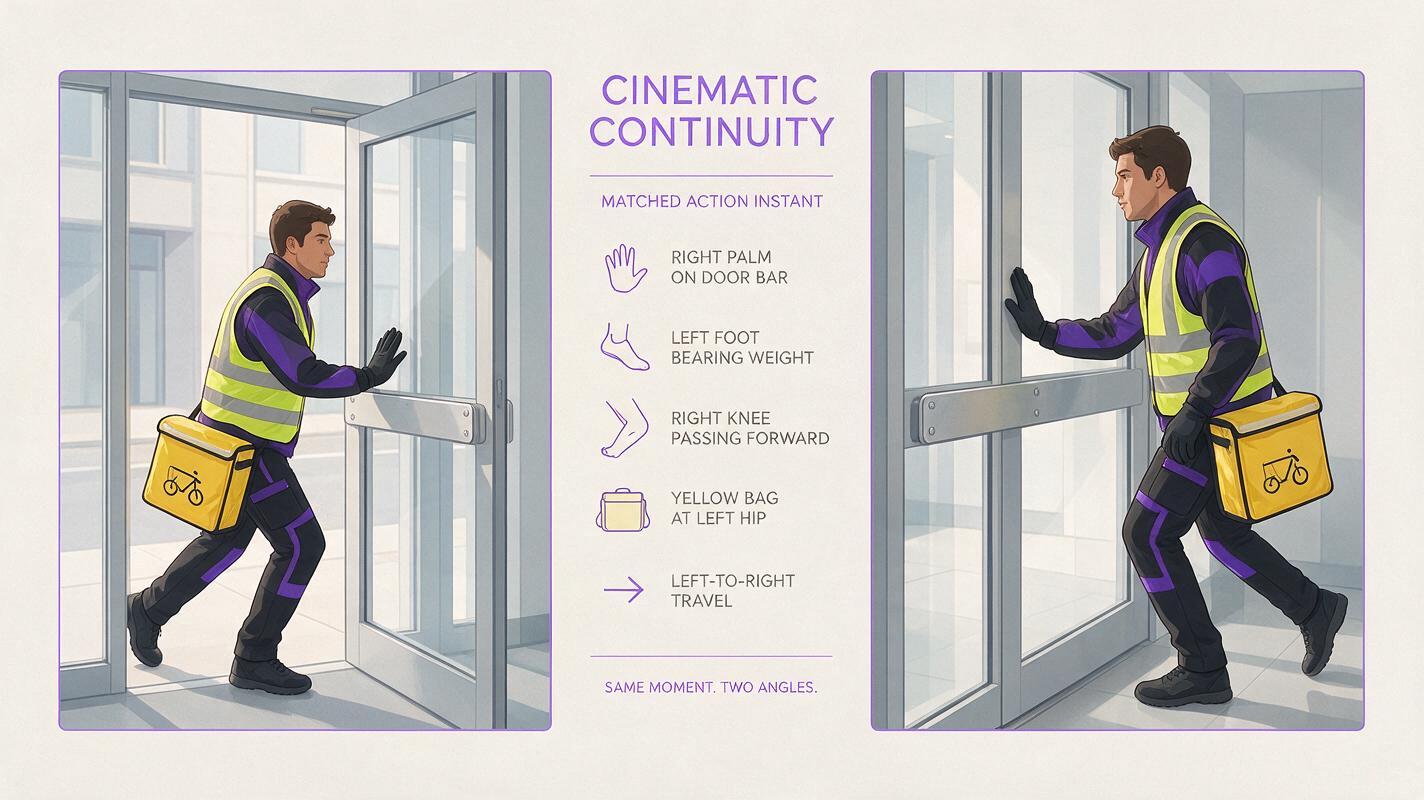
Create Shot B as a tighter interior angle, but preserve the same physical instant. The camera may move; the event may not. Show the courier from the front-right so the hand-to-bar contact remains visible while the station interior appears behind the door.
Reusable visual prompt:
Two-frame cinematic continuity comparison presented side by side, featuring the exact same referenced bicycle courier at the exact same instant of pushing through a railway-station glass door. LEFT FRAME: wide exterior three-quarter view, courier moving left to right, right palm contacting the horizontal metal door bar, left foot planted, right knee passing forward, mustard-yellow messenger bag at left hip. RIGHT FRAME: tighter interior reverse three-quarter view of the same physical pose, same right palm at the same height on the same bar, same left-foot weight phase, same torso lean, same bag position, door opened only a few degrees. MANDATORY CAMERA AND LAYOUT: landscape 16:9 contact sheet with two equal frames separated by a thin neutral gutter; left camera at chest height with 35mm lens appearance; right camera inside the station near the front-right of the courier with 50mm lens appearance; maintain left-to-right screen direction in both frames. Cinematic editorial realism, rainy morning daylight, warm station practical lights, realistic anatomy and glass reflections. No captions, no arrows, no identity change, no mirrored bag, no changed hand, no extra limbs, no duplicated courier.Expected result: Two frames that could be alternated without making the body jump. A small perspective difference is correct; a different stride phase is not.
Screen-direction check: A reverse camera angle can accidentally mirror the apparent movement. Compose Shot B so the courier still progresses toward the right side of the displayed frame unless the story intentionally crosses the axis.
Step 5 — Animate Shot A with a controlled contact action
Use the wide master frame as the input. Ask for one short action: the courier takes the final stride, contacts the bar, and begins pushing. Do not include the full run, door crossing, camera orbit, and crowd reaction in one generation.
Seedance-style motion prompt:
The courier maintains left-to-right forward momentum and completes one natural running stride. The left foot bears weight as the right knee passes forward. The right palm reaches the metal door bar and makes firm contact; only after contact, the glass door begins rotating inward a few degrees. The mustard-yellow bag trails slightly behind the left hip from inertia. Locked wide camera, stable station geometry, restrained realistic body motion, consistent face and clothing. End while the right palm remains on the bar. No camera movement, no hand switching, no direction reversal, no extra stride, no bag changing sides.Kling-style motion prompt:
Locked 35mm wide shot. Action order: 1) courier travels left to right; 2) left foot plants; 3) right hand contacts the door bar; 4) door starts to open inward; 5) hold contact briefly at the end. Preserve the reference identity, navy jacket, yellow strap over right shoulder, bag at left hip, exact door and background. Natural running mechanics and subtle cloth inertia. Avoid morphing hands, sliding feet, mirrored accessories, duplicated people, camera pan, zoom, or orbit.Expected result: Shot A should finish near the planned transition pose. The hand must contact the bar before the door moves; otherwise, the action will feel mechanically disconnected.
Step 6 — Animate Shot B with intentional overlap
Start Shot B slightly before the ideal edit point. Repeating a fraction of the push gives you multiple candidate frames during editing. Continue from hand contact through the doorway, but keep the clip focused on that single action.
Motion prompt:
The shot begins with the courier's right palm already approaching the horizontal door bar, left foot carrying body weight and right knee passing forward. The palm contacts the bar at the same height shown in the reference, the right arm extends, and the glass door rotates inward smoothly. The courier continues left to right into the station without pausing or restarting. The mustard-yellow messenger bag swings naturally at the left hip and the strap stays over the right shoulder. Locked interior camera, stable face, stable clothing, stable door geometry, realistic foot contact. No reverse movement, no neutral standing reset, no hand swap, no sudden speed change, no camera move.Expected result: The opening portion of Shot B overlaps the final portion of Shot A. Both clips should contain at least one comparable moment with the same hand contact and stride phase.
Step 7 — Find the cut by matching movement phase
Place both clips on a timeline and inspect the contact action frame by frame. First find the frame in Shot A where the palm settles on the bar. Then locate the closest frame in Shot B by comparing the body, not the face.
Check these features in order:
- Contact: Is the same hand touching the same area of the bar?
- Weight: Is the same foot carrying the body?
- Silhouette: Are the elbow, knee, and torso angles comparable?
- Momentum: Does the bag swing in a compatible direction?
- Object state: Is the door open by roughly the same amount?
- Identity: Does the face remain stable enough at normal playback speed?
Cut during motion rather than after the character stops. Continuous movement directs attention through the edit and makes small visual differences less noticeable. If necessary, remove a few frames from the beginning of Shot B instead of changing its playback speed.
Step 8 — Repair only the failed continuity variable
If the cut almost works, identify the specific mismatch. Do not regenerate both clips automatically.
- Face drift only: Apply face swap to the affected section while preserving the successful body performance.
- Bag on the wrong side: Regenerate the still reference or Shot B; face repair cannot correct body-level wardrobe geometry.
- Wrong stride phase: Return to the matched opening frame and correct the planted foot before animating again.
- Door jumps position: Rebuild the second scene frame with closer object-state matching.
- Movement reverses: Correct the composition and screen direction rather than adding more motion language.
- One or two malformed frames: Trim around them if the action rhythm remains natural.
Expected result: Repairs remain proportional to the problem. Identity tools address identity; reference-frame regeneration addresses pose, prop, and environment errors.
Keep the same action logic across a longer sequence
For three or more shots, create a small continuity ledger. Give every cut a defined incoming and outgoing state rather than relying on the model to remember previous clips.
| Shot | Opening state | Closing state | Protected detail |
|---|---|---|---|
| Wide entrance | Courier running | Right palm contacts bar | Left-to-right travel |
| Interior medium | Right palm contacts bar | Torso crosses doorway | Bag remains at left hip |
| Close tracking shot | Torso clears door | Courier accelerates | Right foot begins next stride |
Save the character sheet, location frames, prompt language, and accepted boundary frames. Those assets are more useful for future continuity than a long prose description alone.
Alternative: Use motion transfer for complex body mechanics
Running, fighting, dancing, and athletic turns can exceed the reliability of prompt-only movement. Record or source a clean performance with the desired stride timing, then use motion transfer to apply that performance to the generated character.
Keep the source camera stable, show the full body, avoid limb occlusion, and include the exact transition movement in both camera takes. Motion transfer improves timing, but it does not automatically solve bag placement, door geometry, or identity. Those still require strong reference frames.
Alternative: Hide the cut with foreground occlusion
If matching the exact pose remains unreliable, place a pillar, passing commuter, door edge, or dark foreground object across the frame at the edit. End Shot A as the courier becomes partially hidden and begin Shot B before the courier fully reappears.
The occluder should belong naturally in the scene. A station pillar is credible; an unexplained object sliding across the lens is distracting. Preserve movement speed and direction through the hidden interval so the reappearance still feels physically connected.
Where this workflow falls short
- Rapid acrobatics: Fast rotations create many possible body configurations, making exact phase matching difficult from still references alone.
- Heavy occlusion: If the contact hand or planted foot is hidden in both shots, evaluating continuity becomes guesswork.
- Flexible props: Loose coats, ropes, straps, and long hair may move differently between generations even when the body pose matches.
- Reflective environments: Glass doors and mirrors can introduce duplicate limbs or inconsistent reflections.
- Long clips: Identity, speed, and environment geometry have more time to drift. Short, action-specific shots are easier to control.
- Face repair limits: Face swap can correct facial identity, but it cannot fix the wrong hand, stride, screen direction, or object state.
FAQ
Should both shots use the same seed?
A shared seed is not a substitute for matched reference frames. Even when a model exposes seed control, changing the camera and composition can produce a substantially different result. Prioritize visible continuity anchors: pose, outfit, prop state, lighting, and screen direction.
How much action should overlap between clips?
Include enough overlap to offer several possible edit points around the key contact or movement phase. Avoid repeating so much action that the final edit appears to stutter backward.
Can text to video create both camera angles in one clip?
It can attempt a multi-angle sequence, but the model may blend the transition, alter the location, or reset the pose. Separately generated shots provide better control when continuity at a specific cut matters.
Should I match the face or the body first?
Match the body first. Viewers notice a changed contact hand, planted leg, or travel direction immediately during an action cut. Minor facial variation can often be repaired after the physical action works.
What is the easiest action for a first test?
Try a person walking past a fixed landmark or reaching for a large door handle. Both actions provide clear positional anchors without the complexity of fast spins, jumps, or hand-to-hand interactions.
When should I regenerate instead of repairing?
Regenerate when the body phase, camera axis, hero prop, or environment geometry is wrong. Use localized repair when the movement and scene are successful but a small identity region drifts.
Final checklist
- Create a three-view character sheet before scene generation.
- Establish location geography and one screen direction in a wide frame.
- Define the exact hand, foot, torso, prop, and object state at the cut.
- Generate Shot B from the same physical instant at a new camera angle.
- Animate each shot separately with short, ordered motion prompts.
- Include a small action overlap for flexible frame selection.
- Match contact and weight distribution before evaluating facial detail.
- Repair identity locally, but regenerate structural continuity errors.
Ready to test the matched-pose workflow? Create your first ai video free with MagicBoat and compare how multiple models handle the same reference frames.
Keywords
ai video tutorial, action continuity, image to video, character consistency, seedance prompts, kling prompts, prompt engineering, ai video workflow