AI Video Enhancer Workflow for Compressed Social Clips
Learn how to improve a compressed social video without creating waxy faces, harsh edges, or artificial detail. This ordered workflow covers artifact reduction, conservative upscaling, motion checks, and controlled before-and-after evidence.
Table of contents
Rescue a Compressed Clip Without Making It Look Artificial
A good AI video enhancer workflow does not simply maximize sharpness. It separates compression cleanup, noise reduction, scaling, color correction, and export so that each operation solves one visible problem without amplifying another.
Consider a realistic case: a vertical product demonstration was sent through a messaging app before reaching the editor. The downloaded copy now has blocky shadows, smeared hair, soft product labels, and unstable edges during hand movement. The original recording is unavailable, but the clip still needs to look acceptable in a social post.
This tutorial explains how to enhance videos with AI while keeping expectations realistic. Missing facial features, unreadable lettering, and objects erased by compression cannot be authentically recovered. Enhancement can suppress distractions and improve presentation, but it should not be treated as forensic reconstruction.
Best first move: ask for the original camera file. Use enhancement only when a cleaner source cannot be recovered.
Step 1 — Build a Controlled Before-and-After Test
Protect the received file and create a working duplicate. Do not repeatedly export the same processed copy, because every additional lossy encode can introduce new artifacts. Record the source resolution, frame rate, duration, and orientation before changing anything.
Choose a representative segment lasting several seconds. It should contain the clip's hardest material: a moving hand, a face turning, hair against the background, a textured product, and at least one shadow area. Run every early test on this short segment rather than processing the entire video.
Create three comparison files:
- Source: the untouched received clip.
- Candidate: the enhanced test using your current settings.
- Control: a copy exported at the final delivery dimensions without enhancement.
The control is important. It reveals whether an apparent improvement comes from the enhancer or merely from viewing a larger frame. Compare all three at the same displayed size.
| Inspection area | Source problem | Acceptable candidate | Reject when |
|---|---|---|---|
| Face | Blocky cheeks or soft eyes | Less distracting compression | Skin becomes plastic or identity changes |
| Hands | Smearing during movement | Cleaner silhouette | Fingers merge or leave trails |
| Product edges | Ringing and pixel blocks | Stable, restrained edges | Bright halos appear |
| Fine text | Soft or unreadable label | No additional damage | Invented letter-like shapes appear |
Reusable visual prompt:
Create a photorealistic controlled comparison asset showing the same vertical product-demo frame twice within a clean 16:9 landscape composition: the left frame has believable heavy messaging-app compression, blocky shadows, mosquito noise around a ceramic bottle, and slight hand-motion smearing; the right frame preserves the identical pose and composition but has restrained cleanup, stable edges, natural skin texture, and no invented label detail. MANDATORY CAMERA: locked eye-level medium close-up, identical framing on both sides. Neutral lived-in kitchen, soft window light, no text overlays, no logos, no interface elements, no watermarks.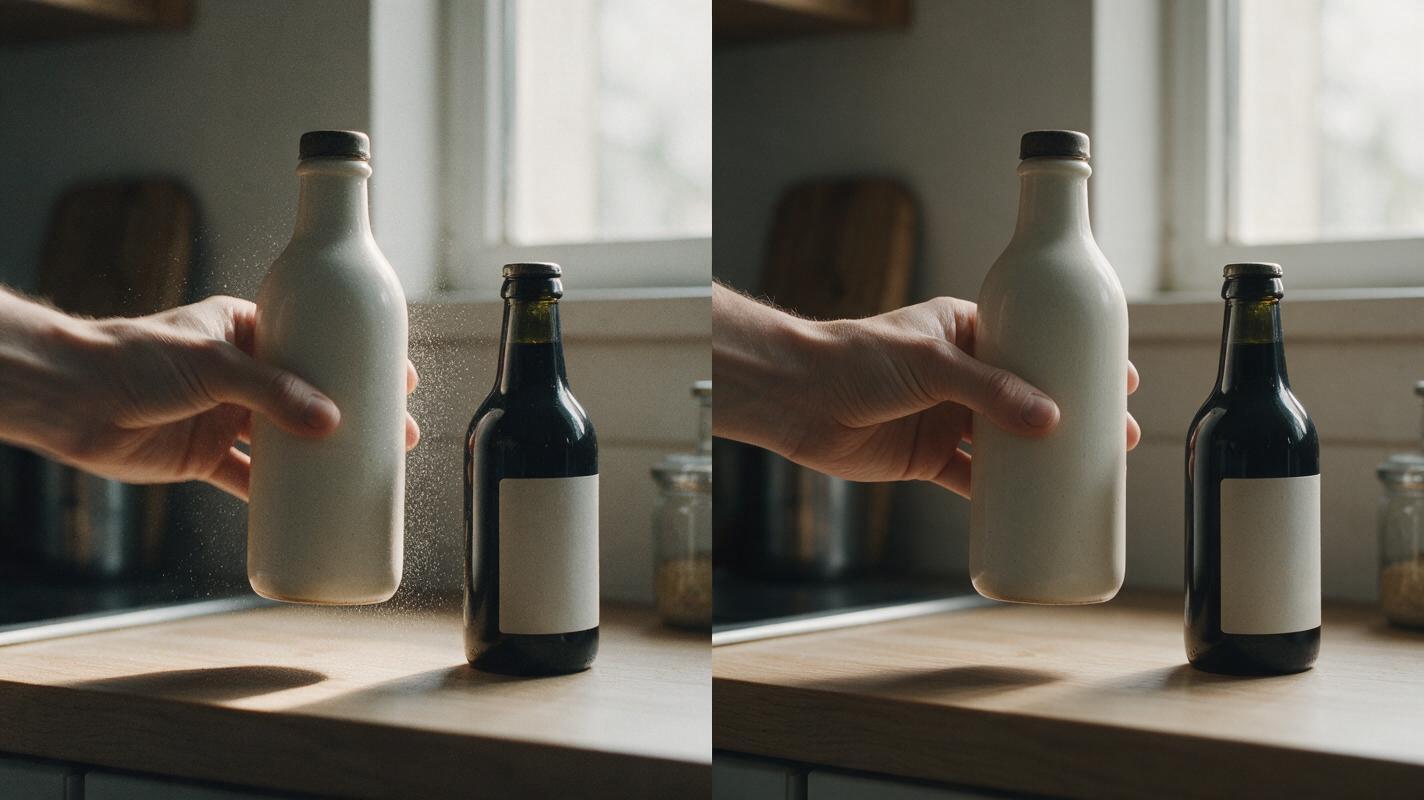
Step 2 — Diagnose the Damage Before Choosing Settings
Pause on several frames and identify the dominant defect. Different problems need different treatments, and a single aggressive preset often combines too many operations.
- Compression blocks: square patches that become obvious in walls, shadows, or gradients.
- Mosquito noise: flickering speckles around hard edges and existing text.
- Sensor noise: random grain, often strongest in underexposed areas.
- Motion smearing: lost detail caused by movement, low shutter speed, or compression.
- Low resolution: insufficient real pixels, especially around eyes, hair, and small objects.
- Banding: visible tonal steps in skies, painted walls, or other smooth gradients.
If blocking and flicker are the main problems, prioritize artifact reduction. If the clip is clean but physically small, a conservative AI video upscaler may be enough. If moving objects are already smeared, sharpening cannot reconstruct their authentic texture and may make the smear more conspicuous.
Step 3 — Reduce Compression Artifacts Before Upscaling
Clean the source at its existing dimensions before enlarging it. Upscaling first makes every block, halo, and speck larger, forcing later filters to work harder.
Begin with low artifact-reduction and denoise values. Increase them only until background blocks become less distracting. Keep natural pores, fabric weave, hair separation, and subtle surface texture visible. When a tool offers temporal processing, inspect moving frames rather than judging a single paused image.
A safe test order is:
- Apply mild deblocking or compression recovery.
- Add minimal temporal denoising if noise changes from frame to frame.
- Use weak spatial denoising only for persistent grain within individual frames.
- Review the result at normal playback speed and frame by frame.
Do not try to denoise video until every surface is perfectly smooth. Some residual texture usually looks more credible than waxy skin or motion trails.
Reusable visual prompt:
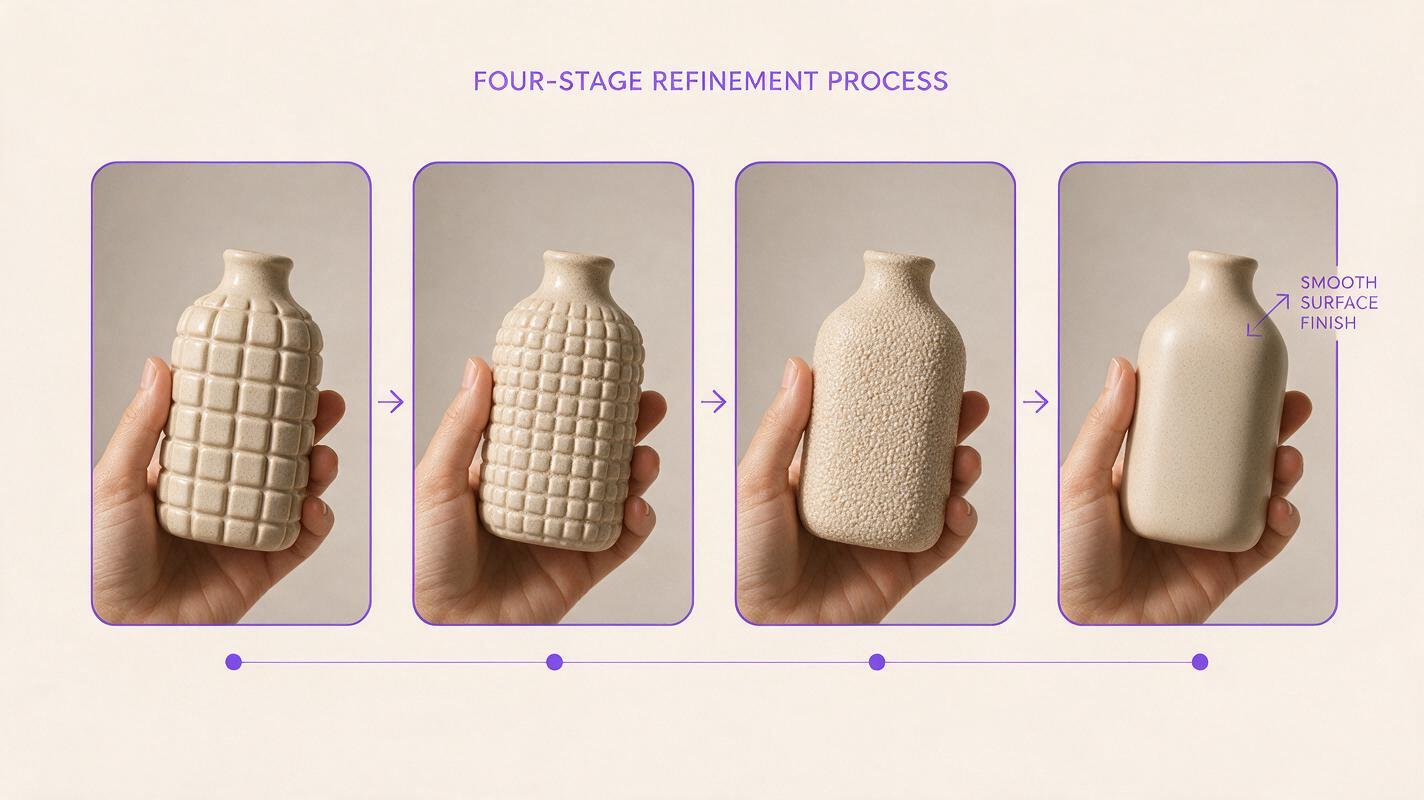
Create a neutral four-panel technical diagram without words, labels, numbers, logos, or software interface elements. Show one close crop of a hand holding a matte ceramic bottle progressing from visible square compression blocks, to reduced blocks with retained grain, to gentle enlargement, to a clean natural final frame. MANDATORY LAYOUT: four equal frames arranged horizontally in a 16:9 canvas with identical crop and object position. Editorial realism, accurate skin texture, soft kitchen daylight, restrained detail, no glowing effects and no invented lettering.Step 4 — Upscale Conservatively and Add Sharpening Last
Choose the final delivery dimensions before scaling. Enlarging far beyond what the platform or edit requires adds processing time and increases the chance of fabricated texture. For a vertical social post, match the dimensions required by the delivery workflow rather than automatically selecting the largest available output.
Keep sharpening low during the first upscale test. AI-generated micro-detail may look impressive in a paused frame while flickering during playback. Pay particular attention to eyelashes, teeth, jewelry, patterned fabric, foliage, and product lettering.
After scaling, apply only enough sharpening to restore edge separation lost during cleanup. Inspect dark edges against bright backgrounds for ringing. A thin bright or dark outline around the subject means the setting is too strong.
Practical rule: if the enhanced version looks dramatically sharper at thumbnail size but unstable at full size, reduce enhancement rather than adding another correction pass.
Color and contrast should come after structural cleanup. Mild contrast can make a soft clip appear clearer, but crushed shadows may hide block artifacts rather than fix them. Keep skin, neutral walls, and product colors believable.
Step 5 — Verify Motion, Faces, and Export Quality
Before approving the clip, inspect the beginning, middle, and end of every shot. AI video tools can behave well on static frames but fail when a hand crosses a face, the camera pans, or a subject turns into profile.
Check playback at normal speed, half speed, and frame by frame. Look for:
- Texture that crawls or flashes between adjacent frames.
- Ghost outlines behind moving hands or hair.
- Facial features that subtly change during a head turn.
- Patterns that appear and disappear on clothing.
- Halos around product edges.
- Gradient banding introduced by the final encode.
Export one short candidate using the intended delivery codec and dimensions, then compare that exported file rather than relying only on an editor preview. Record your observations in plain language. For example, write “blocks reduced, hair stable, slight halo on bottle edge” instead of assigning a vague quality score.
Reusable visual prompt:
Create a photorealistic 16:9 editorial inspection contact sheet containing six consecutive frames of a hand rotating a small unbranded ceramic mug on a wooden table, with consistent lighting and position changes that clearly reveal motion continuity. MANDATORY CAMERA: locked true three-quarter close-up from table height with a 50mm documentary perspective. The first three frames show subtle edge trails and crawling texture; the final three show stable natural edges and preserved surface grain. No text, no labels, no logos, no app interface, no watermarks.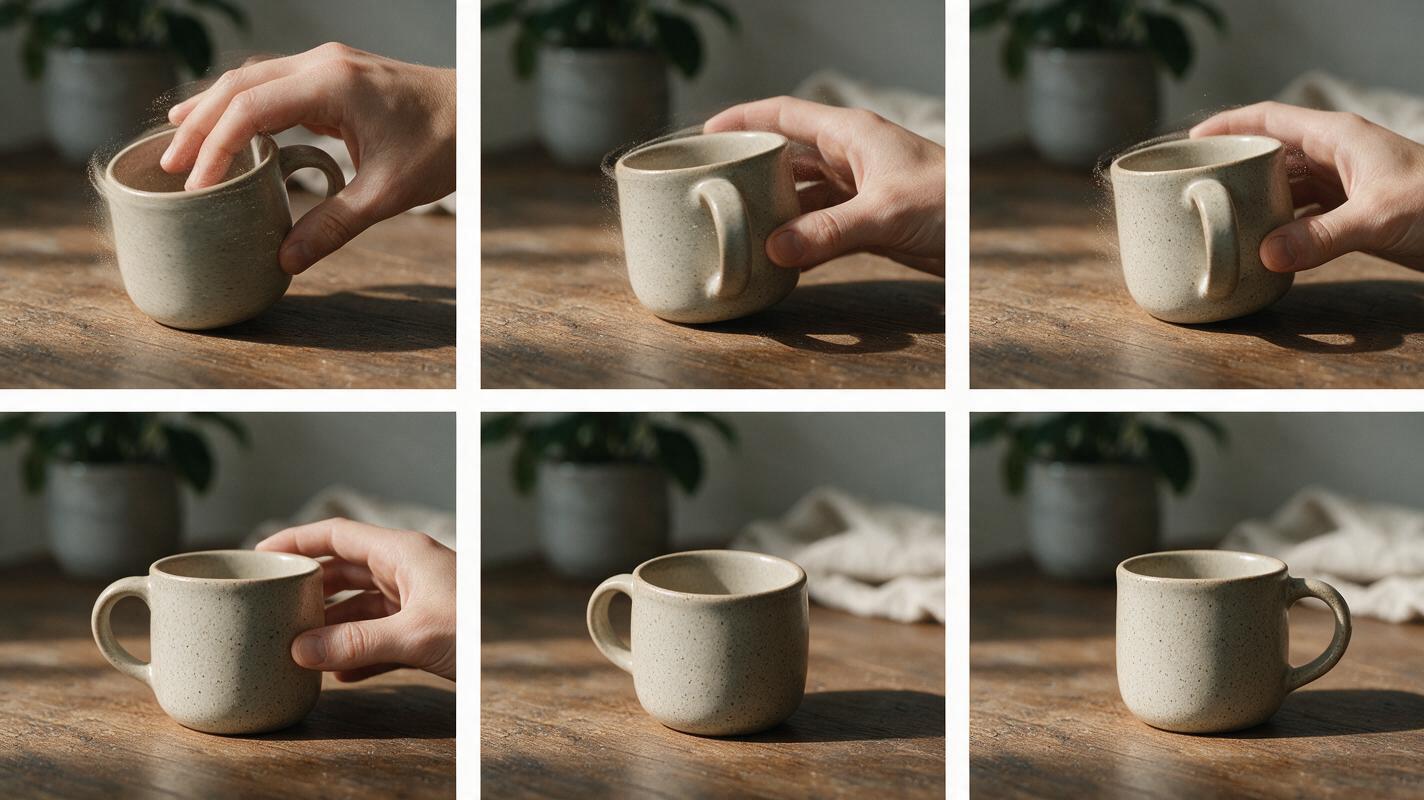
Step 6 — Replace Only What Cannot Be Credibly Restored
Some frames are too damaged to rescue. A product label may be permanently unreadable, or several consecutive frames may contain severe corruption. In those cases, consider shortening the shot, covering the damaged moment with authentic B-roll, or returning to an owned clean product photograph.
MagicBoat should not be presented as a dedicated restoration utility here. Its closest useful capability is image to video: an owned product image can become a short replacement insert when regenerating the shot is editorially acceptable. This creates new footage rather than restoring the damaged pixels, so disclose AI-generated imagery when the publishing context requires it.
A restrained replacement prompt might be:
Animate this owned product photograph as a three-second editorial insert. Keep the product shape, material, color, proportions, and visible packaging unchanged. Add only a slow five-degree camera push-in and a subtle natural window-light shift. Keep the background stable. No object rotation, no new lettering, no extra props, no hands, no morphing, no dramatic particles.If a generated insert fits the project, you can try this prompt for free. Keep the original photograph available so reviewers can distinguish the reference asset from the generated movement.
Final Checklist
- Preserve the untouched received file.
- Test the hardest short segment before processing the full clip.
- Reduce compression artifacts before upscaling.
- Use the lowest denoise strength that solves the visible problem.
- Add sharpening after cleanup and scaling.
- Compare source, control export, and enhanced export at equal size.
- Review faces, hands, hair, lettering, and gradients during motion.
- Reject invented details, identity changes, halos, and temporal flicker.
- Use generated replacement footage only when restoration is no longer credible.
FAQ
Can an AI video enhancer recover text erased by compression?
It may make existing letter edges easier to see, but it cannot reliably recover characters that are absent from the source. Treat newly formed letter-like detail as a visual guess, not authentic information.
Should I denoise video before or after upscaling?
For a heavily compressed clip, mild cleanup at the source dimensions usually belongs before scaling. Final settings still depend on the footage, so compare a short test rather than applying a universal preset.
Why does enhanced video look good when paused but flicker during playback?
Individual frames may contain plausible generated detail that is inconsistent over time. Reduce detail recovery or sharpening and favor settings designed to preserve temporal consistency.
Is a larger export always better?
No. Export for the actual delivery requirement. Excessive enlargement cannot restore authentic information and can make artifacts or synthetic textures easier to notice.
Can MagicBoat directly repair compressed footage?
This workflow does not claim that MagicBoat is a dedicated video-restoration tool. Its relevant role is creating a new animated insert from an owned clean image when a damaged shot cannot be credibly restored.
Sources
- FFmpeg Filters Documentation
- Topaz Video AI Official Product Page
- Blackmagic Design DaVinci Resolve Training
Keywords
ai video enhancer, enhance videos with ai, ai video upscaler, denoise video, ai video tools