How to Create a Controlled Rack Focus with Image to Video
Create a convincing AI rack focus by staging two subjects at clearly separated depths, generating a strong anchor frame, and animating one deliberate focus change with minimal competing motion. This workflow uses image-to-video generation, model comparison, and short repair clips to prevent pulsing blur, accidental zooms, and unstable subjects.
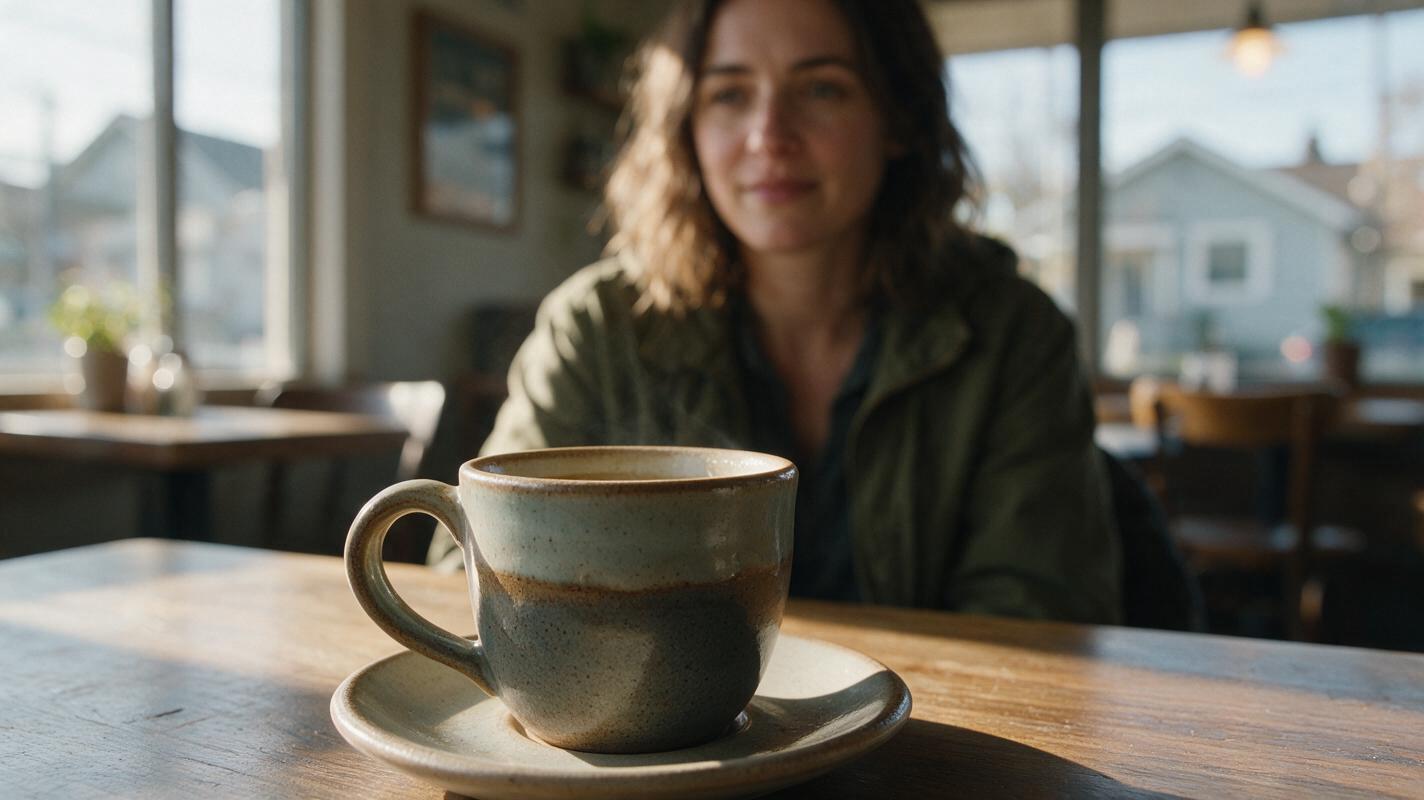
Table of contents
TL;DR: Build the depth first, then animate one focus change
The fastest way to create a controlled rack focus in an ai video is to begin with an anchor image containing one clear foreground subject and one clearly separated background subject. Animate that image with a short prompt that keeps the camera and subjects still while transferring focus only once, from a named starting plane to a named destination plane.
Avoid asking the model to invent the composition, perform a complex action, move the camera, and change focus at the same time. A convincing focus pull is usually a restrained optical event, not a transition packed with motion.
Why AI rack-focus shots often look wrong
A real rack focus changes the lens focus distance during a continuous shot. One depth plane becomes soft while another becomes sharp, directing attention without requiring a cut. AI video models can imitate the appearance, but they do not necessarily simulate a physical lens.
Common failures include:
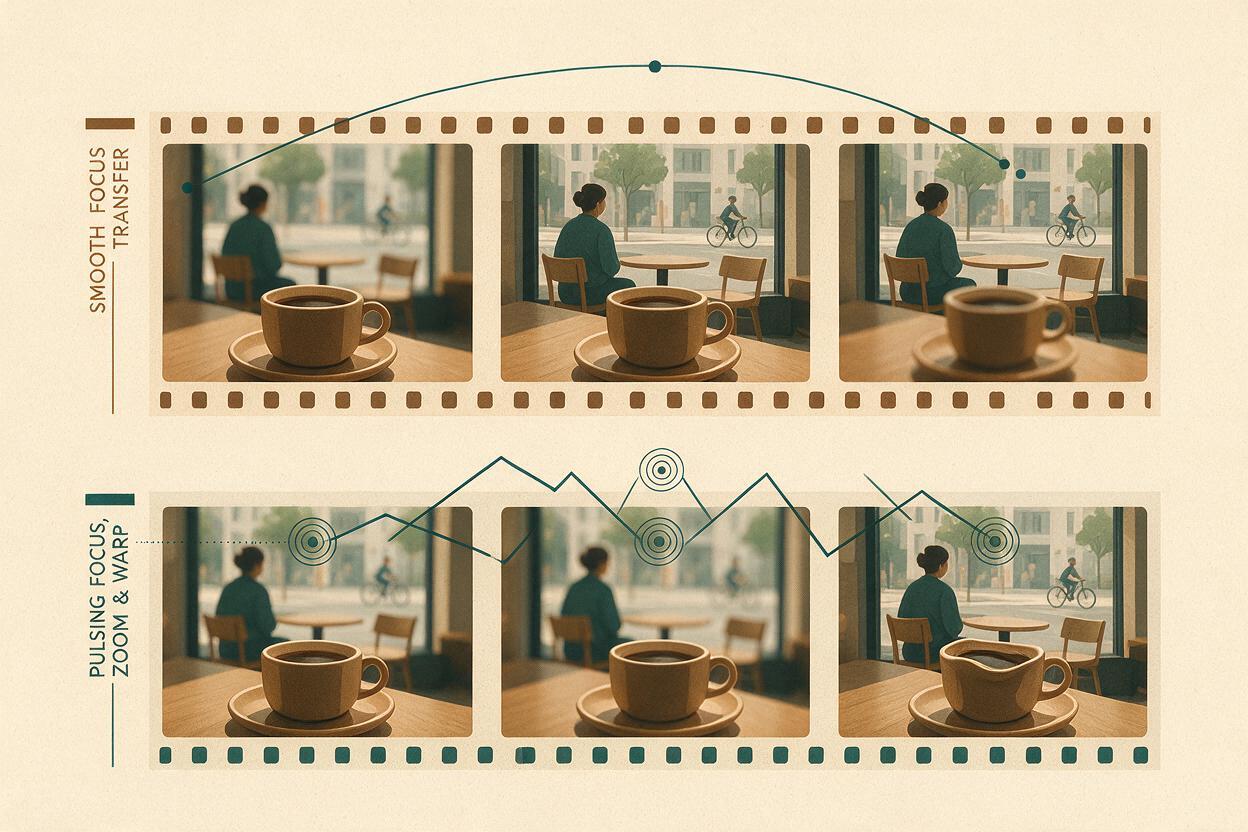
- Focus pumping: sharpness oscillates between subjects instead of moving once.
- Digital morphing: the blurred subject changes shape, clothing, or facial structure.
- Accidental camera movement: the requested focus pull becomes a push-in, zoom, or dolly shot.
- Uniform blur: the entire frame softens because the subjects do not occupy distinct depth planes.
- Weak destination focus: the background subject becomes less blurry but never looks decisively sharp.
- Timing errors: focus changes immediately, leaving no readable hold before or after the pull.
These symptoms usually begin in the source composition. If both subjects are similar in size, overlap heavily, or appear to stand on the same plane, the model has little visual evidence for a genuine focus transfer.
Three ways to create a focus pull
- Anchor-frame image to video: design the depth relationship first, then animate it. This offers the most control and is the primary workflow below.
- Text to video: describe the complete scene and focus event in one prompt. This is faster for exploration but less predictable.
- Two-clip editorial simulation: generate one foreground-focused clip and one background-focused clip, then blend them in an editor. This is useful when a model repeatedly pumps focus.
Best default: use a single anchor image, one focus destination, one stationary camera, and only subtle subject motion.
How MagicBoat handles focus-controlled AI video
MagicBoat provides a one-account workflow for testing image and video generation models without rebuilding the project across separate platforms. You can create an anchor frame with an available image model such as Seedream, Flux, or GPT Image, then send the same composition through image to video models such as Seedance or Kling.
This multi-model approach is especially useful for rack focus because the same prompt can produce different interpretations. One model may preserve the composition better, while another may create a more noticeable focus transition. Keep the source image, aspect ratio, duration, and prompt meaning constant when comparing outputs.
| Workflow | Best use | Main risk |
|---|---|---|
| Text to video | Rapid scene exploration | Composition and focus are invented together |
| Image to video | Controlled depth and subject placement | Source image may already contain ambiguous focus |
| Two-clip blend | Repairing unstable focus behavior | Motion must match across both clips |
Step 1 — Define a two-plane focus map
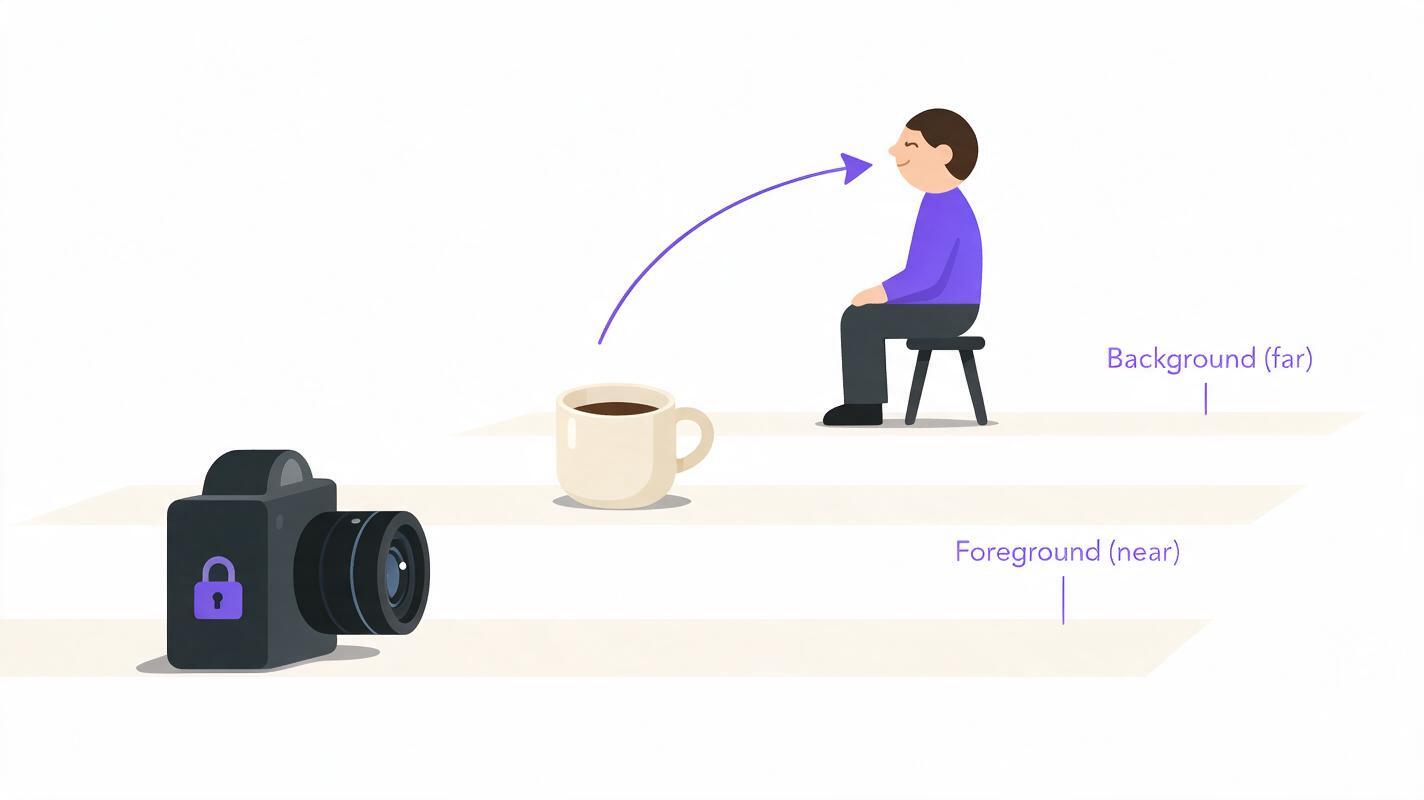
Before writing a cinematic prompt, reduce the shot to two named depth planes. Decide what begins sharp, what ends sharp, and what the viewer should notice after the transfer.
Use a compact planning block:
FOREGROUND: ceramic coffee cup, 25 cm from camera, starts sharp
BACKGROUND: seated woman beside window, 3 m from camera, ends sharp
CAMERA: locked medium-wide composition
FOCUS ACTION: one smooth foreground-to-background pull
SUBJECT MOTION: woman makes one subtle glance toward the cup
END HOLD: background remains sharp
Choose subjects with different silhouettes and enough physical separation to make depth legible. Foreground objects such as flowers, a glass, a shoulder, a door frame, or a tabletop prop work well. The background target should remain large enough to read when focus arrives.
Expected result: a shot plan with exactly two focus targets and no uncertainty about the direction of travel.
Step 2 — Generate an anchor frame with visible depth
Create a still image before attempting the motion. The starting frame should already show the foreground target in clear focus and the background target softly blurred. Use perspective cues such as scale difference, partial foreground cropping, floor lines, or overlapping furniture.
Cinematic interior of a quiet neighborhood cafe in natural morning light.
A handmade ceramic coffee cup dominates the lower-left foreground,
crisp rim and visible glaze texture. Three meters behind it, a woman in
an olive jacket sits beside a window, recognizable but softly out of focus.
Locked medium-wide camera, realistic shallow depth of field, 50mm lens look,
natural proportions, restrained color palette, no text.
Do not use extreme blur. The background target must retain enough structural information for the video model to reconstruct it as focus changes. If the face is only an indistinct patch of color, the model may invent new facial details during the pull.
Reject anchor frames where the cup overlaps the face, the background subject is tiny, or both subjects appear equally sharp. Generate alternatives until the depth relationship reads instantly.
Expected result: a stable starting composition with a sharp foreground anchor, a recoverable background subject, and convincing spatial separation.
Step 3 — Remove competing movement from the prompt
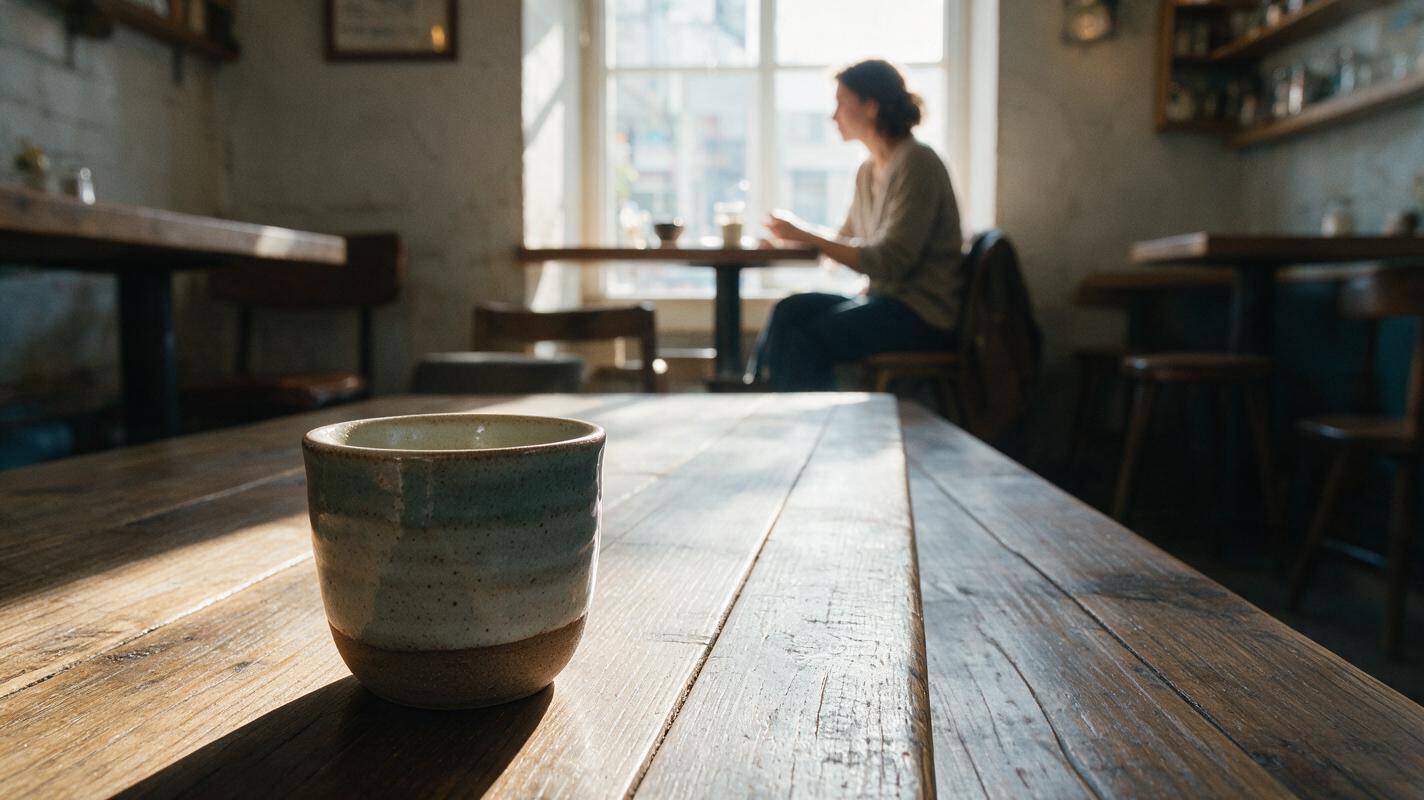
A focus pull already introduces a major temporal change. Keep every other instruction restrained during the first test. Avoid combining it with orbiting, rapid dialogue, walking, hand interaction, changing weather, or dramatic lighting transitions.
Use a motion hierarchy:
- Focus movement is the primary event.
- A single micro-action supports realism.
- The camera and environment remain stable.
The camera remains completely locked. The coffee cup stays still.
The woman makes one small natural glance toward the foreground.
No zoom, no dolly, no pan, no reframing, no object movement.
Negative wording cannot guarantee perfect behavior, but it clarifies which visual changes are unwanted. Positive wording such as “locked camera” should carry more weight than a long list of prohibitions.
Expected result: the model spends its temporal capacity on focus and subtle life rather than redesigning the shot.
Step 4 — Prompt the focus pull as a timed optical event
Describe the starting state, transition, destination, and final hold in chronological order. Name the subjects rather than using vague terms such as “front” and “back.”
Locked cinematic shot. Begin with the ceramic coffee cup in crisp focus
and the seated woman softly blurred in the background. Hold briefly.
Perform one smooth, deliberate rack focus from the cup to the woman's face.
The cup becomes naturally soft as her face resolves into clear focus.
Hold the final background focus steadily. Subtle breathing only.
No zoom, no dolly movement, no focus pumping, no scene change.
“Hold briefly” and “hold the final focus steadily” give the clip useful handles for editing. Without those holds, the generated video may begin midway through the focus transfer or end before the destination becomes readable.
For a reverse pull, change only the direction:
Begin with the woman's face in crisp background focus and the foreground
coffee cup softly blurred. Pull focus once to the cup, then hold the cup sharp.
Expected result: one readable transfer instead of repeated automatic refocusing.
Step 5 — Compare Seedance and Kling with the same input
Run the same anchor frame and semantically identical prompt through Seedance and Kling when both are available to you. Do not rewrite the prompt to flatter each result during the first comparison; otherwise, you will not know whether the model or the wording caused the difference.
| Check | What to inspect | Reason to reject |
|---|---|---|
| Composition | Object positions and framing | Push-in, crop change, or drifting camera |
| Focus path | One directional transfer | Sharpness reverses or pulses |
| Identity | Face, clothing, and silhouette | Features change while becoming sharp |
| Foreground | Shape and material of the prop | Cup rim melts or changes geometry |
| Final hold | Stable destination focus | Clip ends during the transition |
Judge the entire shot, not only whether the blur looks dramatic. A gentler focus change with stable geometry is usually more useful than a strong blur effect accompanied by facial or object morphing.
Expected result: a fair model comparison that identifies the strongest usable clip rather than the most visually aggressive one.
Step 6 — Repair an unstable result without rebuilding the scene
If the shot is close but not usable, diagnose one failure at a time. Keep the anchor frame and most of the prompt unchanged.
- If the camera zooms: move “locked camera” to the first sentence and remove words such as “reveal,” “approach,” or “cinematic movement.”
- If focus pumps: repeat “one continuous focus pull” and strengthen the final hold.
- If the background face changes: reduce blur in the anchor image or shorten the focus transition.
- If nothing changes: increase depth separation and explicitly state that the starting subject becomes soft.
- If both subjects stay sharp: revise the still image rather than stacking more lens terminology into the motion prompt.
You can also split the shot into two short generations. Use the best frame near the midpoint as the starting reference for a continuation that completes and holds the destination focus. Trim the clips where sharpness, framing, and subject pose overlap most closely.
Expected result: a targeted correction that preserves the successful composition instead of introducing new variables.
Step 7 — Edit for a believable focus rhythm
Review the clip frame by frame around the transition. Remove unstable opening frames, retain a short starting hold, and let the final focus settle before cutting away. A rack focus communicates thought or discovery, so its editorial timing should match the story beat.
Subtle sound can reinforce the attention shift without literally imitating a lens. For example, lower foreground cafe noise slightly as the background character becomes sharp, or introduce a quiet line of dialogue only after focus reaches the speaker.
Do not hide a failed focus pull with excessive motion blur. If the target never resolves clearly, repair or replace the shot.
Expected result: a clean attention shift with readable visual holds and an edit point at either end.
Keep the same focus language across a project
Create a small focus vocabulary for recurring scenes. Reuse phrases such as “locked camera,” “one continuous rack focus,” “hold the destination plane,” and “subtle breathing only.” Consistent wording makes comparisons easier and reduces accidental changes between shots.
Also keep a simple shot log containing the source frame, model, aspect ratio, prompt, focus direction, and failure notes. The goal is not to find one universal prompt, but to identify which depth arrangements and instructions behave reliably in your visual style.
Alternative: simulate the rack focus with two clips
When optical behavior remains unstable, generate two restrained clips from the same composition: one favoring foreground sharpness and one favoring background sharpness. Keep subject motion minimal and match the first frames closely. In an editor, overlap the clips and use a short dissolve while animating localized blur if your editing software supports it.
This alternative is less physically pure, but it offers precise timing and avoids repeated focus pumping. It works best for static environments and subjects making only micro-movements.
Alternative: use motion transfer for a performance-led shot
If the background character must perform a specific gesture, prioritize the performance separately. Use motion transfer to establish the body action, then choose a restrained segment where the pose remains compatible with the foreground composition. A rack focus is easier to add around a controlled gesture than around an unpredictable full-body performance.
For dialogue coverage, consider cutting to a sharper close-up after the focus pull rather than asking one generated shot to handle focus, lip movement, hand gestures, and camera motion simultaneously.
Where this workflow falls short
- Generated focus does not always follow physically accurate lens behavior or produce realistic bokeh.
- Heavily blurred faces can acquire new details as they sharpen, creating identity drift.
- Transparent glass, reflections, smoke, hair, and fine foliage can blur inconsistently.
- Very long focus pulls give models more time to introduce camera drift or object deformation.
- A single source image cannot reveal background details that were never represented clearly enough to reconstruct.
When identity, product geometry, or optical accuracy is critical, treat AI generation as a plate-making step and finish the focus effect in conventional compositing software.
FAQ
Should I use text to video or image to video for a rack focus?
Use image to video when subject placement and focus direction matter. Text to video is useful for discovering compositions, but it asks the model to invent both the scene and the optical event simultaneously.
How blurred should the background be in the anchor frame?
Soft enough to establish depth, but not so blurred that the destination subject loses facial structure, clothing boundaries, or silhouette. Moderate blur provides better reconstruction evidence.
Can I add camera movement during the focus pull?
Yes, but test the focus with a locked camera first. Once that works, add a slow push or pan as a separate variable. Combining both from the beginning makes failures harder to diagnose.
Why does the model zoom instead of changing focus?
Zooming is an easier visual interpretation of “draw attention to the background.” State “locked camera,” name both focus planes, and describe the foreground becoming soft while the background becomes sharp.
Can rack focus work with two people?
Yes. Place them at visibly different distances and avoid overlapping faces. Keep the non-focus movement subtle so the model does not blend identities while transferring sharpness.
How long should the focus transition last?
There is no universal duration. Prioritize a short starting hold, one readable transfer, and a stable ending hold. If a long transition creates pumping, generate a shorter event and adjust its timing during editing.
Create your first controlled focus shot
Start with the two-plane planning block, generate one depth-readable anchor frame, and test the same focus prompt across available models. Create your first AI video free on MagicBoat and compare which result preserves your composition most effectively.
Final checklist
- Choose exactly one starting focus plane and one destination plane.
- Separate the subjects through depth, scale, and composition.
- Keep the destination subject recognizable in the blurred anchor frame.
- Lock the camera during the first test.
- Describe the focus event in chronological order.
- Include a starting hold and a final hold.
- Compare models with the same source image and prompt meaning.
- Reject focus pumping, zooming, identity drift, and object deformation.
- Repair one failure variable at a time.
Keywords
image to video, AI video prompt engineering, rack focus, focus pull, depth staging, Seedance prompts, Kling prompts