AI Video Upscaler Guide for Crisp 720p Screen Recordings
Learn how to upscale a 720p screen recording to 1080p without turning interface text into ringing, oversharpened edges. This practical workflow covers source preparation, conservative AI enhancement, export settings, and honest before-and-after validation.
Table of contents
Turn a soft screen recording into a cleaner 1080p tutorial
An AI video upscaler can make a 720p screen recording easier to watch at 1080p, but aggressive enhancement often gives small text bright outlines, brittle curves, or invented strokes.
The safest approach is to preserve the original recording, upscale conservatively, and inspect actual-size crops before processing the entire video. This tutorial is designed for software demonstrations, recorded webinars, training videos, and archived presentations in which interface readability matters more than cinematic texture.
Important: upscaling increases output resolution, but it cannot recover text or icons that were never captured clearly. AI restoration may infer plausible edges, so the result must be checked against the source rather than treated as newly recovered information.
Step 1 — Inspect the recording before enhancing it
Open the original file and examine several representative moments at 100% scale. Do not judge it only inside a small preview window, which can hide both compression damage and oversharpening.
Select short test segments containing:
- Small interface text, including light text on dark panels.
- Thin icons and cursor movement, where halos are easy to spot.
- Scrolling pages, which expose temporal shimmer.
- Webcam overlays, if the recording includes a presenter.
- Flat color regions, where compression blocks may become visible.
Identify the real problem before choosing settings. A low-resolution but clean recording primarily needs scaling. A heavily compressed recording may need mild artifact reduction before sharpening. A blurry capture may not contain enough reliable information for aggressive restoration.
| Source symptom | Likely treatment | Main risk |
|---|---|---|
| Clean but visibly pixelated text | Upscale with minimal sharpening | Jagged diagonals |
| Blocky edges around panels | Light compression-artifact reduction | Smeared text |
| Soft capture at every frame | Conservative detail recovery | Invented character strokes |
| Shimmer while scrolling | Temporally stable processing | Flickering edges |
Step 2 — Prepare a short, lossless test clip
Duplicate the source and trim a 10–20 second section that includes static text, cursor movement, and scrolling. Testing a short section prevents a long export from becoming the first quality check.
If possible, send the original recording directly to the upscaler. Re-exporting it through a highly compressed intermediate file adds damage that the enhancer may exaggerate. When an intermediate is unavoidable, use a high-quality mezzanine or visually lossless setting available in your editor.
Keep the frame rate unchanged. Frame interpolation is a different task and can create duplicate cursor shapes, distorted menus, or inconsistent scrolling. Likewise, avoid resizing the clip in an editor before the AI pass; give the upscaler the original pixels.
Test clip plan
Duration: 10–20 seconds
Input scale: 100% of original
Frame rate: match source
Target resolution: 1920 × 1080
Extra frame interpolation: off
Initial sharpening: low or off
Step 3 — Upscale with text-safe settings
Load the test clip into a real video enhancement application such as Topaz Video AI or another upscaler that lets you preview and adjust restoration strength. Control names vary between tools, so treat the following as a decision framework rather than a universal preset.
For a standard 1280 × 720 recording, choose 1920 × 1080 output. That is a 1.5× increase in each dimension. Avoid jumping straight to 4K unless the final delivery genuinely requires it; a larger canvas also gives artifacts more room to become visible.
- Start with low sharpening.
- Use only enough artifact reduction to calm visible blocks.
- Keep grain addition off for interface-focused footage.
- Preserve the original frame rate.
- Disable frame interpolation unless motion conversion is a separate requirement.
- Preview the same frame before changing another control.
If the tool supports natural-language guidance for restoration, use a restrained prompt that protects interface geometry:
Upscale this 720p screen recording to 1080p. Preserve the exact interface layout, text shapes, cursor, icons, colors, and timing. Reduce visible compression artifacts gently. Keep edges clean without halos, artificial texture, added symbols, or altered lettering. Do not interpolate frames.For a recording with a small presenter overlay, a more specific version is useful:
Enhance the screen content conservatively while preserving readable interface edges. Keep the presenter natural, with realistic skin texture and no facial reshaping. Do not modify on-screen text, icons, cursor movement, or application layout.A prompt cannot guarantee literal text preservation. If a model performs generative reconstruction, inspect every important label and numeric value against the original.
Step 4 — Compare before and after at actual size
A proper before-and-after comparison uses matching frames from the original and enhanced exports. Capture both at the same timestamp, then compare equivalent regions at 100% output size. Do not enlarge only the original or present the enhanced frame at a smaller display scale.
Create an evidence sheet with at least three crop pairs:
- A small menu label or filename.
- A diagonal icon, thin divider, or cursor edge.
- A frame captured during scrolling or pointer movement.
| Evidence area | What improvement looks like | Reason to reject the setting |
|---|---|---|
| Small text | Cleaner contours with unchanged characters | Added strokes, closed letter gaps, or glowing outlines |
| Icons and dividers | Smoother edges without shape changes | Double edges or brittle corners |
| Cursor movement | Stable outline across adjacent frames | Ghost cursor or trailing edge |
| Scrolling content | Consistent detail from frame to frame | Crawling pixels or flickering text weight |
This comparison is the before-and-after evidence that matters: matched source frames, matched timestamps, and visible crops. A single attractive still cannot demonstrate temporal stability.

Step 5 — Correct halos and unstable text
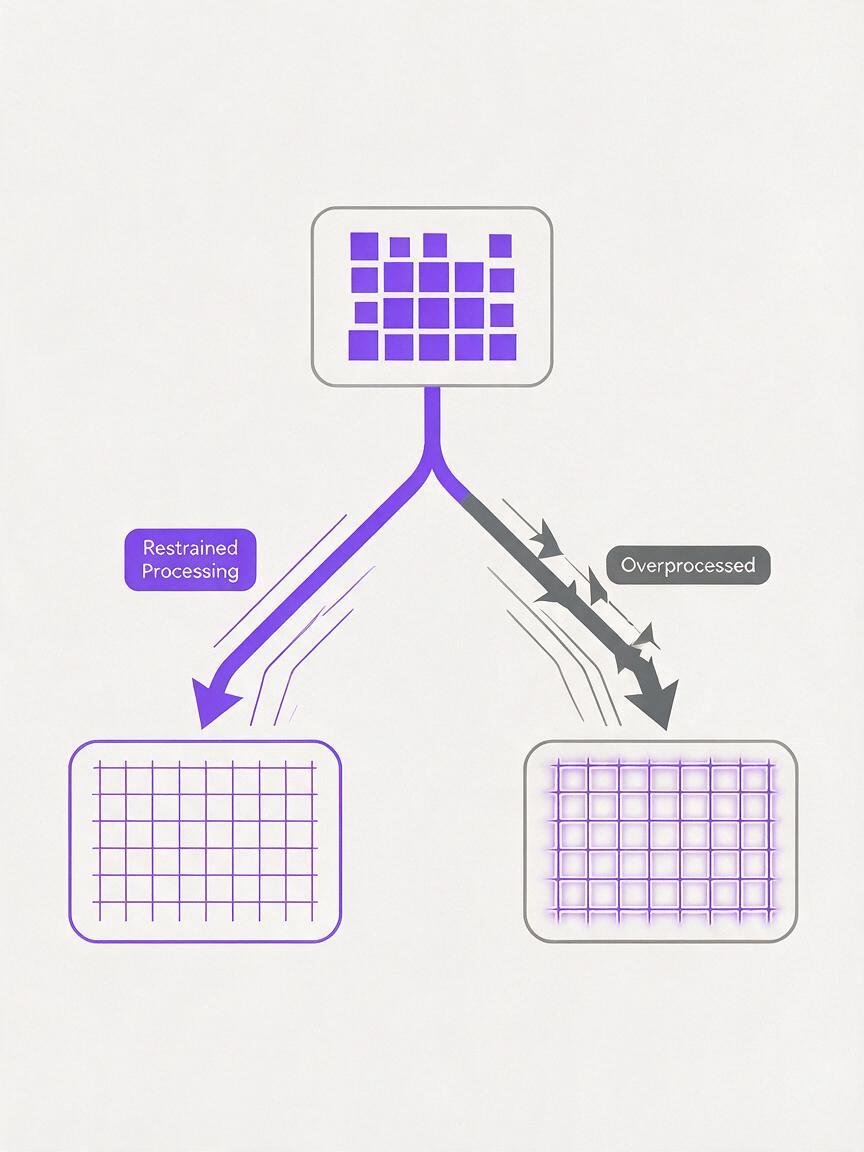
If letters have bright borders, reduce sharpening first. If flat backgrounds look melted, lower artifact reduction. When individual characters change shape, reduce any generative detail or recovery control rather than attempting to hide the problem with additional sharpening.
Review at least five consecutive frames around each problem area. Screen recordings contain abrupt high-contrast edges that may look acceptable in one still but shimmer during playback.
Use this correction order:
- Lower sharpening or detail recovery.
- Reduce compression cleanup if characters look soft.
- Try a less aggressive restoration model or mode.
- Render the short test clip again.
- Compare the same timestamps before starting a full export.
If the original text is unreadable, replacing a critical title or instruction manually in the editor is more honest than allowing an enhancer to guess. Keep such replacements limited to overlays you can verify from the source material.
Step 6 — Export without undoing the improvement
Once the test passes, process the full recording with the approved settings. Export a high-quality master first, then create smaller delivery files from that master. This separates enhancement decisions from distribution compression.
Match the source frame rate and retain the original audio timing. For common web delivery, H.264 and H.265 are widely used options, while available intermediate formats depend on the editor and operating environment. Codec choice alone does not guarantee quality, so inspect the final uploaded or compressed version as well as the master.
Check the beginning, middle, and end of the full export. Also review transitions between slides, fast scrolling, cursor clicks, and webcam layout changes. Long recordings sometimes contain multiple capture conditions that are not represented by one test segment.
FAQ
Can an AI video upscaler make unreadable text readable?
It may improve edge clarity when the source contains enough information, but it cannot reliably reconstruct missing characters. Any text that changes meaning must be verified against the original interface, script, or documentation.
Should I denoise a screen recording before upscaling?
Only when visible compression noise or capture noise is present. Strong denoising can erase punctuation, thin fonts, and icon details. Begin with scaling alone, then add mild cleanup only if the test clip demonstrates a need.
Is 4K better than 1080p for a 720p tutorial?
Not automatically. A 4K output contains more pixels, but it does not guarantee more truthful detail. Choose the resolution required by the publishing workflow and validate whether the larger export provides a visible benefit.
Why does enhanced text flicker during scrolling?
The restoration model may be interpreting edges differently from frame to frame. Reduce detail recovery or sharpening, use a more temporally stable mode if the tool offers one, and judge the rendered sequence rather than a still preview.
Can I upscale after uploading the recording to a video platform?
Use the original local file whenever possible. Downloaded or platform-processed copies may already contain additional compression, which can limit restoration quality.
Sources
- Topaz Labs — Topaz Video AI official product page
- Blackmagic Design — DaVinci Resolve official product page
- Adobe — Export workflows in Premiere Pro
- HandBrake Documentation — Video scaling
Final checklist
- Use the original recording rather than a downloaded copy.
- Test a short segment containing text, scrolling, and cursor movement.
- Upscale 720p to 1080p with low sharpening first.
- Keep the original frame rate unless conversion is intentional.
- Compare matched before-and-after frames at actual size.
- Reject settings that alter letters, numbers, icons, or cursor shapes.
- Inspect the final delivery encode, not only the enhancement master.
Keywords
ai video upscaler, ai video enhancer, enhance videos with ai, upscale 720p to 1080p, screen recording enhancement, video sharpening, video restoration
Decision: PUBLISH — the article addresses a distinct, practical upscaling task with an evidence-based workflow and no unsupported product claims.