How to Animate a Comic Panel Without Warping the Artwork
Learn how to turn a finished comic or webtoon panel into a short animated shot without distorted faces, drifting line art, or unwanted camera movement. This practical workflow covers panel preparation, motion prompts, model selection, and fixes for common image-to-video failures.
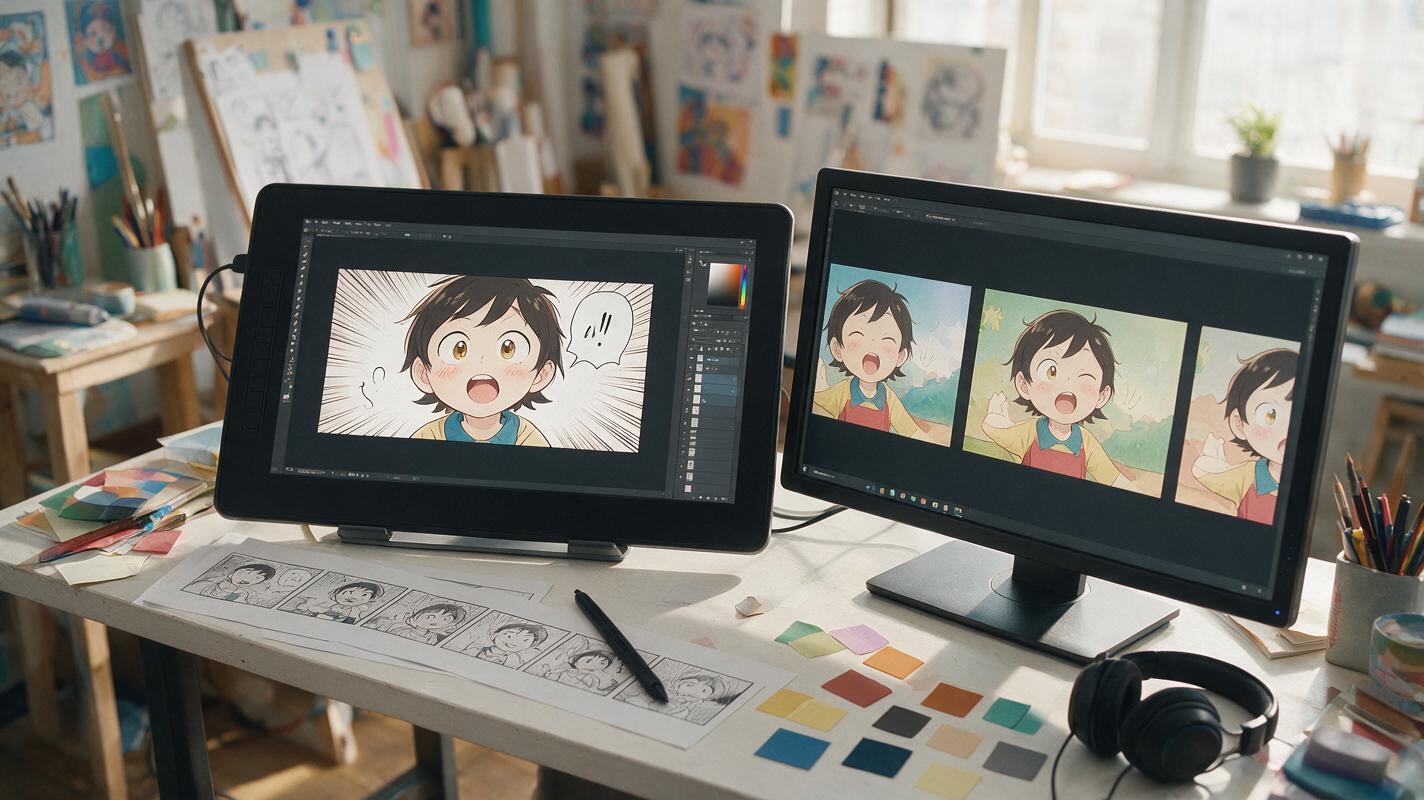
Table of contents
Animate the panel, not the drawing style
A finished comic panel can become a compelling three-to-five-second shot, but only if the AI moves the scene without redrawing the character in every frame. The safest approach is to simplify the source panel, separate camera motion from character motion, and describe only the movement that viewers need to see.
This tutorial shows how to animate a close-up, reaction panel, establishing shot, or environmental panel with an image to video workflow. It is designed for illustrators and webtoon creators who want subtle motion while preserving faces, costumes, line weight, color blocks, and composition.
The core rule: treat the illustration as locked artwork. Ask for restrained motion inside it instead of requesting a new cinematic scene.
Step 1 — Choose a panel that can survive motion
Not every panel should be animated. Dense action panels often contain overlapping limbs, speed lines, impact lettering, and poses that imply movement without showing its intermediate stages. An AI model may interpret those elements as objects that need to bend or travel.
Start with a panel containing one clear subject and one dominant motion idea. Reliable candidates include:
- Reaction close-ups: blinking, breathing, shifting eyes, moving hair, or a small change in expression.
- Establishing shots: drifting fog, rain, passing clouds, flickering signs, or a slow camera push.
- Quiet dialogue panels: subtle head movement and atmospheric background motion.
- Object inserts: a vibrating phone, turning page, steaming cup, swinging pendant, or opening door.
Avoid beginning with a crowd, a complex fight pose, several visible hands, or a panel packed with speech balloons. Those can be animated later as layered composites, but they are poor first tests.
Step 2 — Prepare a clean animation source
Export a version of the panel without speech balloons, captions, gutters, or sound-effect lettering whenever possible. Add those elements again after animation. Generated frames can make lettering shimmer, stretch, or mutate even when the rest of the image remains stable.
Before uploading, inspect four areas:
- Face: pupils, eyelids, mouth corners, hairline, and silhouette should be clearly defined.
- Hands: obscure or crop unnecessary hands rather than asking the model to invent their movement.
- Edges: extend the background beyond the visible crop if you plan to pan or zoom.
- Effects: remove speed lines or particles that conflict with the intended direction of motion.
Use the highest clean resolution accepted by your chosen tool, but do not add artificial detail that clashes with the original line art. If the panel is extremely narrow, place it on a larger canvas matching the final video format instead of stretching it.
Source preparation checklist
- dialogue and captions removed
- character silhouette readable
- background extended for camera movement
- no accidental transparent gaps
- final crop matches the publishing format
- original panel saved separately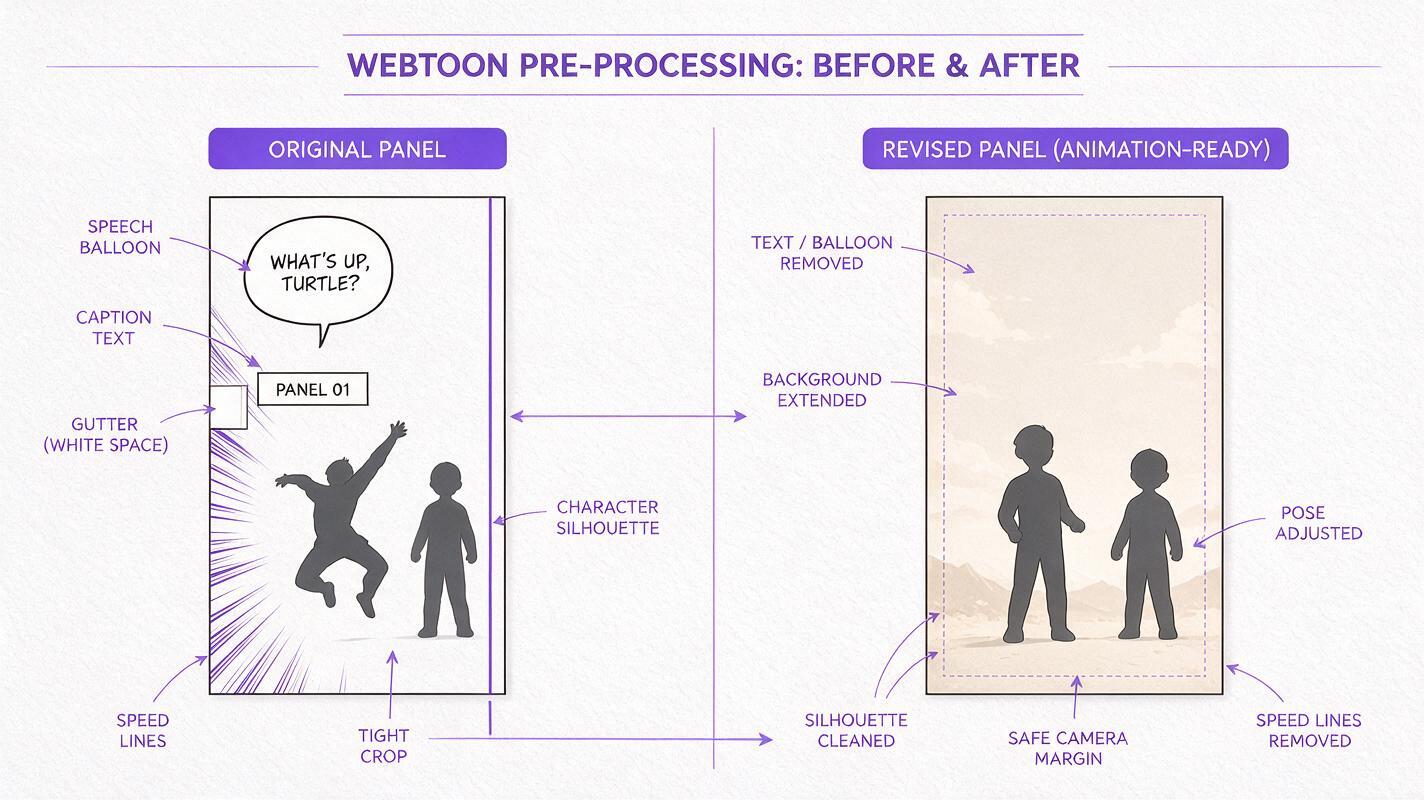
Step 3 — Separate camera motion from subject motion
A common mistake is combining a dramatic camera orbit, walking character, blowing coat, changing expression, falling rain, and moving lights in one request. Every additional action gives the model another opportunity to reinterpret the drawing.
Choose one motion layer for the first generation:
| Motion layer | Good first test | Main risk |
|---|---|---|
| Camera only | Slow push-in on a still reaction | Background edges becoming exposed |
| Character only | One blink and gentle breathing | Facial features drifting |
| Environment only | Rain, steam, dust, or curtains moving | Effects crossing the face |
| Camera plus environment | Small push-in with distant fog | Excessive depth reconstruction |
For dialogue and reaction shots, a locked camera is usually the safest starting point. For landscape panels, camera motion can carry the shot while the main character remains almost still.
Step 4 — Write a motion prompt that protects the art
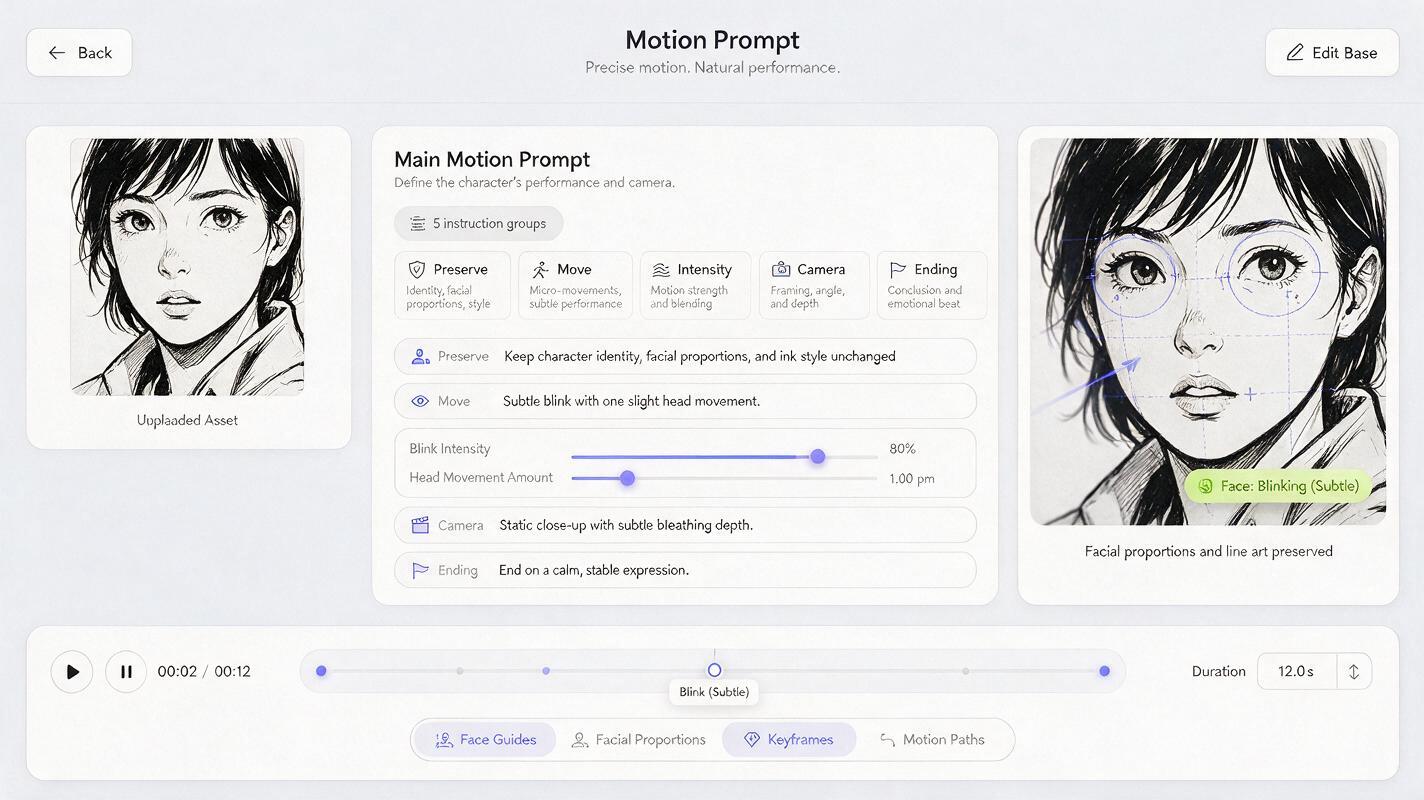
An effective comic animation prompt has four parts: what stays fixed, what moves, how much it moves, and how the shot ends. It should not spend most of its words redescribing the character. The source image already provides appearance information.
Preserve the original illustrated character design, facial features,
line art, flat colors, costume details, and panel composition.
The character remains nearly still and blinks once naturally.
Only a few loose hair strands move gently in the breeze.
Locked camera, minimal motion, no scene transition.
End on the original facial expression.
For an environmental webtoon panel, use a similarly narrow instruction:
Keep the original inked illustration and composition unchanged.
The two characters remain still. Light rain falls in the background,
a small puddle ripples, and the shop sign flickers softly once.
Very slow camera push-in, no rotation, no new objects.
Maintain clean outlines and stable faces throughout the shot.
Words such as subtle, minimal, locked, gentle, and stable are useful because they constrain intensity. Avoid ambiguous phrases such as “make it epic,” “bring everything to life,” or “dynamic anime action” unless large visual changes are acceptable.
If the first frame is already composed correctly, do not ask the model to improve it. Ask the model to preserve it.
Step 5 — Pick the model by the kind of motion you need
Kling, Runway, Veo, Seedance, and other image-led video models can interpret illustrated inputs differently. Their behavior may also change as model versions and controls are updated, so test the same short prompt rather than assuming one model will win every panel.
| Creative need | Useful first test | What to evaluate |
|---|---|---|
| Small character gesture | Kling or Runway | Face stability and restraint |
| Atmospheric establishing shot | Veo or Seedance | Environmental motion and depth |
| Strong camera movement | Test multiple models | Edge reconstruction and composition |
| Stylized line-heavy art | Generate short variations | Line flicker and color consistency |
Use the shortest practical duration while testing. A stable three-second result is more useful than a longer clip that begins well and collapses near the end. Generate several restrained variations, select the cleanest one, and only then explore longer movement.
When you have a suitable panel, test this prompt yourself in an ai video generator and compare face stability at normal playback speed and frame by frame.
Step 6 — Diagnose warping before changing everything
When a result fails, change one variable at a time. Rewriting the prompt, changing the model, extending duration, and adding camera motion simultaneously makes it impossible to identify the cause.
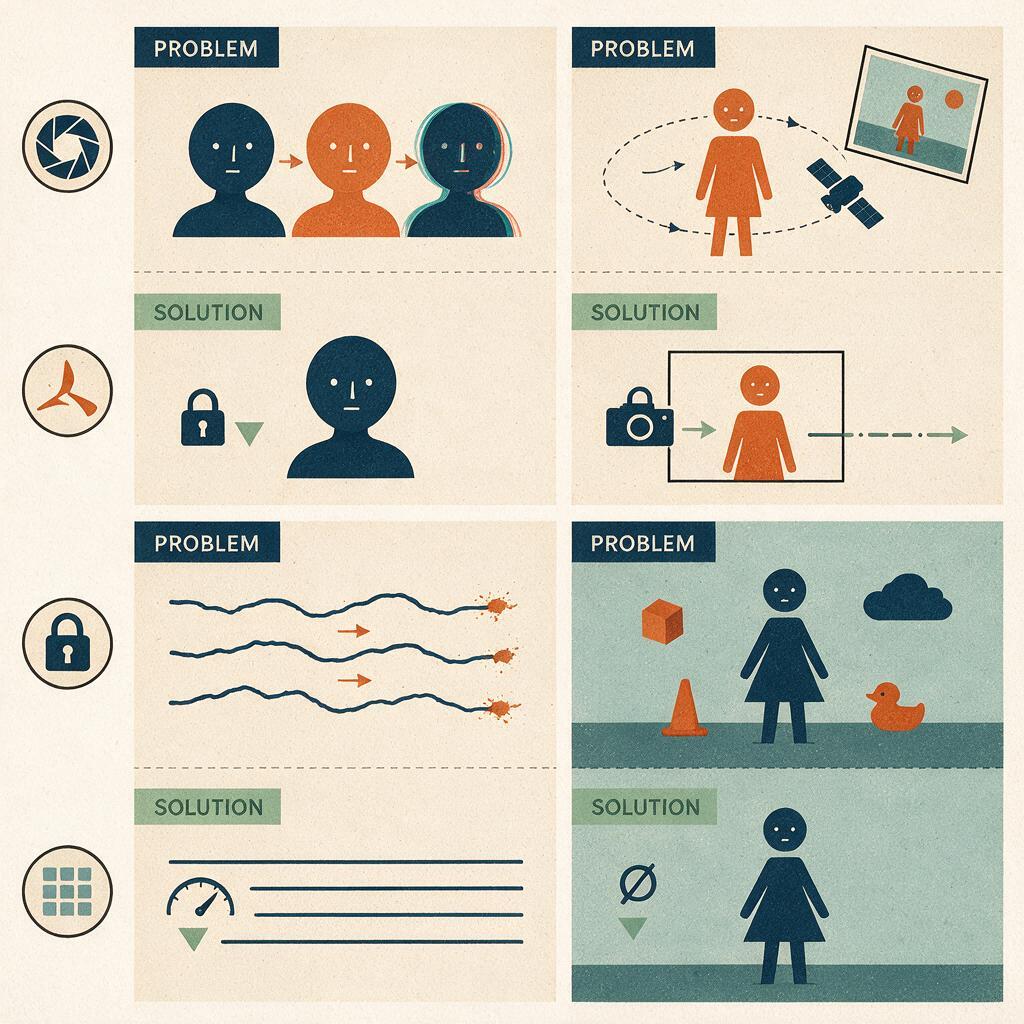
Face changes during a blink
The requested action may be too large. Replace “closes her eyes and smiles” with “blinks once; expression remains unchanged.” If the face is small in frame, crop closer for generation and composite the animated area back into the full panel.
Line art crawls or flickers
Reduce motion intensity and remove instructions about lighting transformations. Strong moving shadows can cause the model to redraw facial planes and clothing folds. A shorter clip may also reduce cumulative drift.
The camera rotates around a flat drawing
Remove words such as “orbit,” “parallax,” and “cinematic sweep.” Use “locked camera” or “very slow straight push-in.” A comic panel rarely contains enough hidden spatial information for a convincing orbit.
Background objects appear from nowhere
Add a direct constraint such as “no new objects, no background changes.” More importantly, simplify the request. Unspecified areas are more likely to be reconstructed during large camera movements.
The final frame no longer matches the comic
Ask the action to settle back toward the original pose, or cut the clip before drift becomes visible. You can also use the generated motion only as an insert between two held frames of the original artwork.
Step 7 — Build the final comic-panel shot
The generated clip should be treated as animation material, not necessarily as the finished edit. Place it in your editor and compare its first frame with the source panel. A brief still-image hold before motion helps the audience read the composition, while another hold afterward creates a deliberate endpoint.
A simple webtoon trailer shot might use this structure:
0.0–0.8 sec  Hold original panel
0.8–3.5 sec  Generated blink, hair movement, or atmosphere
3.5–4.0 sec  Freeze the cleanest ending frame
4.0–4.3 sec  Cut or fade to the next panel
Restore dialogue, captions, and sound effects as separate overlays. This keeps typography sharp and allows you to time each element independently. For a multi-panel sequence, vary the motion language: follow a camera push with a locked close-up, then use an environmental insert. Repeating the same zoom on every panel quickly feels mechanical.
Sound can create more perceived movement than extra visual animation. Rain, cloth movement, room tone, a phone buzz, or a single breath can make a nearly static panel feel intentional without risking the drawing.
Final checklist
- Choose a panel with one subject and one clear motion idea.
- Remove balloons, captions, gutters, and mutable lettering.
- Extend the background before requesting a pan or push.
- Test camera, character, and environmental motion separately.
- Explicitly preserve line art, colors, face, costume, and composition.
- Begin with a short clip and minimal movement.
- Change only one variable when troubleshooting.
- Restore text and sound effects during editing, not generation.
- Cut the clip before visible identity or line-art drift begins.
Keywords
comic panel animation, illustration to video, image to video, webtoon AI, Kling, Runway, AI comic maker, comic prompts