Why Anime Day-to-Night Edits Recolor Characters—and How to Fix It
Day-to-night anime edits often turn skin gray, shift costume colors, and erase the original palette instead of changing only the illumination. This guide explains how to use Seedream 4.5 with protected local colors, explicit light sources, targeted repairs, and continuity checks to create a convincing night version without redesigning the character.
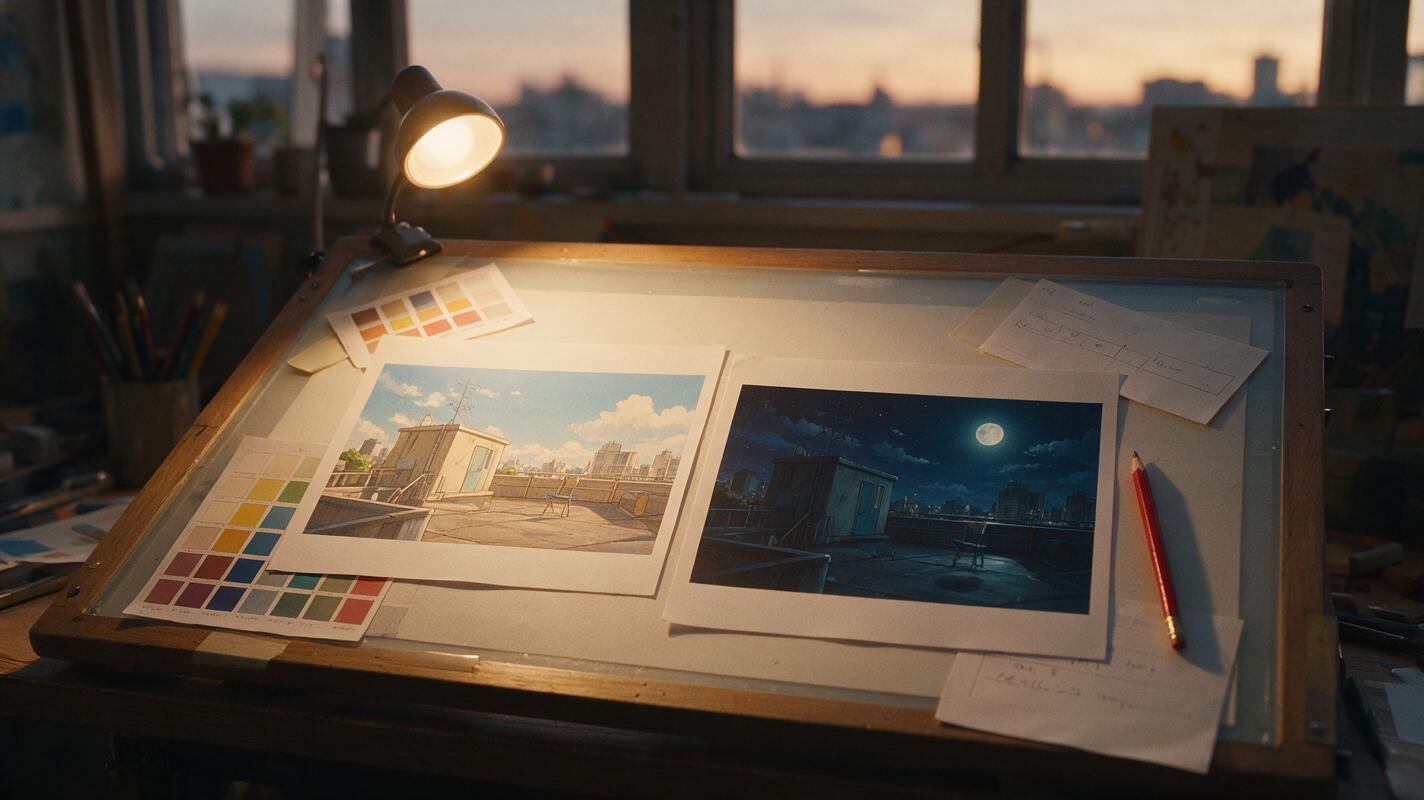
Table of contents
Turn daylight into night without repainting the character
A weak anime day-to-night edit applies a blue filter to the entire frame. Skin becomes gray, white clothing turns cyan, hair loses its signature color, and carefully designed accents disappear into muddy shadows. The scene may look darker, but it no longer looks like the same character.
The better approach is to treat night as a lighting change rather than a palette replacement. Preserve the character’s local colors, define where the new light comes from, and edit unstable regions separately. This method works especially well for dialogue shots, visual-novel illustrations, anime key art, and consecutive storyboard frames that need matching night continuity.
Core rule: darkness should change the amount, direction, and temperature of light—not the identity of every color in the image.
Why global night filters damage anime designs
Anime artwork communicates character identity with simplified color blocks. A jacket may use one dominant red, one shadow red, and a small highlight tone. When an edit adds the same blue or purple cast everywhere, those controlled relationships collapse.
Common failures include:
- Skin contamination: faces become blue-gray even when a nearby lamp should keep them warm.
- Costume drift: white fabric becomes blue, red fabric becomes purple, and gold trim becomes green.
- Value compression: hair, clothing, and the background merge into one dark mass.
- Line-art loss: black outlines and interior details disappear in crushed shadows.
- Unmotivated highlights: random bright edges appear without a visible light source.
- Sequence mismatch: each edited frame receives a different moonlight hue or exposure level.
A day-to-night conversion therefore needs two sets of instructions: what illumination should change and what design information must remain fixed.
Separate illumination from local color
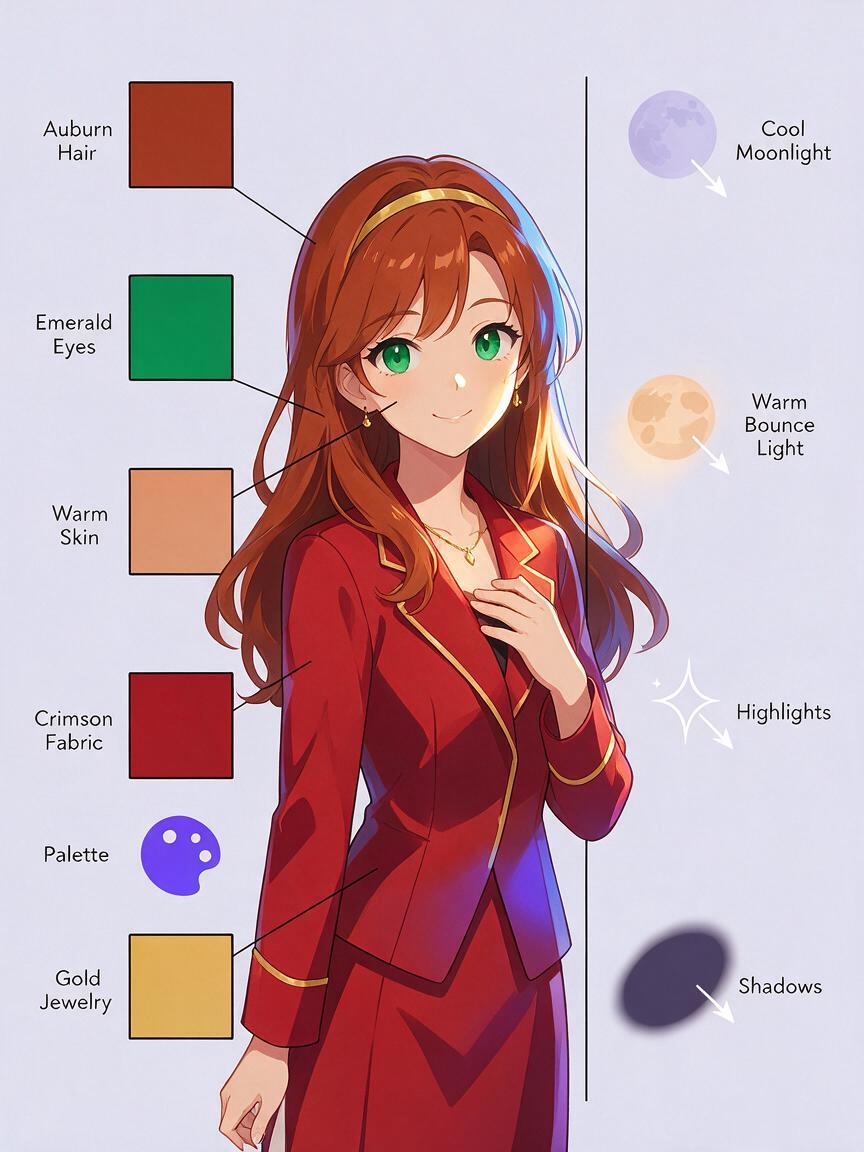
Local color is the recognizable base color of an object before lighting affects it. A character’s auburn hair remains auburn under moonlight, even if its visible highlights become cooler and its shadow values deepen. The same principle applies to skin, eyes, uniforms, weapons, and recurring props.
Before editing, write a short protection list from the source image:
- Hair: dark auburn with one copper highlight band
- Eyes: saturated emerald green
- Skin: warm light peach
- Jacket: muted crimson with cream piping
- Necklace: small gold crescent
- Line art: dark brown, clean, and fully visible
This list is more useful than a vague command such as “keep the character consistent.” It tells the model which visual facts cannot be exchanged for a generic night palette.
Use seedream 4.5 with the original illustration as the visual base. Keep the composition, pose, facial expression, costume construction, and background geometry fixed while requesting only the relighting operation.
Choose a believable night-lighting setup
“Night lighting” is not one universal look. A moonlit rooftop, a neon alley, and a bedroom beside a warm lamp require different shadow directions and color relationships. Define one dominant source and, if needed, one weaker supporting source.
| Scene | Dominant light | Supporting light | Character treatment |
|---|---|---|---|
| Moonlit rooftop | Cool overhead moonlight | Weak warm city glow below | Cool rim light with readable warm skin midtones |
| Neon street | Magenta or cyan shop sign | Neutral streetlight | Colored edge light without replacing costume colors |
| Bedroom at night | Warm desk lamp | Cool window light | Warm face and hands, cool background-facing edges |
| Forest camp | Warm firelight from below | Faint blue moonlight | Orange facial planes with restrained cool rim light |
A visible source helps the result feel intentional. If moonlight enters from frame left, highlights should not suddenly appear on the right cheek, right sleeve, and unrelated background objects.
Build a controlled relighting prompt
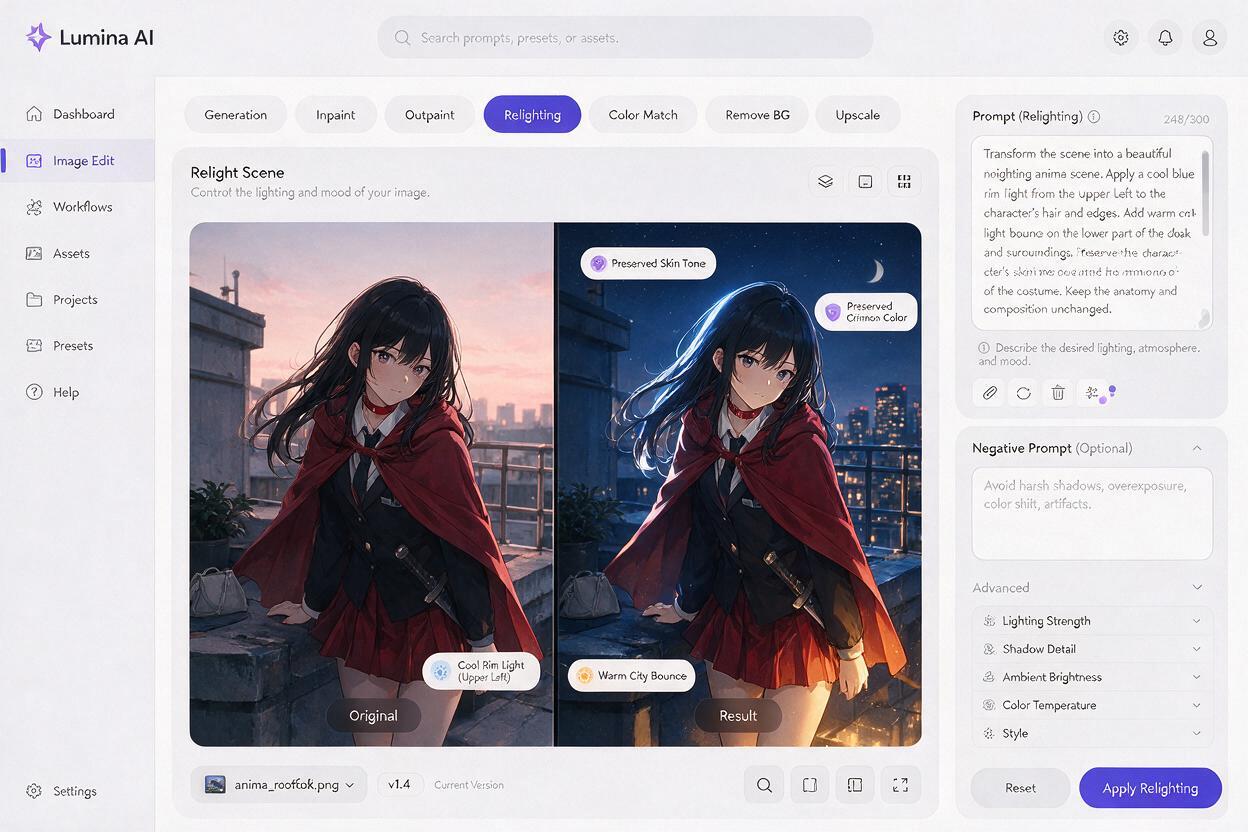
The prompt should establish the unchanged image first, describe the lighting operation second, and finish with exclusions. This prevents atmosphere words from overpowering the character specification.
Edit the supplied anime illustration into a clear nighttime version.
Preserve the exact character identity, pose, facial expression, anatomy,
hairstyle, costume design, accessory shapes, line art, camera angle,
and background geometry.

Lighting change only: cool moonlight enters from the upper left,
creating a narrow blue-violet rim on the hair and left shoulder.
Add a weak warm city bounce light from below to keep the face readable.
Deepen environmental shadows while preserving separation between the
character, railing, and skyline.

Maintain the original local colors: dark auburn hair, emerald eyes,
warm peach skin, muted crimson jacket, cream piping, and gold necklace.
Keep clean cel-shaded anime rendering and controlled two-tone shadows.

Do not apply a uniform blue overlay. Do not recolor the costume,
desaturate the eyes, gray the skin, crush the line art, alter the face,
move objects, add accessories, or create unexplained highlights.
For a neon, lamp, or firelit scene, replace only the lighting paragraph. Keep the preservation and exclusion blocks stable across the sequence. This makes repeated ai image generation easier to compare because the creative variables are limited.
Protect faces from muddy shadows
Faces often fail first because they contain small, high-priority features packed into a limited area. Strong darkening can close the eye shapes, flatten the nose, discolor the lips, or merge the jaw with the neck.
Keep at least one readable facial plane. In a moonlit exterior, that may be a soft city bounce on the lower face. In an interior, a desk lamp can illuminate the eyes and nose while the hair receives cooler window light.
Useful face-specific instructions include:
- preserve the exact eye shape, iris color, and catchlight placement
- retain warm skin undertones beneath cool environmental light
- keep the nose shadow small and consistent with the established source
- maintain clear separation between chin, neck, and collar
- do not add glossy realism to a flat cel-shaded design
If the face is correct but the environment is too bright, do not regenerate the whole frame immediately. Darken or repair the environment separately so a successful likeness is not lost.
Repair faces, costumes, and effects separately
A full-frame retry gives the model permission to reinterpret everything. Targeted edits are safer when only one region is wrong.
Restore contaminated skin
Select the face, neck, and exposed hands. Ask for the original warm skin tone under the established scene light, with no changes to anatomy, expression, eyes, hairline, or line weight.
Recover costume colors
Select only the affected garment. Repeat its canonical color and construction details, then request the same directional shadow already present elsewhere in the frame. Avoid words such as “redesign,” “upgrade,” or “more detailed.”
Control emissive elements
Neon signs, magical effects, phone screens, and flames can flood the character with excessive color. Specify that the effect casts a narrow, localized light influence rather than recoloring the entire body.
Repair only the selected jacket area. Restore the canonical muted crimson
fabric and cream piping. Preserve all seams, folds, buttons, silhouette,
and line art. Apply the existing cool moonlight only to the upper-left
facing planes. Keep the shadow side dark red, not purple or blue.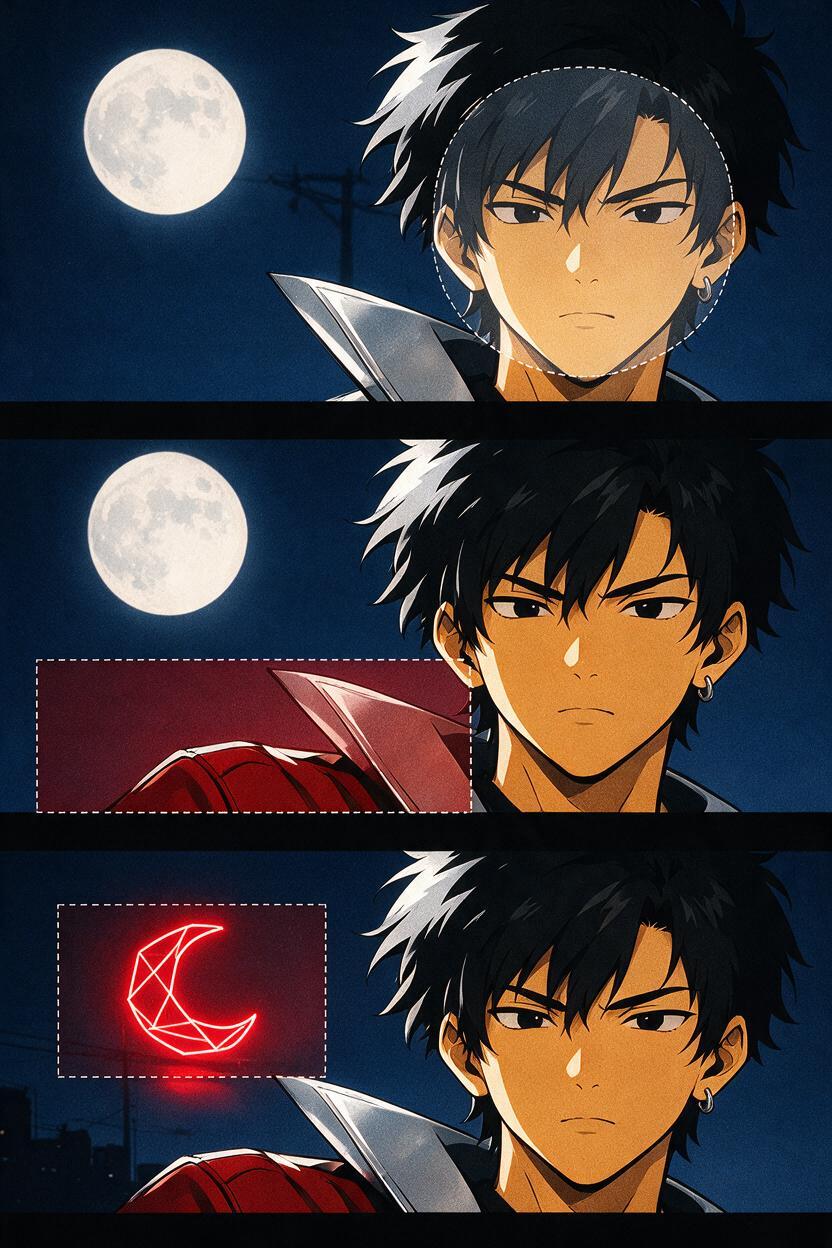
Match multiple night shots as one scene
When converting storyboard frames or comic panels, judge continuity across the sequence rather than approving each image in isolation. Establish a small lighting bible after the first successful frame.
| Continuity item | Locked decision |
|---|---|
| Moonlight direction | Upper left in every shot unless the camera crosses the axis |
| Moonlight hue | Muted blue-violet, never bright cyan |
| Practical light | Warm amber windows below the rooftop |
| Face exposure | Eyes and mouth remain readable |
| Costume values | Crimson jacket stays distinct from auburn hair |
| Background contrast | Lower than the character’s facial contrast |
For reverse angles, think in world space rather than screen space. A lamp positioned east of the character may move from the left side of the frame to the right after a camera reversal, but its physical location has not changed.
Diagnose the result before generating again
Compare the day and night versions side by side at full size and as small thumbnails. The full-size view reveals facial and line-art damage; the thumbnail reveals whether the silhouette and focal hierarchy still work.
- Everything is blue: strengthen the local-color protection list and request source-specific lighting instead of a night filter.
- The character disappears: add restrained rim light or environmental bounce rather than raising the entire exposure.
- The face looks ill: restore warm skin undertones and reduce blue saturation on facial planes.
- The outfit changes color: name the canonical garment colors and repair the garment locally.
- The background competes with the face: reduce distant contrast, saturation, and highlight intensity.
- Frames do not match: reuse one lighting bible and compare every result against an approved anchor frame.
Once the source frame, protection list, and lighting setup are ready, create your own version and test one controlled edit before processing an entire scene.
Final checklist
- The character’s hair, eyes, skin, costume, and accessories retain their canonical colors.
- The dominant light has a clear direction, temperature, and believable source.
- Night shadows deepen the scene without crushing line art or facial features.
- Rim light appears only on surfaces facing the source.
- Warm and cool lights affect limited regions instead of tinting the whole frame.
- Targeted repairs are used instead of unnecessary full-frame regeneration.
- Every shot follows the same lighting bible and approved anchor frame.
Keywords
anime day to night, anime relighting, seedream 4.5, anime color consistency, ai image editing, night scene prompt, anime lighting