Keep the Same Character in AI Video Mirror Shots
Mirror shots can make one character look like two different people when a visible face and its reflection are generated independently. This tutorial uses an anatomy-aware character sheet, paired reference images, and cut-point checks to keep identity and movement coherent.

Table of contents
One character, two views
A mirror shot works best when you treat the person and the reflection as two views of one physical performance—not as separate characters to generate.
The difficult part is not simply making both faces attractive or similar. An eyebrow notch may appear on the wrong anatomical side, a hand may rise in the reflection before it rises on the person, or the reflected face may change shape between cuts. The fix is to establish one identity, plan what the mirror can actually show, and check the person and reflection together at every shot boundary.
This is a how-to workflow for a short sequence: a character enters a dressing room, approaches a mirror, touches their temple, and turns away. It also works when only the reflection appears in one of the shots. If you use an ai image generator to prepare still references, choose a workflow that lets you inspect and retain the approved images before making video shots. Do not assume a text description alone will preserve every facial detail.
Step 1 — Define identity in anatomical terms
Write a compact character sheet before making the mirror frame. Distinguish features that must persist from features that may change with pose, lighting, or the camera. Describe asymmetry using the character’s own left and right, not the left and right sides of an image. A mirror changes the apparent placement of details in the composition; it does not move a scar to the other side of the person’s face.
Copy and adapt this sheet. The example describes a fictional adult, Mara:
CHARACTER: Mara
Stable face: oval face; broad straight nose; close-set dark eyes;
small notch in Mara's anatomical LEFT eyebrow; short black curls.
Stable body and clothing: medium height; dark teal jacket;
plain silver ring on Mara's anatomical RIGHT hand.
Allowed changes: gaze, expression, head turn, camera distance,
lighting, and the visible portion of the reflected face.
Do not change: eyebrow notch side, ring hand, facial proportions,
hairline, jacket color, or number of people present.
Mirror rule: the reflection shows Mara's same body and action
from the mirror's viewpoint; it is not a second performer.
The notch and ring serve different jobs. The notch helps you inspect facial identity; the ring helps you inspect hand placement and motion. Avoid loading the sheet with tiny traits that will never be visible at the intended framing.
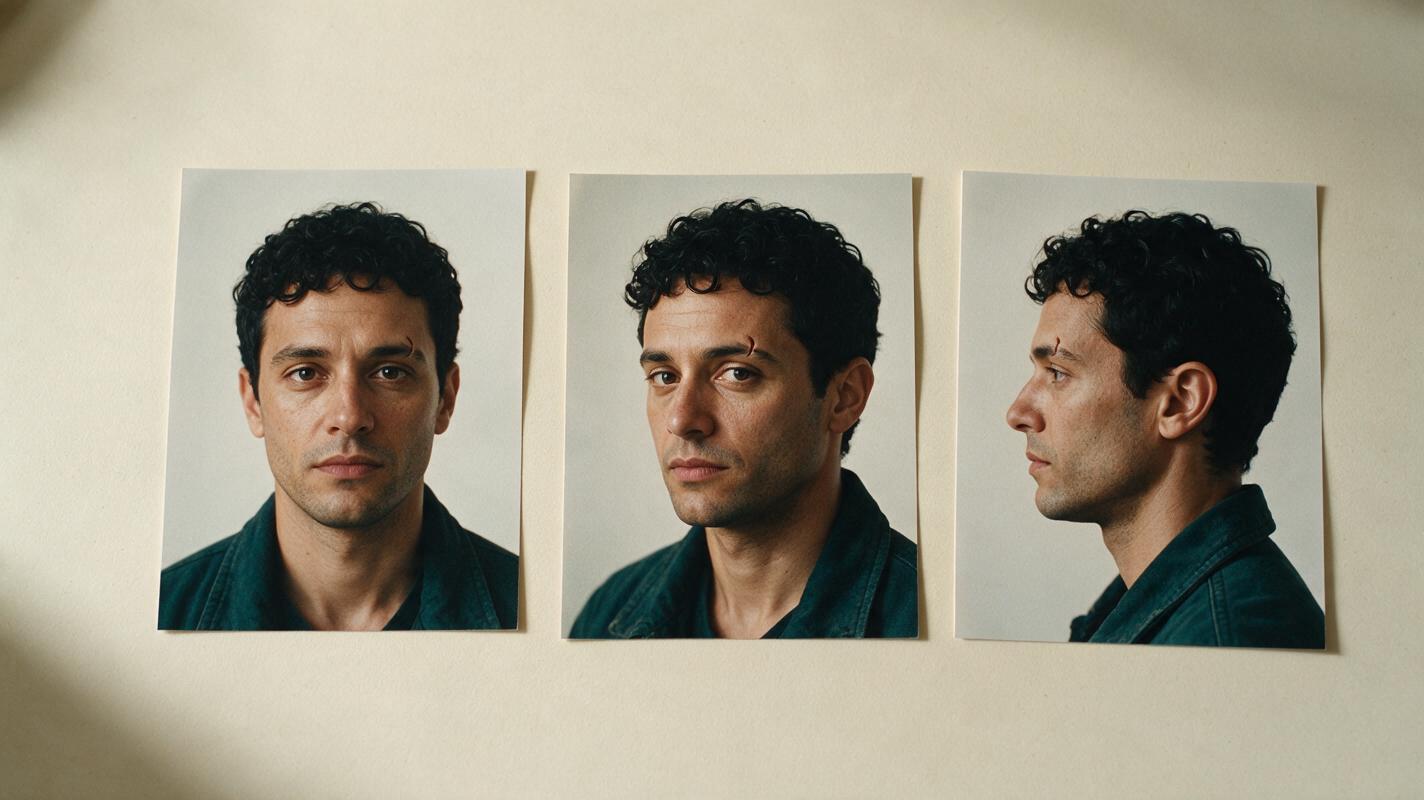
Step 2 — Build paired references, not duplicate portraits
Prepare a clear direct-view portrait and a separate mirror-view reference for the same character. The mirror reference should show the planned camera position, mirror edge, and enough of the person outside the mirror to establish the spatial relationship. If a real mirror photograph is available, use it to reason about framing. If you create the references as images, inspect them for physical coherence before approving either one.
Keep one approved direct-view image as the identity anchor. Use the paired mirror image as a composition and reflection anchor—not as permission to redesign the face. Record which anatomical side holds each asymmetric feature. When an image is mirrored for layout planning, do not relabel the character’s left eyebrow as the right eyebrow merely because it appears on the other side of the picture.
For a simple three-shot ai storyboard, pair each intended frame with the reference that answers its main question:
| Shot | What the viewer sees | Reference to prioritize | Continuity check |
|---|---|---|---|
| Approach | Mara from behind and a partial reflection | Mirror composition plus clothing | One jacket, one reflected person |
| Gesture | Mara and reflection in the same frame | Direct face plus mirror view | Right-hand ring and synchronized touch |
| Turn away | Direct face as reflection leaves frame | Approved direct-view portrait | Same eyebrow notch and facial structure |
If your chosen workflow accepts only one reference image per shot, make a clean approved start frame that already contains the intended mirror arrangement. If it accepts additional references, keep the identity image separate from the composition image so their purposes remain clear.
Step 3 — Plan the mirror's sightline before motion
Sketch where the camera, character, and mirror stand. A reflection is constrained by viewpoint: the camera cannot see a full frontal reflected face if the mirror angle and the character’s position would hide it. Decide whether the character faces the mirror, stands at an angle, or passes its edge. Then decide exactly when the reflection enters and exits the frame.
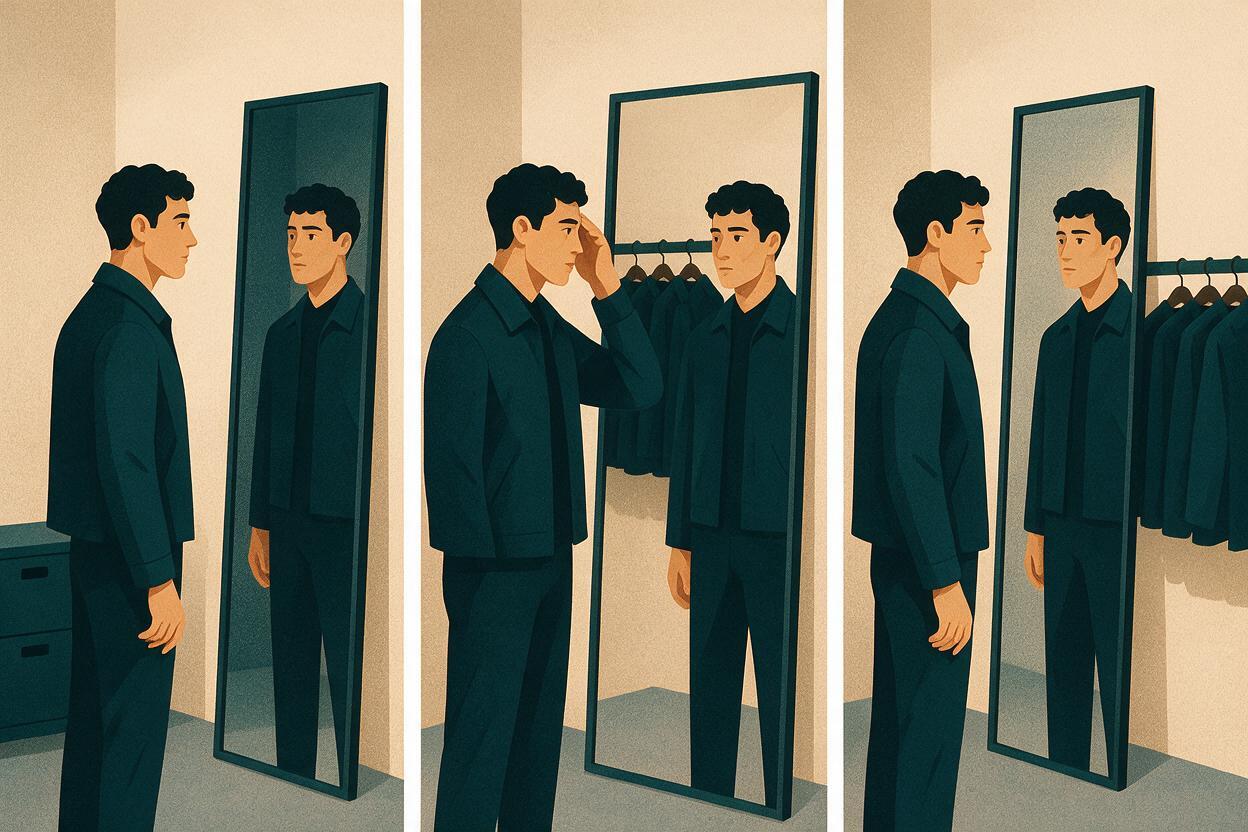
Use a short storyboard reference for the gesture: before the touch, during contact, and after the hand lowers. In each frame, the visible person and reflected person must describe the same instant. Do not ask the reflection to perform an expressive reaction independently; that turns a continuity instruction into a second-character instruction.
Useful test: Cover either the person or the reflection with your hand. Would the uncovered view still describe the same pose and moment? If not, fix the planned frame before generating motion.
For the approach shot, keep the mirror action modest. A slow walk and slight head lift are easier to evaluate than simultaneous walking, turning, speaking, and touching. Complexity can be added after the identity and spatial relationship survive the simpler version.
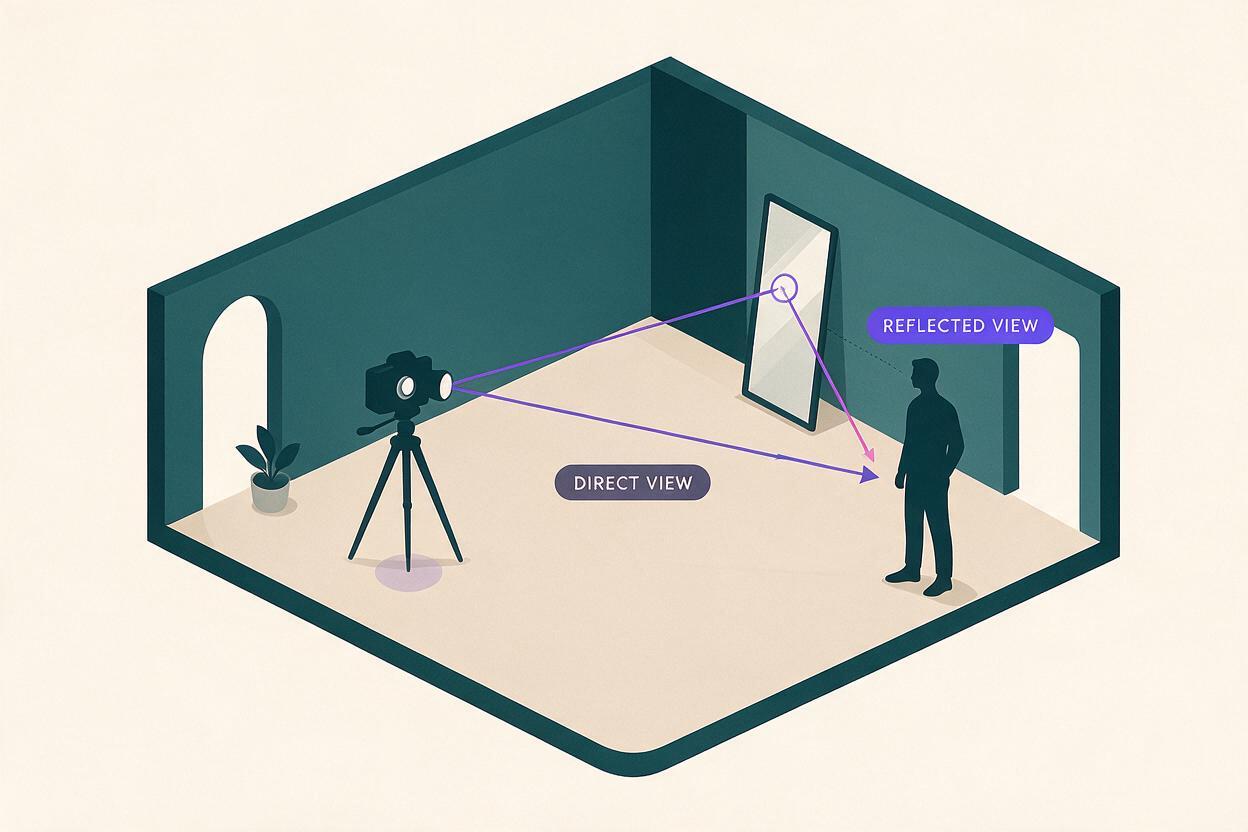
Step 4 — Generate short shots with one action each
Start each shot from its approved frame where your workflow permits. For image to video, inspect how the visible person and reflection move together rather than judging the prettiest single frame. Generate the gesture separately from the approach and departure so a failure has a clear place to fix.
Here is a copyable prompt for the central mirror shot:
Use the approved frame as the starting composition. Mara stands
before a dressing-room mirror. Mara slowly raises her anatomical
RIGHT hand, wearing a plain silver ring, and touches her right
temple. Her visible body and mirror reflection show the same action
at the same time. Preserve her oval face, broad straight nose,
close-set dark eyes, short black curls, and the small notch in her
anatomical LEFT eyebrow. The reflection is the same person viewed
in the mirror, not an additional character. Keep the camera steady,
the mirror fixed, and the lighting unchanged. One deliberate gesture;
no new people, clothing changes, or extra reflected limbs.
For the next shot, name the hand’s starting state rather than repeating the entire gesture. This gives the cut a specific match point:
Begin with Mara's right hand resting at her right temple, matching
the end of the previous shot. She lowers that hand and turns away
from the mirror. Preserve the approved face, eyebrow notch,
right-hand ring, hair, and dark teal jacket. The reflection leaves
the mirror naturally as Mara turns; it does not linger or move
independently. Keep the camera position and room layout stable.
These prompts specify the intended result, not a guarantee. If a generation changes the face or invents an extra figure, revise the frame or simplify the action instead of adding a longer list of adjectives.
Step 5 — Repair failures at the frame where they begin
Review the opening frame, the midpoint of the gesture, and the final frame of each shot. Then compare the final frame of one shot with the opening frame of the next. Look at the entire person–mirror relationship, not only a cropped face.
| Failure | Likely source | Practical fix |
|---|---|---|
| Reflection has a different face | Mirror treated as a second portrait | Return to the approved paired frame; explicitly state that both views show one person. |
| Eyebrow notch changes anatomical side | Image-coordinate left confused with character left | Correct the character sheet and check both views against the same anatomical label. |
| Ring appears on both hands | Hand detail lost during motion | Use a clearer hand-visible start frame and shorten the gesture. |
| Reflection moves late or lingers | Too much action in one shot | Split the shot at a stable pose; match that pose across the cut. |
| Extra person appears in the mirror | Ambiguous framing or background shapes | Simplify the reflected background and approve a clean mirror frame first. |
Regenerate the smallest affected segment. If the gesture fails halfway through, retain an approved approach shot and repair the gesture rather than rebuilding the full sequence. When the cut itself fails, select matching end and start frames before attempting more motion.
FAQ
Should I flip the character portrait to make a mirror reference?
You can flip a copy to explore composition, but inspect the result as a mirror view, not a new identity portrait. Keep the original approved reference and the character’s anatomical left/right labels unchanged.
What if only the reflection appears in a shot?
Use the approved mirror-view frame for composition and retain the direct-view portrait as your identity check. Compare facial proportions and stable features when the direct face returns in the next shot.
Is a longer prompt better for mirror consistency?
Not necessarily. Clear reference frames, one action per shot, and an explicit statement that the reflection is the same person are more useful than repeating appearance adjectives without a spatial plan.
Final checklist
- Identity: The same facial structure, hair, clothing, and anatomical-side details persist.
- Space: The mirror shows a plausible view from the planned camera position.
- Action: Person and reflection occupy the same moment and perform the same gesture.
- Cuts: Hand position, gaze, and reflection placement match at shot boundaries.
- Repair: A failed segment is replaced without discarding approved shots.
Once your paired references and gesture frame are ready, test this prompt yourself with a short mirror shot before building the full sequence.
Keywords
character consistency, character reference, multi-shot, storyboard reference, consistent character across scenes, keep the same face across video
Decision: PUBLISH — Distinct mirror-reflection continuity tutorial with an actionable reference workflow and no unsupported performance claims.