Keep the Same Character Through Back-Facing Shots and Reveals
A character can look convincing from the front yet become unrecognizable after a back-facing shot. This tutorial uses a character sheet, matched reference images, and a reveal-point check to preserve identity when the face disappears and returns.

Table of contents
When the character turns away
A convincing face reveal begins before the face is visible: keep the character’s hair, silhouette, clothing, and position identifiable while they are turned away.
This tutorial addresses a specific continuity break. A character walks past the camera, appears from behind in the next shot, then turns back toward us—and the revealed face belongs to someone else. The fix is to plan the hidden-face shot as part of the same identity sequence, rather than treating it as an anonymous transition.
Use one fictional adult character as a running example: Mara has short dark curls, a small scar through her left eyebrow, an ochre trench coat, and a canvas crossbody bag. The scar matters at the reveal; the curls, coat, bag, and body shape help identify her while her face is hidden.
Step 1 — Make a character sheet that works without a face
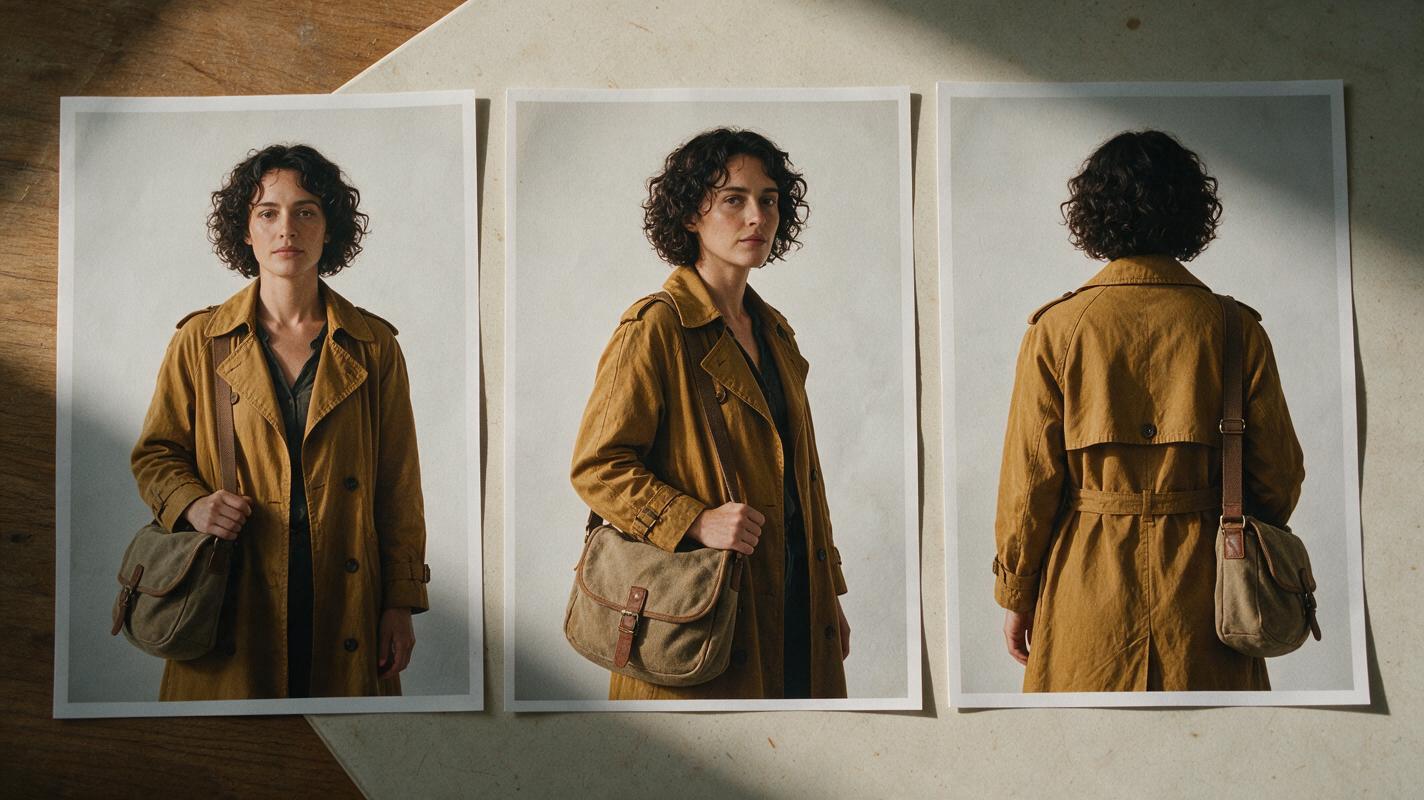
Record both facial anchors and nonfacial anchors. A front-facing portrait alone cannot guide a back-facing shot. Your sheet should include a clear face view, a three-quarter view, and a rear view that shows the same hair, clothing, and carried objects.
Copy this template and replace the example details before generating your references:
CHARACTER SHEET
Name: Mara
Identity anchors: short dark curls; small scar through left eyebrow;
  oval face; straight nose
Rear-view anchors: curl length above collar; ochre trench coat;
  canvas crossbody strap running from right shoulder to left hip
Stable details: approximate adult age; build; coat length; bag size
Allowed changes: camera position, pose, expression, background
Planned change, if any: ____________________
Do not introduce: longer hair, a different coat, an extra bag,
  a reversed strap, or a new facial mark
Keep the sheet visual as well as written. Select approved images showing the front, three-quarter, and rear views. If a rear reference contradicts the front view—for example, the curls become shoulder-length—correct it before producing video. A written instruction should not have to resolve a disagreement between two reference images.
Step 2 — Storyboard the disappearance and reveal
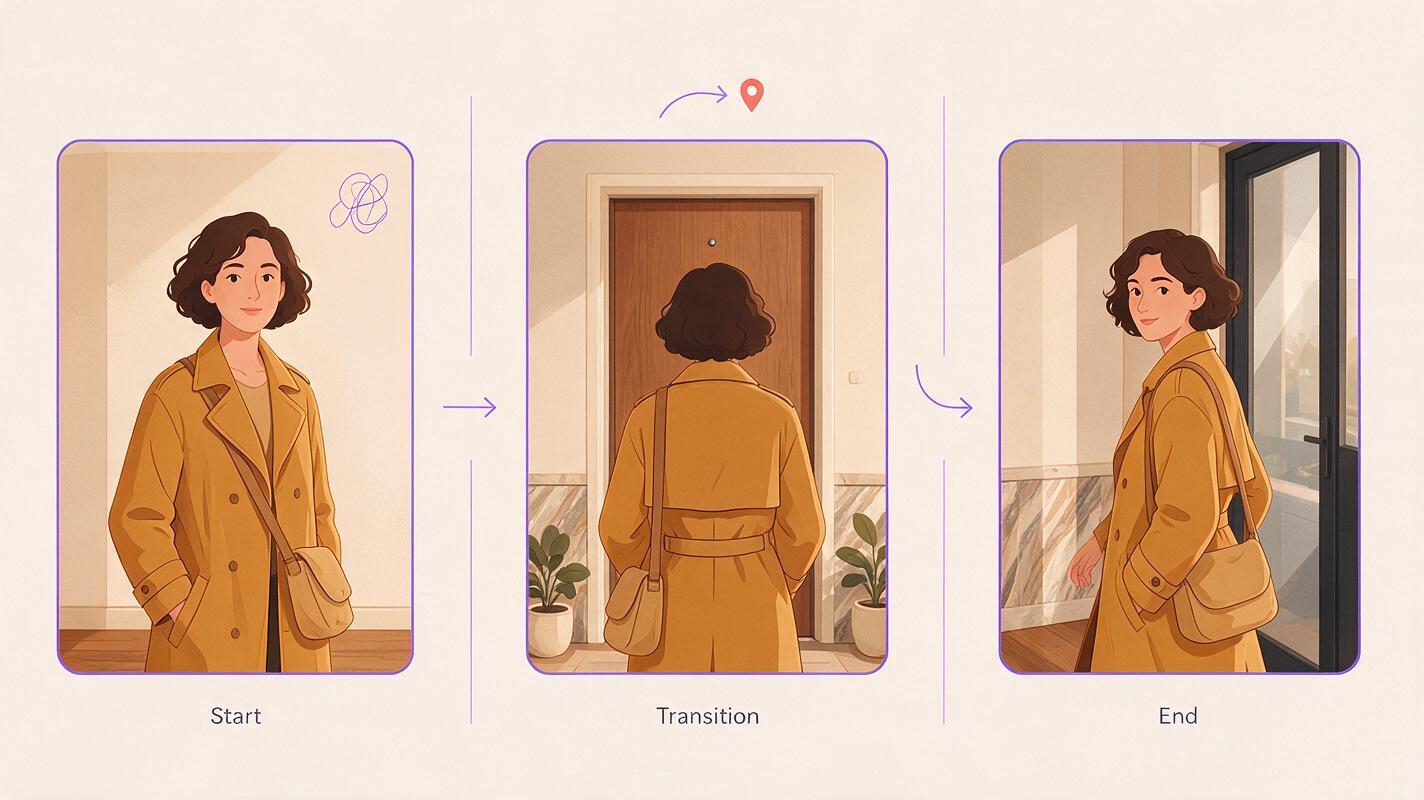
Sketch three frames: the last clear view of the face, the shot in which the face is hidden, and the first clear view after the turn. Mark where the character stands and which side of the body carries the bag. This makes it easier to spot a spatial mismatch that might otherwise be mistaken for a face-generation problem.
| Frame | What the viewer can verify | Continuity check |
|---|---|---|
| Face visible | Facial anchors, hair, coat, bag | Approve the starting identity |
| Back to camera | Hair outline, coat shape, strap, position | Match the approved rear reference |
| Face revealed | Facial anchors plus the same nonfacial details | Compare with the starting view |
For Mara, the middle frame might show her pausing at a doorway with her back to the camera. In the reveal frame, she turns her head and shoulders toward the lens. The coat and bag must remain consistent across that movement; the eyebrow scar should be checked when her face becomes clear enough to see it.
If a feature is hidden by the camera angle, mark it as not visible during review—not as missing. Check it in the first frame where it can actually be seen.
Step 3 — Build a reference-image chain
Start with an approved face image and an approved rear image from the character sheet. Match the rear image to the hidden-face shot’s approximate camera height and framing. Then choose a reveal reference in which the face and at least one nonfacial anchor appear together. That overlap connects the views more clearly than a face-only portrait.
Where a video tool accepts image references or a starting frame, provide the relevant approved image in the format that tool supports. If it does not, use the sheet and storyboard descriptions in the prompt, then inspect the results manually. Do not assume that a tool preserves identity simply because it accepts a reference image.
Generate or select the back-facing shot first. Save a clear frame near its end, where Mara’s hair, coat, and bag are visible. Use that frame to plan the reveal shot’s opening composition. The execution order matters: changing the rear view after approving the reveal can make the two shots impossible to join cleanly.
Copyable prompt: back-facing shot
One continuous shot of Mara, the same adult character shown in the
provided approved rear reference. She pauses at a doorway with her back
to the camera. Preserve her short dark curls above the coat collar,
ochre knee-length trench coat, and canvas crossbody strap from right
shoulder to left hip. Keep her face out of view. Static camera at
shoulder height. End with Mara beginning to turn toward the camera.
Do not change her hairstyle, coat, bag, or body proportions.
Copyable prompt: reveal shot
Continue the same doorway moment with Mara, using the approved character
references and the previous shot's ending frame where supported. Begin
with her short dark curls, ochre trench coat, and canvas crossbody bag
in matching positions. Mara completes her turn toward the camera,
revealing the same oval face, straight nose, and small scar through her
left eyebrow shown in the approved face reference. Keep the camera at
shoulder height. No wardrobe change or additional character.
Step 4 — Review the cut before revising the prompt
Watch the last visible-face frame, the back-facing shot, and the first clear reveal frame in order. Pause at the cut and again when the face comes into view. Compare the sequence against the sheet rather than relying on whether each shot looks plausible by itself.
If the reveal is wrong, identify which link failed. Regenerating everything can discard a good back-facing shot without fixing the cause.
| Failure | Likely cause | Targeted fix |
|---|---|---|
| The revealed face differs from the opening face | The reveal relied on the rear view but lacked a clear face reference | Pair the rear or ending-frame reference with the approved face reference; restate only the defining facial anchors |
| Hair length changes while the face is hidden | The rear reference does not match the sheet | Correct the rear reference first, then remake the hidden-face shot |
| The bag jumps to the other side | Camera direction or strap placement was left ambiguous | Specify shoulder-to-hip placement and check the storyboard for an intentional camera reversal |
| The reveal feels like a new person despite similar features | Coat, build, or posture changes at the cut | Match the opening pose and nonfacial anchors before adjusting facial details |
If repeated attempts still produce a different identity, simplify the reveal. A slower turn in a shorter shot gives you a clearer point to review. Alternatively, choose a cut that returns to an already approved face view. Neither choice guarantees a match, but both make the mismatch easier to locate and revise.
Ready to assemble the sequence? Create a short character-reveal video using your approved views, then check the cut against the sheet before extending the scene.
FAQ
Is a front-facing portrait enough for a back-facing shot?
It may establish the face, but it does not clearly specify rear-view details such as hair length at the collar or where a bag strap crosses the back. Add an approved rear reference.
What if the character’s face is never visible in the middle shot?
Check only the anchors that are visible there. Confirm facial identity in the first clear frame after the character turns back.
Should I reuse the previous shot’s final frame?
It is useful for matching position, clothing, and framing. If your tool supports a starting-frame or image-reference input, use it alongside an approved face reference where possible; the final back-view frame alone may not specify the face.
Final checklist
- Approve front, three-quarter, and rear character references.
- Record facial and nonfacial anchors on one character sheet.
- Storyboard the last face view, hidden-face shot, and first clear reveal.
- Match hair, clothing, objects, and position before checking the revealed face.
- Fix the specific broken link instead of restarting every shot.
Keywords
character consistency, consistent character video, consistent character across scenes, character reference, multi-shot, storyboard reference, keep the same face across video