How to Make a Consistent Anime Character Sheet With AI
Build an AI anime character sheet that preserves the same face, hair, costume, colors, and proportions across expressions and poses. This practical workflow uses a locked design specification, controlled prompts, reference-based generation, and targeted corrections instead of relying on a seed alone.
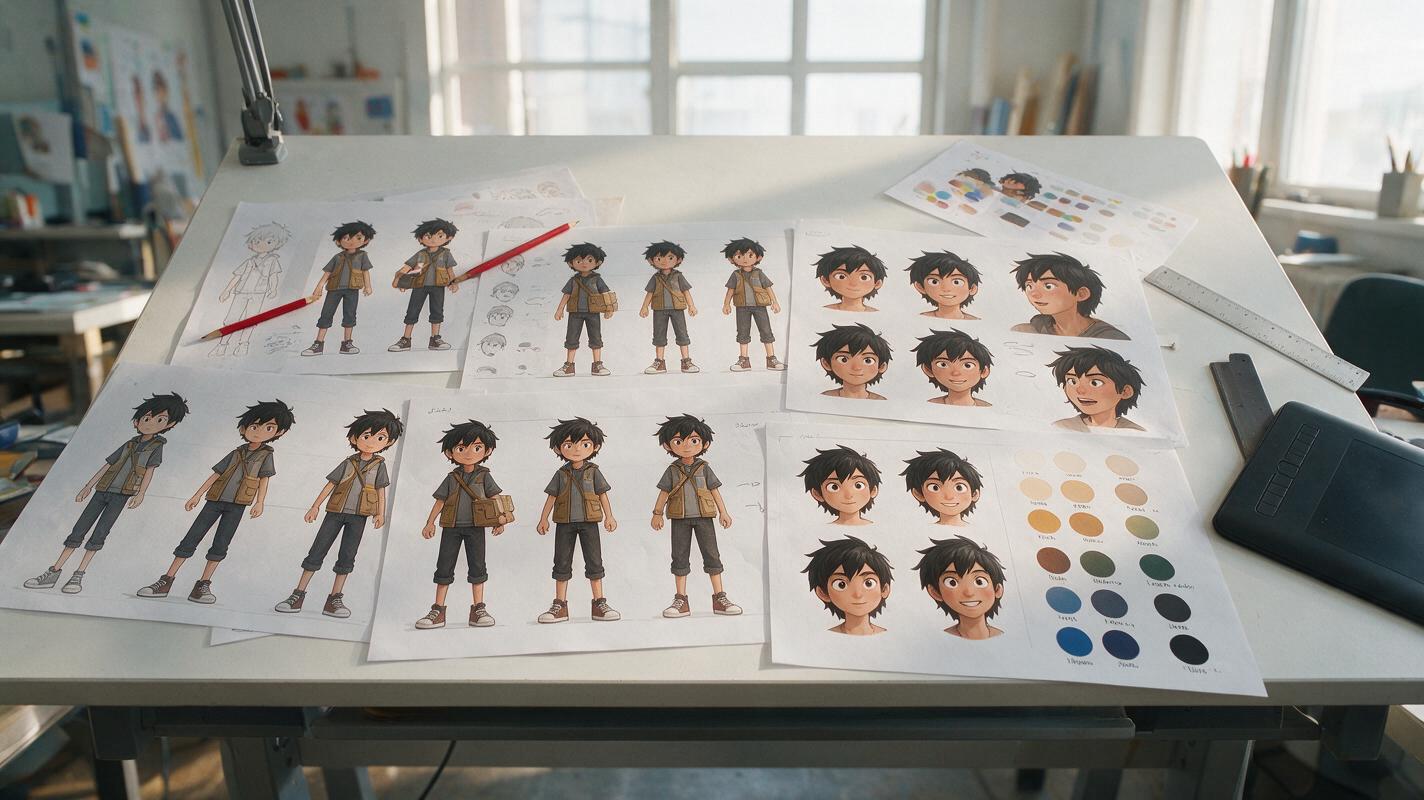
Table of contents
Introduction — Consistency starts before generation
A consistent anime character sheet gives your model one unambiguous identity to follow before you create panels, keyframes, promotional art, or animation.
If every generated image changes the eye shape, bangs, jacket trim, or body proportions, the problem is usually not a missing magic prompt. It is an unstable design specification. Broad descriptions such as “anime girl with blue hair” leave too many decisions open, so the generator redesigns the character whenever the pose or camera angle changes.
The solution is to establish a canonical character, separate permanent traits from shot-specific instructions, and generate the sheet in controlled passes. This workflow works with an ai image generator that supports reference images, image editing, or both.
A character sheet is not a collection of attractive variations. It is a visual contract defining what must remain unchanged.
Step 1 — Write a locked identity specification
Before generating images, describe the character as if another artist had to reproduce the design without asking questions. Concentrate on traits that can be seen and checked. Personality and backstory may guide acting, but they do not reliably preserve a face.
Divide the specification into three groups:
- Identity anchors: apparent age, face shape, eye shape, iris color, nose treatment, hairstyle, hairline, fringe pattern, skin tone, and distinctive marks.
- Costume anchors: silhouette, garment layers, collar shape, sleeve length, closures, accessories, footwear, and exact color placement.
- Proportion anchors: head-to-body ratio, shoulder width, torso length, hand size, leg length, and overall build.
Replace subjective language with countable or positional details. “Complicated hair” is weak. “Chin-length black bob, one long lock in front of the left ear, three triangular fringe groups, no loose hair over the right eye” is testable.
Create a compact specification that can be reused without overwhelming the prompt:
CHARACTER ID: MIKA-01
Young adult woman, oval face, narrow amber eyes,
short black bob ending at the jaw, three-part fringe,
one long side lock in front of her left ear.
Small beauty mark below the right eye.
Slim build, six-and-a-half-head body proportion.

COSTUME LOCK:
Cropped red courier jacket, black standing collar,
two silver chest clasps, charcoal undershirt,
high-waisted black trousers, red ankle boots.
No hat, no gloves, no jewelry.
Give the character an ID and keep the wording stable. Rephrasing permanent traits between generations can unintentionally invite reinterpretation.
Step 2 — Generate one canonical neutral view
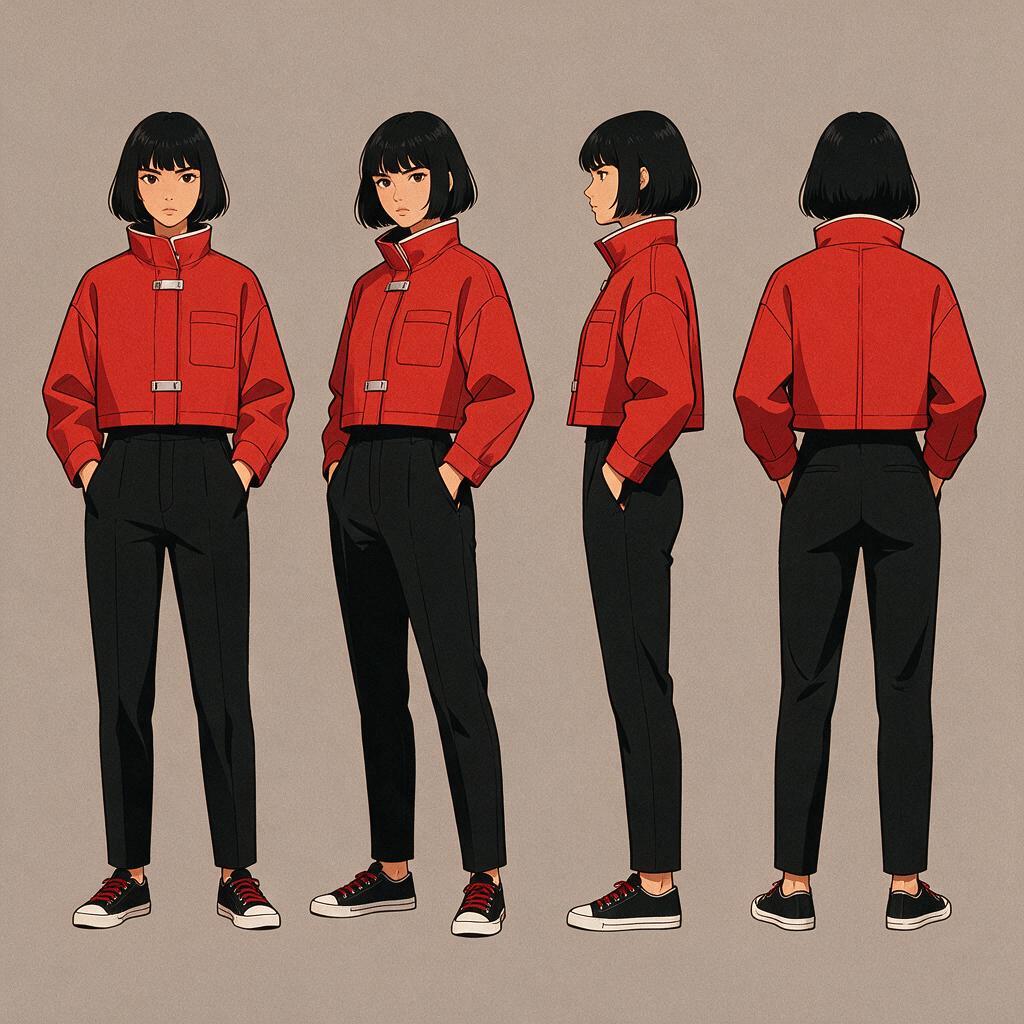
Do not request a turnaround, expression grid, action pose, and cinematic background in the first generation. Begin with one easy-to-evaluate image: a neutral front or three-quarter view, relaxed posture, even lighting, and a plain background.
The canonical image should make these areas clearly visible:
- Both eyes and the full hair silhouette
- The complete costume from collar to footwear
- Hands resting naturally without covering garment details
- Accessories and asymmetric features
- Flat, readable colors without dramatic color casts
Use a prompt that prioritizes design clarity over spectacle:
Anime character design reference, full-body neutral standing pose,
front three-quarter view, plain warm-gray studio background,
soft even lighting, clean controlled line art, flat cel shading.

[Paste CHARACTER ID and COSTUME LOCK]

Character centered, arms relaxed with hands visible,
complete outfit visible, accurate garment construction,
production-ready 2D animation model sheet aesthetic.

Avoid dramatic perspective, wind, motion, props, text,
colored rim light, cropped feet, alternate clothing.
Generate several candidates, but select one canonical design rather than combining details from all of them. Check the silhouette at thumbnail size, then inspect the eyes, fringe, clasps, hands, and shoe design at full size.
Step 3 — Convert the design into a visual anchor map
A reference image contains many details, but not every detail receives equal attention during a new generation. An anchor map tells you which features carry the identity and where drift is most damaging.
| Anchor level | Examples | Rule |
|---|---|---|
| Primary | Face shape, eyes, hair silhouette, signature mark | Reject the image if any primary anchor changes |
| Secondary | Collar, jacket length, clasps, color blocks | Correct before adding poses or expressions |
| Tertiary | Minor folds, tiny highlights, incidental strands | Allow limited variation when the design still reads correctly |
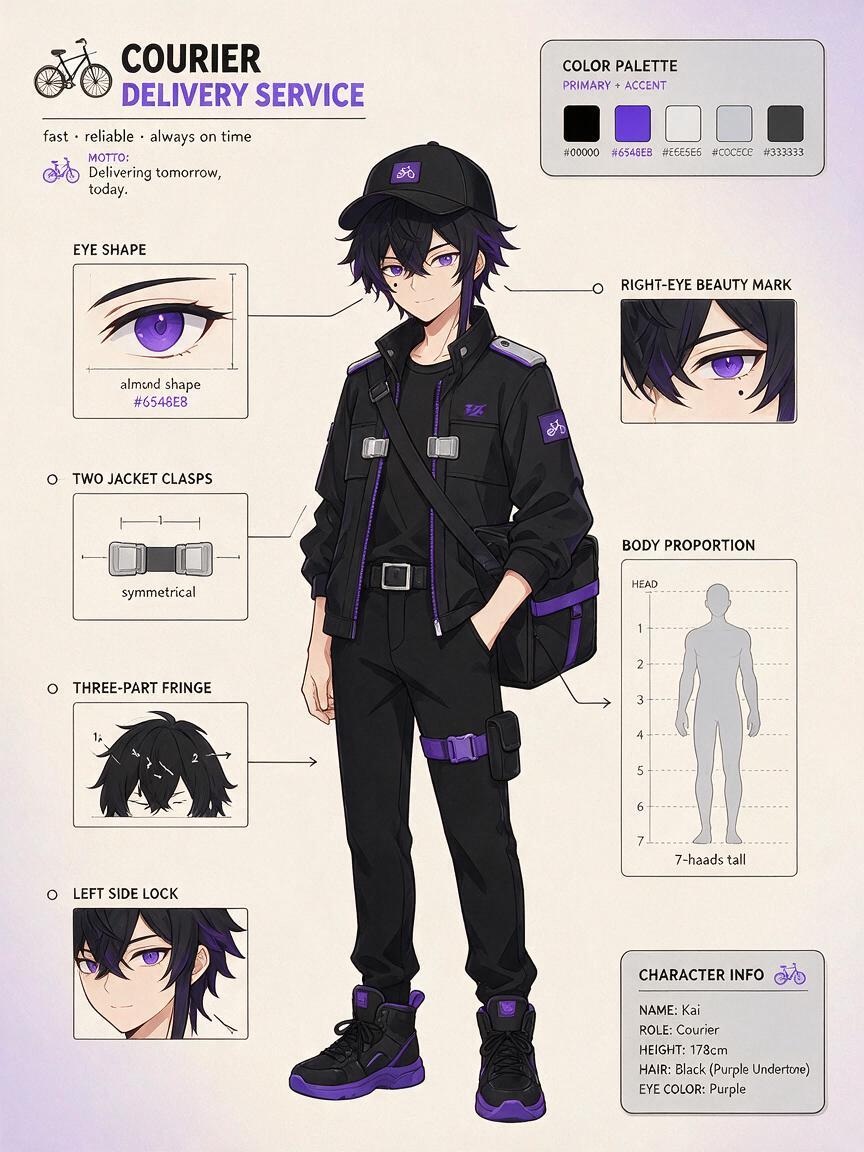
Mark asymmetrical traits explicitly. Generators often mirror a beauty mark, side lock, earring, scar, glove, or shoulder emblem when the character turns around. Record each feature from the character's perspective, not the viewer's perspective.
It also helps to create a small palette card beside the canonical image. Use five to eight named swatches for skin, hair, iris, jacket, undershirt, trousers, metal, and accent colors. The goal is not numerical color science; it is preventing “red jacket” from becoming orange, burgundy, or pink across the sheet.
Step 4 — Build the turnaround one view at a time
A complete turnaround is easier to control when each angle is generated or edited separately. Use the canonical image as the reference, preserve the identity specification, and change only the requested view.
- Create the front view and confirm all permanent details.
- Create the three-quarter view while preserving facial spacing and hair volume.
- Create the side view with special attention to the nose, chin, skull, and jacket profile.
- Create the back view, defining unseen hair and costume construction deliberately.
- Assemble approved views into one clean sheet after generation.
For each new angle, place the variable instruction after the locked character block:
[Paste the unchanged CHARACTER ID and COSTUME LOCK]
Use the supplied canonical character image as the identity reference.

CURRENT VIEW ONLY:
Exact left-facing side profile, neutral expression,
level head, full body, arms relaxed, orthographic presentation.
Preserve facial proportions, hair length, side-lock placement,
body scale, jacket cut, two clasps, and all established colors.
Do not redesign or add details.
Avoid asking for “front, side, back, and dynamic poses in one image” until the design is stable. Multi-panel generation can produce attractive layouts while quietly changing the character between cells.
Step 5 — Add expressions without redesigning the face
Expression sheets often fail because emotion instructions accidentally alter anatomy. “Huge joyful smile” may enlarge the eyes, shorten the jaw, change the apparent age, or reshape the hairstyle. Treat the neutral face as the base drawing and specify muscle-level changes.
Generate a small expression set first:
- Neutral: baseline eye opening and mouth width
- Happy: raised cheeks, slightly narrowed eyes, open smile
- Angry: brows lowered inward, focused pupils, tense closed mouth
- Sad: inner brows raised, softened eyelids, small downturned mouth
- Surprised: raised brows, wider eyes, small open mouth
Keep the camera, head angle, crop, and lighting fixed. Only the expression should change:
Expression reference sheet for the same established character.
Five separate head-and-shoulder portraits: neutral, happy,
angry, sad, surprised. Identical head angle, camera distance,
face proportions, eye color, hairstyle, fringe groups,
beauty-mark position, collar, line weight, and cel shading.
Change only brows, eyelids, cheeks, and mouth articulation.
No age change, no chibi deformation, no costume variation.
If one face is wrong, repair or regenerate that cell instead of rerolling the entire sheet. Local correction protects the approved expressions from new drift.
Step 6 — Diagnose drift before generating more art
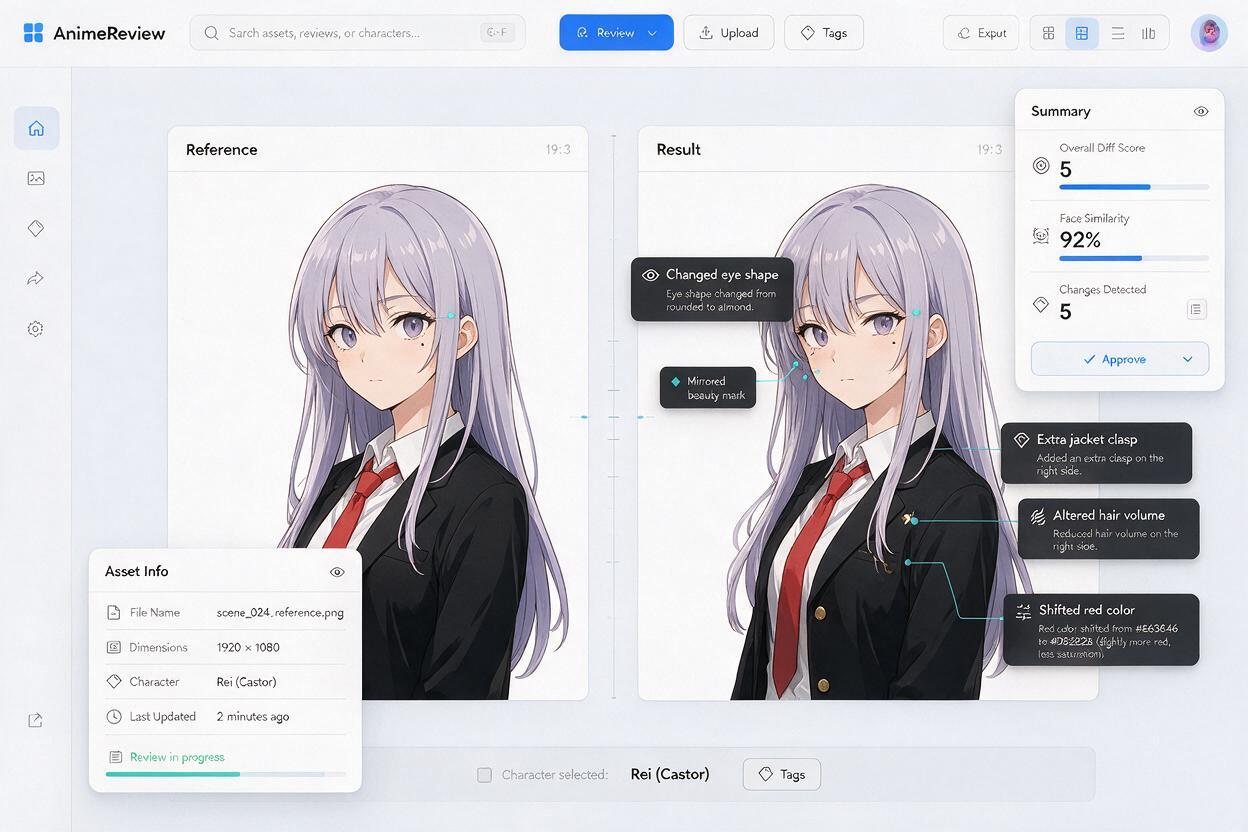
When consistency breaks, identify the category of failure instead of making the prompt longer. Different problems need different corrections.
| Failure | Likely cause | Practical correction |
|---|---|---|
| Face changes at every angle | The canonical face is unclear or stylized inconsistently | Use a sharper neutral portrait and define eye, jaw, and fringe geometry |
| Costume details multiply | The prompt uses vague decorative language | State exact counts and prohibit additional fasteners, trim, and accessories |
| Colors shift | Dramatic lighting competes with local colors | Return to neutral lighting and include a compact palette reference |
| Left and right details swap | Asymmetry was not explicitly locked | Name the character-side location in every relevant view prompt |
| Character becomes younger or older | Expressions or proportions are too exaggerated | Lock jaw length, eye scale, head ratio, and apparent age |
| Line art changes between cells | Style instructions vary or references contain mixed rendering | Use one clean source and repeat the same line and shading description |
A fixed random seed may help repeat a composition in some tools, but it is not an identity system. The stronger controls are an approved canonical image, unchanged identity language, limited variables, and selective editing.
If a new output changes three things when you requested one, reduce the task until only one variable remains.
Step 7 — Package the sheet for future scenes
Once the views and expressions pass inspection, assemble a master reference sheet with a plain background and readable spacing. Include the character ID, approved palette, front and side views, one full-body three-quarter view, expression heads, and close-ups of important props or costume details.
Keep two exports:
- Master sheet: high-resolution design reference containing all approved information.
- Task reference: a smaller crop containing only what the next generation needs, such as the face and upper costume for a dialogue shot.
Too much irrelevant material can confuse a generation just as easily as too little. For a close-up, prioritize the canonical face and expression references. For a full-body illustration, prioritize the turnaround, proportions, and costume construction.
After the still-image identity is stable, you can use selected artwork as the source for character animation. Do not animate an unresolved design: motion tends to amplify ambiguous hair, hands, accessories, and clothing layers. When your sheet is ready, create your own version and test the character in one simple pose before attempting a full scene.
Final checklist
- The character has one canonical neutral image.
- Permanent traits are written in a reusable identity block.
- Hair, eyes, face shape, costume, and proportions are visually testable.
- Asymmetric features are labeled from the character's perspective.
- Turnaround views were approved individually before assembly.
- Expressions change facial movement, not facial identity.
- Neutral lighting preserves the intended local colors.
- Incorrect cells are corrected locally instead of rerolling the whole sheet.
- The final package includes a master sheet and task-specific reference crops.
Keywords
consistent anime character, anime character sheet, anime AI generator, character consistency, AI character design, anime reference sheet, character turnaround