Why AI Comic Backgrounds Change—and How to Keep Locations Consistent
AI-generated comic backgrounds often change doors, windows, furniture, and spatial relationships between panels. This tutorial uses Imagen, a location bible, camera-zone prompts, and selective repairs to keep recurring environments consistent without redrawing every scene.
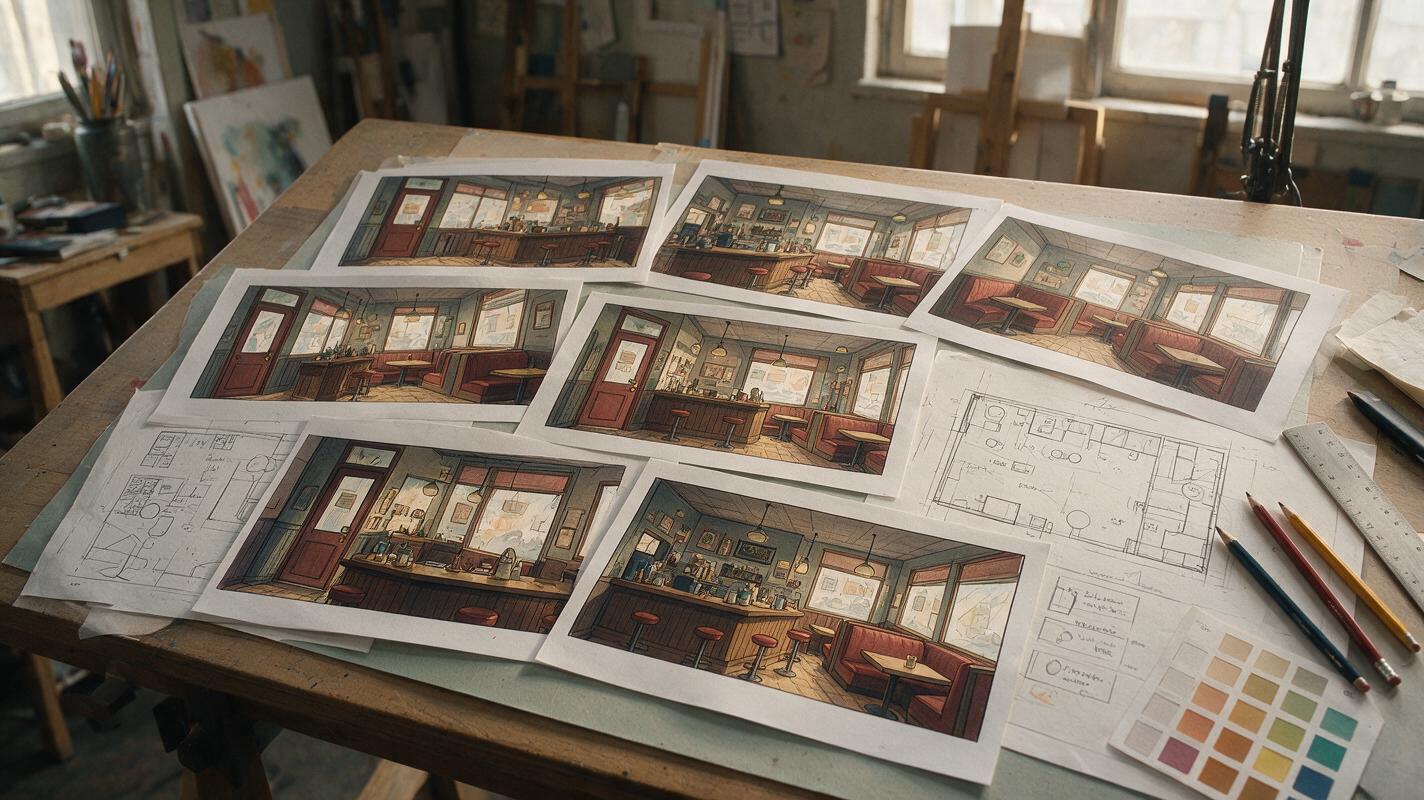
Table of contents
Keep the setting from redesigning itself between panels
A recurring comic location should feel familiar every time the reader returns, but image models often move the door, replace the furniture, add windows, or reverse the room. The solution is not a longer style prompt. It is a compact location bible that separates permanent architecture from movable details, followed by controlled shot extraction rather than full-scene regeneration.
This workflow uses Imagen for environment development, but the structure works with other reference-based image models as well. It is especially useful for bedrooms, cafés, classrooms, studios, shops, spaceship interiors, and any location that appears repeatedly in a comic or webtoon.
Continuity rule: Treat the setting as a reusable production asset, not a new illustration to invent for every panel.
Why AI-generated locations drift
A prompt such as “cozy detective office with wooden furniture” describes a category, not a specific place. Each generation can satisfy that category with a different floor plan. Even when the style remains convincing, the visual evidence tells the reader that the characters have entered another room.
Background drift usually appears in four forms:
- Structural drift: doors, windows, stairs, counters, and walls change position.
- Object drift: furniture disappears, duplicates, rotates, or changes design.
- Directional drift: the model mirrors the room when the camera reverses.
- decorative drift: posters, plants, books, lights, and surface materials mutate between shots.
Structural drift is the most damaging because it breaks staging. If a door was behind the protagonist in one panel, it cannot appear across the room in the next unless the character or camera has clearly moved.
Build a location bible before generating story panels
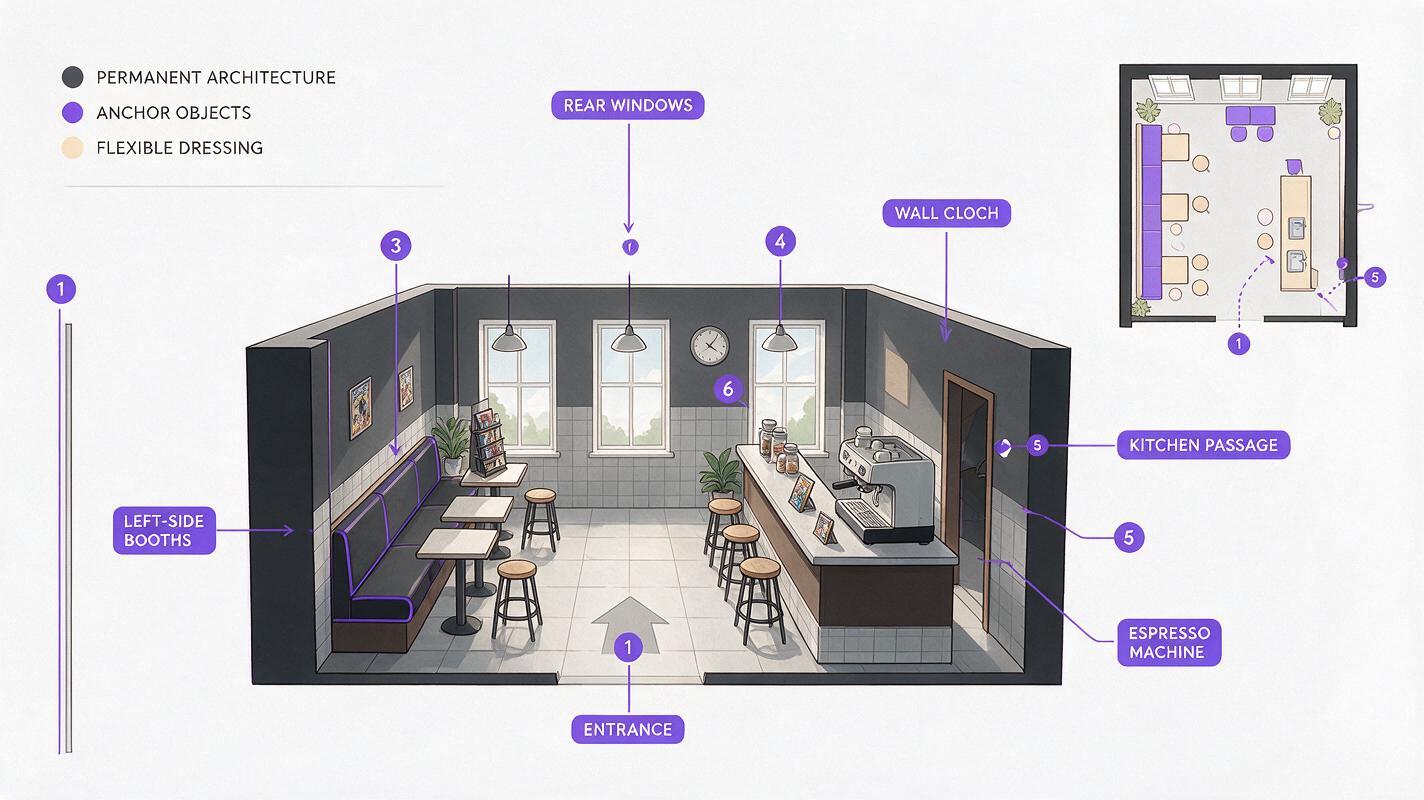
Start with one canonical image that shows the setting clearly. A wide three-quarter view is usually more useful than a perfectly frontal composition because it reveals depth, wall relationships, and major object positions. For this task, use ai image generator with Imagen to develop the environment before adding story-specific action.
Your location bible should record three kinds of information:
| Continuity layer | What belongs there | How strictly to preserve it |
|---|---|---|
| Architecture | Walls, doors, windows, stairs, columns, built-in counters | Exact position and orientation |
| Anchor objects | Desk, bed, sofa, display case, large machinery | Stable design and approximate placement |
| Flexible dressing | Cups, papers, cushions, loose books, small plants | May vary when the story permits |
Do not overload the master image with characters or dramatic effects. Neutral lighting and an empty room make architectural relationships easier to read. Save atmosphere, weather, damage, and crowds for later scene passes.
Create a clean environment reference for a recurring comic location: a narrow neighborhood café viewed from the entrance in a wide three-quarter composition. Permanent layout: glass entrance door on the front-left wall, service counter along the right wall, three tall windows on the rear wall, booth seating along the left wall, open passage to the kitchen behind the counter. Anchor objects: red espresso machine at the far end of the counter, round wall clock above the kitchen passage, dark green booth upholstery. Empty interior, neutral daytime illumination, readable spatial relationships, consistent stylized comic rendering, no characters, no text, no fisheye distortion.After generating the master view, annotate it outside the model. Label the entrance, counter, windows, booths, and kitchen passage. A simple sketch with arrows is enough. This becomes the source of truth when later panels disagree.
Divide the environment into camera zones
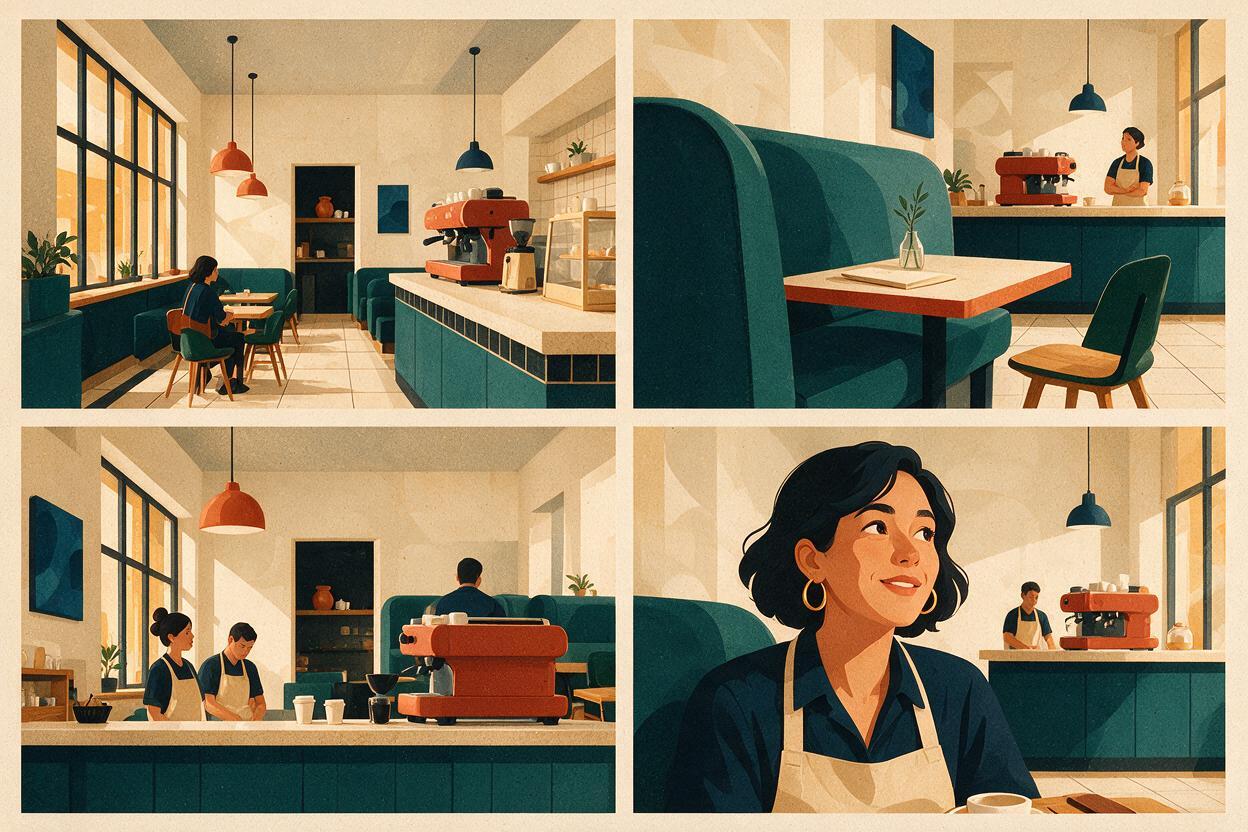
One reference view cannot describe every angle equally well. Instead of asking the model to improvise a reverse shot, divide the location into camera zones tied to the canonical floor plan.
- Zone A: entrance looking toward the rear windows.
- Zone B: booth area looking toward the counter.
- Zone C: behind the counter looking toward the entrance.
- Zone D: rear corner looking diagonally across the room.
Create one clean establishing view for each zone. Keep architecture unchanged while moving only the camera. These views form a compact background pack that can support wide shots, medium shots, close-ups, and over-the-shoulder panels.
When generating an ai storyboard, assign every shot to a zone before rendering it. This prevents a sequence from switching unconsciously between incompatible versions of the setting.
Useful test: If you cannot mark the camera position and viewing direction on a basic floor plan, the requested shot is probably underspecified.
Extract shots instead of rebuilding the room
The safest panel prompt describes a camera move inside an established location. It should not reintroduce the entire environment as though the model were designing it again.
Use the master view or closest camera-zone image as the visual reference when the interface supports reference input. Then identify the visible architectural anchors, the framing, and the character action.
Using the supplied café location reference, create a medium comic panel from camera Zone B, positioned beside the left-side booths and facing the service counter. Preserve the counter on the right wall, the kitchen passage behind it, the round clock above the passage, and the red espresso machine at the far end. A tired courier sits in the nearest booth, seen in three-quarter profile, holding an unopened envelope. Keep the doorway outside the crop rather than relocating it. Quiet late-afternoon mood, consistent line weight and color treatment, no new windows, no additional furniture, no text.The phrase “keep the doorway outside the crop rather than relocating it” addresses a common failure. A model may try to include every named object, even when the camera should not see it. Explicitly allowing off-screen features protects the floor plan.
Write prompts around visible evidence
For each panel, list only the anchors that should be visible from that camera position. Mentioning an invisible window can tempt the model to place it on the wrong wall. A useful shot prompt contains:
- the named location and camera zone;
- camera position and viewing direction;
- two to four visible architectural anchors;
- the intended crop and lens feeling;
- character placement relative to fixed objects;
- features that must remain off-screen;
- the temporary lighting or story condition.
This is more reliable than repeating a long room description in every panel because it distinguishes established facts from shot-specific evidence.
Separate lighting changes from location changes
A recurring room may appear at sunrise, at night, during a blackout, or after an explosion. Those variations should alter illumination and surface condition without changing the underlying layout.
Write the fixed setting first, followed by a clearly separated variation clause:
Preserve the established café architecture, furniture placement, camera Zone A composition, counter dimensions, three rear windows, booth spacing, and kitchen passage position.Scene variation only: nighttime during a thunderstorm, cool blue light through the rear windows, one warm pendant lamp above the counter, wet reflections near the entrance, loose receipts moving slightly in a draft.This division also makes revisions easier. If the night version is too dark, you can change the lighting clause without inviting a new floor plan.
Repair drift without regenerating the whole panel
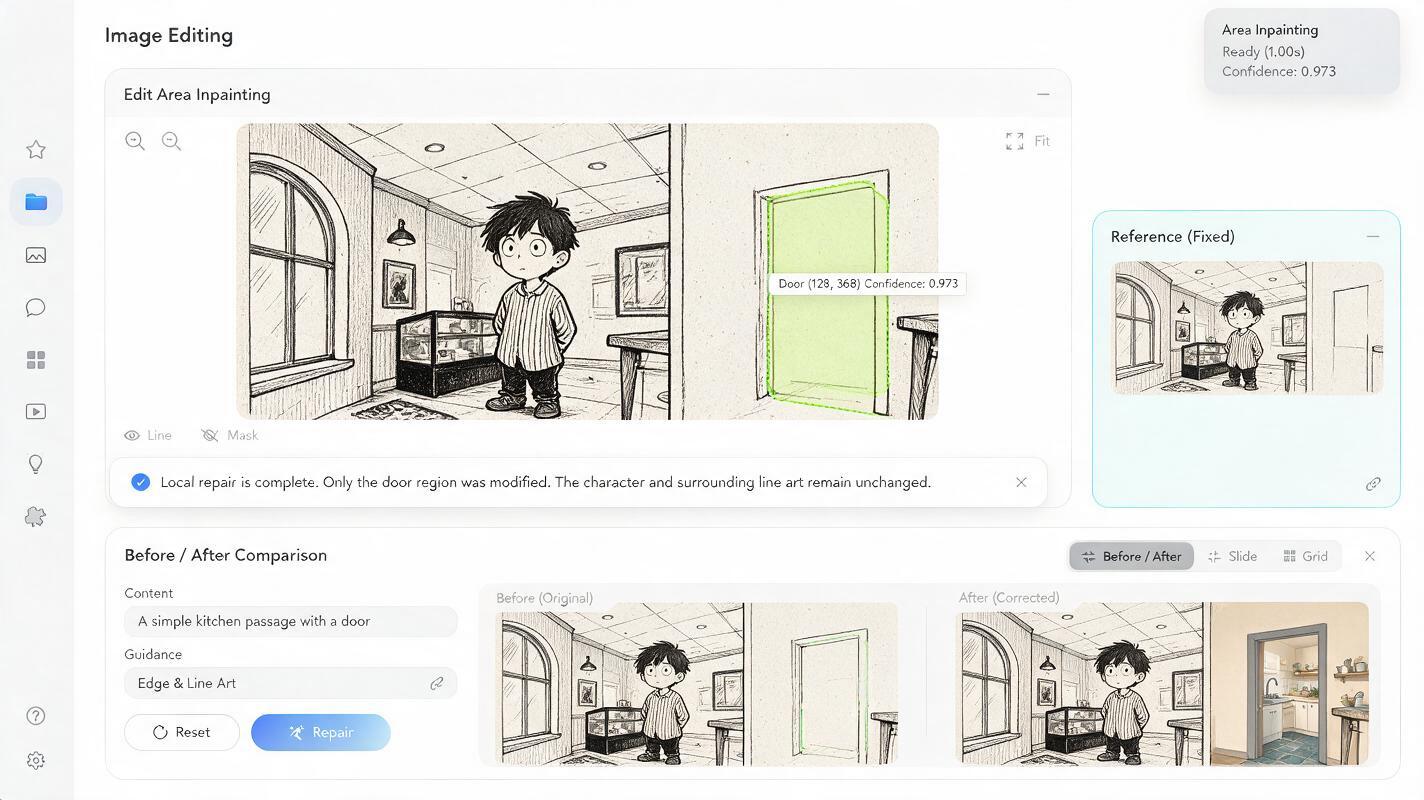
When one background element changes, avoid regenerating the complete panel. A full reroll may repair the window while changing the character, pose, composition, and every other object.
Mask or select the smallest incorrect region and describe both the repair and its relationship to nearby anchors:
Replace only the selected wall section with the established café kitchen passage. Match the reference: rectangular opening behind the right-side counter, round clock centered directly above it, no door, no additional shelves. Preserve the surrounding line art, counter edge, character silhouette, lighting, and camera angle unchanged.Use local repair for:
- a missing or extra window;
- a redesigned chair or counter;
- a misplaced wall decoration;
- a changed floor material;
- an incorrect doorway opening;
- small perspective errors around an anchor object.
Regenerate the full shot only when the camera position, room geometry, or character staging is fundamentally wrong.
Check continuity as a sequence, not as isolated art
A panel can look excellent alone and still fail in sequence. Place three to five consecutive panels side by side and inspect the background before judging polish.
| Question | What to inspect | Likely correction |
|---|---|---|
| Did the camera cross the room? | Entry and exit direction, eyelines, object sides | Return to the assigned camera zone |
| Did an anchor move? | Door, counter, window, bed, desk | Apply a localized reference repair |
| Was the setting mirrored? | Left-right order of permanent features | Regenerate from the correct zone reference |
| Did atmosphere alter structure? | New walls, missing openings, changed furniture | Separate variation language from fixed geometry |
| Is a hidden object forced into view? | Implausible doors or windows near crop edges | State that the object remains off-screen |
Readers do not need to see every landmark in every panel. They need enough stable evidence to understand where the camera and characters are located. Two reliable anchors often establish continuity better than a cluttered background filled with unstable details.
Final checklist
- Create one neutral canonical view before making story panels.
- Separate permanent architecture, anchor objects, and flexible dressing.
- Label important features on a simple floor plan.
- Generate a small set of camera-zone references.
- Prompt only the anchors visible from the requested angle.
- Keep off-screen objects off-screen instead of relocating them.
- Describe lighting and damage as variations, not redesigns.
- Repair small errors locally and review panels as a sequence.
Once your location bible and first camera zone are ready, try these models for free and build a reusable background pack before producing the full scene.
Keywords
consistent comic backgrounds, AI comic generator, Imagen prompts, webtoon backgrounds, location bible, comic panel continuity, visual storytelling AI