How to Keep the Same AI Video Character From Wide Shot to Close-Up
A distant establishing shot may show too little facial detail to anchor the close-up that follows. This tutorial uses a character sheet, a shared location reference, and an intermediate shot to preserve recognizable identity across the cut.
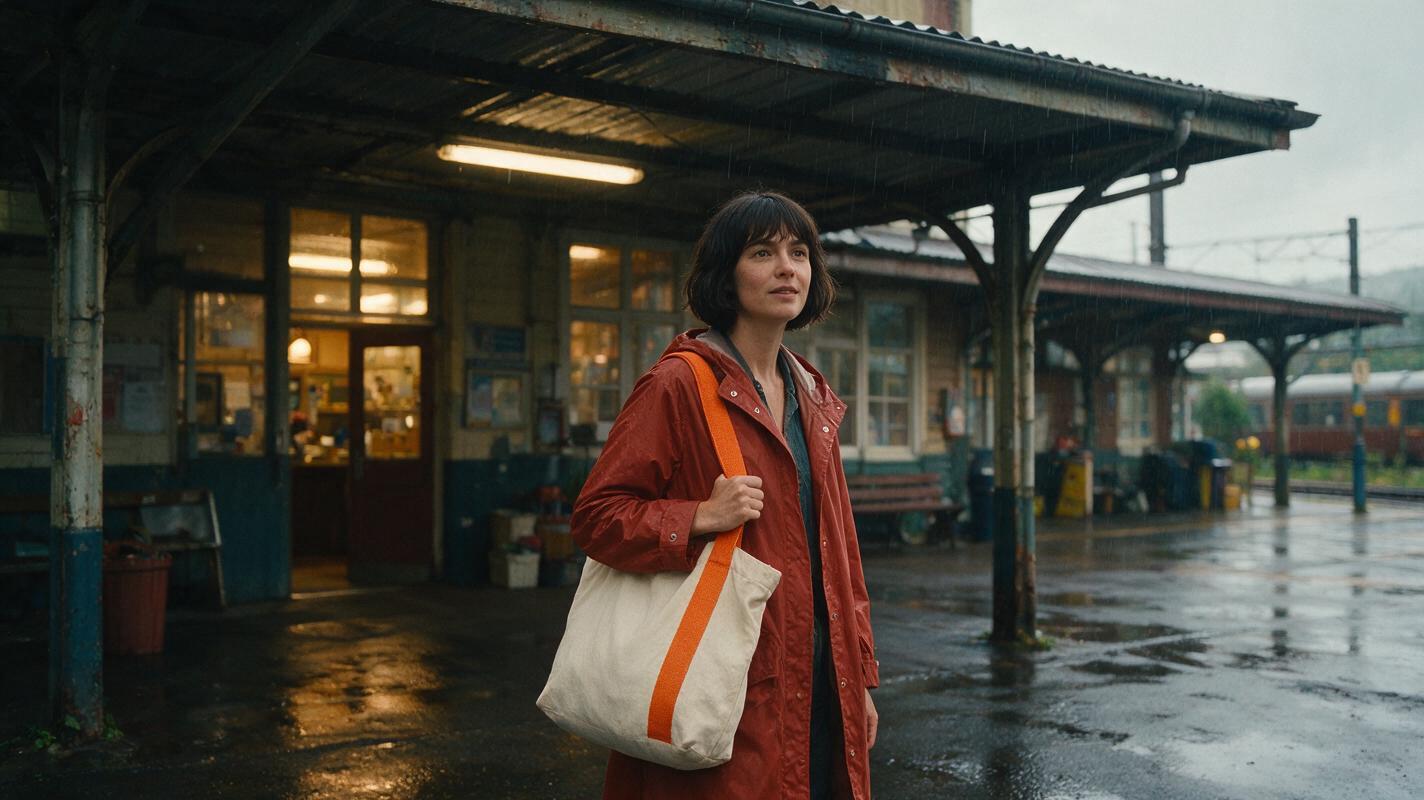
Table of contents
Keep the identity visible even when the face is not
A wide shot identifies a character through silhouette, clothing, position, and movement; a close-up identifies them through facial structure. To make the cut believable, carry both sets of cues through an intermediate shot instead of asking a video model to infer a detailed face from a distant figure.
This walkthrough follows one fictional character, Mara, from a rainy station entrance to a close-up beneath its awning. The shot order matters: approve her design first, establish where she stands, then move the camera closer while retaining her distinguishing details.
Cover visual prompt:
Photorealistic editorial film still, landscape 16:9: a woman with a short dark bob, a rust-red raincoat, and a cream canvas tote with a broad orange strap stands beneath the awning of a lived-in train station on a rainy afternoon; wet pavement and warm interior light provide believable depth, and a distant camera position leaves room for a later close-up; natural light, no text, logos, screens, or interface elements.Step 1 — Approve a character sheet before choosing a shot
Make one character reference that separates Mara’s identity from the station lighting. A neutral sheet gives you a stable source for facial proportions, hairstyle, posture, and wardrobe when the wide shot is too distant to show them all.
Use an ai image generator to draft the sheet, then inspect the three views. Do not proceed if the profile looks like a different person or the coat changes between panels.
Character sheet template: Name: Mara. Fixed face: oval face, straight brows, narrow nose bridge, small chin. Fixed hair: short dark bob, tucked behind the left ear. Fixed wardrobe: rust-red raincoat with a dark collar. Fixed prop: cream canvas tote with a broad orange strap. Variable details: pose, expression, camera distance, and scene lighting.
Visual asset — Mara’s three-view character sheet. Generation prompt:
Photorealistic three-panel character sheet, landscape 16:9, neutral light-gray seamless background: the same fictional adult woman appears in front, true side profile, and back views, each full-length and evenly lit; she has an oval face, straight brows, a narrow nose bridge, a small chin, and a short dark bob tucked behind her left ear, and wears the same rust-red raincoat with a dark collar while carrying a cream canvas tote with a broad orange strap; MANDATORY CAMERA: fixed eye-level camera, equal scale and spacing in all three panels; no text, labels, logos, screens, or interface elements.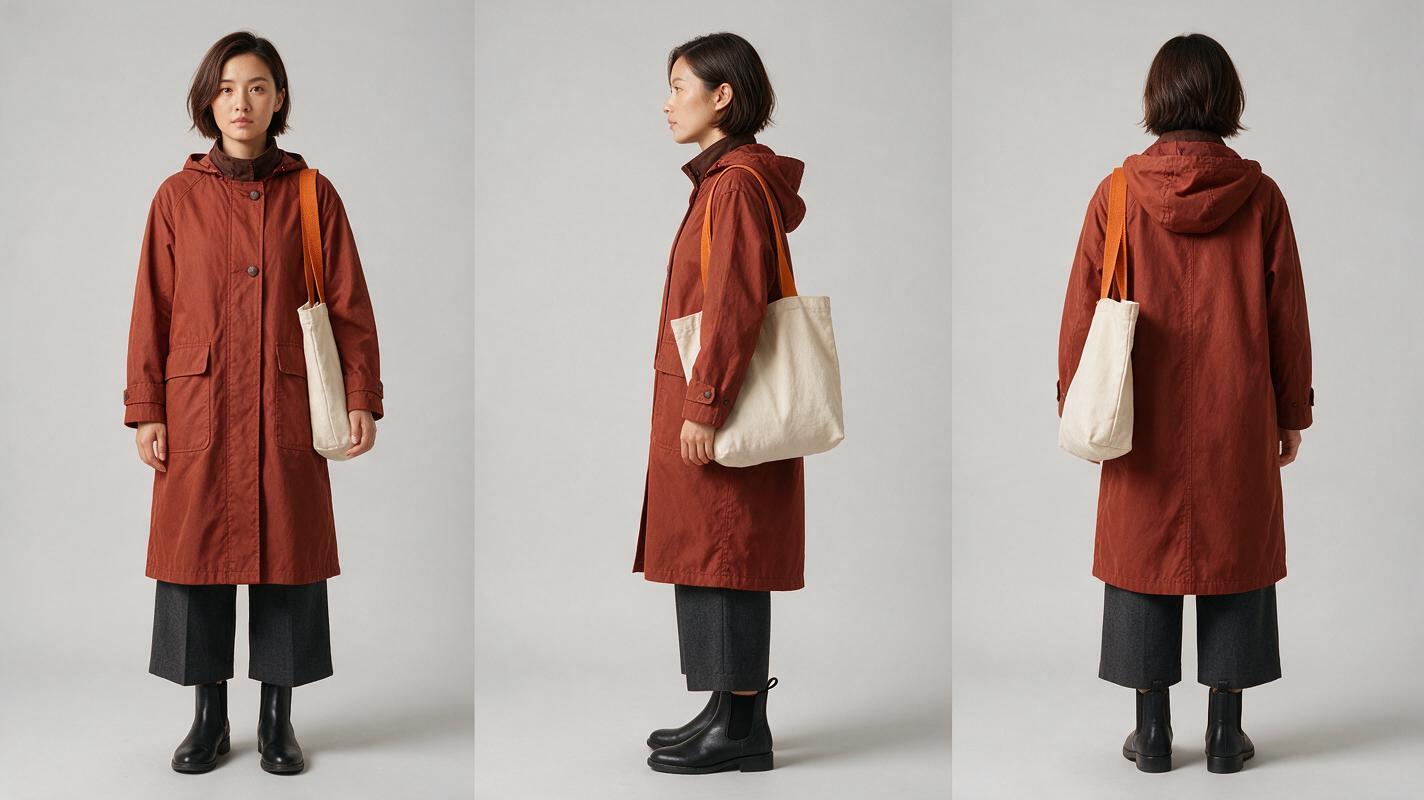
Step 2 — Establish a location the close-up can still belong to
Create the station as a storyboard reference before generating motion. Place Mara beneath the awning, with the entrance behind her and the street to her right. Those landmarks give the later shots a consistent screen direction. In the wide frame, her coat and tote matter more than fine facial detail; keep both readable.
Use the approved sheet as the identity reference if your chosen image tool accepts references. If it does not, repeat the fixed character description and compare the result against the sheet manually. Reject a wide frame that adds a second rust-red coat in the background: it makes Mara harder to identify.
Visual asset — wide station reference frame. Generation prompt:
Cinematic editorial-realism film still, landscape 16:9: at a lived-in train station entrance on a rainy afternoon, the same fictional woman from the supplied character sheet stands alone beneath an awning, wearing her rust-red raincoat and carrying her cream canvas tote with its broad orange strap; the entrance is behind her and the wet street is to her right, with believable commuters in muted clothing farther away; MANDATORY CAMERA: eye-level wide establishing shot from across the pavement, woman fully visible and distinct from the background; natural overcast light, no text, logos, screens, or interface elements.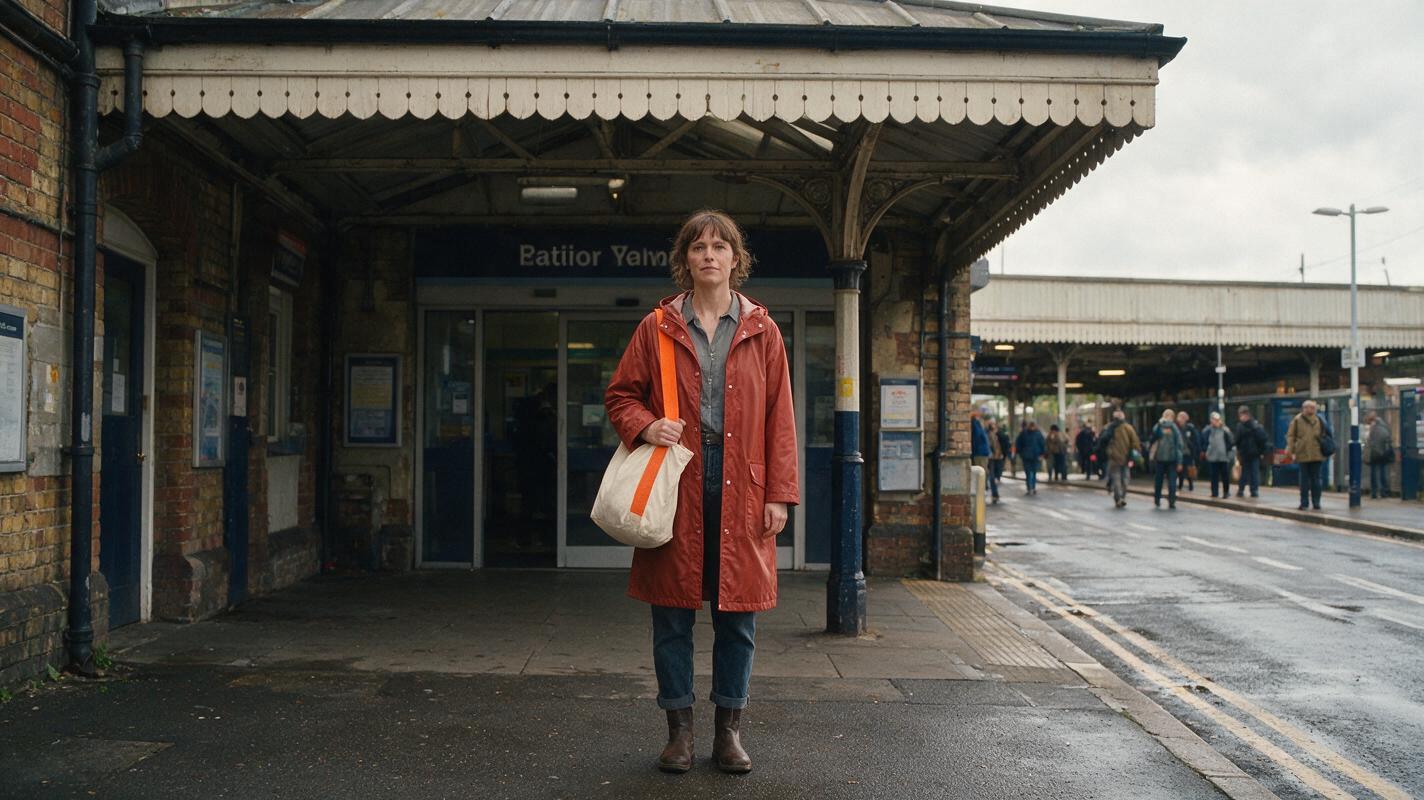
Step 3 — Build a medium shot that bridges silhouette and face
A direct jump from a tiny figure to a face can expose an identity mismatch too late. Make a waist-up reference at the same station position first. It should show Mara’s face, dark collar, and orange tote strap together. Keep the entrance behind her and the street on the same side of the frame.
Compare the medium image with the sheet before animating anything. Check the brow shape, hair part, coat collar, and tote strap. If the face has drifted, revise this still rather than hoping motion will correct it.
The medium shot is the identity handoff: it must connect details visible in the wide shot with details visible in the close-up.
When the three stills agree, use image to video for short, separately generated shots. Supply the approved frame as the starting image wherever the selected model supports that input. Keep movement restrained—a glance toward the street or a small turn under the awning—so the edit, not an ambitious camera move, carries the change in scale.
Step 4 — Match the close-up to the medium frame
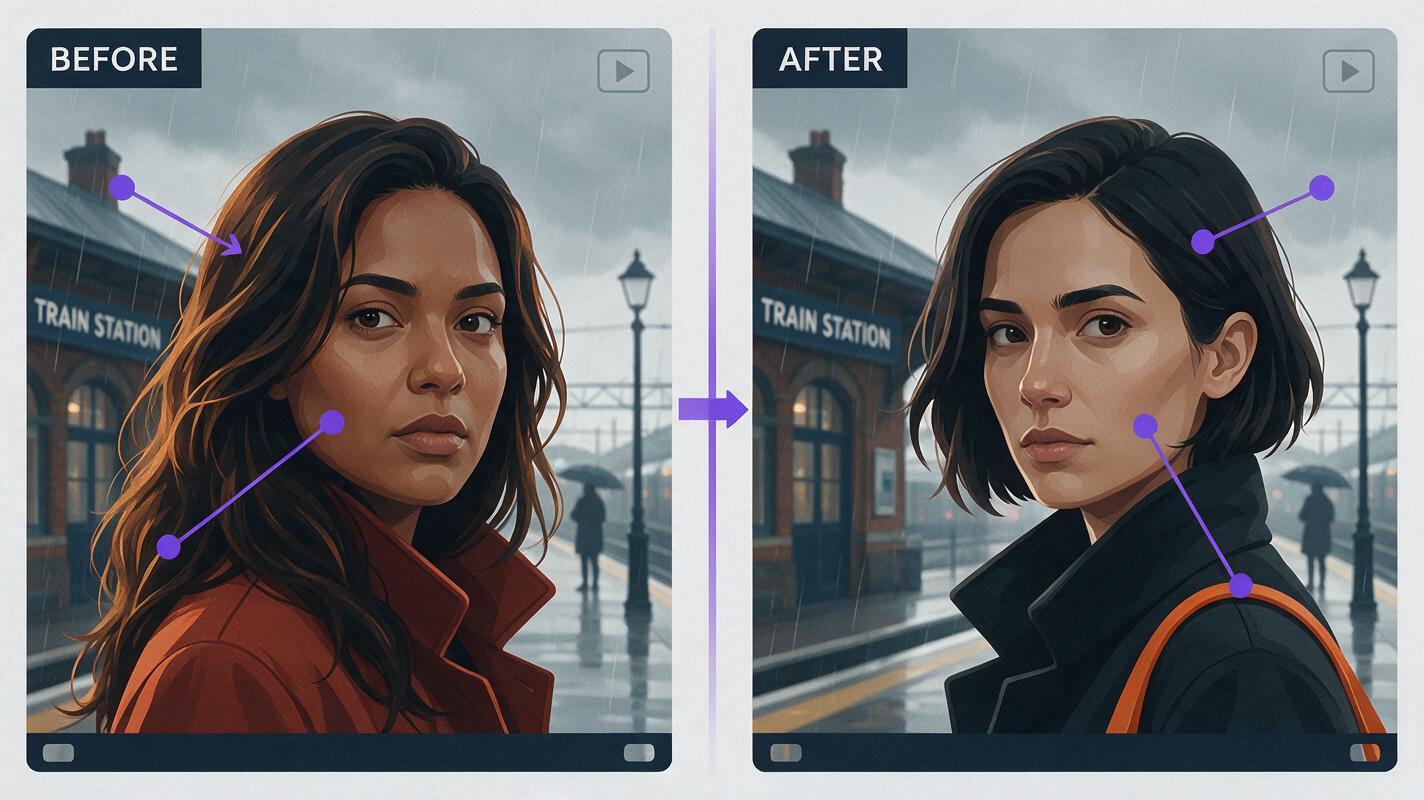
Generate the close-up from a reference in which Mara’s face is already clear. Keep her dark collar at the bottom of the frame and, if composition permits, a sliver of the orange strap. Match the direction of her gaze and the station’s overcast light. This makes the close-up feel like a closer camera position, not a newly cast character in a similar coat.
Visual asset — illustrative failure and corrected close-up. Generation prompt:
Text-free, side-by-side cinematic comparison diagram, landscape 16:9, made from two photorealistic close-up film frames at the same rainy train station: in the left frame, the woman wears the established rust-red coat but has an obviously different long hairstyle and broader facial structure; in the right frame, Mara matches the supplied three-view character sheet, with her short dark bob tucked behind the left ear, straight brows, narrow nose bridge, dark coat collar, and a small visible section of the orange tote strap; MANDATORY CAMERA: matching eye-level close-up composition and matching soft overcast light in both frames; simple dividing gutter only, no text, arrows, logos, screens, or interface elements.Use the comparison as a diagnostic illustration, not as evidence of a tool’s performance. In your own footage, inspect the last clear frame of the medium shot and the first clear frame of the close-up side by side. The face should match; the cut should preserve the direction of Mara’s attention.
Common failures and practical fixes
| What goes wrong | What to change |
|---|---|
| The wide shot reads as a different character. | Restore the approved coat silhouette and orange strap; move similarly dressed extras farther into the background. |
| The close-up changes Mara’s facial structure. | Return to the approved sheet and medium still; regenerate the close-up reference before generating video. |
| The location seems to flip at the cut. | Keep the station entrance and street on their established sides, or insert a deliberate transition shot. |
| Motion hides a mismatch at the edit. | Pause on the final clear medium frame and first clear close-up frame rather than judging only at playback speed. |
FAQ
Can the wide shot alone serve as the close-up reference?
Usually it provides too little facial detail to judge identity reliably. Keep the approved character sheet and create a medium reference with a clearly visible face.
Does every shot need the same reference image?
Use the character sheet as the identity standard, then create shot-specific references for framing and location. A full-length sheet and a close-up still solve different problems.
What if the coat is barely visible in the close-up?
Retain another approved cue, such as Mara’s hairstyle, collar, or tote strap, and check the face against the sheet. Do not distort a tight composition merely to display every prop.
Final checklist
- Approve one front, side, and back character sheet.
- Keep coat, prop, location landmarks, and screen direction consistent.
- Approve wide, medium, and close-up stills before generating motion.
- Compare clear frames on both sides of each cut.
- Fix drift in the reference still rather than masking it with an edit.
Ready to build your own wide-to-close sequence? try these models for free with the sheet and shot prompts above.
Keywords
consistent character across scenes, character consistency, consistent character video, character reference, multi-shot, storyboard reference