How to Keep the Same Face in AI Video After Removing a Mask
A mask-removal reveal can make an AI video character look like a different person because the model must invent facial features it could not see. This tutorial uses an unmasked character sheet, matched shot references and a reveal-point review to preserve identity through the transition.
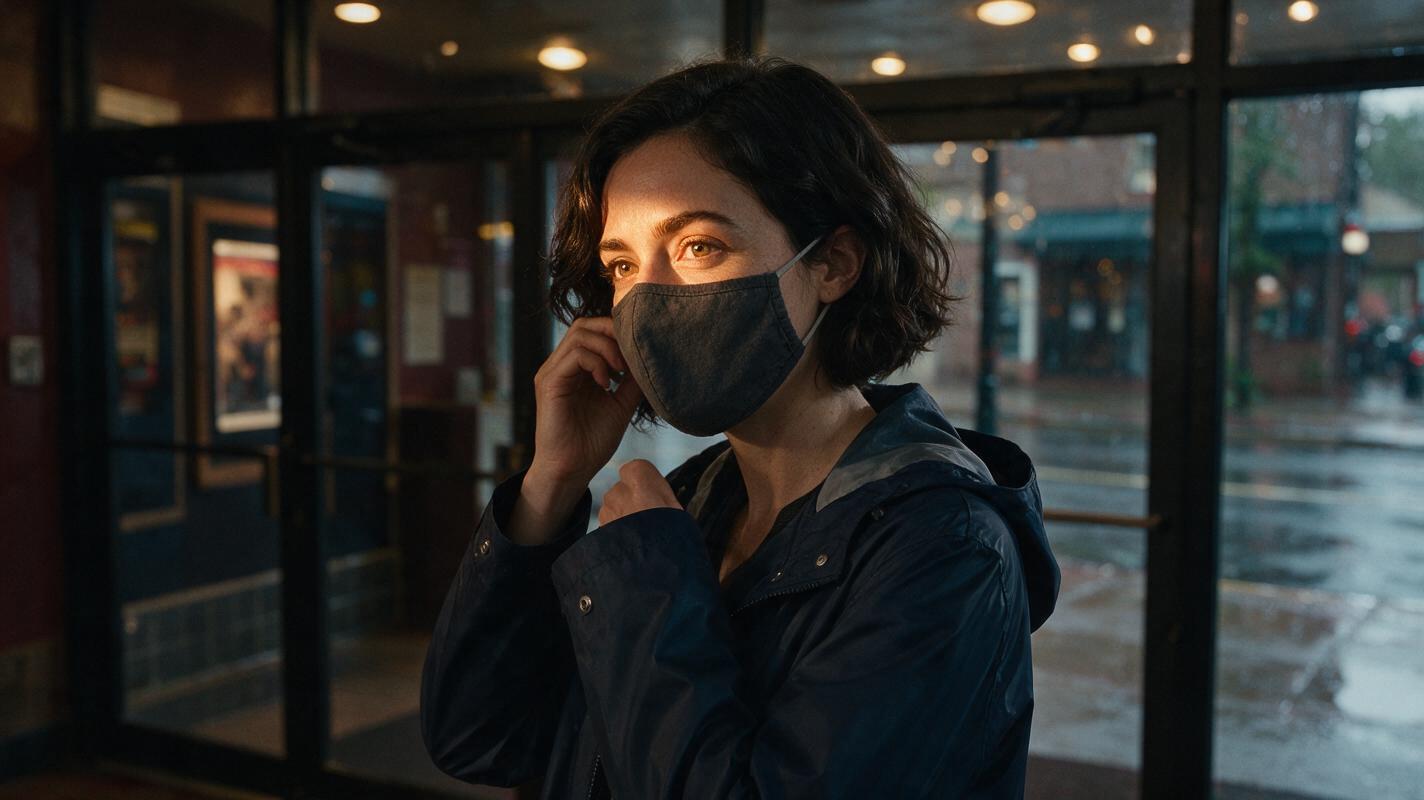
Table of contents
Start with the face the mask will reveal
A masked shot is a poor sole reference for an unmasked reveal: it hides the nose, mouth and jaw the next shot must show. Approve the complete face first, then use that identity reference for every shot—including the ones where the mask covers it.
The example below follows one fictional character entering a rain-darkened theater, pulling down a plain cloth mask and turning toward someone off camera. The sequence has three distinct frames to approve: mask on, mask moving and face clear. Treat the middle frame as the continuity bridge rather than asking a video model to invent the reveal in one long take.
Cover visual prompt — copy and recreate:
Photorealistic editorial film still, landscape 16:9. Inside a lived-in neighborhood theater lobby on a rainy evening, one woman in her late 30s with olive skin, a short dark wavy bob, a faint crescent scar through her left eyebrow, a small silver hoop in her right ear and a navy raincoat stands near a glass entrance. A plain charcoal cloth mask covers her nose and mouth; her hand rests near one ear loop without removing it. Warm practical lobby lights, wet pavement visible outside, believable film grain. MANDATORY CAMERA: medium three-quarter view at eye level, with both eyes and the left eyebrow clearly visible. One person only; no signage, readable text, logos or interface elements.Step 1 — Approve an unmasked character sheet
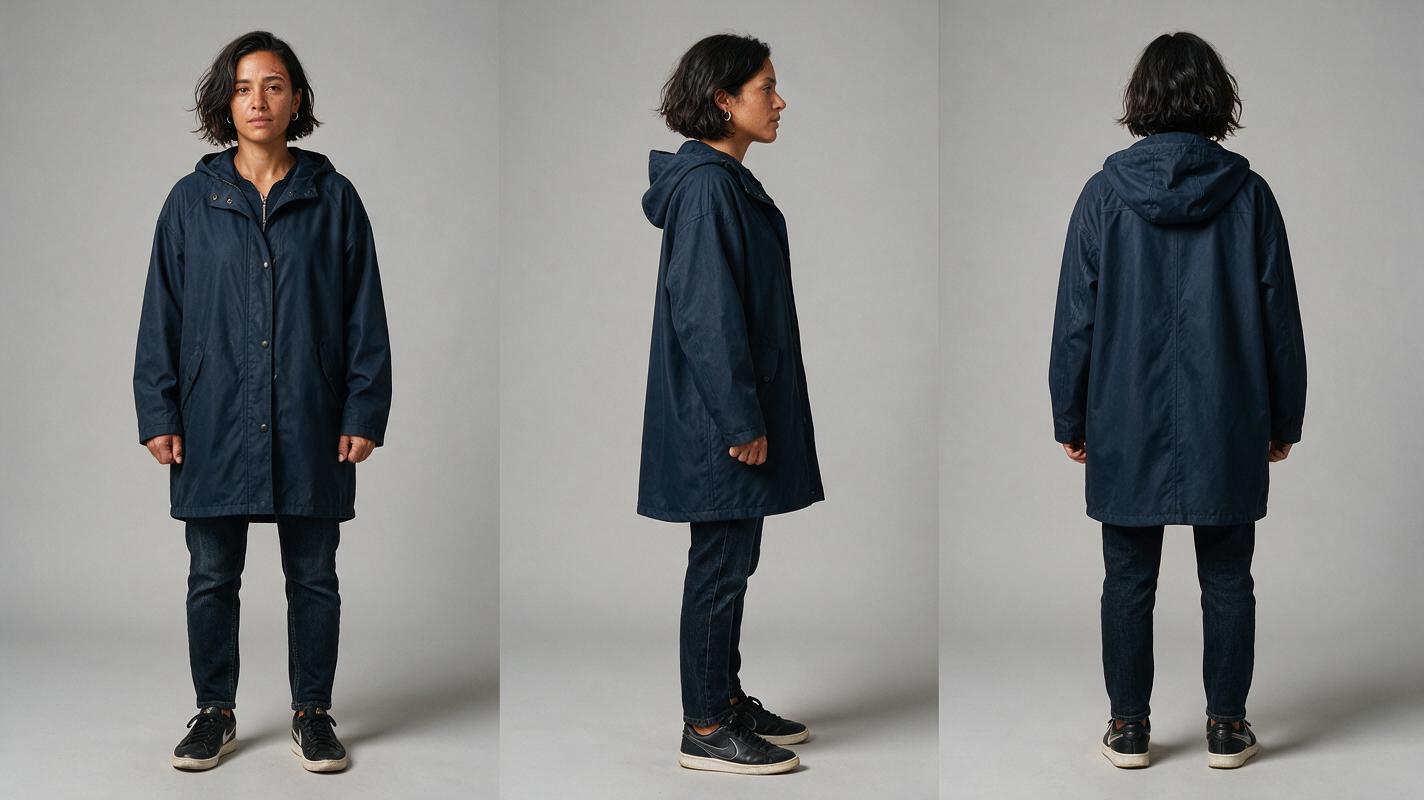
Make the unmasked face your source of truth. A three-view sheet gives you a frontal face for the reveal, a profile for the turning motion and a rear view for hair and coat continuity. Do not use a masked frame as the only character reference, even if its eyes look right.
Character sheet template: apparent age and complexion; face shape; eyebrow and eye details; nose, mouth and jaw; hair shape and part; distinguishing mark; ear and jewelry details; fixed outfit; features allowed to change between shots. For this scene, rain may affect the coat and hair, but it must not move the scar, alter the jaw or switch the earring to the other ear.
Character-sheet visual prompt — copy and recreate:
Photorealistic three-panel character reference sheet of ONE fictional woman in her late 30s, olive complexion, oval face, short dark wavy bob, faint crescent scar through her left eyebrow, small silver hoop in her right ear, navy raincoat over a cream shirt. She is unmasked in every panel. Left panel: straight-on front view with a neutral expression. Center panel: true right-side profile showing the right-ear hoop and exact nose and jaw silhouette. Right panel: straight back view showing the haircut and coat. MANDATORY LAYOUT: three equal, full-height panels in a landscape 16:9 frame, matching body scale and lighting. Neutral light-gray seamless background, soft even studio light, realistic skin texture. One character only; no labels, text, logos, props or UI.Reject a sheet if the panels disagree about facial proportions or the scar changes position. The sheet should clarify identity before it becomes a reference for moving footage.
Step 2 — Build references for both sides of the reveal
Use the approved sheet to make two scene stills in the same theater lobby. In the first, the mask sits correctly over the nose and mouth. In the second, it is lowered below the chin or held in one hand, with the approved face fully visible. Keep camera height, approximate distance, coat, hair, light direction and screen position aligned. This is where a ai image generator can help establish the two endpoints before you animate either one.
A short storyboard reference can record what changes and what does not:
| Frame | Visible identity evidence | Mask state | Continuity check |
|---|---|---|---|
| Before | Eyes, left-brow scar, hairline, right-ear hoop | Covers nose and mouth | Same camera side and coat |
| Bridge | Eyes, scar, nose emerging | One loop released; mask moving down | Hand and mask follow a plausible path |
| After | Full approved face | Below chin or in hand | No facial redesign at the reveal |
Matched-still prompt — copy and adapt for each endpoint:
Use the attached approved unmasked character sheet as the identity reference. Show the SAME woman in the rainy neighborhood theater lobby, navy raincoat unchanged, warm light falling from camera left. Preserve her oval face, short dark wavy bob, left-eyebrow crescent scar and right-ear silver hoop. MANDATORY CAMERA: eye-level medium three-quarter view from her right, 16:9 landscape, fixed camera position and focal-length impression. MASK STATE: [plain charcoal cloth mask fitted over nose and mouth / the same mask lowered below her chin, full face unobstructed]. One person only. No face substitution, duplicated mask, extra hands, readable signage, logos or UI.Approve the unmasked still against the character sheet, not against the masked still. Matching only the visible eyes cannot establish whether the concealed features are correct.
Step 3 — Animate the handoff, not a new identity
For a multi-shot sequence, generate the masked approach and the clear-face reaction as separate short shots. Give the removal action its own brief bridge shot, using the approved stills as its beginning and ending targets where your chosen tool supports that control. If it does not, make the action simpler: cut from her hand reaching for an ear loop to a matched angle with the mask already lowered. An honest cut is preferable to a prolonged morphing face.
When using reference image to video, check which reference controls your selected model actually accepts. Runway, for example, describes reference-driven character consistency for Gen-4; that does not mean every video tool accepts the same inputs or guarantees the same result. Keep the approved face description in every shot prompt even when the mask is on.
Bridge-shot prompt — copy and adapt:
Animate the approved masked theater-lobby still as a short, restrained action. The SAME woman releases the ear loop nearest the camera with her right hand and lowers the plain charcoal cloth mask until her nose, mouth and jaw become visible. Her face must match the attached approved unmasked character sheet: same oval structure, nose profile, mouth, jaw, left-eyebrow crescent scar, short dark wavy bob and right-ear silver hoop. MANDATORY CAMERA: locked eye-level medium three-quarter view from her right; no zoom, orbit or angle change. Warm light remains camera-left; navy raincoat stays unchanged. One continuous hand movement, one mask, one person. Do not duplicate fingers, merge the mask into skin or replace the face during the reveal.Generate the clear-face reaction from its approved unmasked still rather than from an arbitrary late frame of the bridge shot. That prevents a small error introduced during removal from becoming the reference for the next scene.
Step 4 — Inspect the frames where identity is easiest to lose
Review the final masked frame, the first frame showing the nose, the first frame showing the mouth and the opening frame of the clear-face shot. Scrub through the bridge as well: a convincing endpoint does not excuse a face that changes halfway through the movement.
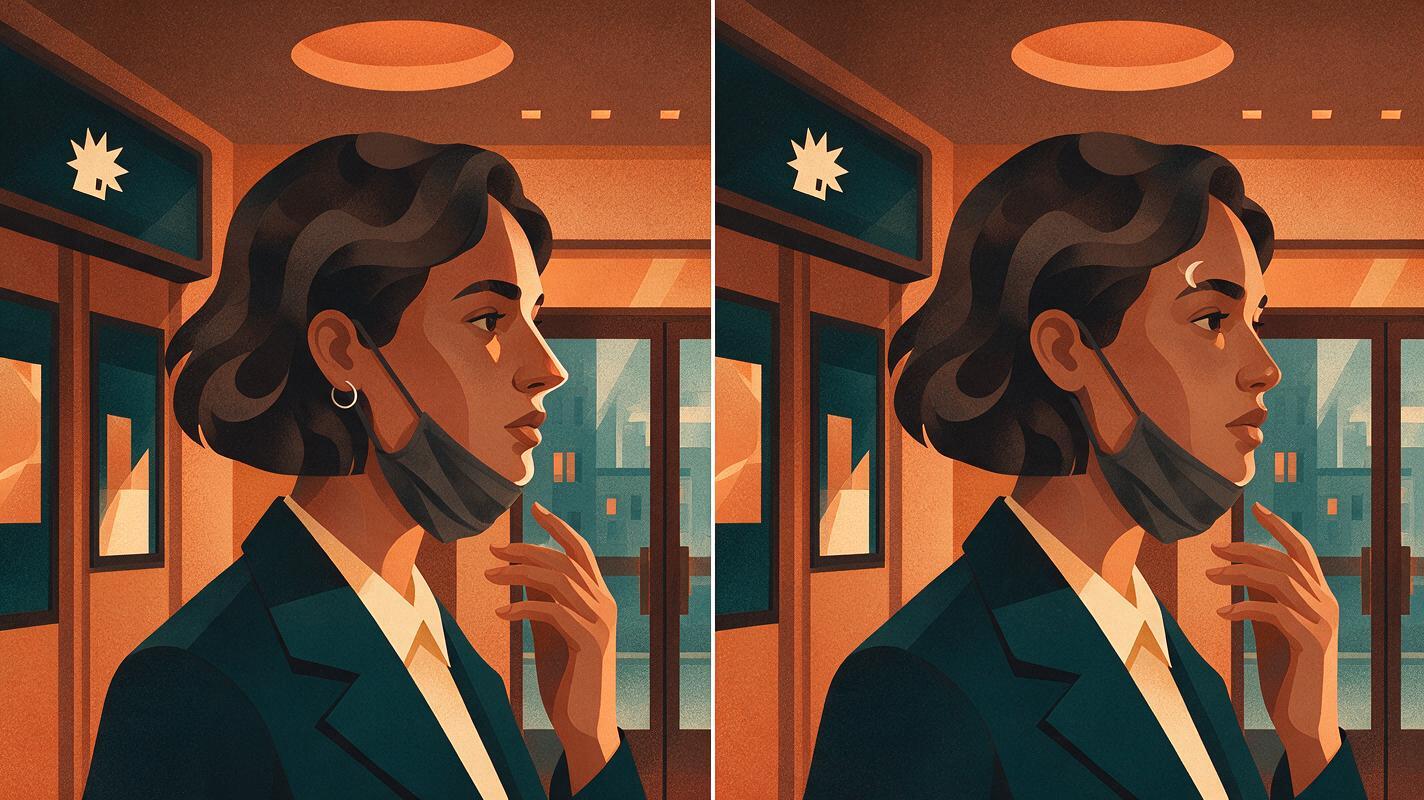
Failure-and-fix visual prompt — copy and recreate:
Neutral illustrative comparison rendered as photorealistic editorial film frames, landscape 16:9, two equal side-by-side panels without dividing labels or text. Both panels show the SAME fictional woman from the approved character sheet inside the warm, rainy theater lobby just after lowering a plain charcoal cloth mask: olive skin, short dark wavy bob, faint crescent scar through her left eyebrow, small silver hoop in her right ear, navy raincoat. Left panel illustrates a continuity error: her revealed jaw and nose visibly differ from the intended character while eyes and clothing remain similar. Right panel illustrates the correction: the approved oval face, nose, mouth and jaw remain coherent with the same eyes, scar and hair. MANDATORY CAMERA: identical eye-level medium three-quarter view from her right in both panels, matched pose, light and framing. One person per panel; no logos, captions, readable text or UI.| What you see | Likely cause | Practical fix |
|---|---|---|
| New nose or jaw appears as the mask drops | The masked image supplied too little facial information | Reintroduce the approved unmasked sheet and shorten the removal shot |
| Mask melts into the cheek or duplicates | Too much hand, fabric and face motion in one generation | Use a simpler downward movement or cut around the action |
| Scar or earring changes sides | Camera side or orientation drifted | Lock the camera side and compare against the appropriate sheet view |
| Reveal matches, but the reaction does not | The next shot inherited a flawed generated frame | Restart it from the approved clear-face still |
Keep the sheet, endpoint stills and selected boundary frames together so revisions start from approved references. If your workflow offers different models in one place, compare their handling of this exact reveal rather than assuming a model that makes an attractive single shot will preserve the face across the cut. You can try these models for free with the same references and prompts.
FAQ
Can I start with a masked portrait if that is the only image I have?
Yes, but first create and approve an unmasked identity reference. You will have to make deliberate choices about the hidden features; the masked portrait cannot establish them on its own.
Is one continuous mask-removal shot better than a cut?
Not necessarily. Use a continuous shot if the face and mask remain stable throughout. Otherwise, separate the approach, a brief removal action and the clear-face reaction, then cut at a visually plausible moment.
What should remain fixed if the character turns during the reveal?
Keep facial proportions, the scar’s anatomical position, hair shape and jewelry assignment fixed. Use the side view from the sheet to judge the profile rather than comparing a turned face only with the frontal reference.
Sources
- Runway, “Introducing Runway Gen-4” — official description of reference-driven character consistency.
Final checklist
- Approve one unmasked front, side and back character sheet.
- Create matched masked and unmasked scene stills from that identity.
- Keep the removal action short and physically plausible.
- Check the first visible nose and mouth frames, then the next shot’s opening frame.
- Regenerate from approved references when the face changes; do not carry a flawed frame forward.
Keywords
keep the same face across video, character consistency, character reference, consistent character across scenes, storyboard reference, multi-shot