How to Keep a Hero Prop Consistent with Image to Video
Keep a hero prop consistent by creating one clean master reference, rebuilding each shot as a controlled anchor frame, and animating only one simple action per clip. This image-to-video workflow protects the prop’s silhouette, materials, markings, and scale while reducing hand deformation and unwanted redesigns.
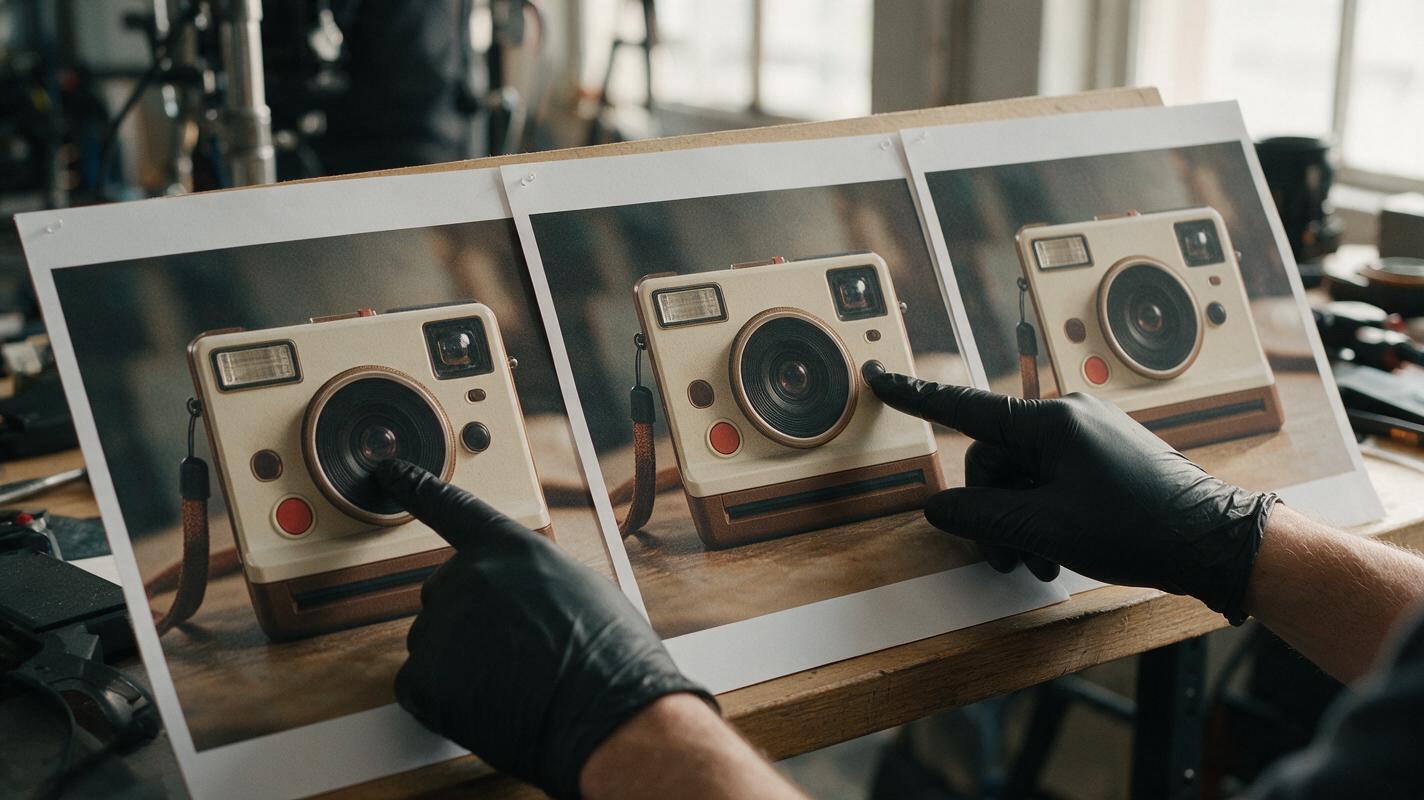
Table of contents
TL;DR
To keep a recurring object consistent in AI video, treat it like a cast member: create a master reference, define its non-negotiable features, build a separate anchor frame for every shot, and animate each frame with tightly bounded motion. The fastest route is an image to video workflow using the same prop reference across Seedance or Kling tests, followed by a continuity audit before editing.
A hero prop can be a watch, camera, package, key, musical instrument, fantasy artifact, or any object the audience must recognize from shot to shot. This guide focuses on preserving that object while changing camera angles, environments, and character actions.
Why Hero Props Drift Between AI Video Shots
Video models do not necessarily understand that an object in one generation must remain mechanically identical in the next. They reconstruct plausible pixels for every shot. If the prompt says only “a woman holding a vintage camera,” the model may produce a different lens, body shape, strap, button layout, or brand-like marking each time.
Prop drift becomes especially visible when the object has:
- A distinctive silhouette: a curved bottle, asymmetrical weapon, unusual handbag, or recognizable instrument.
- Small structural details: switches, buckles, watch crowns, lens rings, vents, or handles.
- Readable graphics: labels, numbers, packaging text, symbols, or display screens.
- Human contact: fingers wrapping around an edge, opening a lid, pressing a control, or passing the object between people.
- Reflective materials: polished metal, glass, glossy plastic, or gemstones that change appearance with the light.
The common symptoms are not limited to obvious redesigns. A prop may slowly grow larger, switch hands without motivation, gain an extra component, bend during camera movement, or merge with the performer’s fingers. These errors are difficult to repair after several clips have already been generated, so consistency must begin at the still-image stage.
Core principle: do not ask a video model to design the prop, stage the shot, animate the actor, move the camera, and preserve tiny details at the same time. Lock the design first, then animate a controlled image.
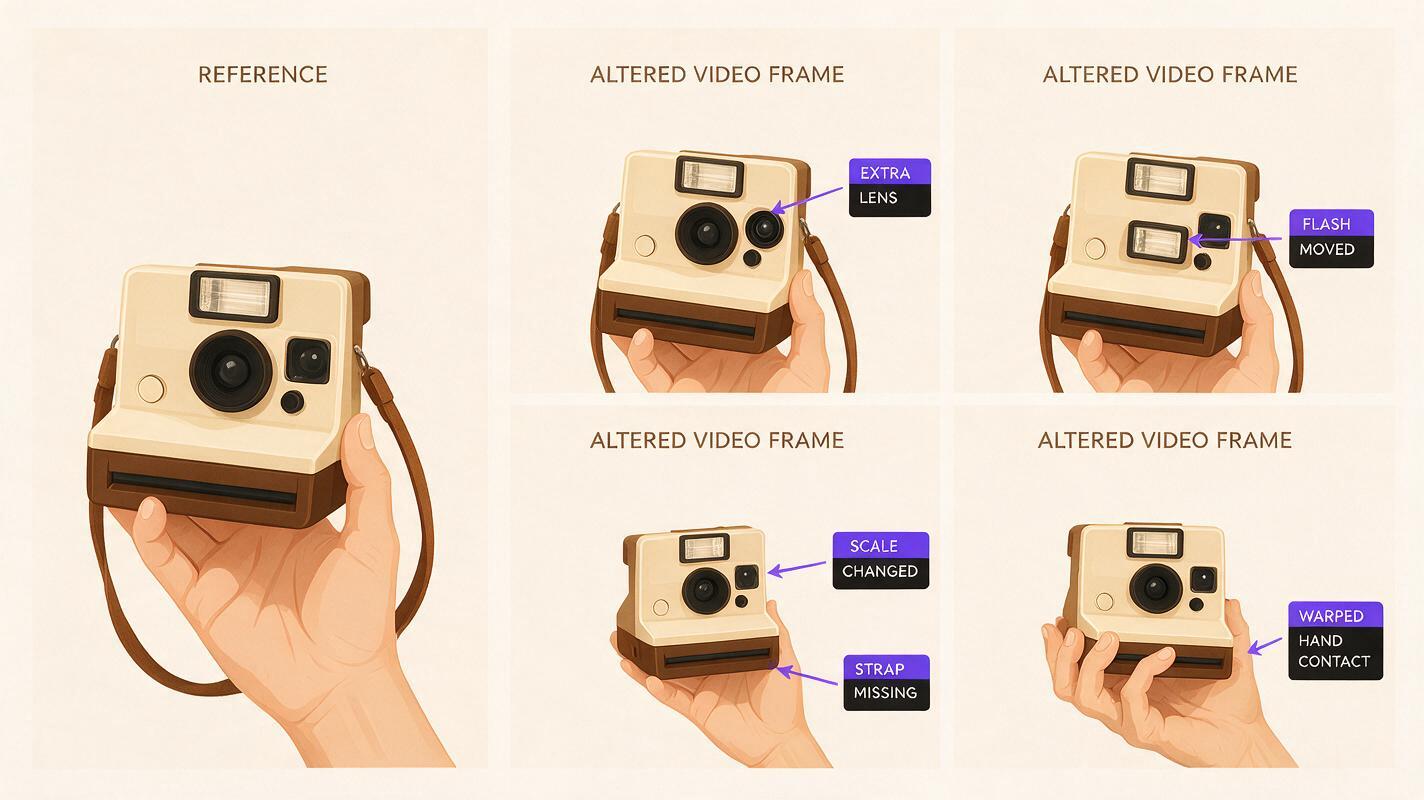
Three Ways to Keep an AI Video Prop Consistent
- Reference-first animation: create a definitive prop image and use it to build shot-specific anchor frames before generating motion. This is the most reliable approach for hero shots.
- Continuity-friendly coverage: use wide shots for broad movement and close-ups for important object details. Cut before fingers or surfaces begin to deform.
- Motion-led replacement: when a precise hand action matters more than the original generation, capture a clean physical performance and use motion transfer with a compatible character and prop design.
The first method should carry most of the sequence. The other two are practical fallbacks for interactions that remain unstable after several controlled attempts.
How MagicBoat Handles Multi-Model Prop Workflows
MagicBoat brings image and video generation models into one account, making it practical to test the same visual plan without rebuilding the project around a single model. Seedream, Flux, or GPT Image can be used to develop clean reference images and shot frames, while Seedance and Kling can be compared for motion behavior. A text to video pass can still help with noncritical establishing shots, but image-led generation is preferable whenever the prop must remain recognizable.
| Task | Useful model family | What to preserve |
|---|---|---|
| Master prop design | Seedream, Flux, or GPT Image | Silhouette, proportions, materials, fixed details |
| Shot-specific anchor frame | Image generation | Prop identity plus camera angle and hand placement |
| Controlled animation | Seedance or Kling | Object rigidity, scale, contact, and lighting |
| Complex physical action | Motion transfer | Timing, body mechanics, and hand trajectory |
| Residual identity repair | Face swap | The authorized performer’s face, not the prop |
Model availability can change, so the useful strategy is not to assume that one model always wins. Give competing models the same anchor frame, motion prompt, aspect ratio, and intended duration, then compare the actual continuity errors.
Step 1 — Write a Prop Passport
Before generating anything, describe the object as if a practical-effects team had to rebuild it. Separate fixed features from details that may legitimately change with angle or lighting.
PROP PASSPORT
Object: compact retro instant camera
Silhouette: rectangular body with rounded corners
Proportions: body width approximately 1.4 times its height
Fixed colors: matte cream body, dark brown front panel
Fixed details: one circular lens, narrow flash above-left of lens,
small red shutter button on top-right, plain brown wrist strap
Materials: lightly textured plastic, brushed metal lens ring
Scale: fits in two adult hands; never oversized
Forbidden changes: no second lens, no folding bellows, no added text,
no logo, no screen, no extra buttons
Prioritize five to seven features that viewers can actually identify. A description containing twenty tiny details may encourage visual clutter without improving continuity.
Expected result: a compact specification that can be copied into every image prompt and used as an objective review checklist.
Step 2 — Generate a Clean Master Prop Reference
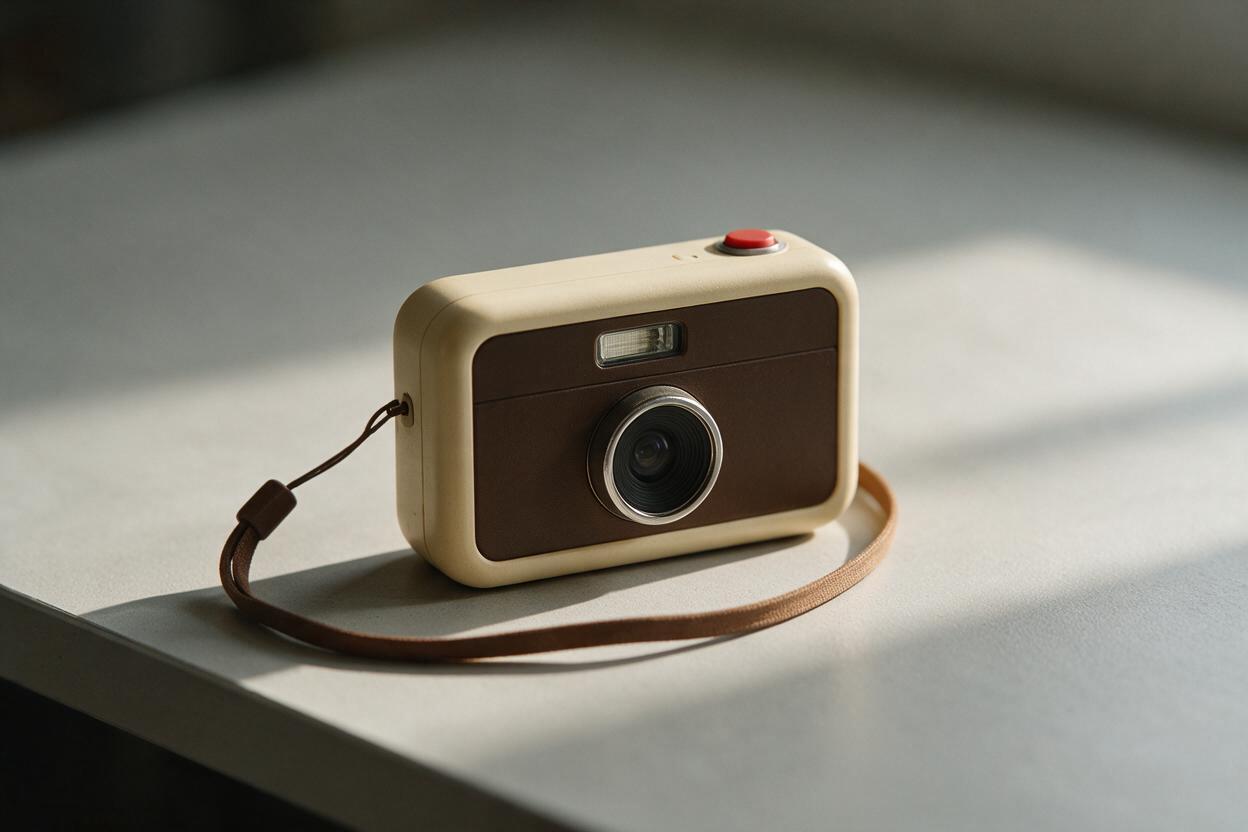
Create the object alone before placing it in a scene. A three-quarter view on a plain surface usually communicates more structure than a perfectly frontal image. Use soft directional light so the outline, controls, and material boundaries remain visible.
Product reference photograph of a compact retro instant camera,
rectangular body with rounded corners, matte cream plastic body,
dark brown front panel, one circular lens with a brushed metal ring,
narrow flash above and left of the lens, small red shutter button on
the top-right, plain brown wrist strap, no logo and no printed text.
Three-quarter front view on a neutral light-gray tabletop, soft window
light, realistic scale, crisp structural details, no hands, no other objects.
Reject attractive generations that violate the passport. A beautiful object with two shutter buttons is not a usable reference. Select the version with the clearest silhouette and least ambiguous construction.
If the reverse side or top controls will appear later, create a small reference sheet showing those views. Keep the background plain and the lighting consistent so changes in reflections are not mistaken for design changes.
Expected result: one canonical image that establishes the prop’s shape, material, color, and scale before motion is introduced.
Step 3 — Build a Separate Anchor Frame for Every Shot
Do not rely on the video model to reinterpret the isolated product reference inside every new composition. Instead, generate the desired scene as a still image first, using the same prop passport and reference appearance.
For a simple three-shot sequence, build:
- Shot A: a medium shot of the performer discovering the camera on a desk.
- Shot B: a close-up of both hands lifting it without covering the lens or shutter button.
- Shot C: an over-the-shoulder view as the performer aims it toward a window.
Cinematic medium shot in a quiet daylight studio. An adult woman in a
charcoal cardigan stands beside a wooden desk and notices the same compact
retro instant camera: matte cream rounded rectangular body, dark brown front
panel, single circular lens, narrow flash above-left, red top-right shutter
button, plain brown strap. The camera rests flat on the desk at realistic
hand-sized scale. Natural window light, restrained colors, 50 mm perspective.
No added labels, no extra controls, no duplicate camera.
For close-ups, specify which fingers remain visible and which parts of the object must not be covered. Avoid asking for a firm grip if the shot only needs the hand to approach the object. Contact can be divided across multiple clips.
Expected result: a set of still frames in which the prop already looks consistent from the camera angles required by the edit.
Step 4 — Give Each Clip One Physical Action
Animate the anchor frames with one clear verb per clip. “Reaches, grabs, lifts, turns, looks through the finder, presses the button, and smiles” is a chain of difficult interactions. It gives the model many opportunities to alter the object or lose finger contact.
Divide the sequence into bounded actions:
- The hand approaches the camera.
- The fingers settle around the side edges.
- The camera lifts vertically from the desk.
- The performer raises it toward eye level.
- One index finger presses the shutter button.
A Seedance or Kling motion prompt can remain concise:
The woman slowly lifts the camera straight upward with both hands.
The camera remains rigid and unchanged: same cream body, brown panel,
single lens, flash position, red shutter button, and brown strap.
Her fingers maintain natural contact along the side edges without crossing
the lens. Subtle breathing and fabric movement. Locked camera, stable framing.
No transformation, bending, resizing, extra controls, or finger-object merging.
Describe visible motion rather than emotion alone. “She feels nostalgic” does not define what the hands, prop, or camera should do. If emotion matters, translate it into a small head tilt, a pause, or a relaxed change in posture.
Expected result: short clips with a stable prop and a clearly inspectable beginning, middle, and end action.
Step 5 — Choreograph Hands Around Stable Surfaces
Hands are most reliable when they contact broad, visible surfaces. Thin handles, trigger guards, jewelry chains, folding mechanisms, and narrow straps create more opportunities for fingers to merge or multiply.
Use these staging rules:
- Keep the grip visible instead of hiding it behind the object.
- Ask fingers to rest along edges rather than thread through small openings.
- Do not combine rotation and a grip change in the same clip.
- Let the object come to rest before a button press or lid opening.
- Use a cutaway when the exact mechanical action is not narratively important.
For a handoff between two people, generate three shots rather than one continuous exchange: the first person extends the prop, a close insert shows the receiving hand taking its weight, and a reverse shot begins after the transfer. This editorial construction avoids the unstable moment when four hands overlap one small object.
If a clip is excellent until the final half-second, keep the usable section. Generating longer motion is not automatically better than cutting on a clean contact frame.
Expected result: believable object interaction assembled from stable physical beats rather than one overloaded generation.
Step 6 — Compare Seedance and Kling with Identical Inputs
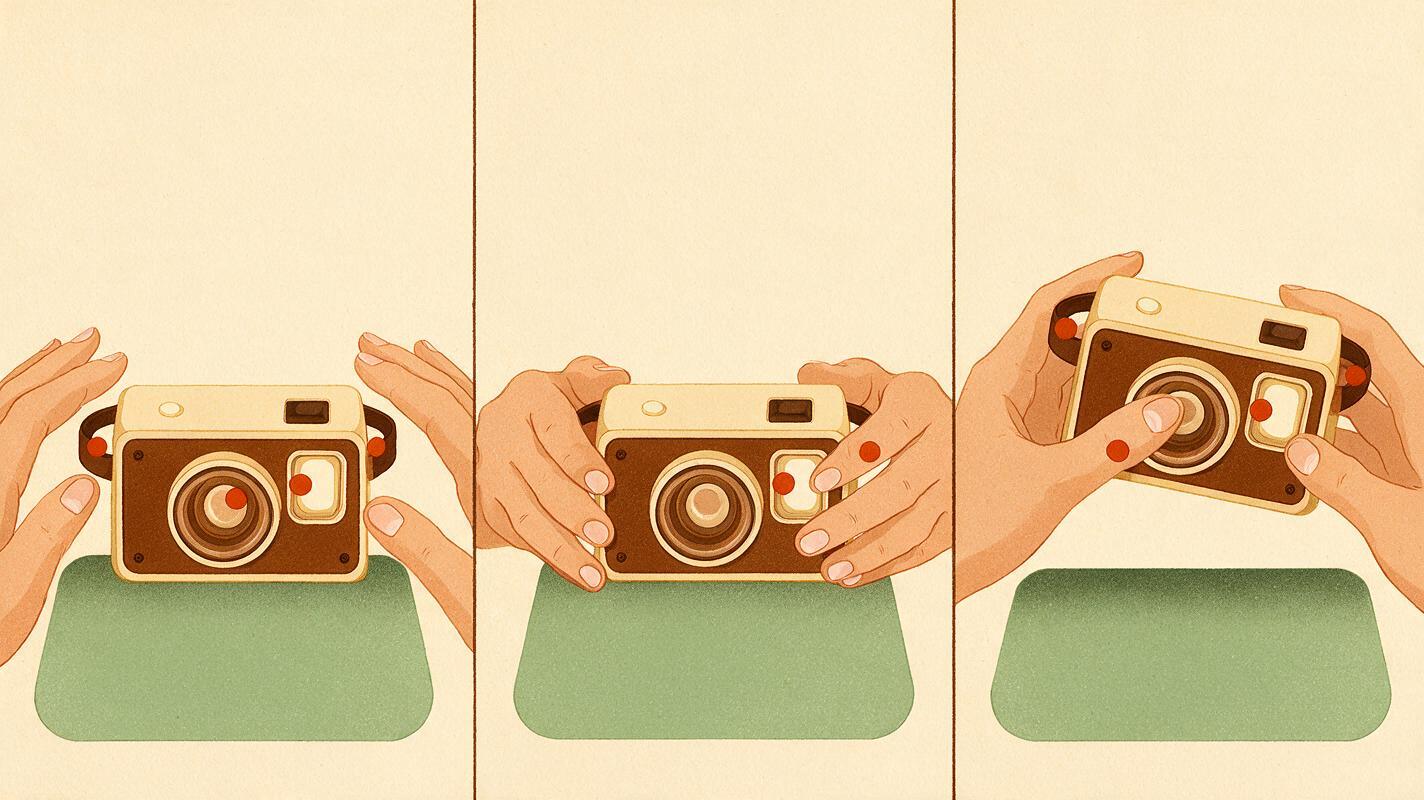
Use the same anchor frame and motion description for a fair comparison. Do not change the composition, prompt, and model simultaneously, because you will not know which change fixed or caused the error.
| Review point | Pass condition | Typical failure |
|---|---|---|
| Silhouette | Outer shape stays rigid | Corners swell or narrow during motion |
| Feature count | One lens, one flash, one shutter button | Controls appear or disappear |
| Scale | Object remains hand-sized | Prop grows as it approaches the face |
| Contact | Fingers remain on visible surfaces | Fingers pass through the body |
| Material | Cream plastic and brown panel remain distinct | Surfaces become metallic or glossy |
| Background | Scene remains spatially stable | Desk edge or nearby objects warp |
Choose the result with the best structural continuity, not necessarily the most dramatic motion. A restrained clip with a recognizable prop is usually more useful in an edited sequence than a dynamic clip that redesigns the object.
Expected result: a model choice based on the specific shot rather than a universal assumption about quality.
Step 7 — Edit Around the Strongest Continuity Frames
Place the clips in sequence and compare the prop at every cut. Check the final clean frame of the outgoing shot against the first clean frame of the incoming shot.
Look for:
- Matching hand or tabletop height.
- Compatible screen direction.
- Consistent prop size relative to the performer.
- The same visible side of the object when the cut implies continuous time.
- A believable change in lighting when moving between locations.
- No sudden appearance of a strap, label, reflection, or control.
Cut during purposeful movement when small discrepancies need to be concealed. A hand crossing the frame, a quick turn toward the window, or a foreground object briefly obscuring the prop can provide a natural transition. Do not use motion blur to disguise a fundamentally different design; viewers will notice the mismatch once the prop becomes clear again.
Expected result: a sequence in which the object reads as one physical item carried through several separately generated shots.
Keep the Same Prop Across Future Projects
Archive the master reference, prop passport, approved anchor frames, and successful motion prompts together. Also save a simple scale rule, such as “the camera body spans the width of two adult palms.” Relative measurements transfer between compositions more reliably than vague words like “small.”
When changing locations, preserve the object description verbatim and modify only the environment, shot size, pose, and lighting. If the prop must age or become damaged in the story, create a second passport for that state rather than gradually adding inconsistent damage in every prompt.
Alternative: Use Motion Transfer for Precise Handling
If the scene depends on recognizable choreography—juggling, drawing a sword, playing an instrument, or operating a tool—record the action with a safe stand-in object of similar dimensions. The source performance should keep the body fully visible, avoid fast occlusion, and use a stable camera.
Design the generated character and prop so their proportions fit the source action. Motion transfer can preserve the broad timing and body mechanics, but it does not eliminate the need to inspect finger contact, thin components, or fine mechanical details.
Alternative: Use Face Swap Only for Performer Drift
If the prop remains stable but the performer’s face changes during an otherwise successful clip, an authorized face swap can repair identity without regenerating the object interaction. It should not be treated as a method for correcting the prop itself, and it works best when the target face is visible, unobstructed, and not heavily motion-blurred.
Where This Workflow Falls Short
- Readable text remains fragile. Packaging copy, serial numbers, watch faces, and screen interfaces may distort during animation. Keep critical text large, minimize motion, or add it during post-production.
- Transparent objects are difficult. Glassware and clear plastic combine refraction, reflections, background distortion, and hand contact in one region.
- Articulated props can mutate. Scissors, folding cameras, mechanical toys, and hinged boxes require the model to preserve both structure and motion.
- Fast rotations hide structural errors. An object may appear correct before and after a spin while becoming amorphous during the middle frames.
- Extreme angle changes need new references. A single front view cannot reliably define unseen controls, ports, or rear surfaces.
When exact commercial geometry or perfectly readable branding is mandatory, use generated video for atmosphere and movement while reserving product-critical frames for controlled photography, 3D rendering, compositing, or manual post-production.
FAQ
Can I keep a prop consistent using text to video alone?
You can describe the same object repeatedly, but text alone provides weak control over exact geometry. Use it for distant or noncritical shots. For hero shots, generate and animate reference-based anchor frames.
Should I include the entire prop passport in every prompt?
Include the defining visual features and forbidden changes. Background information that cannot appear on screen is unnecessary. Keep the fixed description identical across shots.
Why does the object change when the camera moves?
A camera move reveals new surfaces while changing perspective, reflections, and scale. Reduce movement, create a stronger view-specific anchor frame, or split the move into separate shots.
How do I preserve a logo or label?
Keep it large, front-facing, and minimally animated. For exact lettering, plan to track and composite the graphic in post rather than relying on every generated frame to reproduce it.
Which is better for prop consistency, Seedance or Kling?
The answer depends on the prop, composition, and movement. Test both with identical inputs and select the clip that best preserves silhouette, feature count, scale, material, and hand contact.
Can this workflow handle multiple recurring props?
Yes, but give each object its own passport and master reference. Introduce only the props needed in a shot, because crowded compositions increase the chance of duplicated or blended objects.
Create Your First Consistent Prop Sequence
Start with one distinctive object, three simple shots, and one action per clip. Build the reference frames first, compare motion results, and keep only the sections where structure and contact remain stable. Create your first AI video free with MagicBoat and test the workflow across multiple models from one account.
Final Checklist
- Create one clean master reference before generating video.
- Record the prop’s silhouette, scale, materials, fixed details, and forbidden changes.
- Build a separate anchor frame for each camera angle.
- Use one physical action per clip.
- Keep hands on broad, visible surfaces whenever possible.
- Compare models with identical inputs and settings.
- Audit the prop at every edit point.
- Use motion transfer or post-production when exact mechanics exceed generative control.
Keywords
image to video, object consistency, AI video workflow, prompt engineering, Seedance prompts, Kling prompts, motion transfer