How to Denoise Low-Light Concert Video Without Waxy Faces
Low-light concert footage often combines color noise, compression artifacts, motion blur, and rapidly changing stage lights. This practical workflow shows how to denoise video conservatively, preserve facial texture, and document the improvement with matched-frame evidence.
Table of contents
Clean the Noise Without Cleaning Away the Performance
A dim concert venue is a difficult environment for any camera. High ISO settings create dancing color speckles, compression breaks shadows into blocks, and moving lights make automated filters change strength from frame to frame.
The safest way to denoise video from a live performance is not to push one aggressive enhancement preset. Instead, diagnose the defects, process short shots separately, protect faces and lighting transitions, and compare matched frames before export.
The central rule: remove distracting noise while retaining real skin texture, fabric detail, stage haze, and natural motion blur. A perfectly smooth frame is usually an overprocessed frame.
Step 1 — Audit Noise Before Applying a Filter
Duplicate the original file and inspect it at 100% scale. Pause on several representative moments rather than judging only the opening frame:
- A relatively static close-up of the performer
- A fast head turn or hand movement
- A dark area behind the stage
- A lighting transition between two saturated colors
- A frame containing smoke, haze, confetti, or fine hair
Identify what is actually wrong. Chroma noise appears as colored speckles, especially in shadows. Luma noise looks like monochrome grain. Compression creates blocks, mosquito noise around edges, and smeared gradients. Motion blur is different again: denoising cannot recover detail that the camera never captured.
Keep a short diagnostic range of five to ten seconds. It should include both calm and fast movement, because a setting that looks clean on a still frame may leave trails during playback.
Visual recreation prompt:
Photorealistic editorial photograph of a small indoor concert viewed from the audience, a singer under deep blue and magenta stage lights, realistic high-ISO grain visible in the dark background, natural stage haze, raised hands at the lower edge, no logos and no text. MANDATORY CAMERA: eye-level audience viewpoint, 85mm equivalent lens, medium close-up, landscape 16:9. MANDATORY LIGHTING: practical stage lighting only, deep shadows retained. MANDATORY LAYOUT: performer centered slightly left with a large dark background area available for examining noise.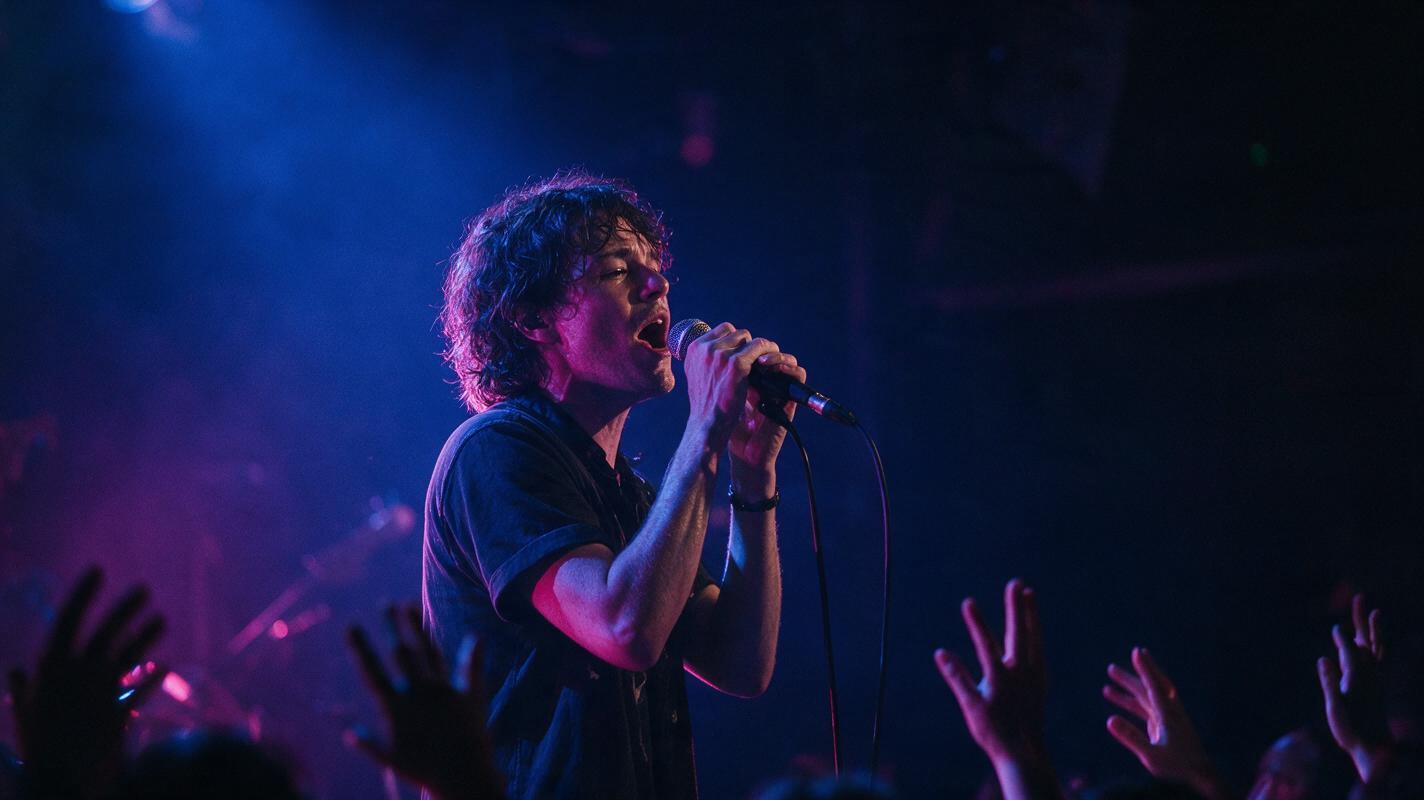
Step 2 — Prepare the Source Without Upscaling It
Work from the highest-quality original available. A direct camera file is preferable to a clip downloaded from a social platform because repeated compression can turn fine noise into larger, harder-to-remove artifacts.
- Keep the original frame rate and resolution during denoising.
- Correct rotation and obvious exposure errors, but avoid strong sharpening.
- Split long recordings at major lighting or camera-angle changes.
- Disable automatic filters that alter exposure or color from frame to frame.
- Do not upscale before noise reduction; enlargement also enlarges defects.
If the footage is underexposed, resist lifting the shadows aggressively before denoising. Raising dark areas reveals more noise and may force the filter to work harder. Use a modest exposure adjustment for evaluation, then decide whether noise reduction should occur before or after the primary color correction in your chosen editor.
Step 3 — Build a Conservative Two-Pass Denoise
A useful concert workflow combines restrained temporal processing with light spatial processing. Temporal denoising compares adjacent frames and can remove random noise efficiently, but excessive strength creates ghosting behind moving hands, microphones, and hair. Spatial denoising works within each frame and can make faces look waxy when pushed too far.
- Begin with low temporal strength and a small frame radius.
- Play the diagnostic range at normal speed, watching moving edges.
- Reduce chroma noise more strongly than luma noise when controls are separate.
- Add only enough spatial reduction to calm remaining speckles.
- Toggle the treatment on and off while viewing the same frame and crop.
Several established tools support versions of this workflow. DaVinci Resolve offers professional finishing tools, Neat Video specializes in noise reduction through supported host applications, and FFmpeg includes configurable filters such as hqdn3d and nlmeans. Features, licensing, and processing controls differ, so verify the current product documentation before choosing a tool.
| Option | Best fit | What to verify |
|---|---|---|
| DaVinci Resolve | Editing, color, and finishing in one project | Noise-reduction availability in the current edition |
| Neat Video | Profile-based denoising inside a compatible editor | Host compatibility and license tier |
| FFmpeg | Repeatable command-line processing | Filter parameters, speed, and output codec |
Visual recreation prompt:
Neutral three-frame technical comparison of the exact same concert close-up: left frame with pronounced colored shadow noise, center frame overprocessed with plastic skin and smeared hair, right frame conservatively denoised with natural pores, individual hair strands, and stage haze retained; no labels, text, logos, interface elements, or brand marks. MANDATORY CAMERA: identical locked medium close-up in all three frames, 85mm equivalent lens. MANDATORY LAYOUT: three equal panels arranged horizontally in landscape 16:9 with perfectly matched composition and timing. MANDATORY LIGHTING: identical blue and magenta concert lighting across every panel.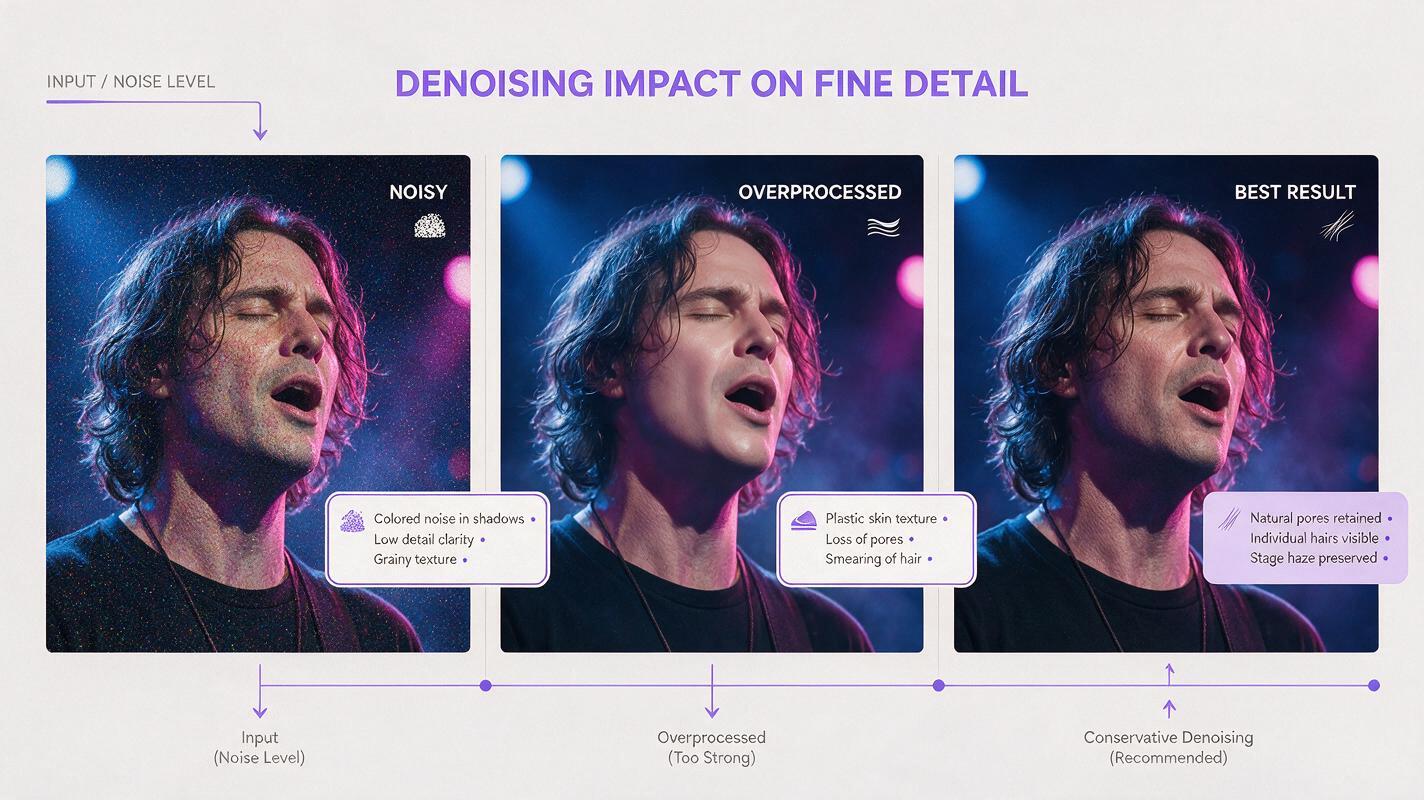
Step 4 — Protect Faces, Motion, and Stage Atmosphere
Faces deserve priority because viewers notice unnatural skin immediately. Inspect eyelids, teeth, nostrils, hairlines, earrings, and the edge of the microphone. If these details pulse, smear, or disappear, reduce temporal strength or isolate the problem shot.
Stage haze and smoke are also easy to misclassify as noise. A strong ai video enhancer may flatten this atmosphere into a static gradient or make it flicker. Evaluate the result in motion instead of trusting a clean paused frame.
Use masks only when they solve a visible problem. For example, a light reduction on a performer’s face and a stronger reduction in an empty black background can work better than one global setting. Feather and track any mask carefully so that its boundary does not become visible under changing lights.
If a filter removes pores, separates a moving hand from a faint trail, or freezes stage smoke, back it off. Those defects are more noticeable than moderate residual grain.
Step 5 — Prove Improvement With Matched Frames
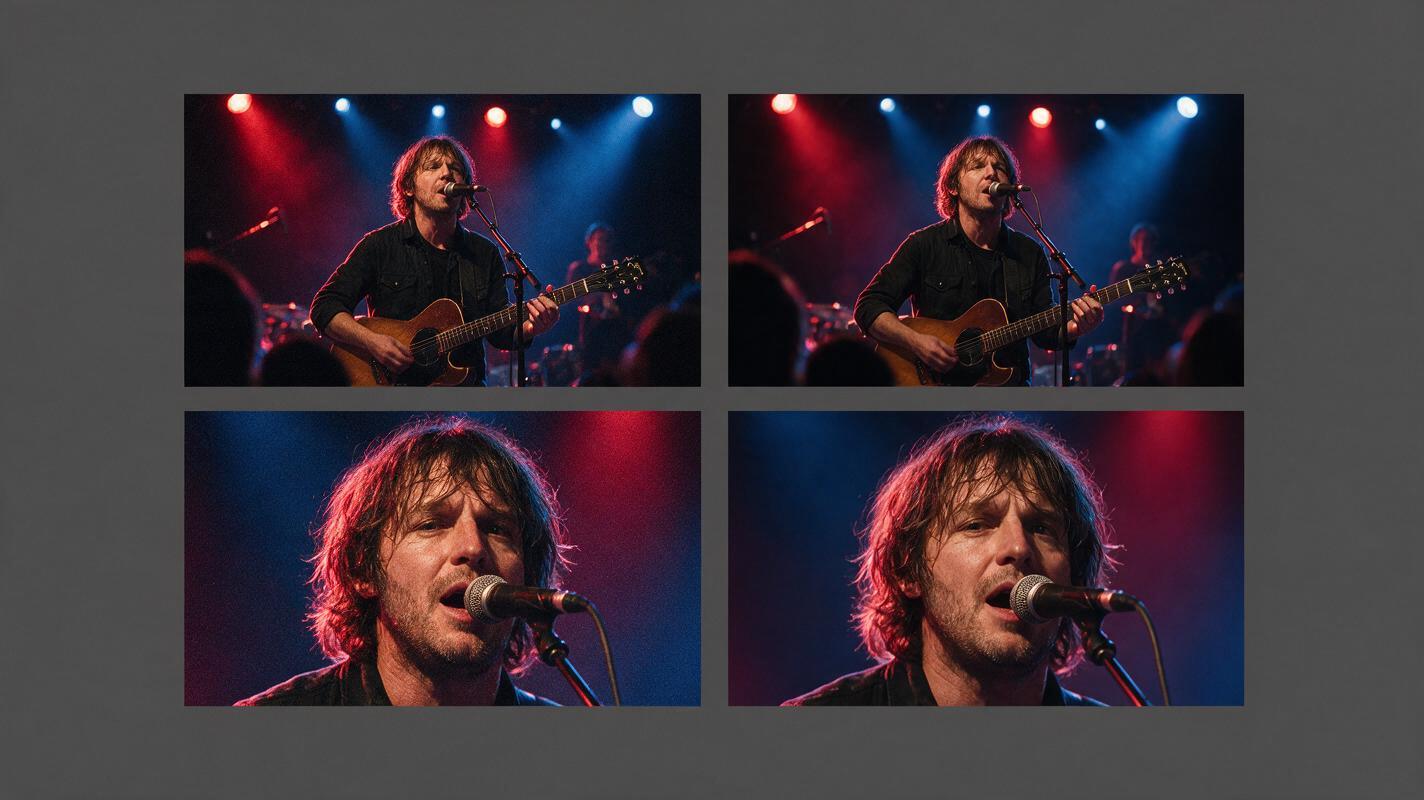
Before-and-after evidence is meaningful only when both views show the same source frame at the same scale. Do not compare a dark original with a brighter processed export or display one image larger than the other.
Prepare three comparisons:
- Full frame: reveals whether the overall image still feels natural.
- Face crop: exposes waxy skin, lost eyelashes, and unstable features.
- Motion sequence: uses three consecutive frames to reveal trails or temporal flicker.
Record the frame number or timecode, filter settings, color adjustments, and export codec. This makes the comparison repeatable. It also prevents accidental claims based on different frames or processing conditions.
| Evidence check | Improvement to seek | Failure to reject |
|---|---|---|
| Dark background | Fewer colored speckles | Large flat patches or pulsing blocks |
| Face crop | Calmer noise with texture retained | Plastic skin or missing eyelashes |
| Moving hand | Stable edge through motion | Ghost trail or duplicated fingers |
| Stage haze | Smooth natural movement | Frozen or flickering smoke |
Visual recreation prompt:
Photorealistic matched-frame evidence board showing two identical concert frames side by side and two corresponding facial detail crops beneath them; the first version has realistic high-ISO chroma noise, while the second has restrained noise reduction with skin texture and hair preserved; no labels, text, logos, borders resembling software, or interface controls. MANDATORY CAMERA: locked audience camera, medium close-up, identical pose and framing in both primary frames. MANDATORY LAYOUT: balanced two-by-two editorial comparison on a neutral charcoal background, landscape 16:9. MANDATORY LIGHTING: consistent red and blue practical stage lights in every view.
Step 6 — Upscale Only After Noise Reduction
An ai video upscaler can enlarge a clean source, but it cannot authenticate missing facial detail. Apply upscaling after denoising and compare the enlarged result against a conventional resize. Watch for invented eyelashes, shifting jewelry, sharpened compression blocks, and halos around the performer.
If the source is already the required delivery size, skip upscaling. To enhance videos with ai responsibly, every process should address a visible delivery problem rather than serve as a mandatory effect.
For finishing, add only mild sharpening if the denoise pass softened genuine edges. A subtle layer of consistent grain can sometimes prevent gradients from looking unnaturally flat, but it should not be used to hide processing artifacts.
Step 7 — Export and Review the Real Delivery File
Export a short test using the same codec, resolution, frame rate, and approximate bitrate planned for delivery. Compression can reintroduce banding and blocks even when the editing timeline looks clean.
Review the exported file on a phone as well as a larger display. Check the opening, the darkest shot, the fastest movement, and every major lighting transition. If the destination platform will recompress the video, preserve a high-quality master separately.
Denoising cannot replace missing coverage. If a promotional edit needs a clearly disclosed stylized transition rather than documentary footage, MagicBoat can use image to video to animate an approved still. Its free entry point and access to multiple generation models in one place make it useful for testing optional inserts, but generated shots should not be presented as footage from the actual performance. You can try these models for free after the restoration pass is complete.
FAQ
Should I remove all visible grain?
No. Fine, stable grain often looks more natural than a perfectly smooth image. Concentrate on colored shadow noise, distracting blocks, and unstable patterns rather than eliminating every trace of texture.
Why does the denoised face look waxy?
The spatial reduction is probably too strong, or the filter cannot distinguish fine facial texture from noise. Lower the strength, separate chroma and luma treatment, and judge the face at normal playback speed.
Why do hands leave trails after denoising?
Temporal processing is borrowing too much information from adjacent frames. Reduce its strength or frame radius, then process the fast-motion shot separately.
Can denoising fix motion blur?
No. It may make noise within the blurred area less distracting, but it cannot reliably reconstruct detail that was never recorded. Strong attempts to invent that detail can produce unstable edges.
Should I denoise before color grading?
Usually, an early noise-reduction pass is useful because strong shadow lifts amplify noise. However, the ideal order depends on the source and software. Test a representative range and avoid extreme exposure changes before evaluating the filter.
Sources
- Blackmagic Design — DaVinci Resolve
- Neat Video — Official Product Site
- FFmpeg — Filter Documentation
Final Checklist
- Inspect chroma noise, luma noise, compression, and motion blur separately.
- Keep the original resolution and frame rate during denoising.
- Use conservative temporal processing before light spatial cleanup.
- Protect faces, moving hands, hair, smoke, and lighting transitions.
- Create matched full-frame, face-crop, and motion comparisons.
- Upscale only when the delivery resolution requires it.
- Review the exported file rather than relying only on the timeline preview.
- Retain an untouched source and a high-quality master.
Keywords
denoise video, ai video enhancer, enhance videos with ai, ai video upscaler, ai video tools