How to Keep a Fantasy Creature Consistent in AI Video
Keep a fantasy creature consistent by defining its silhouette, anatomy, markings, materials, and scale before generating any motion. Build canonical reference views, create shot-specific anchor frames from those references, and animate one controlled action per clip with image-to-video models.
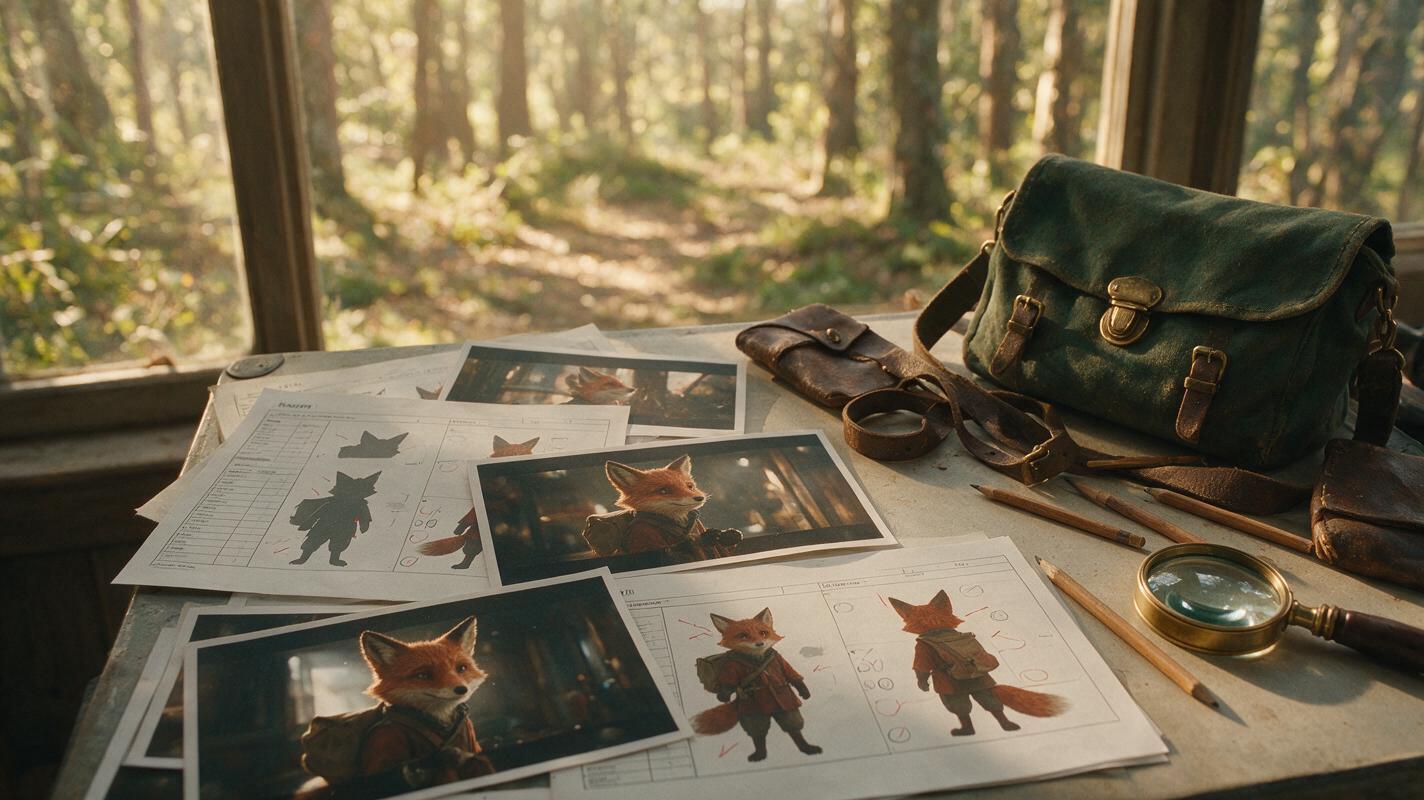
Table of contents
TL;DR: Use reference frames, not description alone
The fastest way to preserve character consistency for a fantasy creature is to lock its visual rules in a canonical reference sheet, derive every shot-specific image from that sheet, and animate those images with restrained motion prompts. Treat silhouette, limb count, markings, materials, scale, and signature accessories as separate continuity checks rather than expecting one long prompt to preserve everything automatically.
This workflow is especially useful for animal companions, mascots, robots, aliens, dragons, and other characters that cannot be repaired reliably with ordinary human-face tools.
Why fantasy creatures drift more than human characters
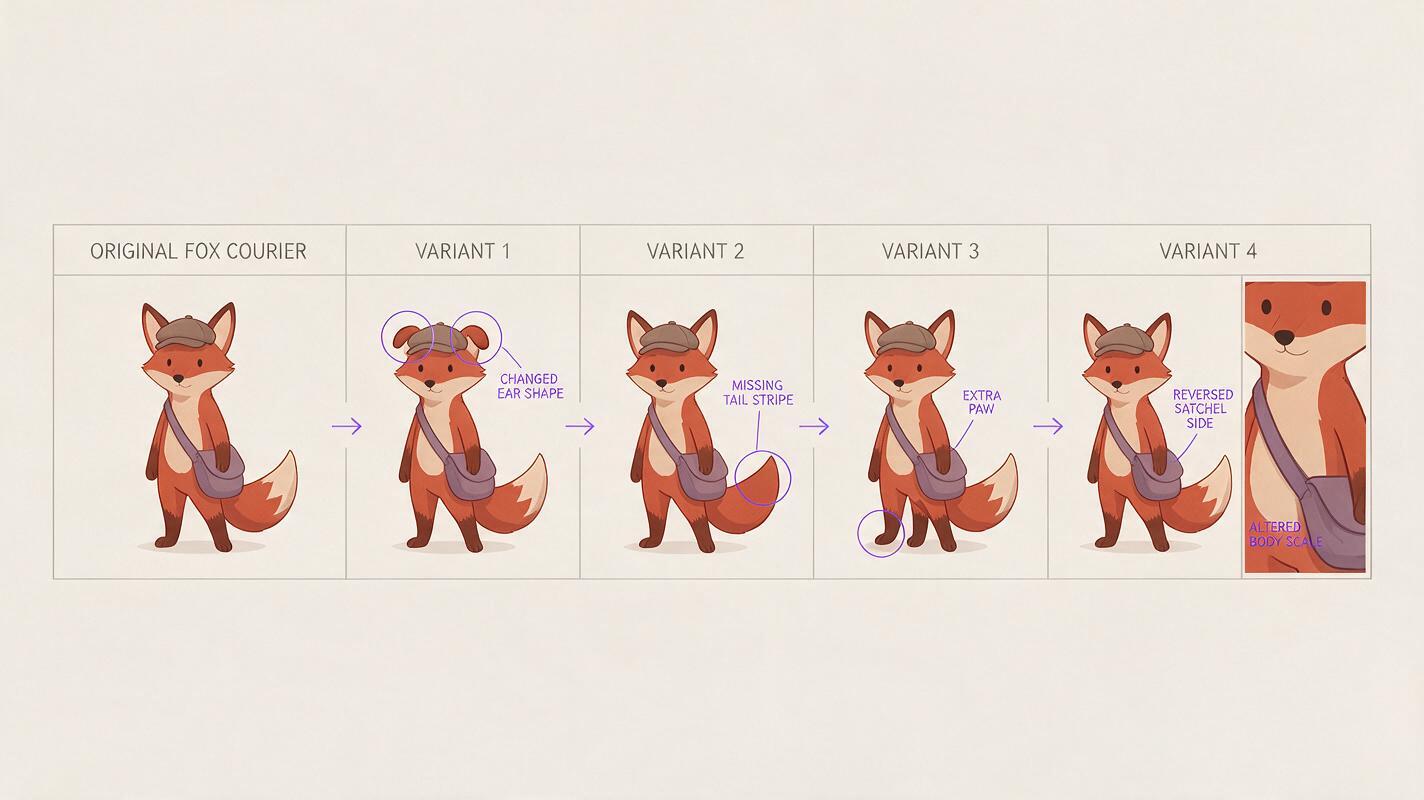
A generated human can drift while still looking broadly human. A creature has fewer familiar anatomical constraints, so small variations can change its entire design. Pointed ears become rounded, four toes become three, a short muzzle lengthens, or a tail changes from feathered to reptilian between shots.
The most common symptoms are:
- Silhouette drift: horns, ears, wings, tails, or shoulder shapes change size and position.
- Topology drift: limbs, digits, joints, plates, or antennae appear and disappear.
- Marking drift: stripes, scars, glowing lines, spots, and facial patches move to the wrong side.
- Material drift: fur becomes smooth skin, brushed metal turns glossy, or translucent wings become opaque.
- Scale drift: the creature appears knee-high in one shot and horse-sized in the next.
- Motion-driven redesign: a turn, jump, or camera orbit exposes areas the model never resolved in the source image.
A creature prompt describes a category. A continuity system defines one individual.
Three ways to preserve a creature design
- Reference-first image to video: create a verified still for each shot, then animate it. This offers the strongest control for most narrative sequences.
- Text to video with a fixed identity block: reuse an identical creature description across prompts. This is quick for exploration but less reliable when exact markings or anatomy matter.
- Motion transfer from a performance: transfer deliberate body movement to a humanoid or bipedal creature while preserving a designed source appearance. This works best when the creature shares the performer’s joint structure.
The tutorial below uses the first approach because it separates design errors from motion errors. If the anchor frame is already wrong, animation will usually amplify the problem rather than repair it.
How MagicBoat handles a multi-model creature workflow
MagicBoat brings image and video generation options into one account, making it practical to test a design across models instead of rebuilding the project in separate tools. Seedream, Flux, or GPT Image workflows can be used to explore still designs and shot-specific compositions, while Seedance and Kling can be compared for animation through image to video.
The important advantage is not that one model always wins. A quiet close-up, a running profile, and a wing-opening shot create different continuity risks. Generate the same controlled input with more than one suitable model, then choose the result that best preserves the features that matter in that shot.
| Production task | Useful workflow | Main continuity check |
|---|---|---|
| Explore the creature design | Text-to-image generation | Silhouette and material language |
| Create alternate views | Reference-guided image generation or editing | Marking placement and anatomy |
| Build a video shot | Image-to-video generation | Motion without redesign |
| Animate a biped performance | Motion transfer | Joint compatibility and body proportions |
| Repair a human-like face | Face swap, when appropriate | Facial identity only |
Step 1 — Write a creature identity block with visible invariants
Start with a compact identity block describing only features that must remain fixed. Avoid mood, camera, action, weather, and background at this stage. Those belong in separate shot instructions.
A strong identity block covers six categories:
- Body plan: species type, posture, limb count, proportions, and approximate size.
- Head landmarks: muzzle, ears, horns, eyes, jaw, crest, or antennae.
- Marking map: color regions, scars, stripes, symbols, and their left/right placement.
- Materials: fur, scales, feathers, ceramic, metal, fabric, or translucent tissue.
- Signature object: collar, harness, satchel, pendant, saddle, or armor plate.
- Explicit exclusions: features that commonly appear but do not belong to this design.
CREATURE IDENTITY — keep unchanged:
A knee-high fox-like forest courier with a compact quadruped body, rust-red short fur, cream chest, narrow charcoal muzzle, two oversized triangular ears, and one feather-shaped tail. The left ear has a small V-shaped notch. Three dark stripes cross the upper tail. Amber eyes, four toes on each visible paw, matte moss-green canvas satchel worn on the right side with one brass circular clasp. No horns, no wings, no extra tails, no long mane.
Expected result: a reusable identity paragraph that can be pasted unchanged into every still-image prompt. If a feature is difficult to verify visually, remove it or make it more concrete.
Step 2 — Build a canonical creature reference sheet
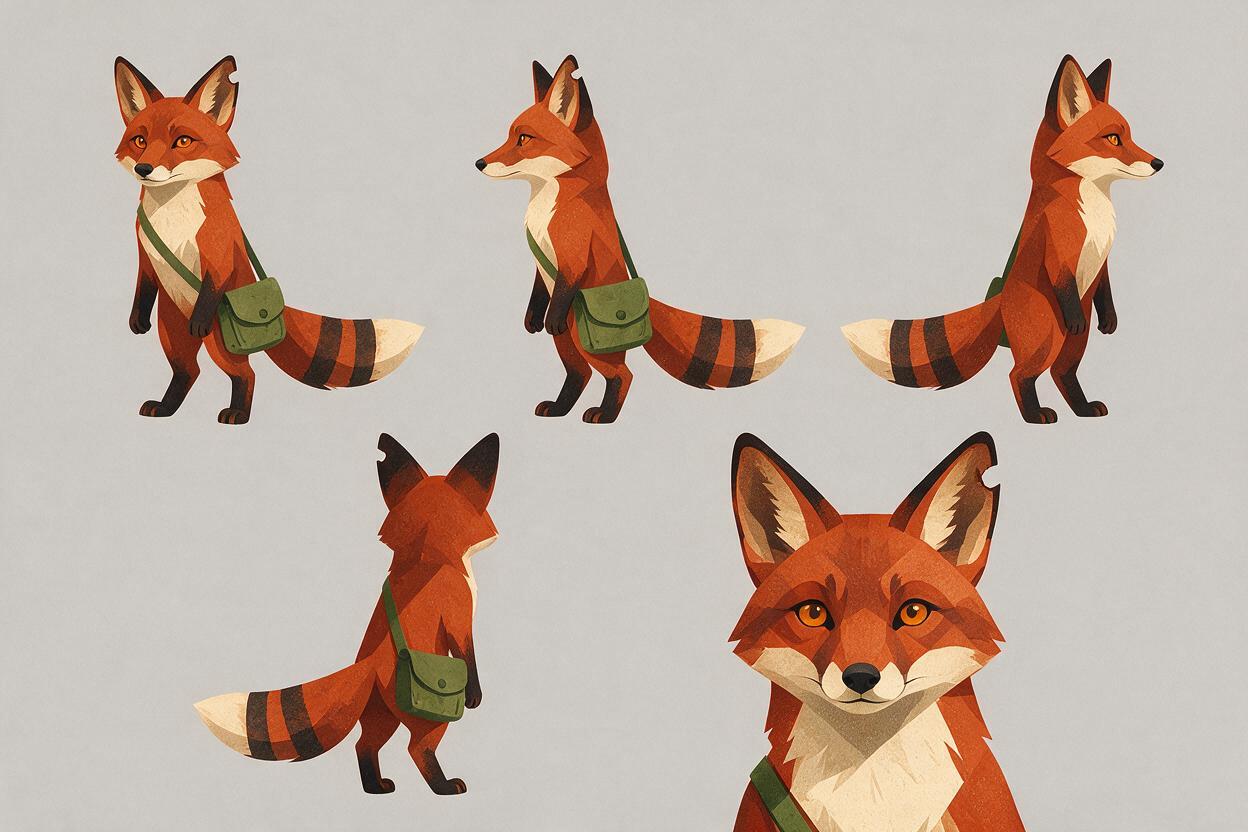
Generate a clean reference sheet before producing cinematic scenes. Ask for neutral lighting, an uncluttered background, and views that reveal the features most likely to drift. A useful set includes front three-quarter, left profile, right profile, rear three-quarter, and one close head view.
Create a clean character reference sheet for the creature described below. Show five separate, non-overlapping views: front three-quarter, exact left profile, exact right profile, rear three-quarter, and close head portrait. Neutral standing pose, consistent proportions in every view, soft daylight, pale gray seamless background, no dramatic perspective, no motion, no text or labels.

[PASTE CREATURE IDENTITY]
Inspect the sheet instead of accepting it as a single image. Confirm the ear notch is on the correct side, count the tail stripes, compare leg length, verify the satchel side, and check that both profiles depict the same skull shape.
If one view is wrong, do not redefine the creature to accommodate it. Regenerate or edit that view. The final sheet becomes the authority for later decisions.
Expected result: a compact visual record that resolves the creature’s front, side, rear, face, materials, and asymmetric details.
Step 3 — Create a shot-specific anchor frame from the reference
Do not ask a video model to invent both the character and the shot simultaneously. First generate a still image with the final composition, pose, environment, lens feeling, and screen direction. Supply the strongest available creature reference and repeat the unchanged identity block.
Keep shot instructions separate from identity instructions:
IDENTITY:
[PASTE CREATURE IDENTITY UNCHANGED]

SHOT:
The same creature stands on the left side of a wet woodland path at dawn, body facing right, head turned slightly toward camera. Full body visible with all four paws planted. The satchel remains on its right side. Soft overcast light, realistic damp fur, restrained cinematic composition, eye-level camera, no foreground obstruction.
For asymmetrical details, think physically rather than visually. If the right side of the body faces away from camera, the right-side satchel may be partly hidden. Do not move it to the visible side just to display it.
Expected result: a finished first frame that could work as a production still even without animation. Reject it if its anatomy or marking map is already inconsistent.
Step 4 — Match motion difficulty to the available reference coverage
Before animation, classify the shot by how much unseen character information it reveals.
| Shot type | Risk | Reason | Safer first motion |
|---|---|---|---|
| Locked close-up | Low | Most geometry stays visible | Blink, breath, slight ear response |
| Side-profile walk | Medium | Leg overlap and ground contact matter | Two or three measured steps |
| Body turn | Medium to high | The hidden side must be reconstructed | Small head turn before full-body turn |
| Jump toward camera | High | Foreshortening changes limbs and face | Separate crouch and landing shots |
| Full orbit | High | Every side and marking becomes exposed | Use several bounded arcs |
If the reference pack lacks a clear rear view, avoid making the first test a 180-degree turn. Generate the missing view first, then create a dedicated anchor frame closer to the final angle.
Expected result: a shot plan that asks the model to reconstruct as little unseen anatomy as possible.
Step 5 — Animate one physical beat per clip
Upload the verified anchor frame and describe motion as one bounded physical event. Repeat only the most vulnerable continuity constraints; do not bury the action beneath the entire design prompt.
The creature takes two slow steps forward, then pauses. Its paws maintain firm contact with the wet path, the feather-shaped tail follows with a small delayed sway, and both ears react once to a distant sound. Preserve the exact face, body proportions, left-ear notch, three tail stripes, four legs, fur colors, and right-side satchel. Locked eye-level camera. No camera orbit, no transformation, no extra limbs, no costume change.This prompt gives the clip a clear beginning, action, and stopping point. It also distinguishes primary motion from secondary motion:
- Primary: two steps and a pause.
- Secondary: delayed tail sway.
- Accent: one ear response.
- Camera: locked.
Avoid combining a run, leap, spin, camera orbit, expression change, and environmental transformation in one generation. Each additional event gives the model another opportunity to redraw the creature.
Try the same anchor and prompt with Seedance and Kling when both are available to you. Compare preservation rather than choosing by maximum motion. The better clip is the one in which the creature remains the same individual from first frame to last.
Expected result: a short, editable action with stable anatomy and a deliberate endpoint suitable for a cut.
Step 6 — Audit landmarks at the first, middle, and last frames
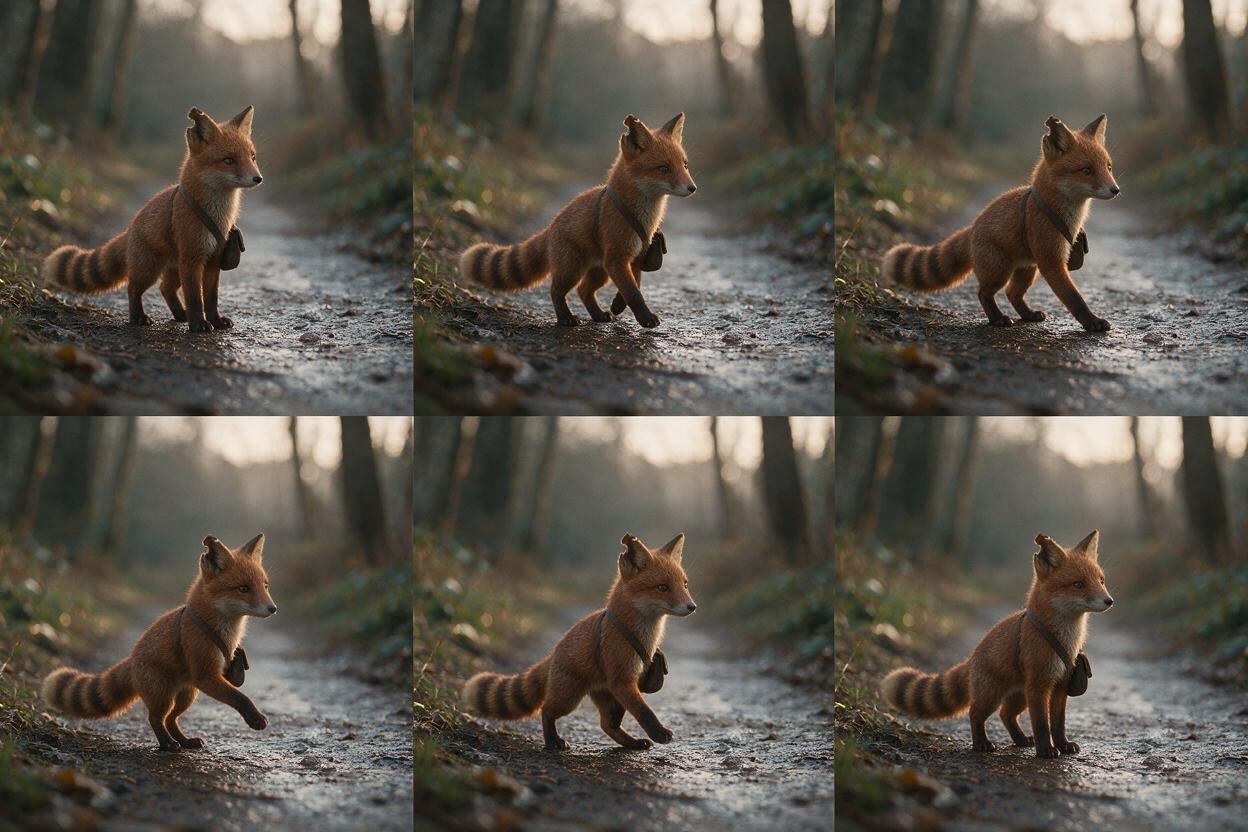
Watch the clip normally once, then inspect representative frames. A video can feel convincing at playback speed while containing a changed tail, duplicated paw, missing clasp, or reversed marking for several frames.
Use a fixed audit order:
- Count major body parts and visible digits.
- Compare the outer silhouette with the reference.
- Verify asymmetric landmarks and accessories.
- Check color boundaries and material texture.
- Check foot contact, weight, and shadow attachment.
- Review the face last, after structural problems are cleared.
Classify each defect as identity, motion, or composition. If the satchel changes side, it is an identity error. If a paw slides, it is a motion error. If the creature exits the frame too early, it is a composition error. This prevents unfocused prompt revisions.
Expected result: a precise diagnosis and one targeted change for the next generation rather than a completely rewritten prompt.
Step 7 — Extend scenes through matched endpoint frames
For a longer sequence, do not ask for one increasingly complex clip. Select a clean endpoint from the approved generation and use it as the anchor for the next physical beat.
For example:
- Clip A: the creature takes two steps and pauses.
- Clip B: from the pause, it raises its head toward a sound.
- Clip C: from that held pose, it turns and exits right.
Keep the environment description, screen direction, creature identity block, and light conditions consistent. Change only the new action and any camera instruction required for that shot.
Continuation works best from a frame in which the creature is balanced, readable, and not hidden by motion blur or overlapping limbs.
Expected result: a sequence assembled from short controllable beats, with cuts placed before visible drift develops.
Keep the same creature across projects
Archive more than the final video. Save the approved identity block, reference sheet, clean head view, left and right profiles, size comparison, accessory close-up, successful anchor frames, and the exact motion prompts that preserved the design.
A practical continuity pack should also record:
- The creature’s height relative to a human or familiar object.
- Which side carries each asymmetric marking or accessory.
- How rigid or flexible the ears, tail, wings, and clothing should be.
- Which actions repeatedly caused anatomy drift.
- Which source angle worked best for each kind of shot.
When beginning a new location or episode, derive new anchors from this pack instead of recreating the character from its text description.
Alternative: use motion transfer for a bipedal creature
Motion transfer can help when the character has human-like shoulders, hips, arms, and legs. Record or select a performance with clear limb separation, a stable camera, and movement compatible with the character’s proportions.
It is less suitable for quadrupeds, creatures with additional arms, very short legs, digitigrade anatomy, or wings that have no equivalent in the source performance. A structurally incompatible motion reference can preserve timing while damaging anatomy.
Alternative: use face swap only for human-like faces
Face swap can correct residual identity drift for humanoid characters with a clearly visible, front-facing facial structure. It does not normally solve changing horns, muzzles, fur patterns, ear geometry, body scale, or limb count.
For strongly non-human creatures, rebuilding the affected anchor frame and regenerating the motion is usually more coherent than placing a human-style face correction over incompatible anatomy.
Where this workflow falls short
- Extreme rotations remain difficult: a single reference cannot fully specify hidden anatomy.
- Fast motion can conceal redesign: blur may hide errors during playback but expose them on a held frame.
- Complex appendages multiply risk: wings, tentacles, branching horns, and multiple tails require more reference coverage.
- Small markings may shimmer: fine stripes, jewelry, lettering, and repeated scales can vary frame to frame.
- Model comparison requires judgment: the most dynamic result may not be the most consistent one.
- Reference sheets are not perfect 3D models: contradictory views can still lead to reconstruction errors during turns.
The best response is usually to simplify the physical beat, improve the missing reference angle, or cut to a second shot rather than adding more adjectives to the prompt.
FAQ
Can text to video keep the same fantasy creature across multiple shots?
It can preserve a broad concept, especially when the identity block remains unchanged, but exact markings, accessories, and anatomy are more reliable when each shot begins from a verified reference image.
Should the full identity block be included in every motion prompt?
Keep it in the still-image stage. For animation, emphasize the action plus the few traits most at risk in that shot, such as limb count, tail shape, ear notch, or accessory side.
How many reference views does a creature need?
Use enough views to cover every angle the sequence will reveal. Front three-quarter and profile may be sufficient for a close-up, while body turns require both profiles and a rear view.
What should I do if only the final second drifts?
Trim before the defect if the action already reads. Otherwise reduce the requested motion, shorten the beat, or continue from an earlier clean frame instead of regenerating the entire sequence unchanged.
Can I keep the same creature while changing its outfit or armor?
Yes. Keep the body plan, head landmarks, marking map, and scale fixed, then place clothing in a separate changeable block. Verify that the new outfit does not hide or relocate identity landmarks unintentionally.
Which model should I use for creature animation?
Test the same approved anchor frame and prompt with suitable available models. Judge the output by anatomy, marking placement, accessory continuity, ground contact, and endpoint quality rather than motion intensity alone.
Final checklist
- Write one fixed identity block containing visible, testable features.
- Build and inspect front, profile, rear, and head references.
- Create a verified anchor image for every important shot.
- Animate one primary physical beat per clip.
- Compare first, middle, and final frames with the reference sheet.
- Extend sequences from clean, balanced endpoint frames.
- Use motion transfer only when the body structures are compatible.
- Use face swap only when the creature has a suitable human-like face.
- Create your first ai video free and test this creature prompt across models now.
Keywords
character consistency, ai video tutorial, image to video, fantasy creature prompts, seedance prompts, kling prompts, ai video workflow