How to Create a First-Person POV AI Video That Feels Believable
Create a believable first-person POV AI video by establishing the viewer’s body position in a clean anchor frame, then animating one controlled action at a time. The most reliable workflow uses image-to-video generation for spatial consistency, while text-led generation and motion transfer work well for specific shots.
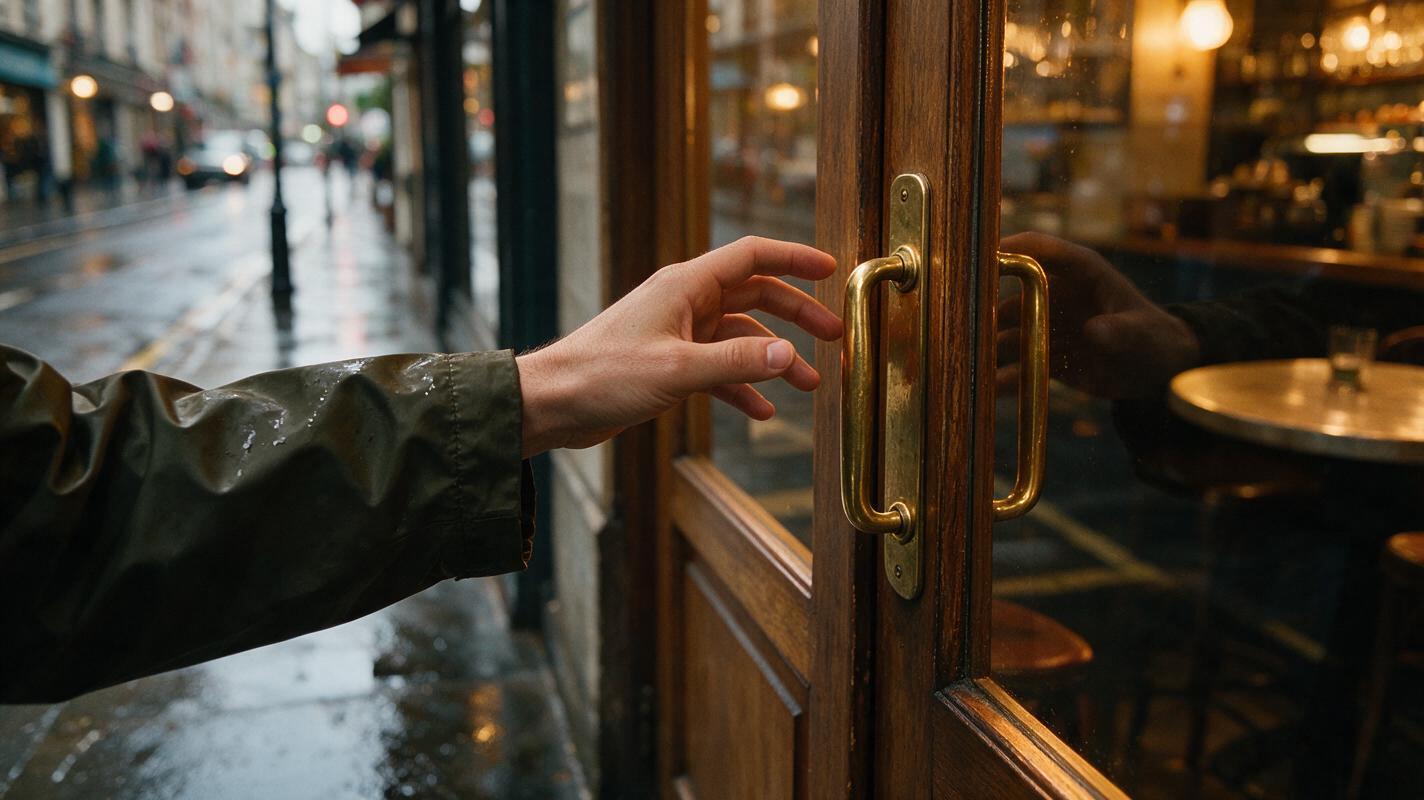
Table of contents
TL;DR: Build the viewpoint before you animate it
The fastest way to create a convincing first-person ai video is to generate a strong POV anchor image, verify where the viewer’s hands and body should be, and animate one simple action with restrained camera movement. Treat the camera as a physical person rather than a floating lens: give it a height, direction, destination, and reason to move.
This tutorial builds a short scene in which the viewer walks toward a rain-covered café window, reaches for the door handle, and enters. The same method works for exploration clips, product demonstrations, fantasy sequences, travel scenes, and first-person advertisements.
Why first-person AI video often feels wrong
A first-person shot removes the actor’s face, but it does not remove the need for character consistency. The viewer still expects the camera, hands, sleeves, shadows, and surrounding space to belong to one coherent body.
Common failures are easy to recognize:
- Floating-camera motion: the view glides through the scene without the subtle vertical rhythm or inertia associated with a person walking.
- Detached hands: a hand enters from an impossible angle, changes size, or appears without a plausible shoulder position.
- Action without contact: fingers approach a handle, but the handle turns before contact or passes through the palm.
- Unstable body details: sleeves change color, rings move between fingers, or the visible hand switches sides.
- Excessive camera instructions: walking, looking around, reaching, opening a door, and entering are compressed into one short generation.
- Incorrect POV language: phrases such as “a person walking toward a café” may produce a third-person shot showing that person from behind.
A useful POV prompt describes what the viewer sees and does. It should not describe the viewer as a separate subject inside the frame.
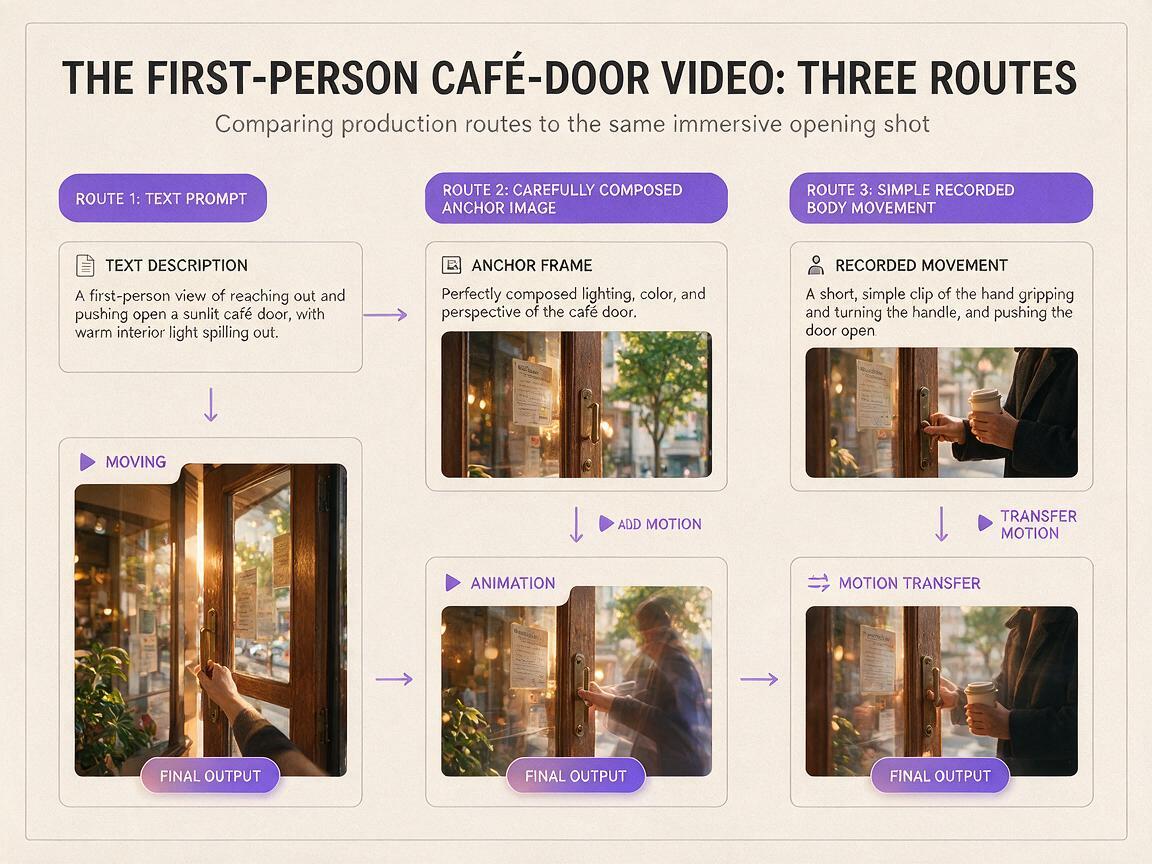
Three ways to create a first-person POV video
| Approach | Best for | Main limitation |
|---|---|---|
| Text-led generation | Fast exploration, wide environments, dreamlike movement | Less control over hands and object contact |
| Anchor image animation | Specific locations, clothing, props, and compositions | The initial frame must already contain workable geometry |
| Motion transfer | Body-led performances based on recorded movement | The source movement and target character must be compatible |
The anchor-image method is the main workflow below because it separates two difficult tasks. First, you solve composition and body geometry in a still image. Then you ask the video model to solve motion without redesigning the entire scene.
How MagicBoat handles first-person video workflows
MagicBoat lets you try multiple generation models from one free account, including Seedance, Kling, Veo, Seedream, Flux, and GPT Image workflows. You can create a POV anchor frame with an image model, send that frame into an image to video workflow, and compare how different video models interpret the same movement prompt.
This model-comparison approach is useful because no single prompt guarantees identical behavior everywhere. One model may preserve the anchor composition more closely, while another may produce more energetic walking motion. Keep the image, duration, aspect ratio, and core prompt unchanged during the first comparison so that the model is the main variable.
Step 1 — Reduce the scene to one physical action
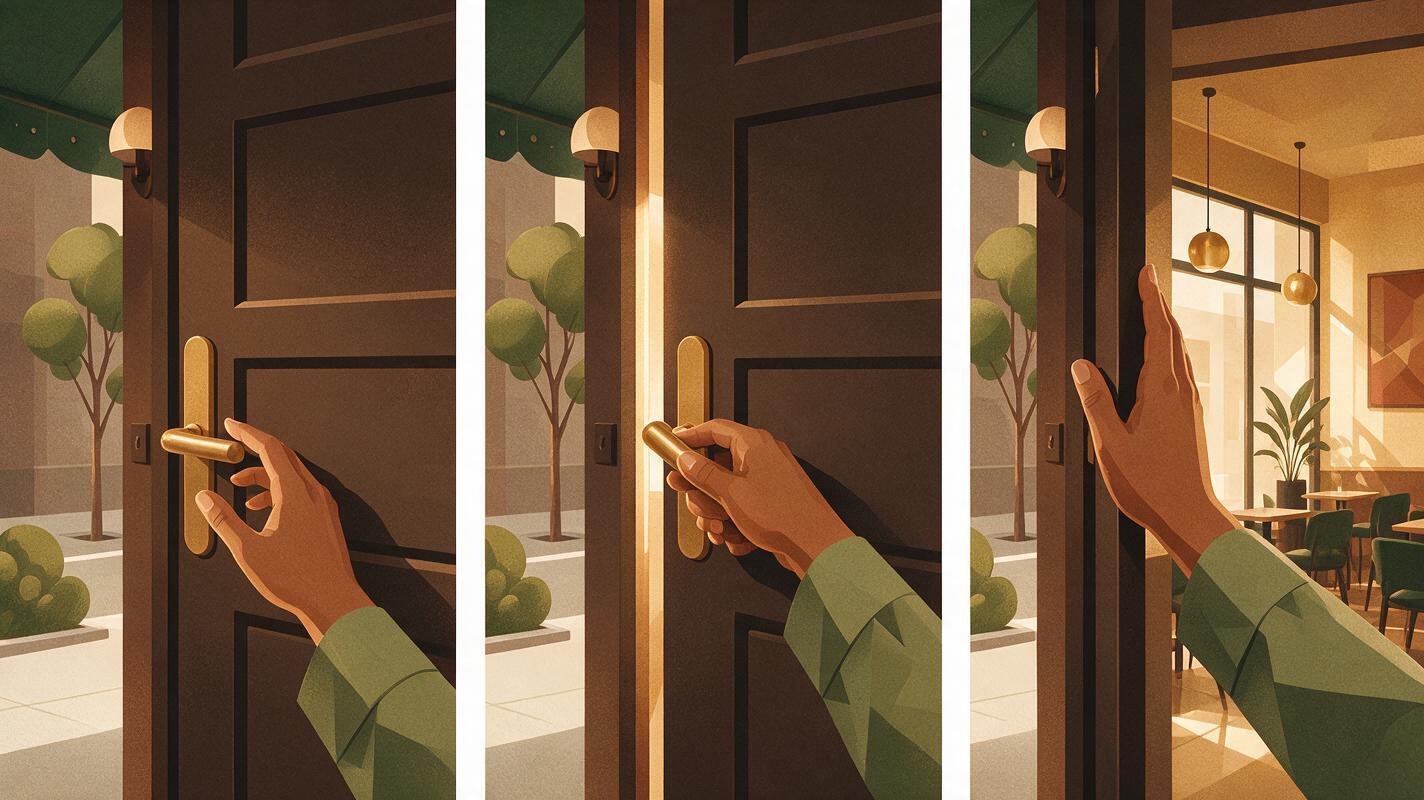
Write the shot as a small sequence of observable events rather than a cinematic paragraph. For the café example, the complete idea contains at least three actions:
- Approach the café door.
- Reach for and turn the handle.
- Move through the doorway.
Do not ask the first clip to complete all three. Begin with the approach and the start of the reach. Object interaction is more reliable when it receives its own shot or generation.
Use this compact shot specification:
Viewpoint: first-person eye level
Environment: narrow city street after rain
Visible body cue: right forearm in a dark olive raincoat
Primary action: walk toward a brass café door handle
Camera behavior: subtle natural walking rhythm
End state: hand close to the handle, before contact
Continuity locks: same sleeve, same hand, same door, same weather
Expected result: a shot plan with one clear destination and an end frame that can connect naturally to the next clip.
Step 2 — Build a clean POV anchor frame
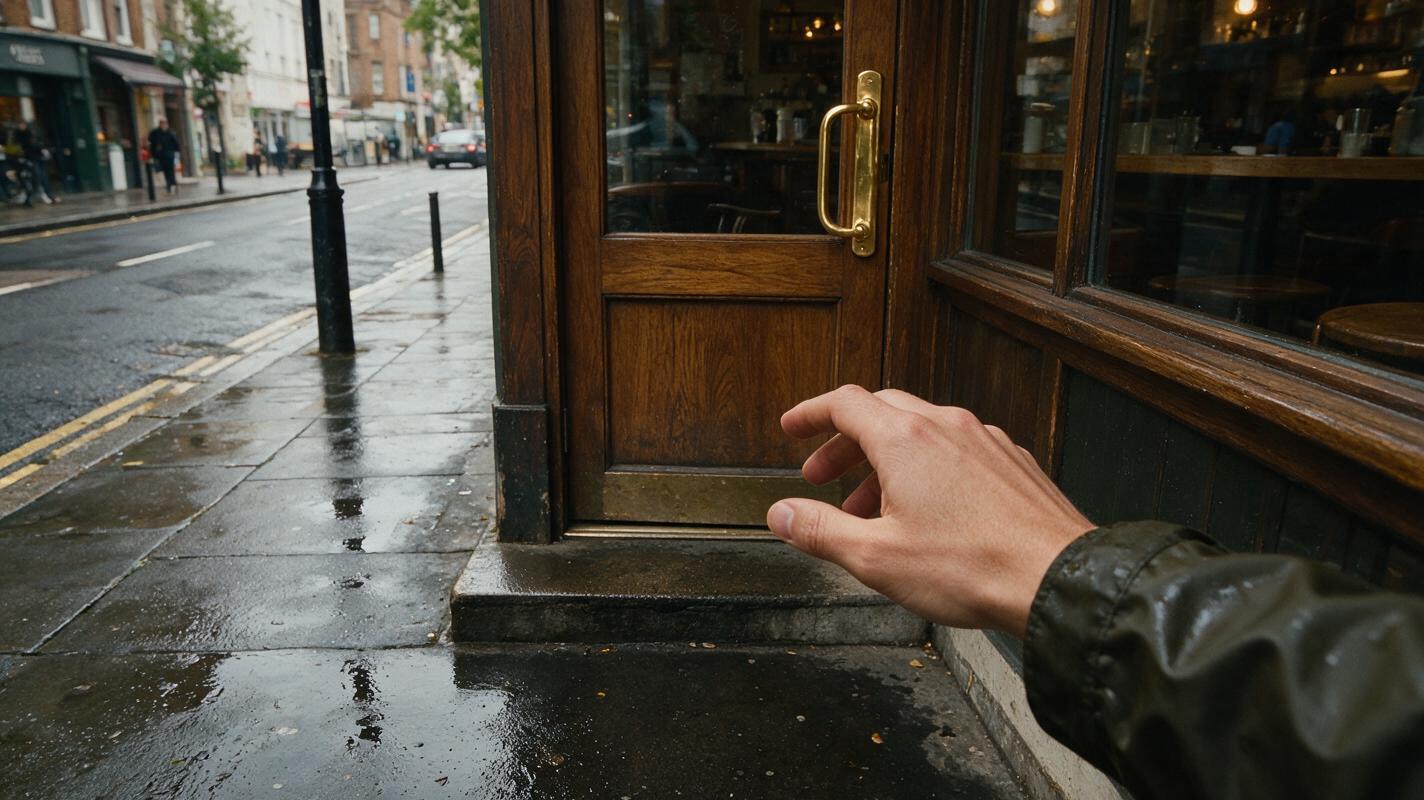
Generate a still image that looks like the first frame of the intended shot. For first-person composition, describe the visible environment first, establish eye-level perspective, and add only the body parts that the action requires.
Photorealistic first-person point of view at adult eye level on a narrow city street after rain, facing a small café entrance three steps away. A brass door handle is visible on the right side of a dark wooden door. The viewer's right forearm enters naturally from the lower-right edge, wearing a dark olive waterproof sleeve, hand relaxed and not yet reaching. Wet pavement reflects warm window light, realistic lens perspective, natural overcast daylight, anatomically correct hand, no visible face, no other body in front of the camera.If the result keeps showing a person from behind, remove narrative wording such as “a traveler approaches.” Reinforce direct camera language instead:
The camera is the viewer's eyes. No protagonist is visible in front of the camera. Only the viewer's right forearm may enter from the lower-right edge.Choose an anchor frame with a simple hand silhouette. A relaxed hand near the frame edge is safer than fingers already wrapped around the handle because the video model needs room to construct the reach.
Expected result: a stable first-person composition with a plausible arm origin, a reachable target, and enough open space for forward motion.
Step 3 — Audit the frame for body and scene geometry
Before animating, inspect the still at full size. Video generation usually amplifies structural problems rather than repairing them.
- Trace the forearm backward mentally. Could it connect to a shoulder behind the camera?
- Compare hand size with the door handle. Does the distance feel physically possible?
- Check finger count, wrist direction, sleeve edges, jewelry, and fingernails.
- Confirm that the door has a clear opening direction and sufficient space around it.
- Look for reflections that accidentally reveal a different body or camera operator.
- Remove pedestrians who might cross the reaching arm or become fused with it.
If a hand is almost correct but visibly malformed, regenerate the still rather than hoping motion will hide it. Slight imperfections in wet pavement or background lettering are less important than errors at the hand-object contact point.
Expected result: an anchor image that remains convincing even when paused, with no structural defect likely to expand during animation.
Step 4 — Animate with a bounded motion prompt
For the first generation, tell the model what changes, what remains fixed, and where the action stops. Avoid repeating every visual detail already present in the image.
First-person POV. The viewer takes two slow natural steps toward the café door. The camera has restrained human walking motion with subtle vertical movement, no dramatic shake. The right forearm lifts gradually and the hand moves toward the brass handle, stopping just before contact. Preserve the dark olive sleeve, hand anatomy, door design, rainy lighting, and realistic scale. Continuous forward motion, no cuts, no third-person view, no extra hands.The phrase “stopping just before contact” is deliberate. Reaching and grasping create different geometry. Splitting them gives the next clip a clean task: close the remaining distance, wrap the fingers, and rotate the handle.
If the camera glides like a drone, add “restrained human walking rhythm” rather than demanding strong head bob. Large vertical oscillation can make the scene feel like a video game or produce background warping.
Expected result: a short approach shot with coherent forward travel and one stable arm moving toward a fixed target.
Step 5 — Compare Seedance and Kling with the same input
Run the same anchor image and core prompt through Seedance and Kling before rewriting anything. This provides a useful A/B test of motion interpretation.
| Check | What to inspect | Reject when |
|---|---|---|
| Viewpoint | The camera remains the character’s eyes | A separate protagonist appears |
| Arm continuity | Sleeve, wrist, and hand remain connected | The arm stretches or changes side |
| Scene stability | Door and handle retain their shape | The target bends or relocates |
| Motion quality | Forward travel has restrained body rhythm | The camera floats, lunges, or spins |
| End frame | The hand stops near the handle | Contact occurs too early or fingers fuse |
Do not select a result solely because it has the most dramatic movement. For a multi-shot POV sequence, the best take is usually the one with the cleanest final second. That final state becomes the continuity bridge into the interaction shot.
Expected result: one selected clip based on viewpoint integrity, hand stability, and a usable ending—not just visual energy.
Step 6 — Continue the action as a separate contact shot
Use a clean frame near the end of the approach as the visual basis for the next generation. The hand should be close to the handle but not visibly intersecting it.
First-person POV continues without a cut in position. The right hand moves the final few centimeters, wraps naturally around the brass handle, and turns it downward once. The wooden door begins to open inward slightly. Keep the wrist aligned with the forearm. Preserve the dark olive sleeve, five fingers, brass handle, door texture, rainy reflections, eye-level perspective, and lighting. Minimal camera movement, no extra hand, no scene change.This prompt narrows the camera movement because the contact action already creates substantial visual change. Asking the camera to push forward while fingers close and the door rotates gives the model three interacting motions to solve at once.
For a third clip, begin after the handle has turned and prompt only the doorway transition:
The door swings inward and the first-person camera takes one careful step into the warm café. The right hand remains on the handle briefly, then releases naturally. Exposure shifts gently from cool rainy daylight to warm interior light. Continuous realistic movement, stable doorway, no cut, no visible person in front of the camera.Expected result: separate approach, contact, and entrance clips that can be trimmed together around compatible hand and door positions.
Step 7 — Edit around motion, not arbitrary clip boundaries
Place the selected clips in order and cut where their physical states match. The exact generated beginning or ending is not sacred; trim unstable setup frames and any late frames where anatomy starts to deteriorate.
- Cut from the approach when the hand reaches the same distance shown at the start of the contact clip.
- Match the wrist angle and door-handle position across the edit.
- Use a straight cut during ongoing arm movement instead of a long dissolve, which can reveal doubled fingers.
- Keep ambient rain continuous across the first cut.
- Add the handle click exactly when the handle begins rotating.
- Shift room tone only as the doorway opens, not at the start of the clip.
Sound is especially important in first-person video because it confirms invisible body movement. Quiet footsteps, clothing rustle, breathing, and object-contact sounds can make restrained visuals feel physical without adding more generated camera shake.
Expected result: a short POV sequence in which each clip performs one manageable action while the edit preserves the impression of continuous movement.
Keep the same POV character across projects
A recurring first-person character can be identified without showing a face. Create a small continuity sheet containing the details that may enter the frame:
- Dominant hand and skin tone
- Sleeve color, material, cuff, and fit
- Watch, ring, glove, tattoo, or nail details
- Approximate eye height
- Preferred camera movement intensity
- Lens character and image style
Reuse one compact identity line in every prompt, such as “viewer’s right hand, medium-brown skin, short natural nails, dark olive waterproof sleeve with a black elastic cuff.” Do not alternate between synonyms if a specific visual detail matters.
Alternative: use motion transfer for body-led POV action
Motion transfer is useful when the clip depends on a distinctive body rhythm rather than precise object contact—for example, dancing in front of a mirror, raising both hands during a performance, or following a rehearsed gesture sequence.
Record a short source clip with one performer, clear limb separation, stable lighting, and minimal obstruction. A chest-mounted or head-height recording can provide useful movement reference, but first-person remapping remains challenging when hands disappear from the source frame or cross each other repeatedly.
Use motion transfer to establish the performance, then generate or edit separate close shots for delicate hand-object interactions.
Alternative: start with text-led generation for hands-free shots
Text-led generation can work well when the body does not need to appear. Examples include moving through a forest path, riding slowly in a boat, or looking over a landscape from a stationary position.
Continuous first-person POV walking slowly along a narrow pine forest path at sunrise, camera at natural adult eye height, restrained human walking rhythm, subtle forward momentum, branches passing at realistic distances, no visible person, no hands, no cuts, no aerial movement, photorealistic natural light.If a text-led result produces a strong environment but inconsistent movement, capture a clean frame and continue with the anchor-image workflow. This changes the process from open-ended scene creation to controlled continuation.
Alternative: use face swap only when a reflection reveals the character
Most POV shots do not show a face, so face swap is usually unnecessary. It becomes relevant when the character appears in a mirror, shop window, polished elevator door, or other reflection.
Generate and approve the motion first. Then use an authorized identity reference to correct only the visible reflected face. A face replacement cannot repair incorrect arm geometry, mismatched clothing, or a reflection that moves independently from the camera.
Where the workflow falls short
- Fine contact remains difficult. Keys entering locks, fingers pressing tiny controls, and complex tool use require precise geometry over time.
- Long shots accumulate errors. Hands, sleeves, object positions, and lighting can drift as more actions are added.
- Mirrors increase continuity demands. The model must coordinate the camera, body, reflected body, and environment simultaneously.
- Fast turns can redesign the location. A rapid 180-degree movement asks the model to reveal space that was absent from the anchor frame.
- Model behavior varies. The same prompt may produce different camera intensity, anatomy, or timing across models and generations.
Plan around these limitations. Use shorter clips, separate interaction beats, avoid unnecessary reflections, and hide difficult transitions with purposeful cuts.
FAQ
Should the hands be visible in every first-person shot?
No. Hands should appear only when they support the action or clarify the body’s location. Constantly visible hands create extra continuity work and can make a naturalistic video resemble game footage.
Why does my prompt produce a character viewed from behind?
The prompt probably describes the protagonist as an object in the scene. Replace “a person walks” with “first-person POV, the camera is the viewer’s eyes,” and explicitly state that no protagonist is visible ahead of the camera.
Should I prompt camera shake to make walking realistic?
Use restrained walking rhythm rather than strong shake. Excessive shake can warp the environment and obscure anatomical errors without creating believable weight.
How many actions should one generated clip contain?
Start with one primary action. Walking toward an object, grasping it, and moving through an opening are better treated as separate generation tasks.
Can I make a POV sequence without generating hands?
Yes. Hands-free shots are often the easiest starting point. Use environmental parallax, footsteps, sound, and subtle camera rhythm to communicate that a person occupies the viewpoint.
Which model should I use for a POV shot?
Test the same anchor and prompt in more than one available model. Choose according to the specific shot: viewpoint stability, anatomy, contact timing, and end-frame quality matter more than a universal model ranking.
Final checklist
- Define one physical action for each generated clip.
- Write from the viewer’s eyes, not about a separate protagonist.
- Create and inspect a clean POV anchor image before animation.
- Keep the visible hand, sleeve, accessories, and dominant side consistent.
- Use restrained human movement instead of dramatic camera shake.
- Separate approach, contact, and doorway movement into distinct shots.
- Compare models with the same input before changing the prompt.
- Edit on matching body and object positions, then reinforce motion with sound.
Ready to test the workflow? Create your first ai video free with the anchor-frame and bounded-motion prompts above.
Keywords
ai video tutorial, first person POV video, image to video, text to video, motion transfer, Seedance prompts, Kling prompts