Fix Closed Eyes in a Wedding Group Photo With Nano Banana Pro
A single blink can spoil an otherwise excellent wedding group photo. This guide shows photographers how to use a second frame and Nano Banana Pro to repair closed eyes while keeping the final image faithful to the people photographed.
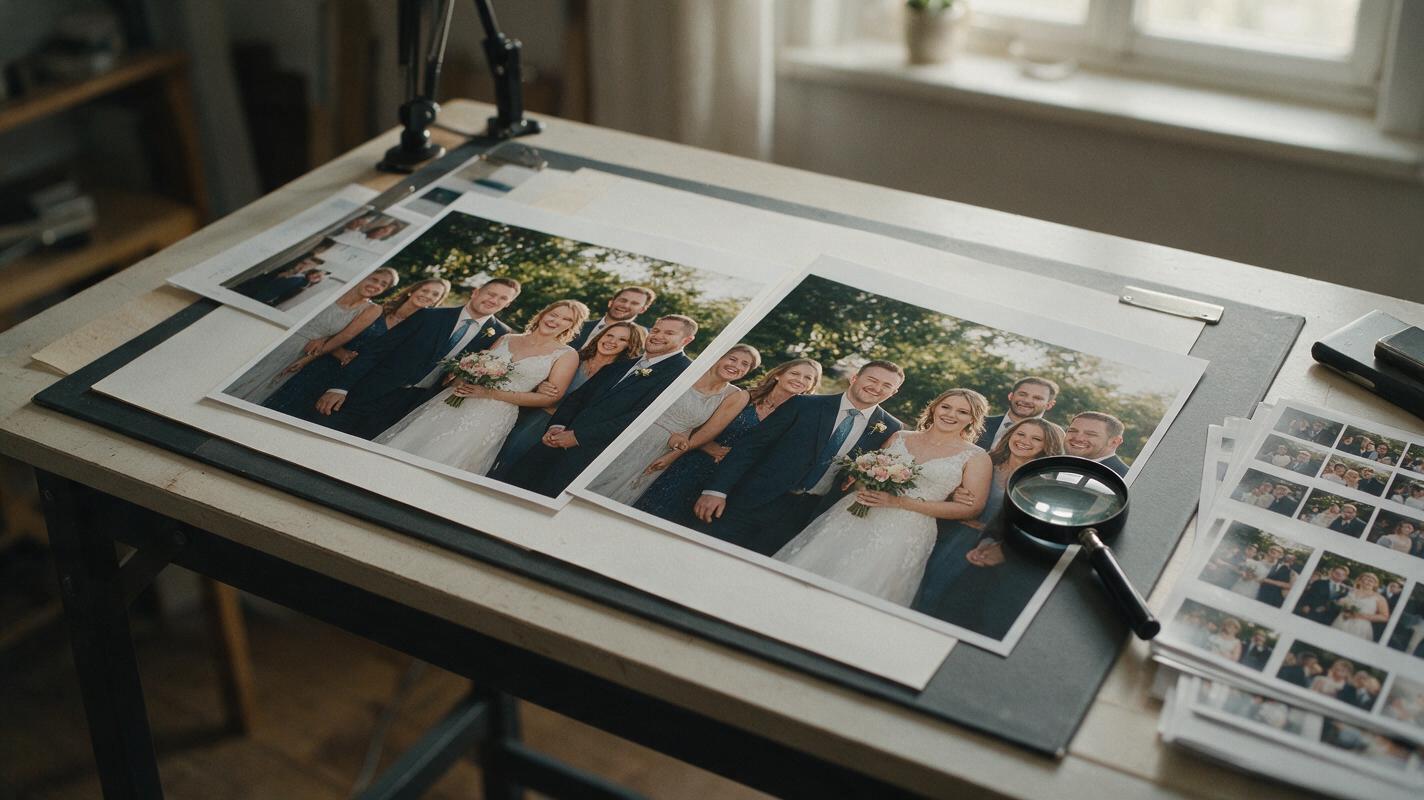
Table of contents
A blink does not have to ruin the group portrait
You have a wedding group photo with the right smiles, spacing, and light—but one person blinked. If you photographed a second frame in which that person’s eyes are open, you can use it as a reference for a small, controlled repair. The goal is not to invent a new expression. It is to preserve the chosen photograph and replace only the eyelids and visible eyes with an appearance supported by another real frame.
Nano Banana Pro can help create a candidate edit, but the dependable finish comes from comparing it with the reference and blending a tiny area back into the original. If there is no usable open-eye frame, do not treat generated eyes as a record of how that person looked.
Choose the right two photographs
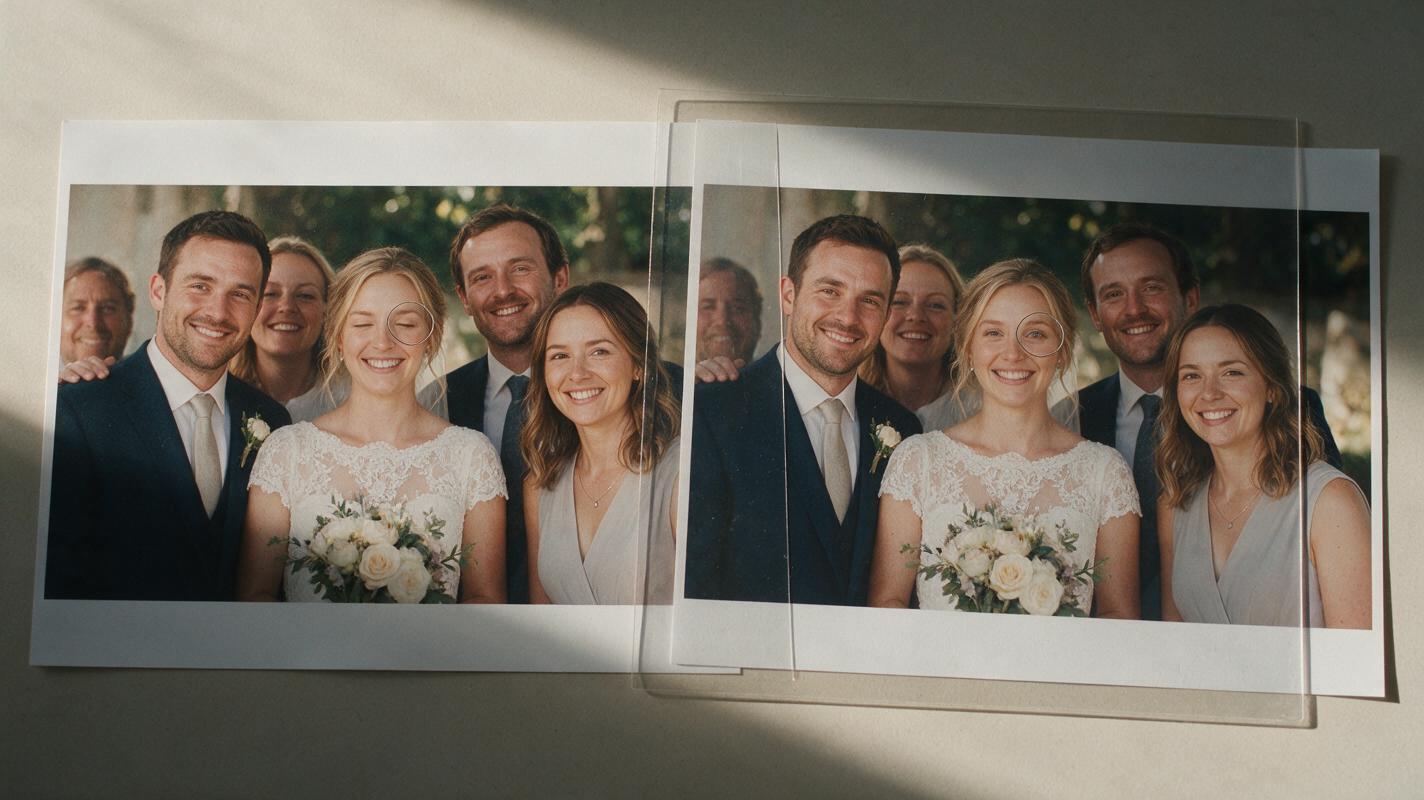
Start with a base frame: the photograph you want to deliver, despite the blink. Then find a donor frame showing the same person with their eyes open. Frames taken seconds apart, from nearly the same camera position, are usually easier to reconcile than photographs made later with different lighting or a changed pose.
Inspect the donor at full size before editing. The eyes should be sharp enough to judge, and the person’s head angle, gaze, and expression should be close to those in the base. Check whether hair, glasses, or another guest obscures the eye area in either frame. A donor with open eyes is not automatically a good donor if the face has turned substantially.
- Good match: Same camera position and light; similar head angle; clear eyes.
- Risky match: Different gaze direction, squint, glasses position, or strong shadow across one eye.
- No reliable match: No frame shows that person’s open eyes clearly. Deliver another photograph or leave the blink intact.
Keep the unedited base and donor files. Work from duplicates or exports so you can compare the repair with both sources throughout the edit.
Ask for an eye-area edit, not a new group portrait
Upload the base photograph and the donor frame to nano banana pro if the editing interface accepts both images. Identify which image is the base and which is the reference; do not rely on upload order alone. Crop reference copies around the relevant person when practical, while retaining enough face and nearby context to show angle and lighting.
The prompt should define a narrow change and a long list of things to preserve. Use the person’s position and clothing to identify them rather than guessing whether the model will correctly interpret a name or a count across a crowded group.
Use Image A as the base wedding group photograph. Use Image B only as a reference for the open eyes of the person in the dark jacket, second from the left in the front row.

In Image A, change only that person’s closed eyelids and immediately surrounding eye area so their eyes appear open as they do in Image B. Match the original head angle, gaze direction, eyelid shape, skin texture, lighting, and sharpness. Preserve their identity and expression.

Do not change any other face, hair, glasses, clothing, hands, background details, framing, or color. Return an edited version of Image A, not a redesigned group portrait.
Adjust the positional description to fit your photograph. If the interface offers a mask or selection, confine it to the eye area with a little surrounding skin for blending. If it does not, the resulting full image is a candidate source for a local composite—not a finished replacement for the original file.
Check whether the eyes actually belong in the scene
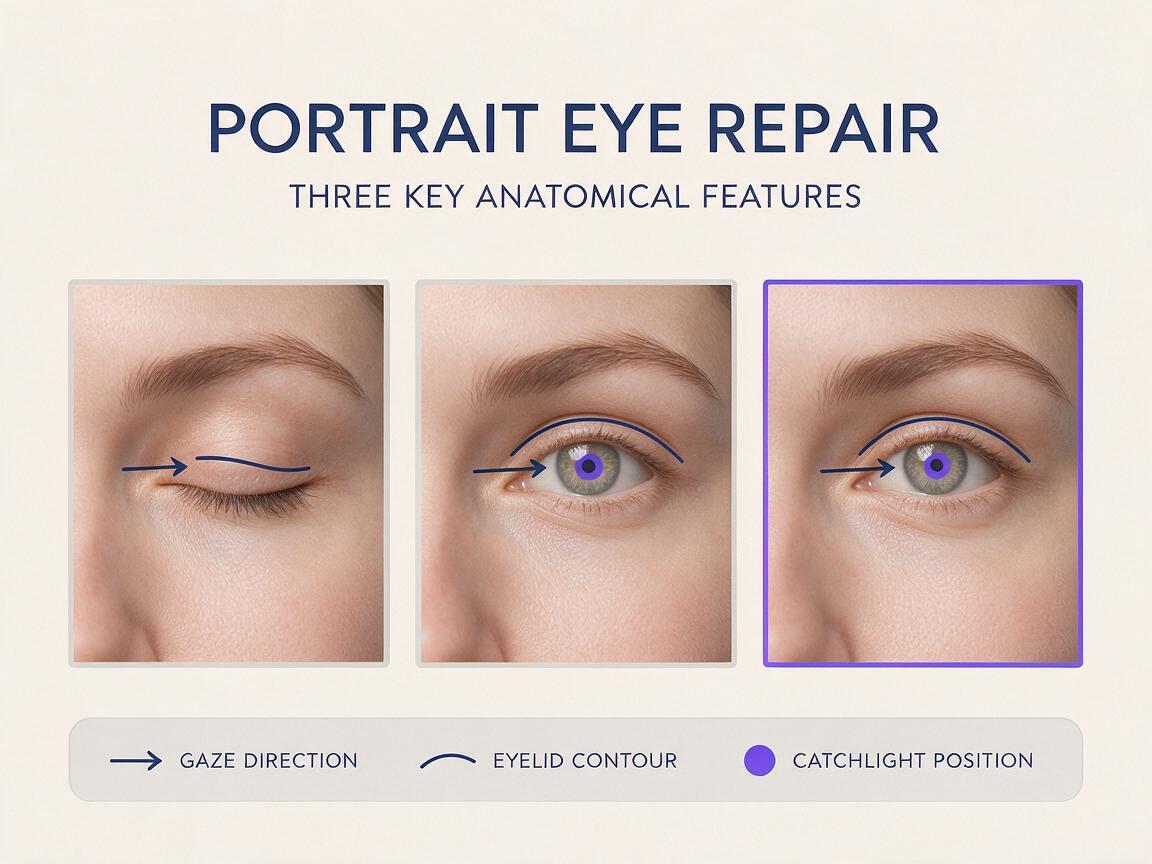
A plausible-looking result can still be wrong. Compare the candidate against both source frames at 100% magnification, then zoom out to the size at which the photograph will be delivered. At full size, inspect eyelid creases, iris placement, catchlights, eyelashes, skin texture, and the transition into the nose bridge. At delivery size, ask whether the repaired person appears to look in a different direction from everyone else.
| What you notice | Likely issue | Better response |
|---|---|---|
| Eyes look open but the person seems unlike themselves | The edit invented eye shape or changed surrounding features | Use a closer donor frame and restrict the edit to a smaller area |
| One eye appears brighter or sharper | Lighting or detail came from the donor without matching the base | Match exposure and texture locally before blending |
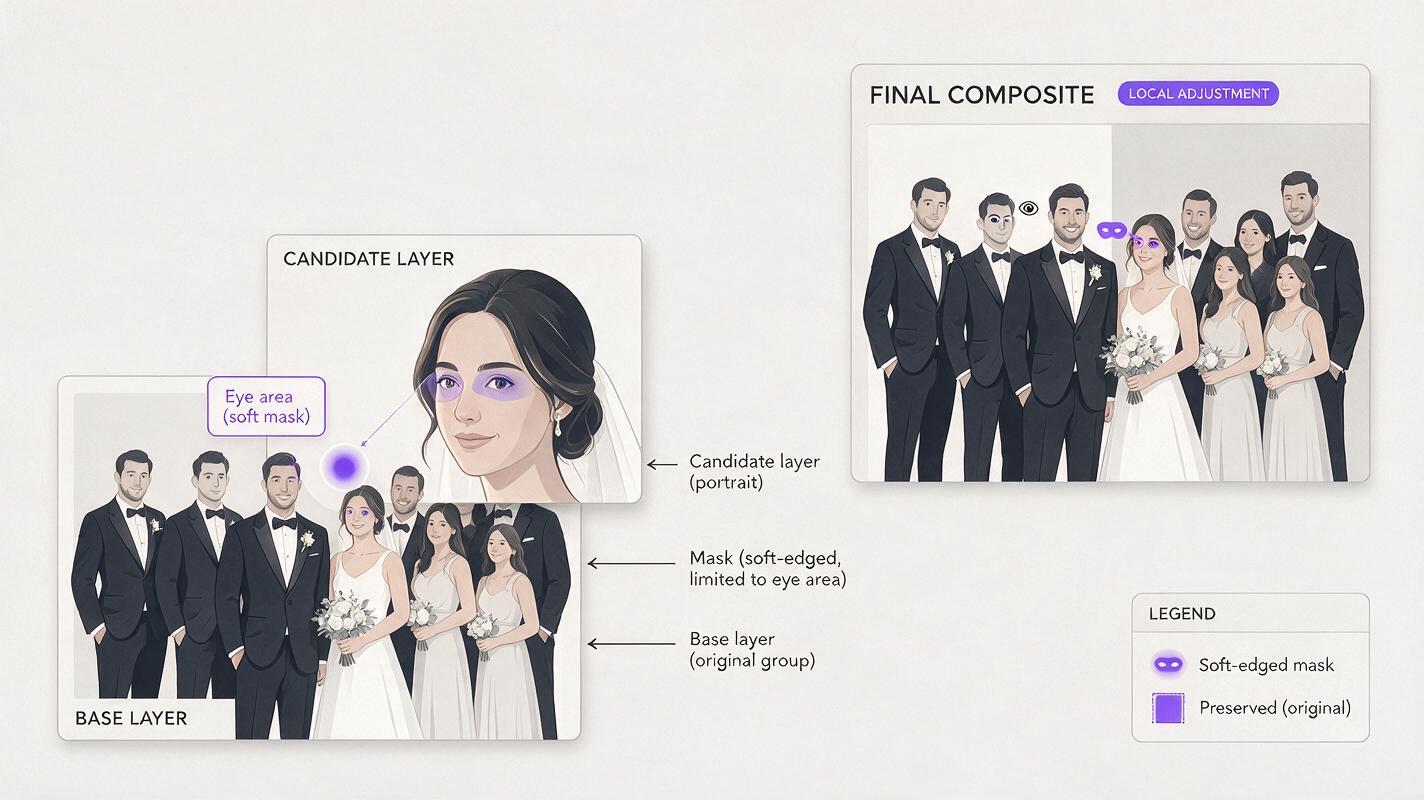
| Other guests’ faces have changed | Too much of the generated frame is being used | Composite only the repaired eye region over the original |
| Gaze looks misaligned | The donor’s head or eye direction differs from the base | Try another donor; do not force an anatomically implausible match |
Generate another candidate only when you can name the defect you want corrected. Repeated broad requests to “make it more realistic” may introduce changes outside the eye area.
Blend the smallest useful area into the original
Open the base photograph and the best candidate edit as layers in your photo editor. Align them, then reveal only the corrected eye area through a soft mask. Keep the base photograph visible everywhere else. This protects the other guests, clothing, venue, and overall rendering from incidental changes in the generated image.
Use a mask large enough to avoid a hard seam but not so large that it replaces the forehead, cheeks, or neighboring face. Check the blend against both light and dark surroundings. If the eye patch differs in grain, sharpness, or color, make small local adjustments. Do not blur it until the detail disappears; match the texture of the photograph.
If a straight copy of the eyes from a near-identical donor frame looks better than the generated candidate, use the photographic composite instead. AI is an option for the repair, not a requirement for the final file.
Save a layered working file and export a separate delivery image. View that export at its intended size, whether it is destined for a client gallery, album spread, or print. A seam that seems minor on a phone can become obvious in a large portrait.
Keep the edit within the couple’s expectations
Opening a blink with a real reference frame is different from changing someone’s smile, pose, or presence in a documentary wedding photograph. Even a small repair deserves judgment: preserve the event as photographed, and avoid presenting invented facial details as observed fact.
If the image is for editorial coverage or another context with strict authenticity requirements, follow the client’s editing policy before making a generative alteration. For a private wedding album, clarify substantial retouching requests with the couple and retain the original. When no trustworthy donor exists, choose a different frame rather than manufacturing a stranger’s eyes.
Final checklist
- The base frame is the photograph you intended to deliver.
- The donor clearly shows the same person’s open eyes at a compatible angle.
- Only the target eye area changes; every other guest remains untouched.
- Gaze, lighting, sharpness, and skin texture hold up at full size.
- The final export has been checked at its intended display or print size.
Have a matching pair of frames? test this prompt yourself, then compare the candidate with both originals before delivering anything.
Keywords
fix closed eyes in photos, wedding group photo editing, nano banana pro, ai photo editing, blink repair, group portrait retouching