How to Generate Furniture and Material Variations from a Single Layout using Flux
Learn how to use Flux to instantly generate photorealistic material, lighting, and furniture variations from a single white-box interior sketch or layout.
Table of contents
The Visualization Bottleneck
One of the most common bottlenecks in interior design is the client presentation phase. A client loves the spatial layout you proposed, but they cannot visualize how different finishes will look. They want to see the same room with hardwood floors instead of polished concrete, or a velvet sofa instead of linen. Traditionally, producing these material variations requires hours of re-texturing and re-rendering in software like 3ds Max or SketchUp.
Instead of manually rendering every single finish option, you can use an ai image generator like Flux to instantly produce photorealistic variations from your base layout. By locking in the structural geometry of the room and only changing the descriptive prompt, you can present a dozen high-fidelity style concepts in minutes.
Step 1 — Prepare Your Base Layout
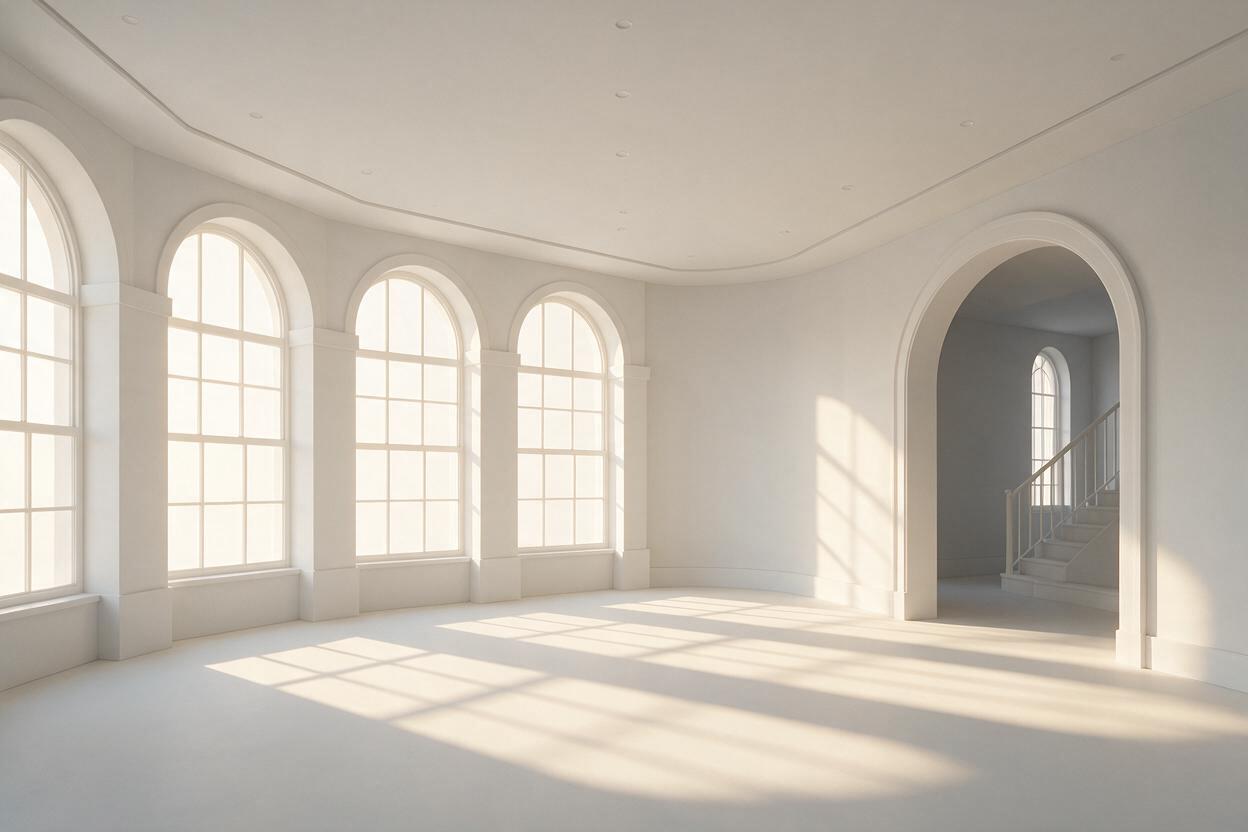
To ensure the AI respects your specific room dimensions and window placements, you need a structural foundation. Do not feed the model a highly detailed, fully textured render if you want to completely change the style; the AI will struggle to overwrite heavy existing textures.
Instead, export one of the following from your CAD or 3D software:
- A White-Box Render: A basic clay render showing only geometry, natural light, and shadows.
- A Clean Line Drawing: A hidden-line export from SketchUp with clear architectural boundaries.
- A Depth Map: If you are using advanced control networks, a depth map perfectly preserves the spatial volume.
This blank canvas allows the model to map new materials cleanly without altering the physical architecture of the space.
Step 2 — Establish Your Core Structural Prompt
When you transition your base image into a text to image workflow (often utilizing Image-to-Image with a denoise strength around 0.65 to 0.75), your prompt must be highly structured. Divide your prompt into three distinct sections: the permanent architecture, the interchangeable materials, and the lighting/atmosphere.
Here is the formula for a reliable interior prompt:
[Architectural constants] + [Specific materials & furniture] + [Lighting & render quality]For example, your base architectural prompt might always start with: "A spacious living room with floor-to-ceiling arched windows on the left wall, a central fireplace, and a vaulted ceiling." You will keep this exact phrase for every variation.
Step 3 — Prompting for Material and Furniture Swaps
Now, let's create the variations. By changing only the middle section of your prompt, Flux will populate your white-box layout with completely different design aesthetics while keeping the walls and windows exactly where they belong.
Variation A: Warm Minimalist
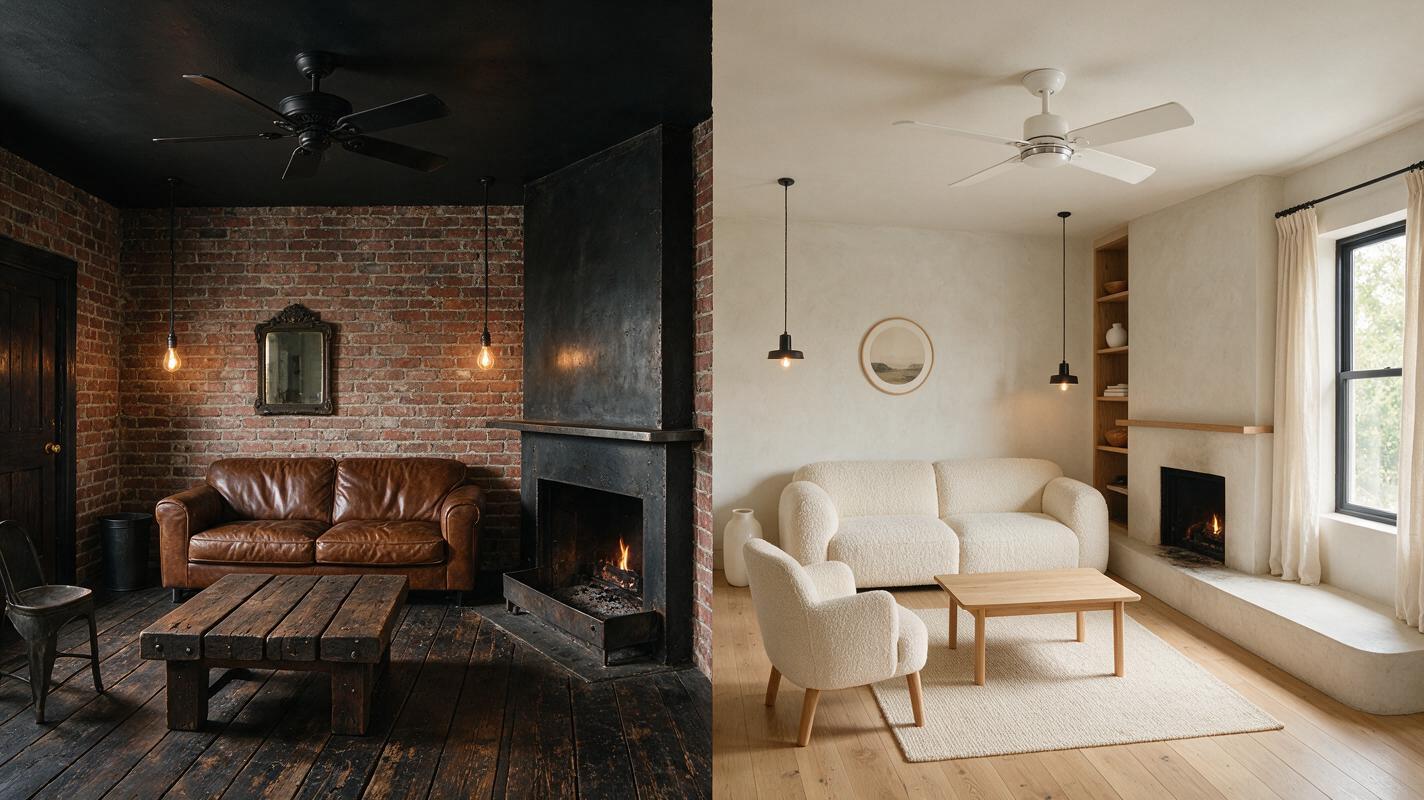
A spacious living room with floor-to-ceiling arched windows on the left wall, a central fireplace, and a vaulted ceiling. Furnished with a curved white bouclé sofa, light wide-plank oak flooring, and a travertine coffee table. Matte plaster walls. Soft, diffused morning sunlight, photorealistic architectural photography, 8k resolution.Variation B: Dark Industrial
A spacious living room with floor-to-ceiling arched windows on the left wall, a central fireplace, and a vaulted ceiling. Furnished with a distressed caramel leather chesterfield sofa, polished dark concrete flooring, and a blackened steel coffee table. Exposed brick walls. Dramatic moody lighting, sharp shadows, cinematic architectural visualization.If you have an active workspace set up, try these models for free now to see how quickly you can pivot from a bright, airy aesthetic to a moody, industrial vibe using the exact same floor plan.
Step 4 — Troubleshooting Consistency and Textures
When generating material swaps, you may occasionally run into rendering artifacts. Here is how to correct common issues when using Flux for interior concepts:
- The layout keeps changing: Your denoise strength (or image weight) is too high. Lower the denoise value to 0.5 to force the AI to adhere strictly to your original sketch.
- Materials bleed into each other: If the wood floor texture starts creeping onto the walls, separate your prompt terms clearly. Use spatial indicators like "flooring made of wide-plank oak" and "walls painted in matte charcoal".
- Furniture looks warped: This happens when the AI tries to force a complex piece of furniture into a base sketch that doesn't have the right volume for it. Keep your base sketch simple (using basic blocking for furniture) rather than highly detailed wireframes.
Pro Tip: When presenting these to a client, always show the original white-box layout alongside the AI variations. This builds trust, proving that the photorealistic concepts are directly tied to the actual floor plan they approved.
Final Checklist for Material Variations
- Export a clean, untextured white-box render or line drawing of your room.
- Separate your prompt into architecture, materials, and lighting.
- Keep the architectural description identical across all generations.
- Use a moderate denoise setting (0.5 - 0.7) to lock in the room's geometry.
- Use precise material descriptors (e.g., "travertine," "bouclé," "matte plaster") to get the best textural results from Flux.
Keywords
interior design, flux, material variations, room visualization, ai rendering, style concepts