How to Create Seamless Match Cuts With Image-to-Video AI
Create convincing AI match cuts by designing two keyframes around the same shape, screen position, and motion direction before generating either clip. This tutorial builds a bicycle-wheel-to-train-window transition with reusable prompts, model comparison, and a frame-level editing workflow.
Table of contents
Create the Cut Before You Create the Motion
TL;DR: The fastest way to produce a seamless AI match cut is to create two still keyframes with one shared visual anchor, animate them separately, and join the clips where their silhouettes align most closely. For the example below, an image to video workflow turns a spinning bicycle wheel into a circular train window without asking one generation to invent the entire transformation.
The important idea is that a match cut is primarily a composition problem, not a transition effect. If the wheel and window occupy different parts of the frame, no amount of motion prompting will make the edit feel invisible.
Why AI Match Cuts Usually Break
Text-to-video models can understand instructions such as “the wheel transforms into a train window,” but that does not guarantee a clean editorial transition. The model may morph spokes into curtains, duplicate the wheel, change the camera angle halfway through the shot, or create a soft liquid transformation instead of a precise cut.
The most common failure symptoms are:
- Anchor drift: the shared circle moves away from the center before the edit.
- Scale mismatch: the outgoing object fills 70 percent of the frame while the incoming object fills only 40 percent.
- Direction reversal: one camera pushes forward while the next immediately continues backward.
- Structural melting: bicycle spokes, window frames, or nearby objects bend during motion.
- Exposure shock: the color and brightness change so sharply that viewers notice the cut before they understand the new location.
A controlled workflow separates three jobs: still-image composition, clip animation, and final frame selection. Each generation therefore has a narrower and more reliable task.
Rule of thumb: if the two still frames do not look related when placed side by side, they will not become a seamless match cut after animation.
Reusable visual prompt — failed versus controlled match cut:
Create a cinematic two-panel comparison showing an AI match-cut failure on the left and a controlled match-cut setup on the right. Left panel: a close bicycle wheel placed low and off-center beside a small train window placed high in frame, mismatched scale, warped spokes, inconsistent perspective, visually awkward transition planning. Right panel: a round bicycle wheel and a round train window shown at matching size in the exact center of their respective frames, aligned circular silhouettes, consistent eye level and perspective, clean geometry. MANDATORY LAYOUT: equal-width side-by-side panels, 16:9 landscape canvas, no software interface, no logos, no readable text. MANDATORY CAMERA: straight-on editorial comparison, geometrically neutral perspective. Photorealistic objects, restrained natural colors, clear educational contrast.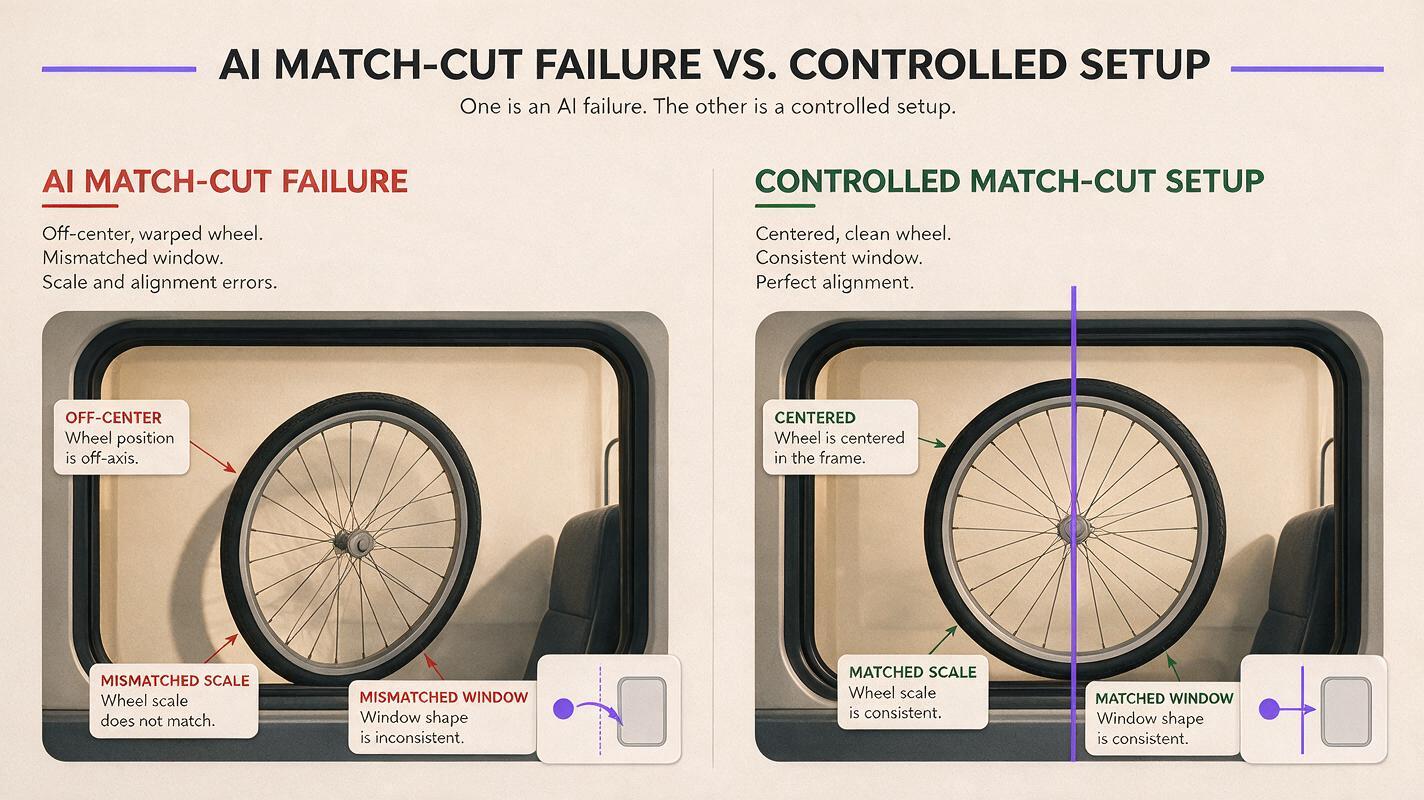
Three Ways to Build an AI Match Cut
- Shape match: cut between objects with similar silhouettes, such as a wheel and window, an eye and eclipse, or a plate and clock.
- Motion match: preserve the direction and speed of movement across the edit, such as a left-to-right turn continuing in a new location.
- Occlusion match: let a dark object, wall, coat, or passing vehicle briefly cover the frame, then begin the next clip behind a similar obstruction.
This tutorial combines shape matching with a forward camera move. Occlusion matching is covered later as an alternative for objects that cannot be aligned precisely.
How MagicBoat Handles a Multi-Model Match-Cut Workflow
MagicBoat brings image and video generation into one ai video workflow, so one free account can be used to try multiple integrated models rather than rebuilding the project across unrelated platforms.
Use an available image model such as Seedream, Flux, or GPT Image to create the two keyframes. Then compare available video models such as Seedance, Kling, or Veo using the same source images and motion brief. Model availability and individual controls can vary, so the workflow relies on portable inputs: a 16:9 still, a concise temporal prompt, and a clearly defined visual anchor.
| Workflow stage | Input | Desired output |
|---|---|---|
| Visual planning | Two-object transition concept | Shared shape and screen position |
| Image generation | Composition-locked prompts | Outgoing and incoming keyframes |
| Video generation | One keyframe per clip | Stable motion toward or away from the anchor |
| Model comparison | Identical images and prompts | The cleanest geometry and camera movement |
| Editing | Two selected clips | A cut placed at maximum visual similarity |
Step 1 — Design the Transition Around One Visual Anchor
Choose one feature that must survive the cut. In this example, the anchor is a centered circle: first a bicycle wheel, then a train window. Define its position before writing cinematic details.
Use a simple continuity specification:
FORMAT: cinematic 16:9 landscape
SHARED ANCHOR: one large circle centered at x=50%, y=50%
ANCHOR SIZE: approximately 65% of frame height
CAMERA AXIS: straight toward the circular object
MOTION: forward push toward the center
CUT POINT: circle nearly fills the frame
COLOR BRIDGE: dark metal rim with warm highlights
Do not rely on phrases such as “same composition as before” in separate text-only generations. Repeat the measurable composition in both prompts. The expected result is a pair of frames that already share a recognizable visual skeleton.
Reusable visual prompt — transition blueprint:
Create a clean cinematic storyboard diagram for a match cut from a bicycle wheel to a round train window. Show three sequential frames from left to right: a complete bicycle wheel centered in frame, an intermediate circular silhouette filling most of the frame, and a round train window centered at the same scale and coordinates. Add simple directional arrows indicating a continuous forward camera push, but include no words, logos, software interface, or decorative technology graphics. MANDATORY LAYOUT: three equal 16:9 storyboard panels arranged horizontally on a warm off-white editorial background. MANDATORY CAMERA: perfectly straight-on axis in every panel, circle center fixed at x=50% and y=50%. Crisp geometric construction, realistic object thumbnails, restrained charcoal and muted amber palette.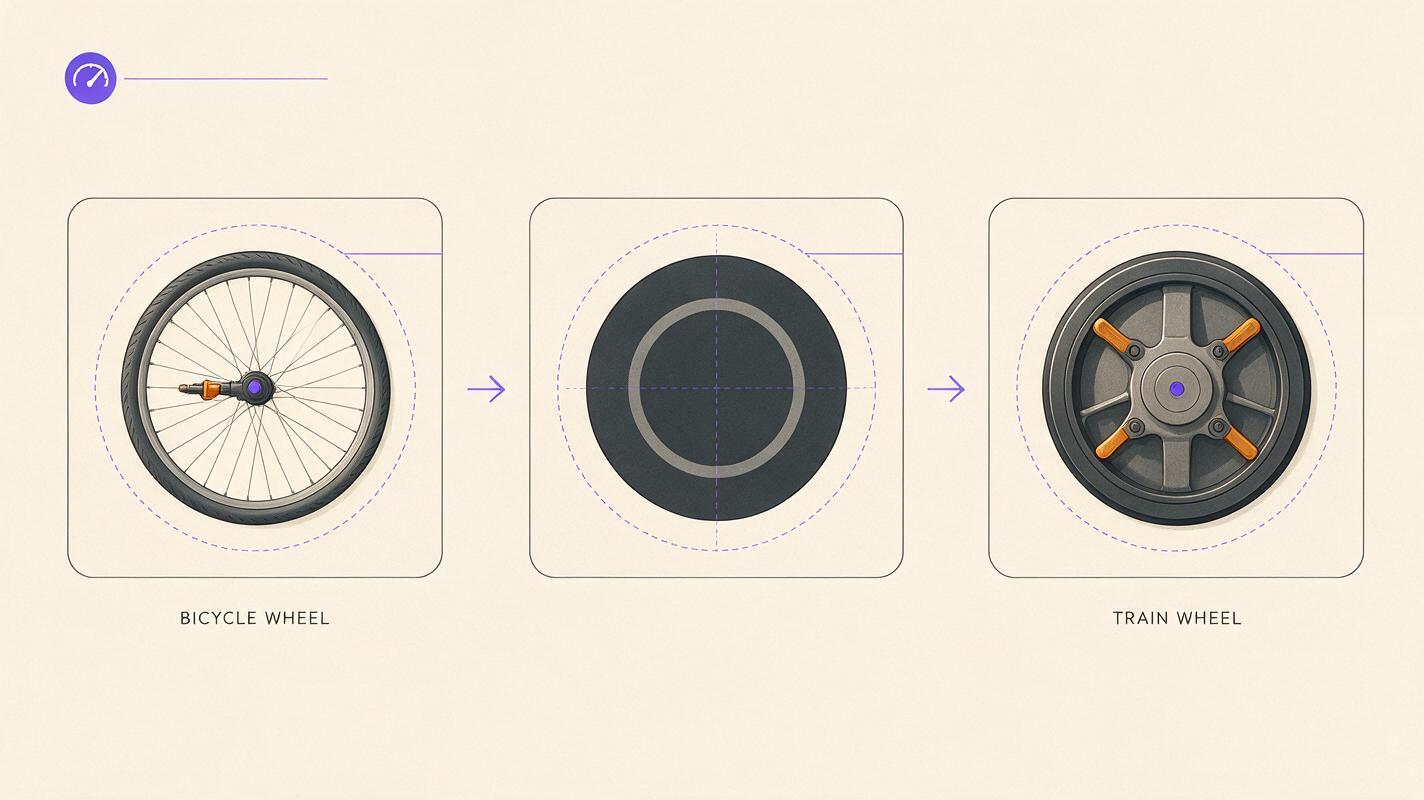
Step 2 — Generate the Outgoing Bicycle-Wheel Keyframe
Create the first still as a finished film frame rather than a broad concept image. The wheel needs clean spokes, a centered hub, and enough environmental context to establish the street before the camera approaches it.
A cinematic editorial-realism frame of a vintage commuter bicycle paused on a rain-darkened European street at early morning, the front wheel facing the camera and forming one precise circle in the center of the frame, dark steel rim with subtle warm reflections, straight undamaged spokes converging on a clearly visible hub, damp stone buildings and a quiet bakery softly out of focus in the background, believable lived-in location, natural overcast light, restrained film grain, realistic metal and rubber textures, no rider, no text, no logos. MANDATORY LAYOUT: landscape 16:9, wheel center fixed at x=50% and y=50%, wheel diameter approximately 65% of frame height, generous context around the tire. MANDATORY CAMERA: straight-on view at axle height, level horizon, medium telephoto perspective, no Dutch angle, no wide-angle distortion.Reject the frame if the wheel is elliptical, partially hidden, turned away from the lens, or cropped before animation begins. A small defect in the still tends to become a large defect once the wheel rotates.
The expected result is a stable outgoing keyframe whose circular anchor can be measured against the incoming frame.
Step 3 — Animate the Outgoing Clip Toward the Cut Point
Use the bicycle still as the image input. A four-to-six-second clip is usually easier to control than a long shot, if the selected model offers duration choices. Request one movement only: a smooth push toward the wheel hub while the wheel rotates gently.
The camera performs one smooth controlled forward dolly directly toward the bicycle wheel hub. The wheel begins rotating slowly clockwise while remaining a rigid, perfectly circular object with straight stable spokes. The hub stays locked to the exact center of frame throughout the shot. Background parallax is subtle and physically believable. During the final second, the dark circular rim expands until it nearly fills the frame, creating a clean graphic cut point. No camera orbit, no sideways movement, no bicycle duplication, no morphing, no bent spokes, no new people entering, no change of weather or location.Use low or moderate motion intensity when that control is available. High motion can create speed, but it also gives the model permission to alter geometry. The expected result is a forward-moving shot with at least several late frames in which the rim dominates the composition.
Test the same source and prompt in more than one available model. Do not decide based only on the most dramatic clip. Choose the version with the roundest wheel, steadiest center point, and cleanest final frames.
Step 4 — Build the Incoming Train-Window Keyframe
The train frame should echo the end of the bicycle clip, not the beginning. Center the circular window, match the rim thickness and warmth, and keep the camera perpendicular to the glass.
A cinematic editorial-realism interior of an older passenger train at sunrise, dominated by one large round window centered precisely in the frame, dark brushed-metal window rim with warm amber reflections, soft countryside visible through slightly weathered glass, muted green upholstered seats and subtle wood paneling only at the far edges, believable used train carriage, natural golden morning light, realistic materials, fine film grain, no passengers, no text, no logos. MANDATORY LAYOUT: landscape 16:9, circular window center fixed at x=50% and y=50%, outer window diameter approximately 68% of frame height, rim thickness visually similar to a bicycle tire. MANDATORY CAMERA: straight-on at the window's center height, level horizon, lens perpendicular to the glass, symmetrical framing, no fisheye distortion.Place the generated train frame beside the final usable bicycle frame. Crop or regenerate until the two outer circles align. Minor differences can be hidden during a fast cut, but a visibly shifted center will make the picture appear to jump.
The expected result is a second keyframe that reads as a new location while retaining the outgoing clip's dominant geometry.
Reusable visual prompt — aligned source frames:
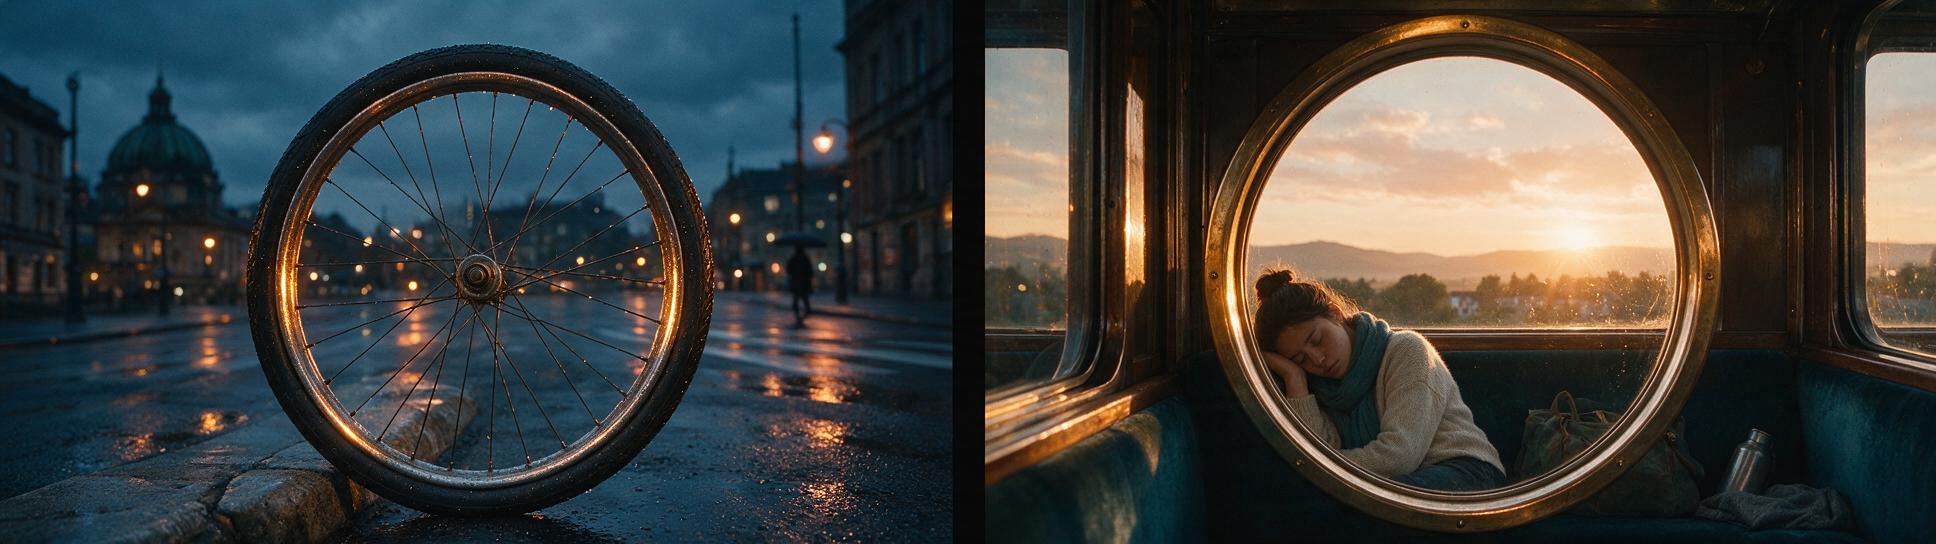
Create a photorealistic cinematic diptych showing the two source frames for a seamless match cut. Left panel: a vintage bicycle wheel viewed straight-on on a rain-darkened street, circular rim centered and occupying about two-thirds of frame height. Right panel: a round metal train window viewed straight-on inside a lived-in passenger carriage at sunrise, centered at exactly the same coordinates and scale, with matching dark rim thickness and warm highlights. MANDATORY LAYOUT: two equal 16:9 frames side by side with a narrow neutral divider, both circles centered at x=50% and y=50%, no labels, no interface, no logos. MANDATORY CAMERA: level straight-on views at the center height of each circle, matched medium-lens perspective, no tilt or wide-angle distortion. Editorial film realism, physically accurate materials, subtle grain.Step 5 — Animate the Incoming Clip Away From the Anchor
Use the train still as the input, but reverse the camera logic. The shot should begin close to the window and then reveal the carriage. Keep the opening moment calm so the editor has multiple stable frames from which to choose.
Begin with the round train window stable and centered, matching the source image exactly. Hold the composition briefly, then perform one smooth controlled backward dolly that reveals more of the passenger carriage. The countryside moves naturally beyond the glass, but the circular window remains rigid and undistorted. Preserve the window rim, carriage materials, sunrise lighting, and straight camera axis. No sudden zoom, no camera roll, no added passengers, no duplicated windows, no melting frame, no lighting flicker, no transformation effect.If the first generated frame differs noticeably from the still, generate another version rather than planning to hide the mismatch. The opening frame is the most important part of this clip.
The expected result is a reveal that feels like the camera has passed through the bicycle wheel and emerged inside the train, even though the two shots were generated independently.
Step 6 — Cut on the Closest Matching Frames
Import both clips into any frame-accurate editor. Move backward from the end of the bicycle shot and mark the last frame with a clean circular rim. Then inspect the beginning of the train clip and find the frame with the closest circle size, center, brightness, and edge contrast.
- Place the bicycle clip first and the train clip immediately after it.
- Use a hard cut rather than a long dissolve.
- Trim one or two frames at a time until the center no longer appears to jump.
- If needed, apply a subtle crop or scale correction to one clip.
- Match overall exposure and color temperature without flattening both locations.
- Bridge the edit with continuous sound, such as a wheel hum becoming train-track rhythm.
A two-to-four-frame motion blur or extremely short blend can conceal minor texture differences, but it should not be used to repair major misalignment. The transition succeeds when viewers first perceive continuous movement and only then recognize the location change.
Step 7 — Diagnose the Cut Before Regenerating Anything
| Visible problem | Likely cause | First repair |
|---|---|---|
| The image jumps sideways | Anchor centers do not match | Reframe or crop the incoming clip |
| The cut feels like a flash | Exposure mismatch | Match rim brightness and highlights |
| The wheel melts near the end | Too much requested motion | Shorten the clip or reduce motion |
| The train shot begins unpredictably | Opening motion starts too early | Request a brief stable hold |
| The transition feels slow | Too many near-identical frames | Trim closer to peak motion |
| The object changes before the cut | Prompt asks for transformation | Generate two normal clips instead |
Regenerate only the side that fails. If the bicycle shot is strong but the train window is too small, keep the bicycle clip and rebuild the incoming still. This preserves useful work and prevents unnecessary variation.
Advanced: Keep the Match-Cut Language Across a Project
A single transition can become a repeatable visual motif. Store a short continuity note containing anchor coordinates, approximate size, camera axis, movement direction, rim color, and exposure range. New objects can then be designed against the same template.
For example, continue the montage from the train window to a coffee cup seen from above, then from the cup to a setting sun. Avoid repeating the exact same timing every time; preserve the geometric rule while varying shot duration and sound.
Alternative: Use an Occlusion Cut When Shapes Do Not Match
If the source and destination objects have incompatible silhouettes, cover the frame instead. End the first clip with a bus, wall, coat, or dark foreground object passing close to the lens. Begin the second clip with a similar color filling the frame, then reveal the new scene.
This technique relaxes geometric requirements because the audience briefly loses visual information. Prompt the obstruction as an ordinary physical object, not as a magical transition. Keeping its travel direction consistent is more important than matching every contour.
Alternative: Use Motion Transfer or Face Swap for Human-Centered Cuts
For a cut between two performers repeating the same gesture, motion transfer can provide a shared movement source. Keep the camera angle, body scale, and timing similar, then cut at the clearest pose.
If a strong generated shot contains the wrong identity, face swap may repair the face without rebuilding the camera move. It is best treated as a localized finishing option: it will not correct mismatched body proportions, lighting, occlusion, or scene geometry.
Where This Workflow Falls Short
- Thin structures such as bicycle spokes can still wobble during aggressive motion.
- Reflections in glass or polished metal may change between frames.
- Some generations introduce motion immediately, leaving no stable edit handle.
- Exact optical continuity is difficult when the two source images use different perspectives.
- Long shots increase the chance of structural drift and are rarely necessary for a quick transition.
- A match cut cannot hide an unclear story relationship; visual similarity should support the sequence rather than replace it.
For critical commercial work, plan extra versions of both clips. Generative variation means the first result may have the right mood but the wrong final frame.
FAQ
Can I create the entire match cut with text to video?
Yes, but a single text-generated transformation gives the model control over composition, geometry, timing, and the transition itself. Separate reference images make the two endpoint designs more predictable.
Should I use a dissolve between the clips?
Start with a hard cut. A match cut depends on alignment and motion continuity. Use only a very short blend if minor texture or exposure differences remain after trimming.
How long should each generated clip be?
Use only enough duration to establish the original scene, approach the anchor, and provide several usable edit frames. Shorter clips are generally easier to keep structurally stable.
Do the two prompts need identical wording?
No. Their subjects and locations need different descriptions. Repeat only the continuity constraints: aspect ratio, anchor coordinates, anchor size, camera axis, motion direction, and bridging color.
What is the best object for a first match cut?
Choose large, rigid shapes with simple outlines. Wheels, windows, clocks, plates, doorways, and eyes are easier than hands, hair, foliage, or transparent objects.
Can this technique work with vertical video?
Yes. Define the shared anchor using relative coordinates and size for a 9:16 frame. Leave extra safe space around the object because small center shifts are more noticeable in a narrow composition.
Final Checklist
- Choose one shape, edge, or obstruction as the transition anchor.
- Fix its screen position and approximate size before adding cinematic detail.
- Generate the outgoing and incoming stills separately.
- Keep both cameras on a compatible axis.
- Request one controlled motion per clip.
- Compare models using identical images and prompts.
- Cut at the frames with the closest geometry and exposure.
- Use sound to carry momentum through the edit.
- Regenerate only the failed side of the transition.
- Create your first AI video free and test the wheel-to-window prompts now.
Keywords
image to video, AI match cut, AI video tutorial, prompt engineering, Seedance prompts, Kling prompts, AI video workflow