How to Create Match-Cut Transitions with Image to Video
Create a convincing AI match cut by designing two still frames around the same subject position, silhouette, and camera angle, then animating each side separately. This workflow uses controlled image-to-video generation, endpoint planning, and a precise edit to turn unrelated scenes into one fluid visual transition.
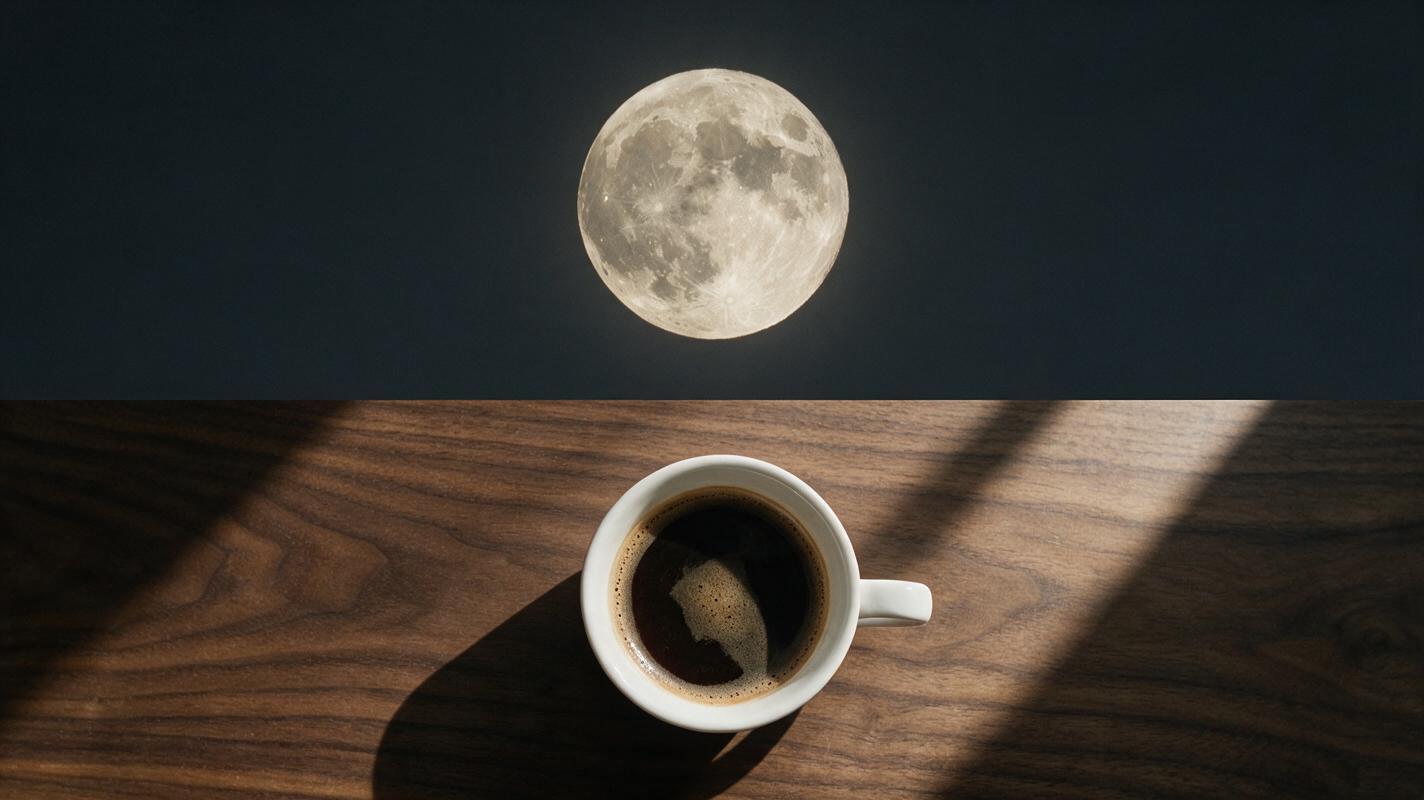
Table of contents
Create an AI match cut by designing the transition before the motion
A strong match cut does not depend on a complicated effect: it works because the last frame of one shot closely resembles the first frame of the next. The fastest AI workflow is to create two composition-matched stills, animate them with image to video, and join the clips at the point where their shapes, scale, and movement align.
TL;DR: Choose one visual anchor, such as a circular object or centered silhouette, and hold its screen position constant across two different scenes. Generate the stills first, animate away from or toward the transition frame, and trim the two clips on their closest matching frames.
Why AI-generated match cuts often feel like ordinary scene changes
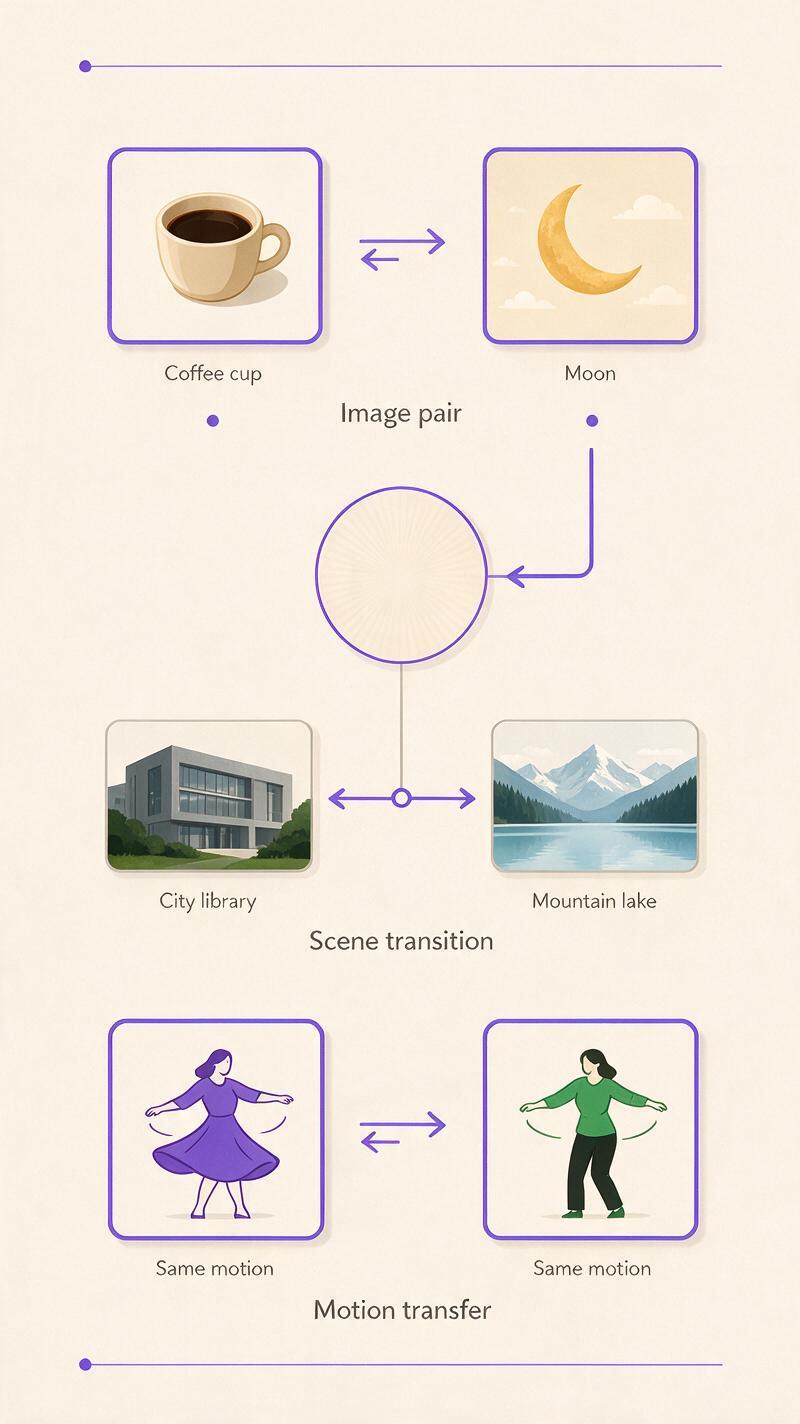
A match cut links two different shots through visual continuity. A coffee cup seen from above might become the moon, a spinning bicycle wheel might become a rotating turbine, or a person opening a door might cut to another person completing the same movement in a different location.
The idea is simple, but uncontrolled generation introduces several failure modes:
- The anchor jumps: the matched object moves from the left side of one frame to the center of the next.
- The scale changes: an object occupying one-third of the first frame suddenly fills the second.
- The camera axis flips: motion traveling left to right reverses after the cut.
- The silhouette drifts: a clean circle becomes an ellipse or an irregular shape during animation.
- The transition is over-prompted: asking one generation to transform a cup into a moon often produces a liquid morph instead of an editorial cut.
- The best frames occur at the wrong time: both clips contain suitable images, but those images are buried in their middles rather than placed at editable endpoints.
The practical solution is to treat the transition as a pair of shots, not as one magical transformation. Design the shared visual frame first. Motion is added only after that frame is stable.
Three ways to build an AI match-cut transition
- Matched stills plus separate animation: create two images with nearly identical compositions, animate each one, and cut between them. This is the most controllable method and the focus of this tutorial.
- A shared bridge frame: begin from one carefully designed frame, create two visual interpretations of it, and animate outward in opposite narrative directions.
- Motion-matched live action: record a simple movement, apply it to different characters or styles, and cut at the repeated pose. This is useful when body motion matters more than object geometry.
Best beginner rule: match one dominant shape, one screen position, and one direction of motion. Trying to match every detail can make the two scenes look too similar and weaken the surprise.
How MagicBoat handles a multi-model match-cut workflow
MagicBoat brings image and video generation models into one account, so the same pair of source frames can be tested across different workflows without rebuilding the concept each time. You can create anchor images with image models such as Seedream, Flux, or GPT Image, then test motion through available video options such as Seedance or Kling.
A practical division of labor is:
| Task | Useful workflow | What to evaluate |
|---|---|---|
| Design the matched frames | Image generation | Composition, silhouette, lens angle, object scale |
| Explore an idea quickly | text to video | Whether the concept produces a readable visual rhyme |
| Control the final shots | Image-led video generation | Frame preservation, motion direction, camera behavior |
| Repeat human movement | Motion transfer | Pose timing, limb path, body orientation |
| Repair identity after motion | Face swap | Facial continuity and authorization of the reference |
Model behavior can vary by prompt and source image. Instead of assuming one model is best for every transition, compare short tests made from the same frame, prompt, aspect ratio, and intended motion.
Step 1 — Choose a transition anchor with a clear silhouette
Select the visual feature that will survive the cut. Simple geometric forms are easier to match than detailed objects because viewers recognize their position and outline immediately.
- Circle: coffee cup, eye, wheel, clock, tunnel, sun, moon.
- Rectangle: doorway, phone screen, window, picture frame, building facade.
- Vertical silhouette: standing person, tree trunk, tower, bottle.
- Diagonal line: raised arm, road edge, sword, staircase railing.
- Repeated action: head turn, hand sweep, door opening, object spin.
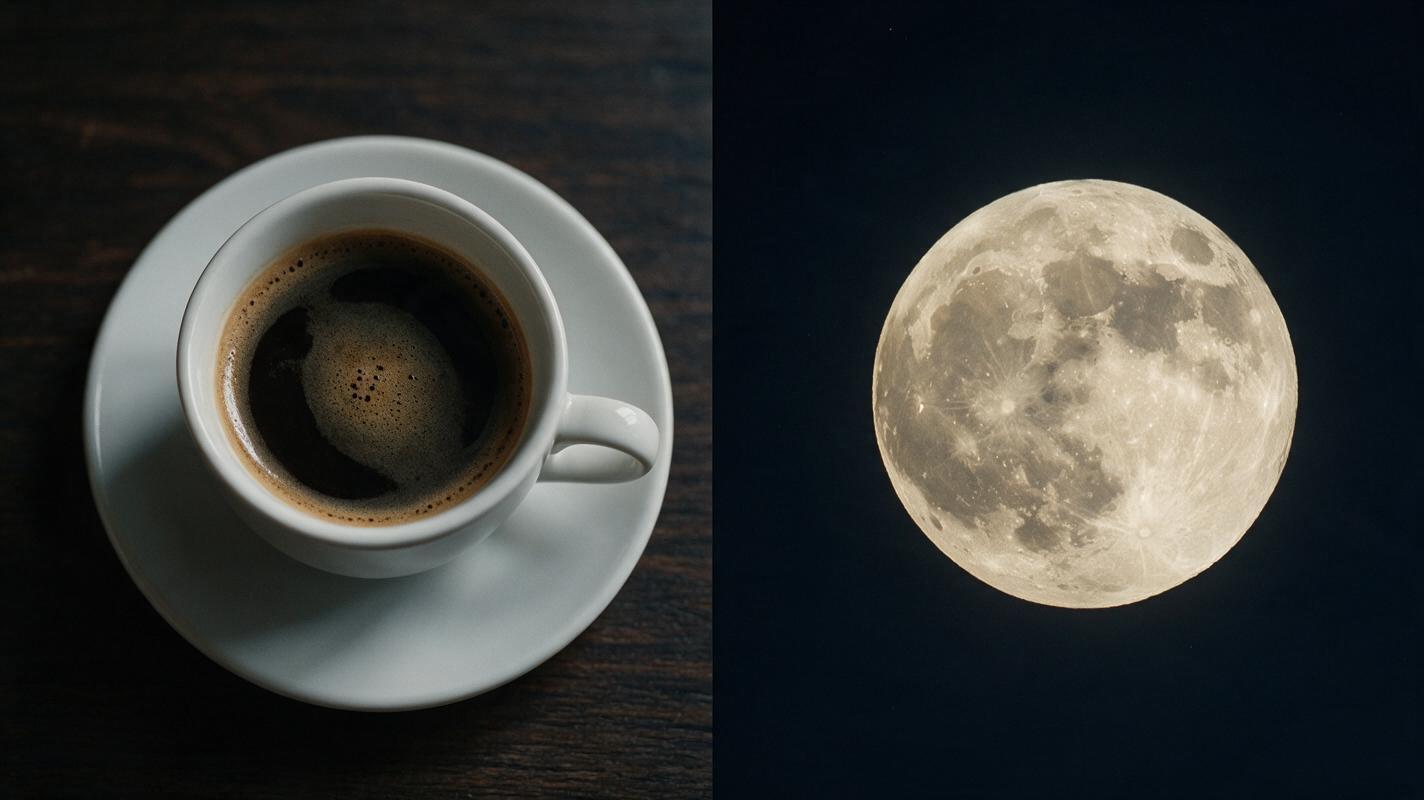
For this tutorial, use a top-down coffee cup that cuts to a full moon. The circular anchor should remain centered and occupy approximately the same proportion of both frames.
Transition concept:
Shot A: overhead coffee cup on a dark wooden table
Shot B: full moon in a dark night sky
Shared anchor: centered bright circle
Shared framing: static top-down or flat frontal composition
Motion direction: slow clockwise rotation in both shots
Cut point: when the circle is centered and unobstructed
Expected result: a transition plan that can be described without mentioning model effects. If the match only works because of a proposed morph, simplify it.
Step 2 — Generate the first anchor frame
Create the final composition of Shot A as a still image. Because this image will define one side of the cut, prioritize geometry over decorative detail.
Overhead editorial photograph of a white ceramic coffee cup filled with dark coffee, perfectly centered on a nearly black walnut table, the cup seen as a clean circular shape occupying about one third of the frame width, soft window light, minimal composition, no hands, no spoon, no text, symmetrical framing, realistic texture, 16:9Reject images with an angled cup, a strongly visible handle crossing the silhouette, heavy steam covering the center, or props that compete with the circular form. A small handle can remain if it does not dominate the transition frame.
Expected result: a clean, centered cup with enough negative space to support subtle camera movement without losing the anchor.
Step 3 — Generate the matching destination frame
Build Shot B by translating the composition rather than merely describing a moon. Repeat the placement, scale, contrast, and visual weight established in Shot A.
Photorealistic full moon centered in a deep charcoal night sky, the moon occupying about one third of the frame width, perfectly circular silhouette, flat frontal view, restrained crater detail, sparse faint clouds kept away from the moon, minimal composition, no stars crossing the moon, symmetrical framing, 16:9Compare the two frames side by side. The subjects do not need pixel-perfect outlines, but their centers and outer boundaries should be close. If one circle is noticeably larger, regenerate or crop before making video.
| Property | Shot A | Shot B |
|---|---|---|
| Anchor center | Frame center | Frame center |
| Anchor size | About one-third of width | About one-third of width |
| Background value | Dark wood | Dark sky |
| Camera angle | Overhead | Flat frontal |
| Visual interruption | No steam over center | No clouds over center |
Expected result: two clearly different scenes that produce an immediate visual rhyme when alternated.
Step 4 — Animate Shot A toward a stable cut frame
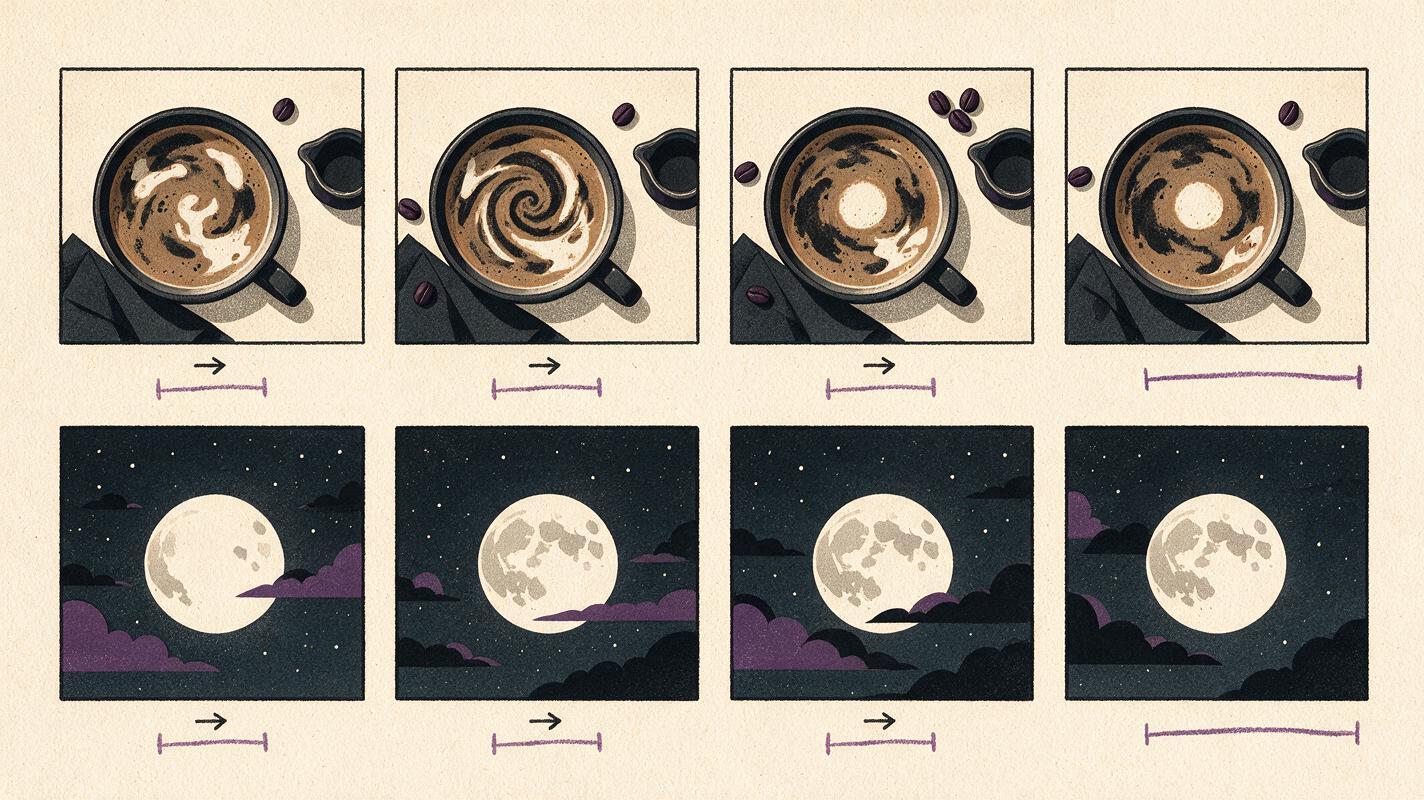
Use the coffee image as the source for the first video. Keep the motion restrained near the intended endpoint. The model should preserve the circle instead of inventing a transformation.
Static overhead camera. A faint reflection moves slowly across the dark coffee while the cup remains perfectly centered and keeps its circular shape. Very subtle clockwise movement in the coffee surface. No camera tilt, no zoom, no new objects, no hands entering the frame. End on a clean unobstructed view of the centered cup.Generate a short test and inspect the last portion frame by frame. Watch the rim rather than the coffee texture: if the rim bends, slides, or grows, the structural match is weakening.
If the camera moves despite the prompt, remove descriptive movement words and restate the camera constraint at the beginning. If the result is too static, add motion inside the object instead of moving the entire camera.
Expected result: a first shot that settles on a clean version of the original circular composition.
Step 5 — Animate Shot B away from the matching frame
Use the moon frame as the source for the second clip. Begin with a stable composition, then introduce atmosphere gradually. The motion should continue the visual energy of Shot A rather than contradict it.
Begin with a static centered full moon matching the source image. Thin clouds drift very slowly clockwise around the moon without crossing its center. The moon remains circular, fixed in position, and unchanged in size. After the opening moment, use a barely perceptible pullback while preserving symmetrical framing. No sudden camera movement, no additional celestial objects.The cleanest cutting frame should appear at the start of this clip. If cloud motion immediately obscures the moon or the camera begins off-center, simplify the prompt and regenerate.
Expected result: a destination shot that begins as a compositional match and then reveals its new environment.
Step 6 — Compare Seedance and Kling with controlled prompts
Use the same source image and core instruction when testing Seedance and Kling. Do not rewrite the prompt for every model on the first pass; otherwise, you will not know whether a difference came from the model or the wording.
CONTROLLED TEST
Input: identical anchor image
Prompt: identical motion instruction
Aspect ratio: identical
Duration choice: comparable where available
Evaluation: anchor position, outline stability, motion timing, unwanted additions
Choose the result that protects the transition frame, even if another version looks more dramatic overall. For a match cut, endpoint accuracy matters more than the amount of movement.
After identifying the better baseline, make one prompt change at a time. Useful revisions include “lock the camera,” “preserve the exact silhouette,” or “delay atmospheric movement until after the opening moment.” Avoid stacking several new camera commands into one retry.
Expected result: two clips selected for structural compatibility, not simply for isolated visual appeal.
Step 7 — Find and trim the closest matching frames
Place Shot A before Shot B in a video editor and inspect the boundary frame by frame. Trim the end of Shot A to its cleanest centered cup frame. Then trim the beginning of Shot B to the moon frame with the closest size and position.
Use a direct cut first. A dissolve often weakens the effect by revealing both objects simultaneously, turning the match into a transparent blend. The viewer should experience instant recognition: one circle disappears and another takes its place.
- If the moon is slightly larger, apply a small crop or scale correction before regenerating everything.
- If the centers differ, reposition one clip while ensuring the frame edges do not become visible.
- If motion pauses at the cut, trim earlier or later until the perceived rotation continues.
- If the change feels confusing, allow more contextual footage before and after the cut.
Play the transition at full speed, then inspect it frame by frame. Frame inspection diagnoses geometry; normal playback determines whether the edit feels intentional.
Expected result: a crisp editorial transition in which the cup becomes the moon without requiring a visible morph.
Step 8 — Add sound that bridges the two scenes
Visual matching creates the cut, but sound can make it feel continuous. Carry one sound across the edit or place a synchronized accent directly on it.
- Continue the soft circular stirring sound into a low night wind.
- Use one restrained whoosh exactly on the cut.
- Let music continue unchanged while the visual world changes.
- Place a tonal hit on the transition if the cut is meant to feel surprising.
Avoid layering several loud effects. Match cuts are strongest when the audience notices the visual idea rather than an attempt to hide the edit.
Expected result: a transition that feels connected in time even though its location and subject change completely.
Keep the same transition language across a project
A repeated match-cut system can become part of a video's visual identity. Choose a rule and reuse it: circles always mark location changes, doorways introduce new chapters, or repeated hand movements connect different characters.
Save a compact transition record for each sequence:
Anchor type: circle
Anchor position: center
Anchor scale: 33% of frame width
Camera behavior: locked at cut
Motion direction: clockwise
Shot A clean frame: ending
Shot B clean frame: opening
Edit type: direct cut
Sound bridge: continuous ambient tone
This record is more useful than saving prose prompts alone because it captures the visual constraints that make the transition work.
Alternative: use motion transfer for a pose-matched cut
For human movement, a geometric anchor may be less important than pose timing. Record a clear action such as turning, raising an arm, or stepping through a doorway. Use the same motion pattern for two different visual treatments, then cut when the body reaches the repeated pose.
Keep the performer fully visible, avoid motion blur in the source, and choose actions with a readable midpoint. The two destination characters should have broadly compatible body proportions and clothing silhouettes; otherwise, the cut can jump even when the pose timing matches.
Alternative: replace only the identity with face swap
If the motion and framing succeed but the generated face is inconsistent, preserve the clip and repair identity afterward with an authorized reference. This is often more efficient than regenerating the entire transition, especially when the cut depends on a rare hand position or precise body pose.
Face replacement will not repair a drifting head outline, incorrect lighting, or broken occlusion. Use it for identity continuity, not as a substitute for structurally sound source footage.
Where this workflow falls short
- Complex silhouettes remain fragile: fingers, spokes, hair, and transparent materials may change during generation.
- Exact endpoint control varies: a prompt can request a stable opening or ending, but the cleanest frame may still occur elsewhere in the clip.
- Large camera moves weaken geometry: fast orbits and aggressive zooms make it harder to preserve the shared anchor.
- Texture changes can distract from the match: a highly detailed first object and a flat second object may not feel connected despite similar outlines.
- Not every mismatch requires regeneration: small scale and position errors may be easier to correct in editing, but large perspective differences usually require a new source image.
The technique works best when generation supplies controlled motion and editing supplies the exact transition timing.
Frequently asked questions
Can I create the entire match cut with one text-to-video prompt?
You can explore the concept that way, but one prompt may produce a morph, blend, or uncontrolled camera move. Separate image-led shots generally provide more control over the exact frames used at the cut.
Should the two anchor objects be exactly the same size?
They should be close enough that the viewer reads continuity immediately. Minor differences can add energy, but a major scale jump usually looks accidental unless the motion clearly motivates it.
Is a direct cut always better than a dissolve?
For a classic match cut, start with a direct cut. A very short dissolve can help a dreamlike sequence, but it changes the effect from visual substitution to visible blending.
What should I change first when the object drifts?
Simplify the motion prompt and lock the camera. Keep movement inside the scene, such as a reflection or cloud drift, rather than asking the anchor or camera to move.
Can this workflow match two characters instead of two objects?
Yes. Match their head position, body silhouette, pose, gaze direction, and movement path. Motion transfer can help when the same physical action must occur in both shots.
Do I need the same model for both clips?
No. The edit depends on compatible frames, not identical generation methods. You can select different models if each produces the required composition and motion, although matching texture and contrast may require additional grading.
Final checklist
- Choose one dominant visual anchor with a readable silhouette.
- Place it at the same screen position in both source images.
- Match object scale, camera angle, and motion direction.
- Animate each shot separately instead of requesting a complex morph.
- Keep the transition endpoint or opening frame unobstructed.
- Compare models using the same inputs and prompts.
- Trim on the closest matching frames and test a direct cut first.
- Use sound to bridge the scene change without overpowering it.
Ready to build the transition? Create your first AI video free and test the cup-to-moon prompt with multiple image and video models.
Keywords
image to video, AI video workflow, match cut transition, prompt engineering, Seedance prompts, Kling prompts, AI video tutorial