Manga Page to Anime Storyboard With Nano Banana Pro
Convert a manga page into a production-ready anime storyboard instead of simply animating each panel. This workflow uses Nano Banana Pro to create consistent shot frames while preserving character identity, screen direction, dramatic emphasis, and editing rhythm.
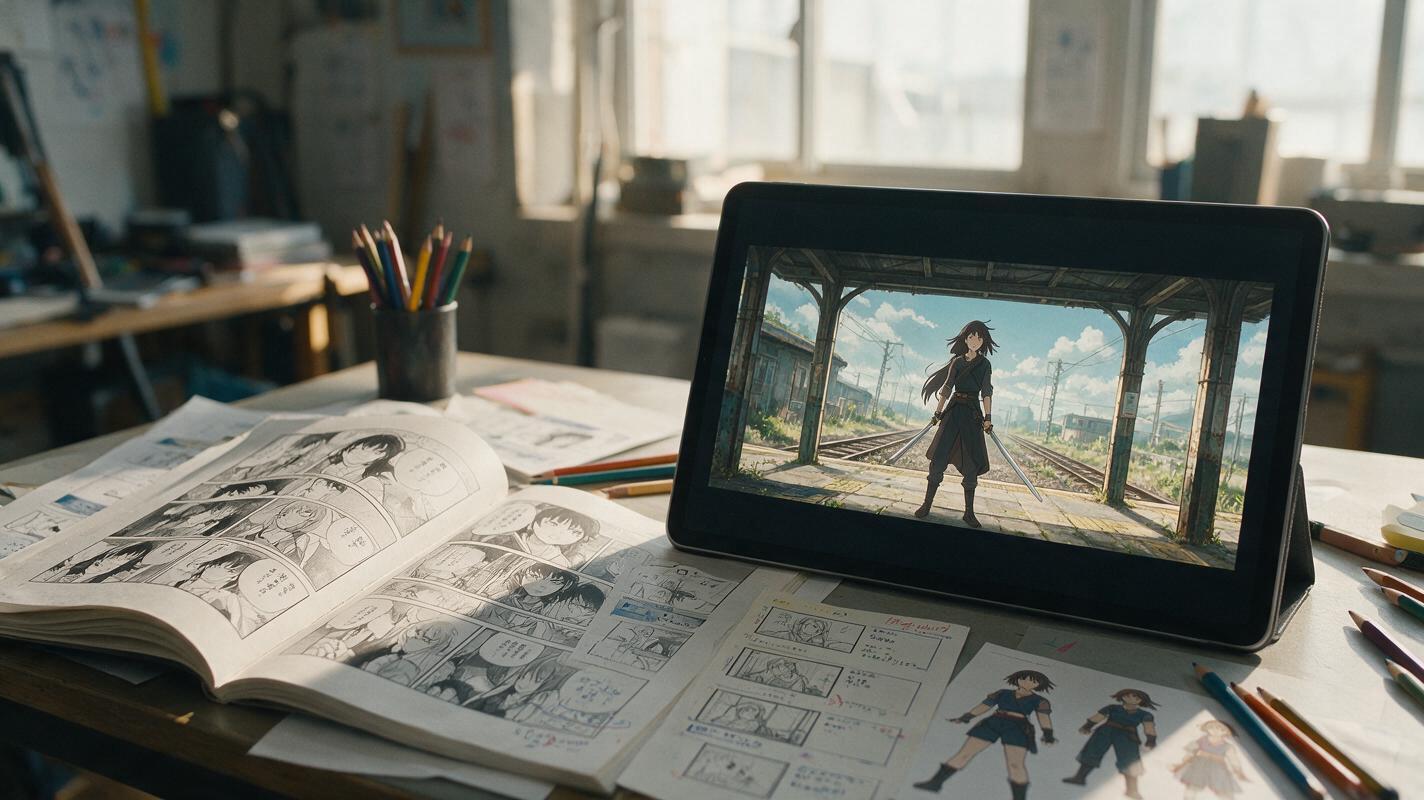
Table of contents
Turn Panels Into Shots, Not Slides
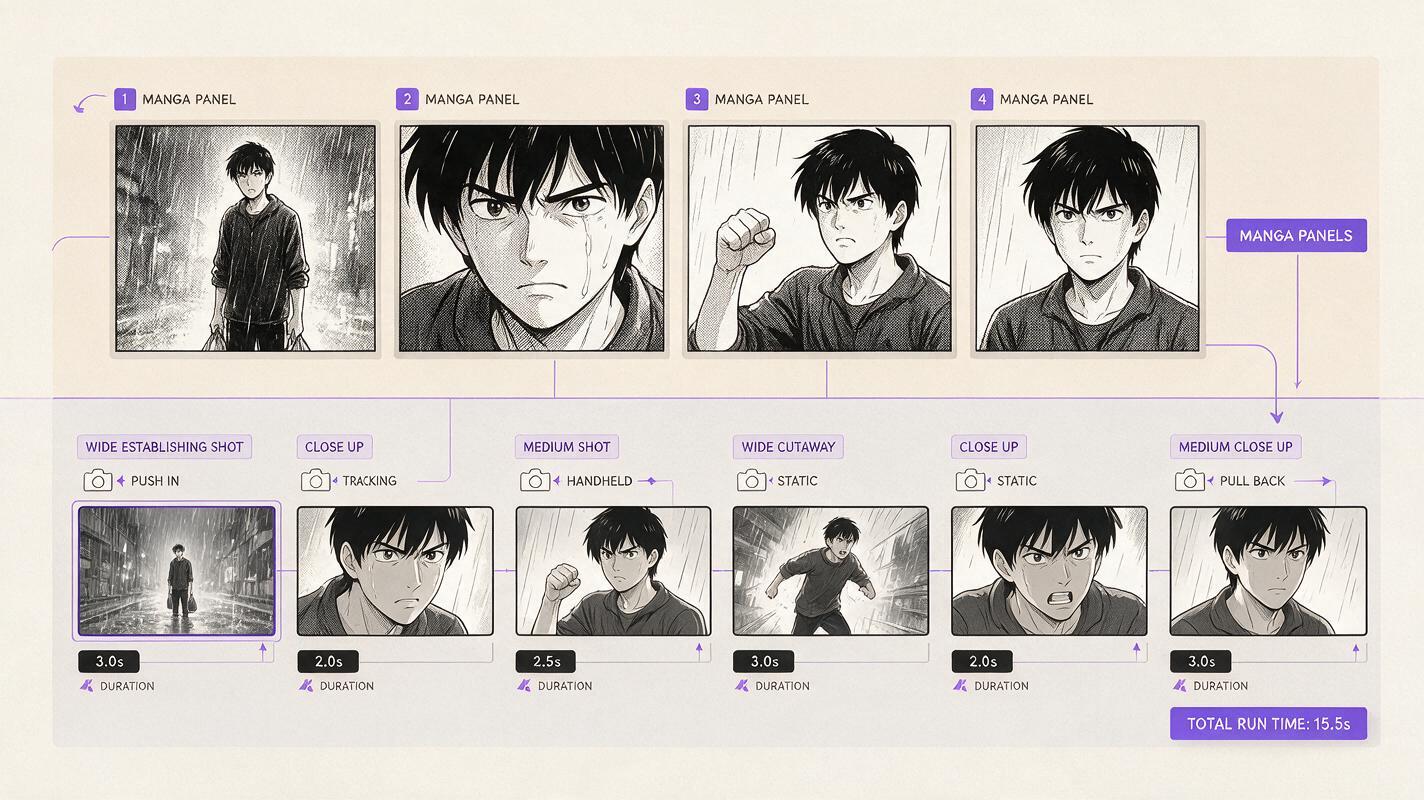
A manga page is not automatically an anime storyboard. Panels control reading order and page composition, while animation needs shot duration, camera position, screen direction, movement, and cuts. If you simply animate every panel, the result often feels like a slideshow with random motion.
The better approach is to identify the dramatic job of each panel, rebuild the page as a sequence of shots, and generate only the storyboard frames needed to communicate those shots. Nano Banana Pro can help create and revise the frames, but continuity decisions should be locked before generating large batches.
The core rule: preserve the story beat, not the panel border. One panel may become three shots, while several panels may collapse into one continuous shot.
Decode What Each Manga Panel Is Doing
Begin by annotating the page rather than prompting immediately. For every panel, write down its narrative function in a few words. Common functions include establishing a location, revealing information, showing a reaction, delivering dialogue, emphasizing an object, or creating an impact.
Imagine a page with these four panels:
- A swordswoman enters an abandoned train platform.
- Her hand moves toward the sword at her waist.
- A shadow appears behind a pillar.
- Her eye widens as she notices it.
A literal conversion would produce four clips. A cinematic adaptation might instead use a slow establishing shot, an insert of the hand, a point-of-view reveal, and a sharp reaction close-up. The content remains the same, but the sequence now has visual grammar.
| Manga device | Anime equivalent | Storyboard decision |
|---|---|---|
| Large opening panel | Establishing shot | Hold longer and introduce atmosphere |
| Small detail panel | Insert shot | Isolate the hand, weapon, clue, or expression |
| Repeated face panels | Reaction progression | Use a push-in or increasingly tight cuts |
| Diagonal action panel | Directional movement | Preserve the implied travel direction |
| Borderless splash image | Hero or impact shot | Give it the strongest silhouette and longest visual emphasis |
Build a Shot Map Before Generating Frames
Translate the panel analysis into a compact shot map. This becomes the blueprint for your ai storyboard and prevents attractive but unusable images from taking over the sequence.
Each shot entry should contain:
- Shot size: extreme wide, wide, medium, close-up, or insert.
- Subject: the character or object carrying the beat.
- Action: one visible action, not a chain of events.
- Camera: static, pan, push-in, pullback, tilt, or handheld accent.
- Direction: where the character looks or moves on screen.
- Duration: a rough hold measured in seconds or animatic frames.
- Cut reason: new information, emotional change, impact, or rhythm.
SHOT A — Extreme wide
Empty rural train platform at dusk. The swordswoman enters from screen left and stops beneath a broken lamp. Slow lateral camera drift. Hold 3 seconds.

SHOT B — Insert
Right hand hovering above the sword hilt. Sleeve moving slightly in the wind. Static camera. Hold 1 second.

SHOT C — Medium point of view
Dark silhouette partly hidden behind a pillar on screen right. Subtle push-in. Hold 2 seconds.

SHOT D — Extreme close-up
The swordswoman's left eye tightens, then widens. No head turn. Fast cut after 12 frames.
Keep each shot focused on one visual change. Requests such as “she enters, sees the enemy, draws her sword, attacks, and jumps away” force too many beats into one frame or clip. Separating the actions also makes later motion generation easier to control.
Lock the Continuity Package
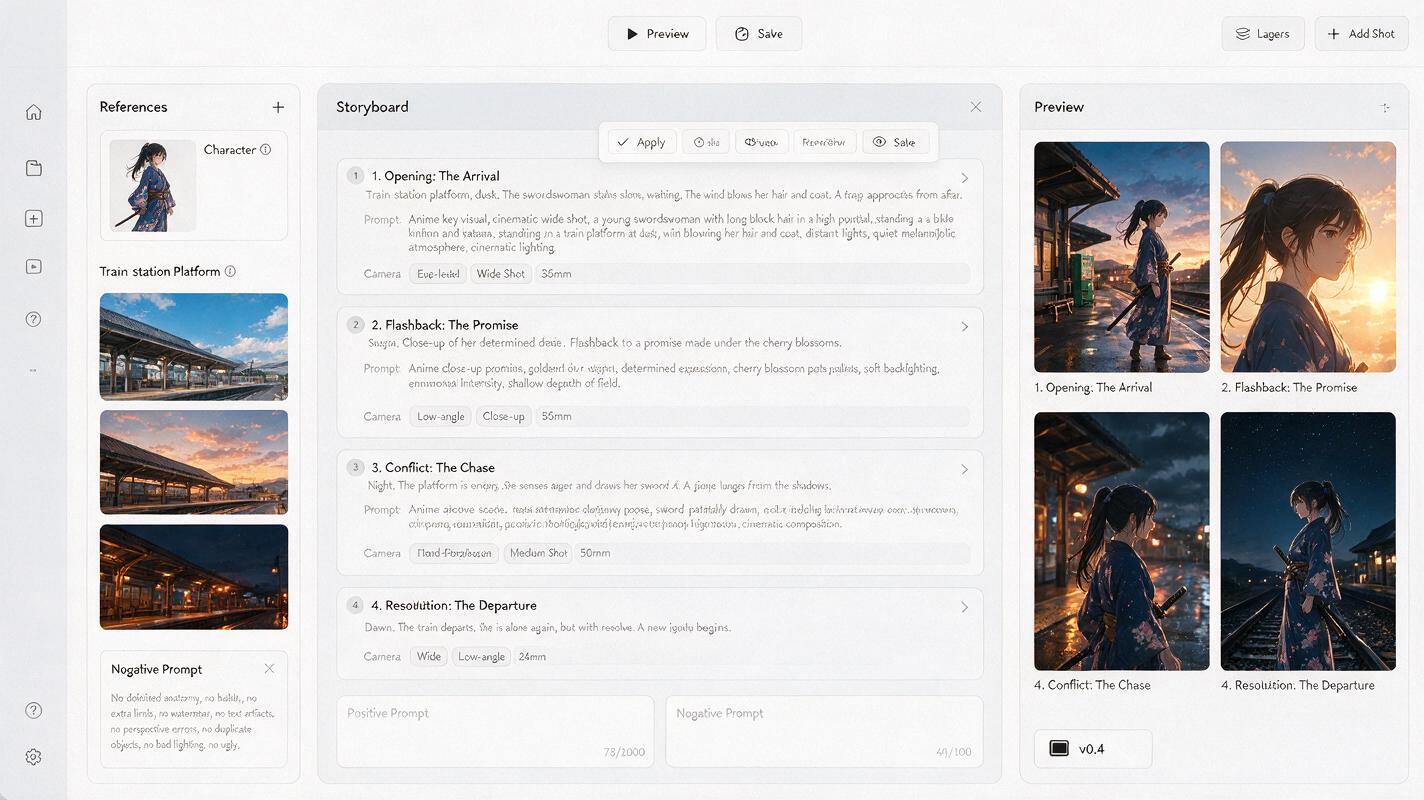
Before creating storyboard frames, assemble a small reference package for every recurring character and location. A polished character sheet is useful, but production continuity also depends on details that may not appear clearly in a front-facing portrait.
- Front and three-quarter character views
- Full costume silhouette
- Hair shape from both sides
- Weapon dimensions and carrying side
- Two or three essential expressions
- A simplified environment reference
- A fixed palette with named colors
Write the non-negotiable traits in plain language. For the swordswoman, that might be: short black bob with one long strand over the right cheek, amber left eye, gray right eye, navy uniform coat, red cord on the left shoulder, and sword carried at the right hip.
A reference image shows what the design looks like. A continuity note tells the generator which details are not allowed to change.
Generate Neutral Boards With Nano Banana Pro
Use Nano Banana Pro to create one clean frame for each shot in the map. Feed it the same continuity package throughout the sequence and change only the camera framing, pose, expression, and environment details required by that shot.
Storyboard frames should be readable rather than highly rendered. Excessive lighting effects, particles, fabric detail, and decorative backgrounds make continuity harder to inspect. Ask for clean anime preproduction art, clear silhouettes, restrained color, and visible staging.
Create a clean 16:9 anime storyboard frame using the attached character and station references.

Shot: extreme wide establishing view of an abandoned rural train platform at dusk.
Character: the same swordswoman enters from screen left and stops beneath the broken lamp.
Continuity: preserve her face, short black bob, heterochromia, navy uniform coat, red cord on the left shoulder, and sword at the right hip.
Composition: character occupies less than 15 percent of the frame; empty tracks lead toward the distant vanishing point.
Style: simplified color anime preproduction board, crisp silhouette, minimal shading, no text, no panel border.
Do not add characters, alter the costume, move the sword, or reverse the screen direction.
Create the establishing frame first because it defines spatial relationships. Then generate medium shots and close-ups from that established geography. If the pillar is on the right side of the wide shot, it should not suddenly move behind the character in the next frame unless the camera crosses the set deliberately.
For difficult close-ups, edit or crop an approved wider frame instead of generating a completely independent portrait. This gives the model more contextual evidence about costume, lighting, and scene direction. If you are ready to build the first board frame, test this prompt yourself with your own manga page and references.
Preserve Screen Direction Across Cuts
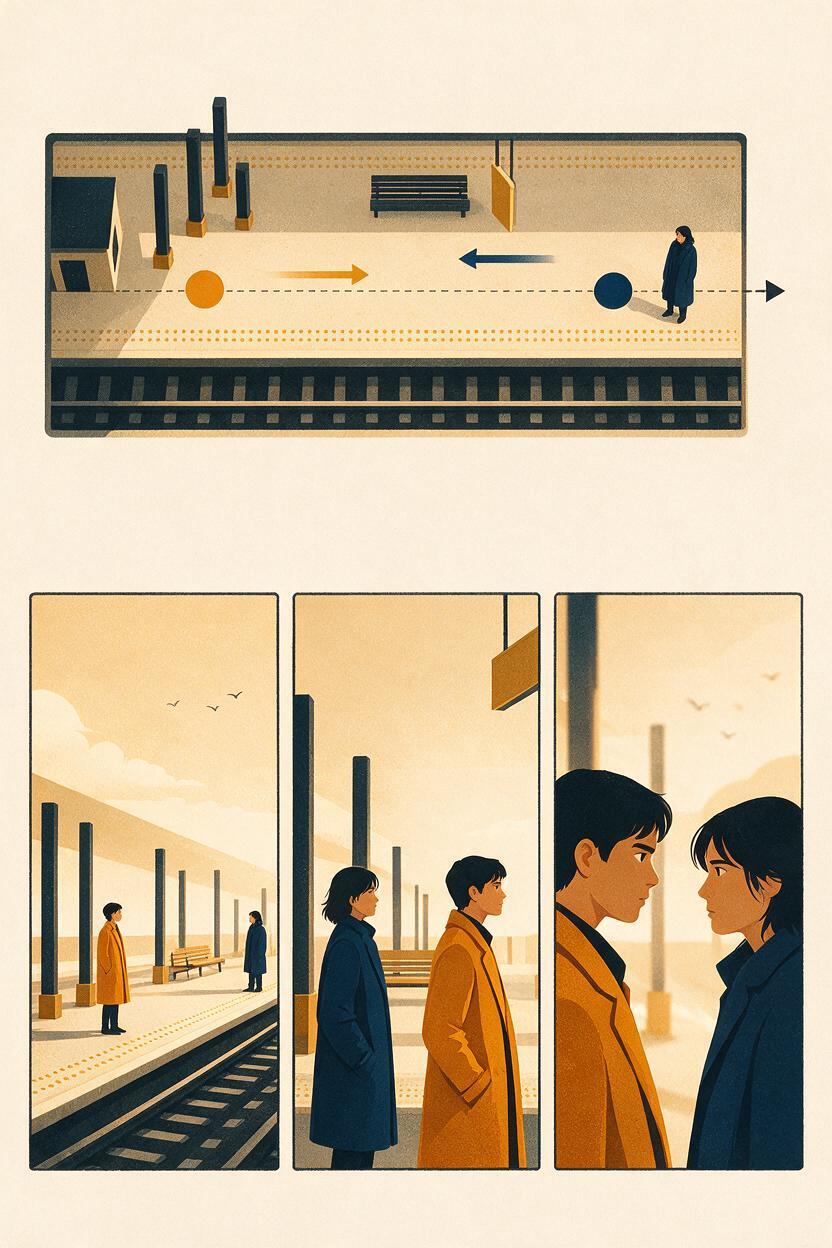
Screen direction is one of the easiest continuity errors to miss in isolated AI images. If a character walks left to right, successive shots should normally preserve that direction. If two characters face each other, keep their eyelines complementary: one looks screen right and the other looks screen left.
Draw a simple overhead map of the set and mark an imaginary line through the characters. Keep the camera on one side of that line during the exchange. Crossing it without a neutral transition reverses their positions and can make viewers think the characters swapped places.
Useful ways to cross the line intentionally include:
- A visible camera move around the character
- A neutral head-on shot
- A wide shot that re-establishes both positions
- A motivated character movement across the axis
Include direction directly in prompts: “facing screen right,” “enemy remains in the right background,” or “camera stays on the platform side of the tracks.” Avoid relying only on “same composition,” because that phrase does not define the spatial rule that matters.
Turn Static Frames Into an Animatic
Place the approved frames on a timeline before attempting final animation. An animatic reveals whether the visual information arrives in the correct order and whether each shot earns its duration.
Start with approximate timing:
- Establishing views: long enough to understand the location.
- Dialogue close-ups: matched to the spoken line and reaction.
- Insert shots: brief unless the object carries critical information.
- Reactions: held until the emotion is readable.
- Impacts: short approach, sharp contact, then a readable aftermath.
Add temporary dialogue, sound effects, and a basic music pulse. Audio often exposes redundant shots. If the same emotional beat is communicated by the line, expression, and music at once, one frame may be unnecessary.
Do not animate every storyboard image simply because it exists. Some shots only need a slow camera move, blinking light, drifting dust, or subtle hair motion. Reserve complex character animation for the moments where movement changes the story.
Repair Weak Frames Without Restarting the Sequence
When a board frame fails, diagnose the failure by category. Rewriting the entire prompt often introduces new problems.
| Failure | Likely cause | Targeted repair |
|---|---|---|
| Character looks different | Weak identity evidence | Reuse the approved face reference and restate fixed traits |
| Weapon changes sides | Ambiguous pose or mirrored composition | Specify the carrying side and screen-facing orientation |
| Shot feels flat | No foreground, depth, or visual priority | Add one foreground layer and define the focal subject |
| Sequence is confusing | Missing location reset | Insert a wider frame that restores spatial context |
| Close-up feels unrelated | Independent regeneration | Crop or edit an approved medium shot |
| Every frame feels equally important | Repeated shot size | Contrast wide, medium, insert, and close-up views |
Approve frames in small groups rather than generating the entire scene at once. Compare each new image with the previous frame, the next planned frame, and the continuity package. This catches drift before it spreads across the board.
Final Checklist
- Every shot has one clear narrative job.
- Panel borders have not been treated as automatic cut points.
- Character traits, costume details, and props remain unchanged.
- Movement and eyelines preserve screen direction.
- The environment maintains a coherent spatial layout.
- Shot sizes vary according to dramatic emphasis.
- The animatic works with temporary dialogue and sound.
- Only story-relevant shots are selected for full animation.
Keywords
manga to anime, anime storyboard, Nano Banana Pro, comic to video, manga animation, anime character consistency, 2D animation AI