How to Turn a Massing Sketch into a Concept Render with GPT Image
Turn a simple architectural massing sketch into a presentation-ready concept image without letting the design change along the way. This guide shows how to prepare the sketch, direct GPT Image with a constraint-led prompt, and check the result against the original geometry.
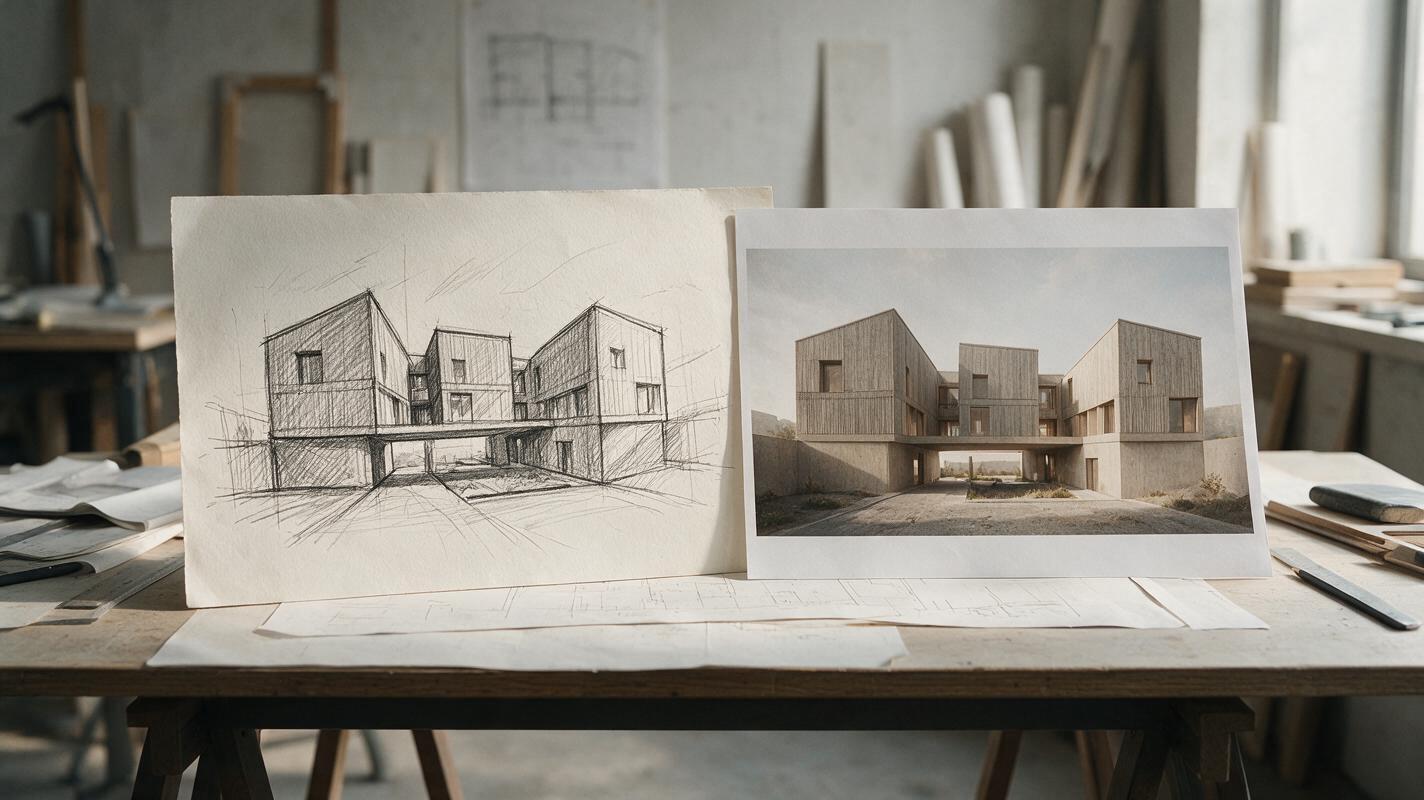
Table of contents
From rough massing to a believable concept image
A massing sketch can communicate the shape of a building in seconds, but it rarely shows how that shape might feel as architecture. GPT Image can help turn the sketch into a concept render by adding materials, light and context. The challenge is keeping the proposed volumes intact: a convincing image is not useful if it quietly adds a floor, moves a courtyard or changes the roofline.
Use this method for early design conversations, not measured documentation. You will need a legible sketch, a short list of elements that cannot change, and time to compare the output with its source.
Step 1 — Prepare a sketch the model can read
Start with a single view of the proposal. A simple perspective sketch works well when the goal is a client-facing image; an axonometric is better when the relationship between volumes matters most. Keep important edges dark and continuous. Remove stray notes that could be mistaken for walls, and make openings and recesses visibly different from solid faces.
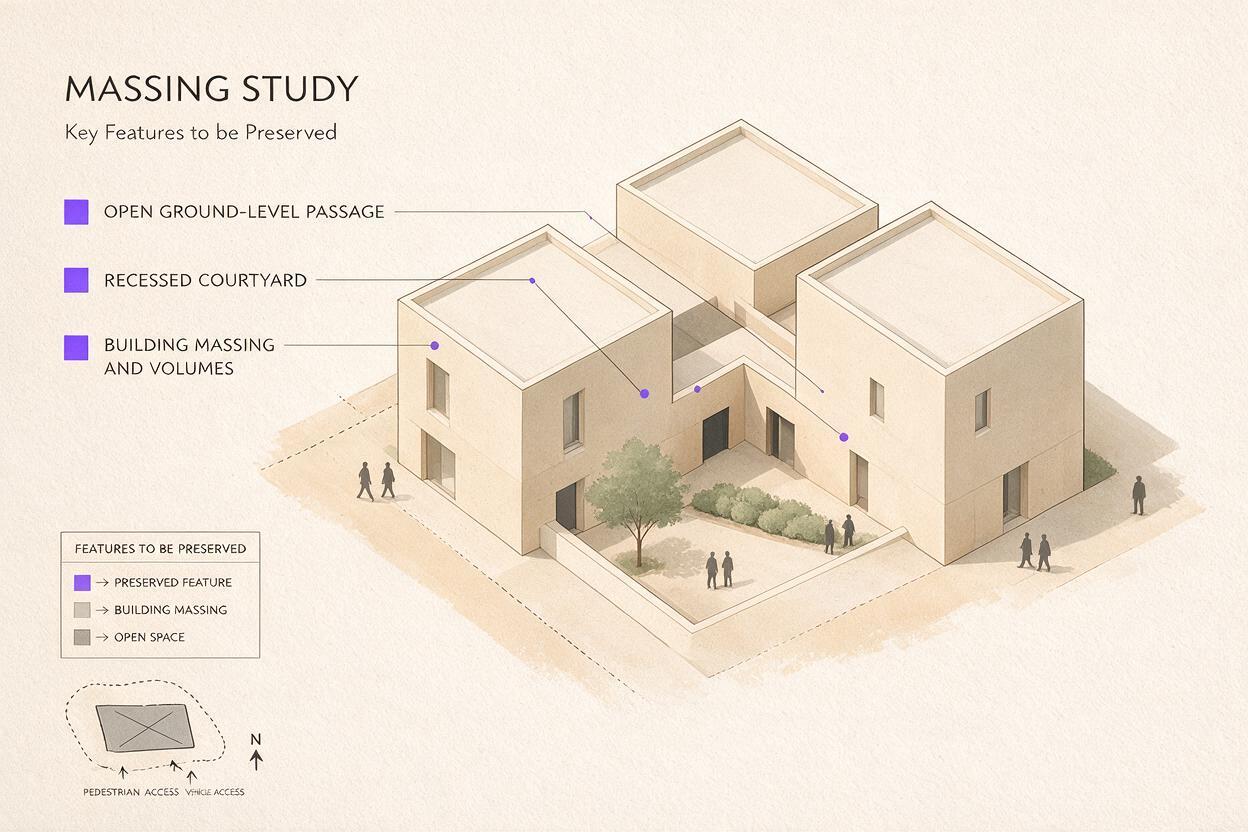
Before uploading, write down the decisions the image must preserve. For example:
- Three distinct building volumes, with the tallest at the rear.
- A ground-level passage between the left and central volumes.
- A recessed courtyard visible from the chosen viewpoint.
- Flat rooflines and no additional storeys.
These are design constraints, not aesthetic preferences. If an opening is essential but ambiguous in the drawing, clarify it on the sketch first rather than hoping a prompt will resolve it.
Step 2 — Ask for one rendering direction, not a redesign
Upload the sketch to an ai image generator that accepts image references and ask for a render based on that specific drawing. In GPT Image, describe the viewpoint, the elements to retain and one coherent visual direction. Avoid mixing several facade systems or competing moods in the first request.
Adapt this prompt to your proposal:
Use the uploaded architectural massing sketch as the source of truth for the building's overall form and camera view. Create a realistic early-stage concept render of the same proposal. Preserve the number, relative height, position and silhouette of all three volumes. Keep the ground-level passage open and the courtyard recessed. Do not add floors, bridges, towers, balconies or new wings. Interpret the sketch with pale mineral-rendered surfaces, restrained dark metal window frames and a quiet planted site. Soft overcast daylight; eye-level architectural photograph; believable scale. Where the sketch does not define details, keep them simple rather than inventing prominent features.The phrase “source of truth” sets the priority, but it is not a geometry lock. Image generation can still alter the design. Treat the first result as a proposal to inspect, not an approved rendering.
Keep geometry instructions specific and the atmosphere simple. “Preserve the passage between these two volumes” is more useful than “make it accurate.”
Step 3 — Compare the output with the sketch
Place the sketch beside the generated image and inspect it from large shapes to small details. Attractive glazing and landscaping can distract from a changed building. Review these features before evaluating visual polish:
| Check | What to compare | If it changed |
|---|---|---|
| Silhouette | Overall outline and relative heights | Request a correction to the specific volume or roofline. |
| Voids | Passages, courtyards and recesses | Name the opening and state that it must remain unobstructed. |
| Volume count | Number and position of major masses | Return to the source sketch if two masses have merged. |
| Viewpoint | Visible faces and camera height | Ask to retain the sketch's view rather than generate a new angle. |
If several major features have changed, revise the sketch or restart from the original input. Repeatedly editing a heavily altered result may reinforce the invented geometry. If only one feature is wrong, request a narrowly scoped change:
Keep the current lighting, materials and camera view. Restore the open ground-level passage between the left and central volumes shown in the original sketch. Do not change the number, height or position of the building volumes.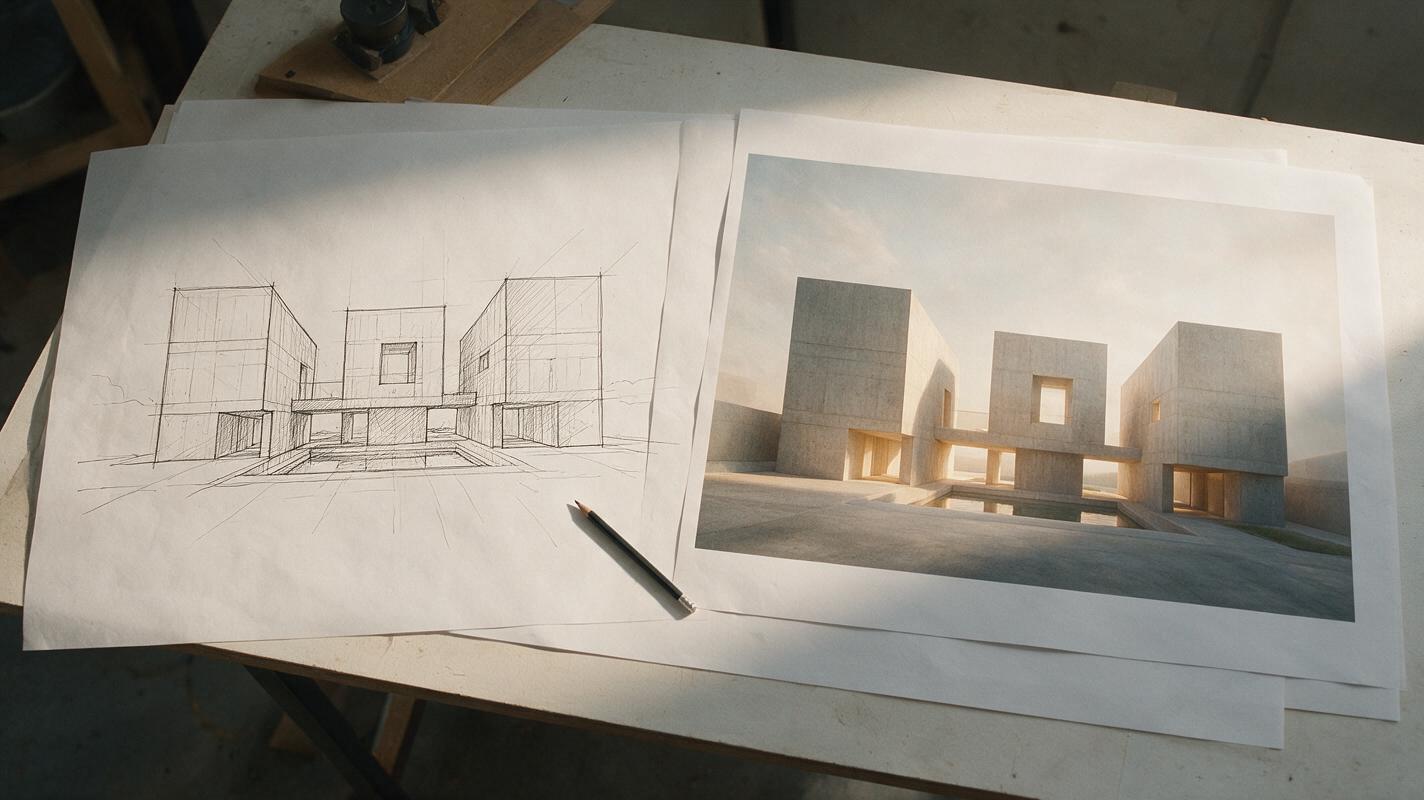
Step 4 — Explore materials without losing the chosen form
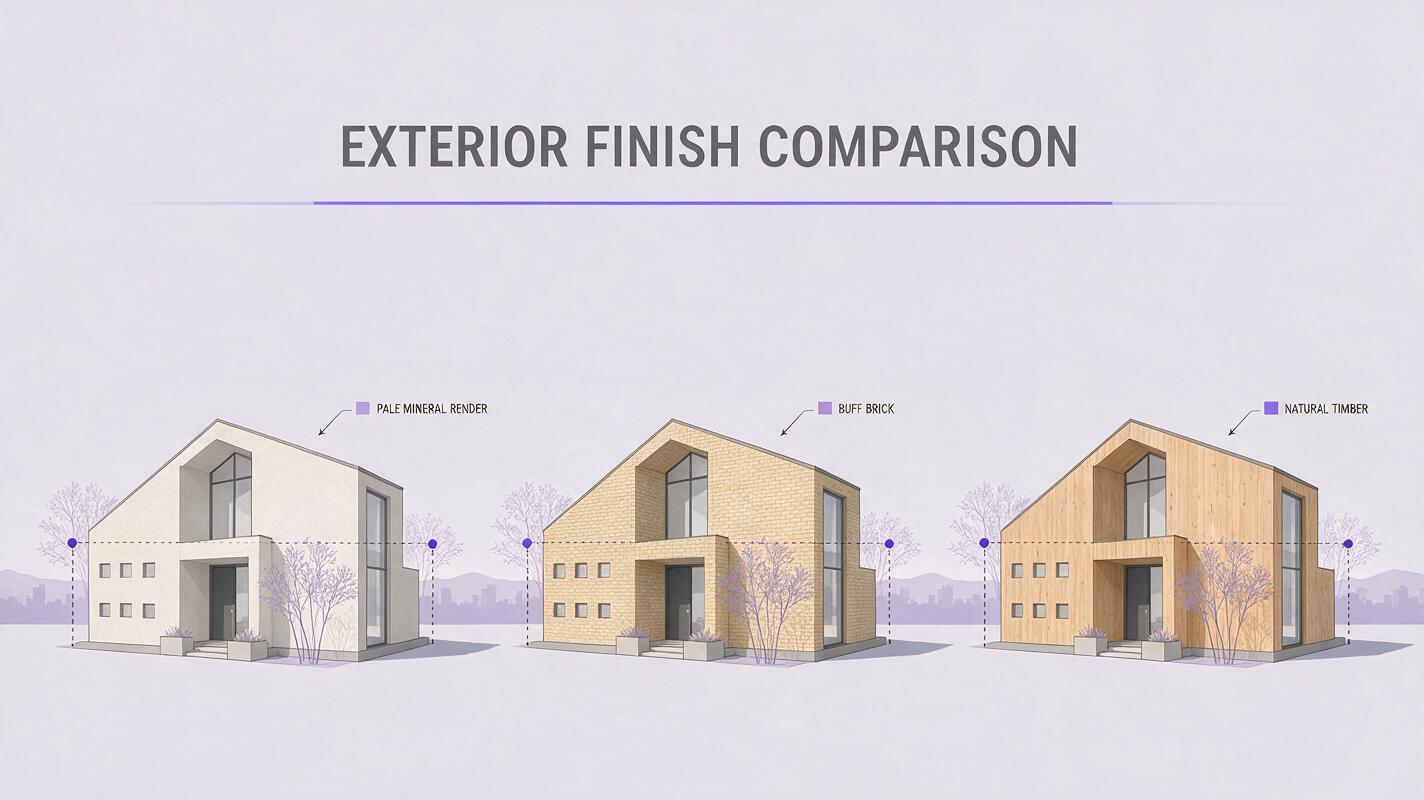
Once a result passes the massing check, use it as a visual baseline for a small set of alternatives. Change one design variable at a time: facade material, daylight or site treatment. That makes the images easier to compare and helps you spot unintended geometry changes.
For a material study, keep the request narrow:
Using this approved concept image as the reference, keep the same building form, openings, camera view and site arrangement. Change only the primary exterior finish from pale mineral render to warm buff brick. Keep window frames dark and understated. Maintain the same overcast lighting so the material comparison is fair.Make a separate request for timber or another finish rather than asking for several options in one image. Test this prompt yourself with your own sketch, then compare each variation against the original drawing as well as the approved image. A consistent-looking series can still drift away from the design.
Step 5 — Present the image with the right level of certainty
A concept render can help a client understand intent, but image-generated details may be unresolved. Label the image as an early visualization, and distinguish established design decisions from interpretive elements such as glazing patterns, planting and construction joints.
For a useful review sheet, pair the chosen render with the source sketch and a short caption naming what is being tested: massing and material character, for example. Keep dimensions, compliance claims and constructability assessments in the appropriate design documents. If the concept advances, rebuild the approved proposal in your architectural model before relying on it for coordinated views.
Final checklist
- Is the sketch clear about major volumes and essential voids?
- Does the prompt state what must not change?
- Do the silhouette, volume count and viewpoint still match?
- Were material options made from the same approved baseline?
- Is the final image clearly identified as a concept visualization?
Keywords
massing sketch, concept render, sketch to render, GPT Image, architectural visualization, AI image editing, architecture prompts