How to Use Motion Transfer in an AI Short Drama
Motion transfer can preserve intentional acting across AI-generated shots, but only when the source performance, character reference, camera framing, and edit boundaries are planned together. This tutorial shows how to build a reusable performance pipeline for an AI short drama without introducing identity drift, unwanted camera motion, or unstable gestures.
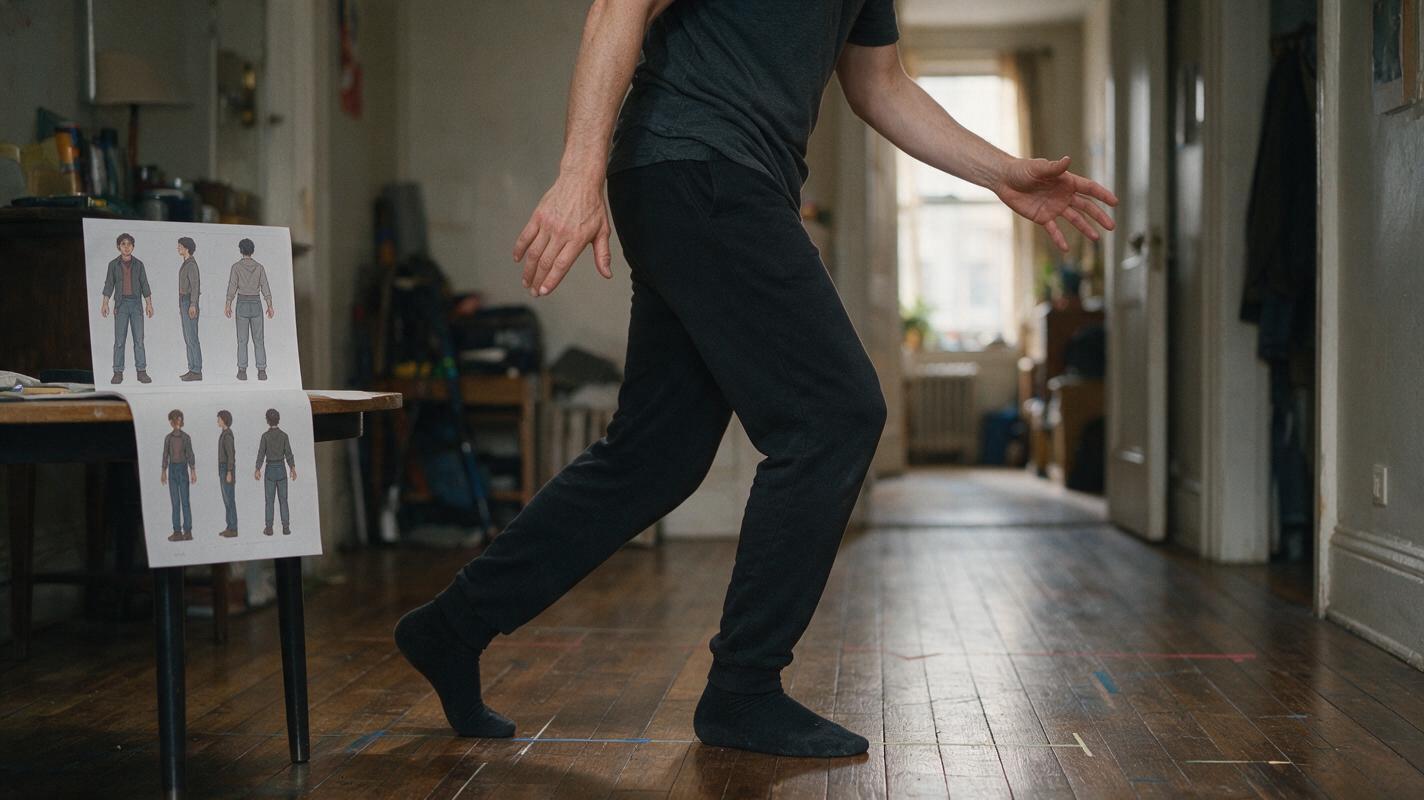
Table of contents
Use motion transfer as performance direction, not automatic animation
For an ai short drama, motion transfer is most useful when a scene depends on a precise physical performance: hiding evidence, recoiling from a discovery, crossing a room with purpose, or turning toward an off-screen sound.
The reliable workflow is to record the acting first, simplify it into one readable action, and then transfer that action to a locked character image. Generate separate clips for separate dramatic beats rather than asking one performance to carry an entire scene.
The governing rule: transfer one dramatic intention at a time. A short, controlled gesture is easier to preserve, regenerate, and edit than a continuous improvised performance.
Cover recreation prompt:
Photorealistic editorial production still of a performer rehearsing a cautious backward step in a lived-in apartment hallway while a printed three-view character reference rests on a nearby table, practical window light, subtle floor marks for blocking, realistic filmmaking atmosphere, no screens, no logos, no text, landscape 16:9, 35mm lens, eye-level camera, natural color, crisp hands and full-body posture.Step 1 — Choose the performance before the model
Motion-transfer tools differ in their controls and supported inputs, but the selection question should come after the performance has been defined. Start by writing a physical action that can be recognized without dialogue.
| Tool path | Useful starting point | Test before production |
|---|---|---|
| Viggle | Character animation driven by a supplied motion or video | Silhouette stability, limb behavior, and background treatment |
| Runway Act-Two | Transferring a recorded performance to a character | Facial expression, gestures, framing, and identity retention |
| Kling AI | Reference-led video generation and available motion controls | Character adherence, camera behavior, and access to the required feature |
| General image-to-video model | Animating a designed start frame with bounded movement | Whether prompting alone can reproduce the required action |
Features, access, output limits, and commercial terms can change. Confirm the current product documentation and test the exact account tier before committing an episode pipeline.
Use a transfer-specific tool when the actor's timing matters. Use image to video when only a small movement matters, such as a glance, breath, hand withdrawal, or slow turn. The simpler route often produces a cleaner editorial result.
Step 2 — Lock a motion-ready character reference
A beautiful portrait is not necessarily a usable motion-transfer reference. The character should have a readable silhouette, visible joints, uncomplicated clothing, and enough empty space around the body to accommodate movement.
Create a three-view sheet before generating the dramatic frame. Record stable identity details in a character lock:
- Face: age range, face shape, eye color, hairline, and hairstyle.
- Wardrobe: garment type, color, sleeve length, footwear, and accessories.
- Body: approximate height, build, posture, and handedness.
- Exclusions: no coat changes, jewelry changes, loose props, or extra people.
Reusable visual prompt — three-view character sheet:
Photorealistic three-panel character reference sheet of the same fictional woman in every panel, age 31, oval face, dark brown eyes, shoulder-length black bob with a precise center part, charcoal long-sleeve knit top, dark straight-leg trousers, plain black ankle boots; front view in left panel, exact side profile in center panel, exact back view in right panel; arms relaxed, neutral posture and expression, complete body visible from head to shoes, identical wardrobe and proportions across all panels, neutral light-gray seamless studio background, soft even studio lighting, no props, no text, no logos, no interface elements, landscape 16:9. MANDATORY CAMERA: eye-level full-body orthographic-style reference framing with minimal perspective distortion.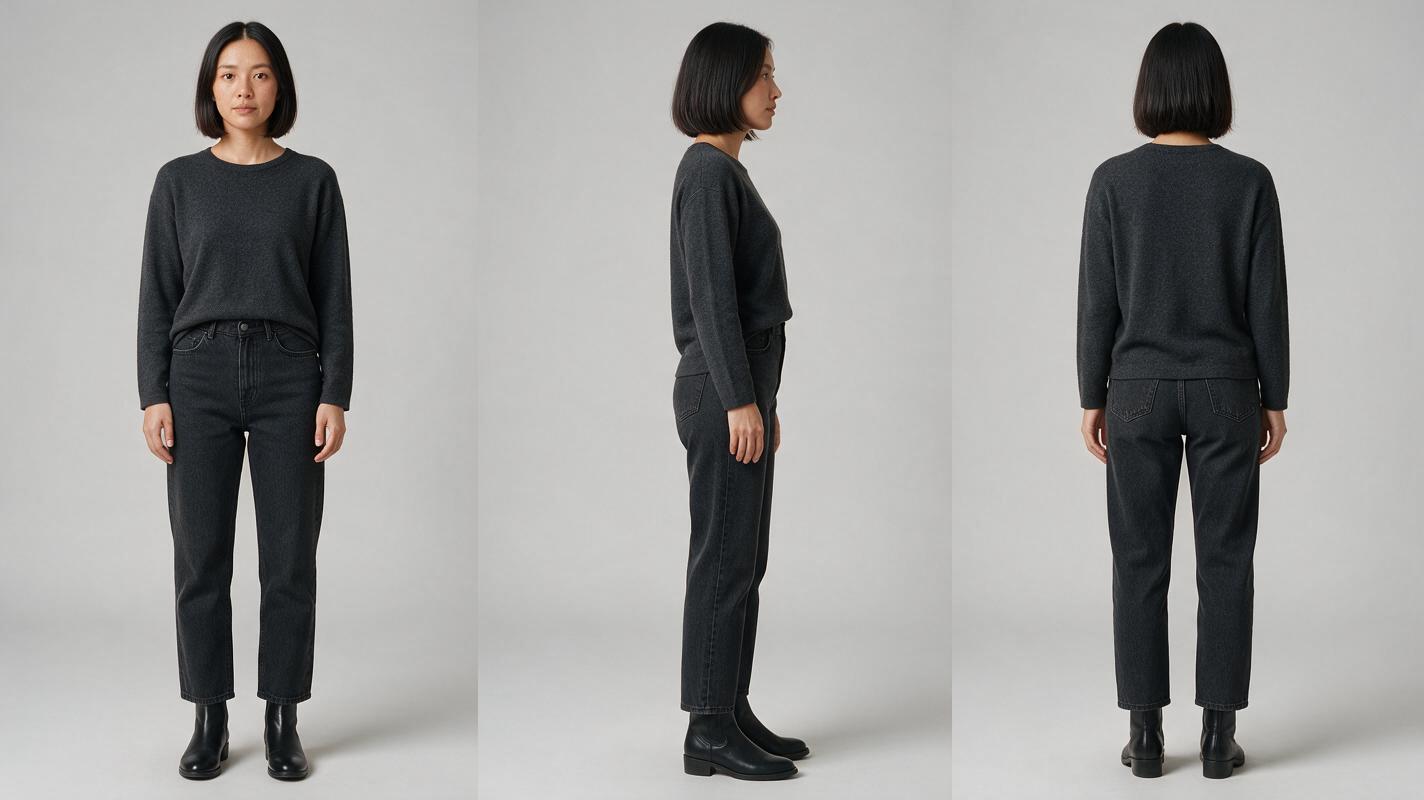
Step 3 — Record a clean driving performance
The driving video is production footage, not a casual reference clip. Record the performer at the same approximate camera height and body scale intended for the generated shot.
- Keep the camera fixed unless camera movement is essential.
- Show the full moving limb; do not cut off a hand that must reach or point.
- Use a plain, contrasting background and even light.
- Avoid crossing the arms over the face or hiding both hands behind the torso.
- Leave a neutral hold before and after the action to create edit handles.
- Perform at a controlled pace rather than relying on extreme slow motion.
Break a complex beat into clips. “Enter, notice the photograph, stumble backward, cover the mouth, and turn toward the door” should become several shots. Each clip then has one movement owner and one emotional turn.
PERFORMANCE BEAT
Start: neutral stance, weight balanced, eyes aimed toward the table.
Trigger: recognize the photograph.
Action: right hand stops ten centimeters above the photograph.
Reaction: shift weight backward once and inhale.
End: hold the hand suspended and look toward the closed door.
Restrictions: no walking, no touching the photograph, no camera movement.
Step 4 — Build the dramatic frame around the action
Design the location frame only after identifying the movement envelope. If the character steps backward, leave negative space behind the body. If a hand reaches toward evidence, keep the object separated from the torso and visible in the vertical story column.
For vertical drama, compose the master frame in 9:16 even when a supporting editorial image is displayed at 16:9. Keep the face, active hand, and story object away from the outer crop zones. A full-width cinematic background can provide location reference, while the final generated shot uses a tighter vertical crop.
Reusable visual prompt — motion-ready location frame:
Side-by-side photorealistic cinematic comparison using the same fictional woman and the same apartment hallway: left side shows a failed composition with her reaching hand merged into a framed photograph, bent fingers, duplicated wrist, and insufficient space behind her body; right side shows the corrected composition with a clean hand silhouette hovering above the photograph, anatomically correct fingers, clear separation between body and prop, and open floor space for one backward step; lived-in believable apartment, evening practical lamps, restrained editorial realism, no labels, no text, no logos, no interface elements, landscape 16:9. MANDATORY CAMERA: locked eye-level medium-wide three-quarter view, 35mm lens, identical camera position and lighting on both sides.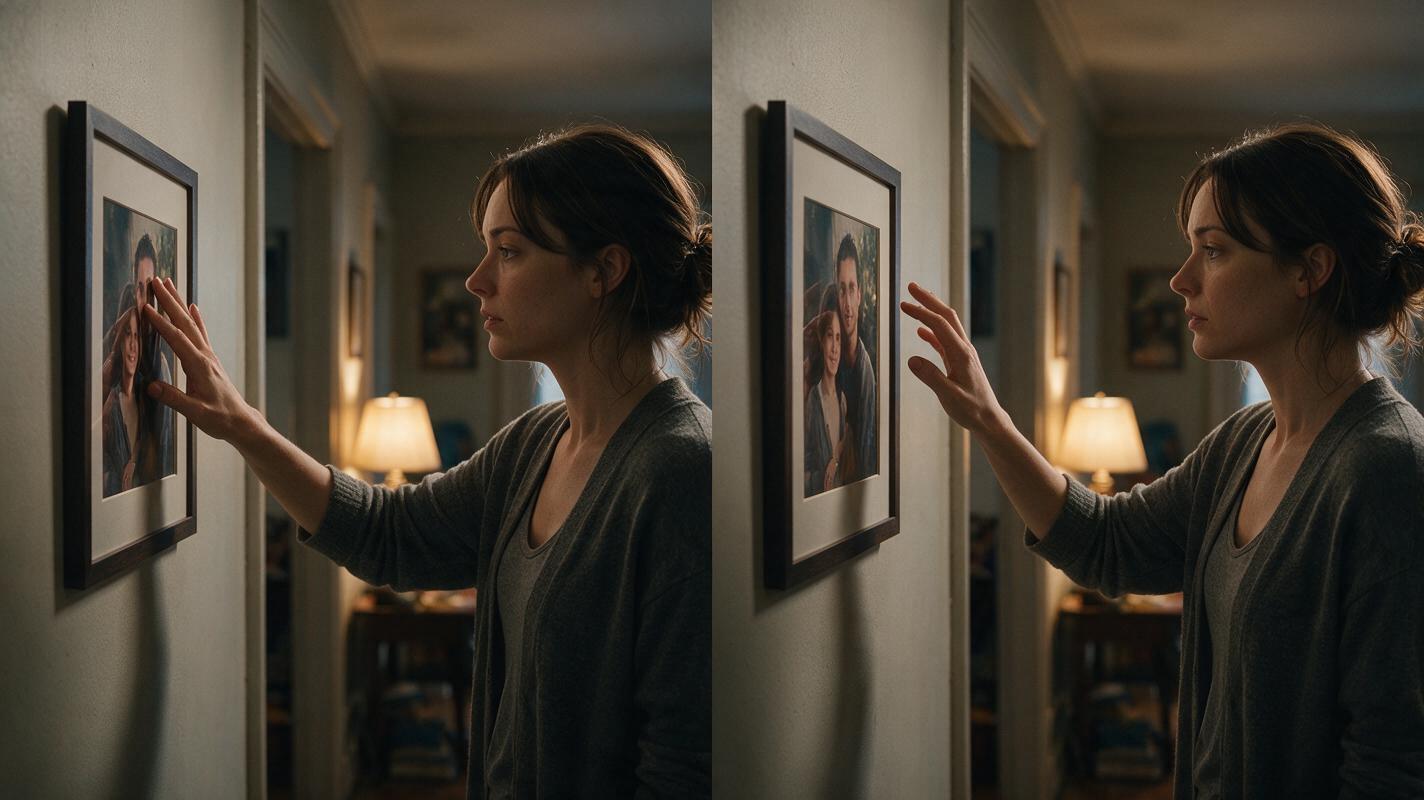
Step 5 — Transfer the smallest useful motion
Use the locked character image as the visual source and the clean performance clip as the motion source. Keep the generation instruction focused on preservation rather than adding new choreography.
Transfer the supplied performance to the referenced fictional character.
Preserve the exact face, centered black bob, charcoal knit top, body proportions, and apartment lighting.
The character raises only her right hand toward the photograph, stops before contact, shifts her weight backward once, and holds.
Maintain the locked camera and original background geometry.
Preserve five fingers, natural wrists, stable facial structure, and clear separation between hand, torso, and photograph.
No additional character, no duplicated limbs, no walking, no zoom, no camera shake, no wardrobe change, no object mutation.
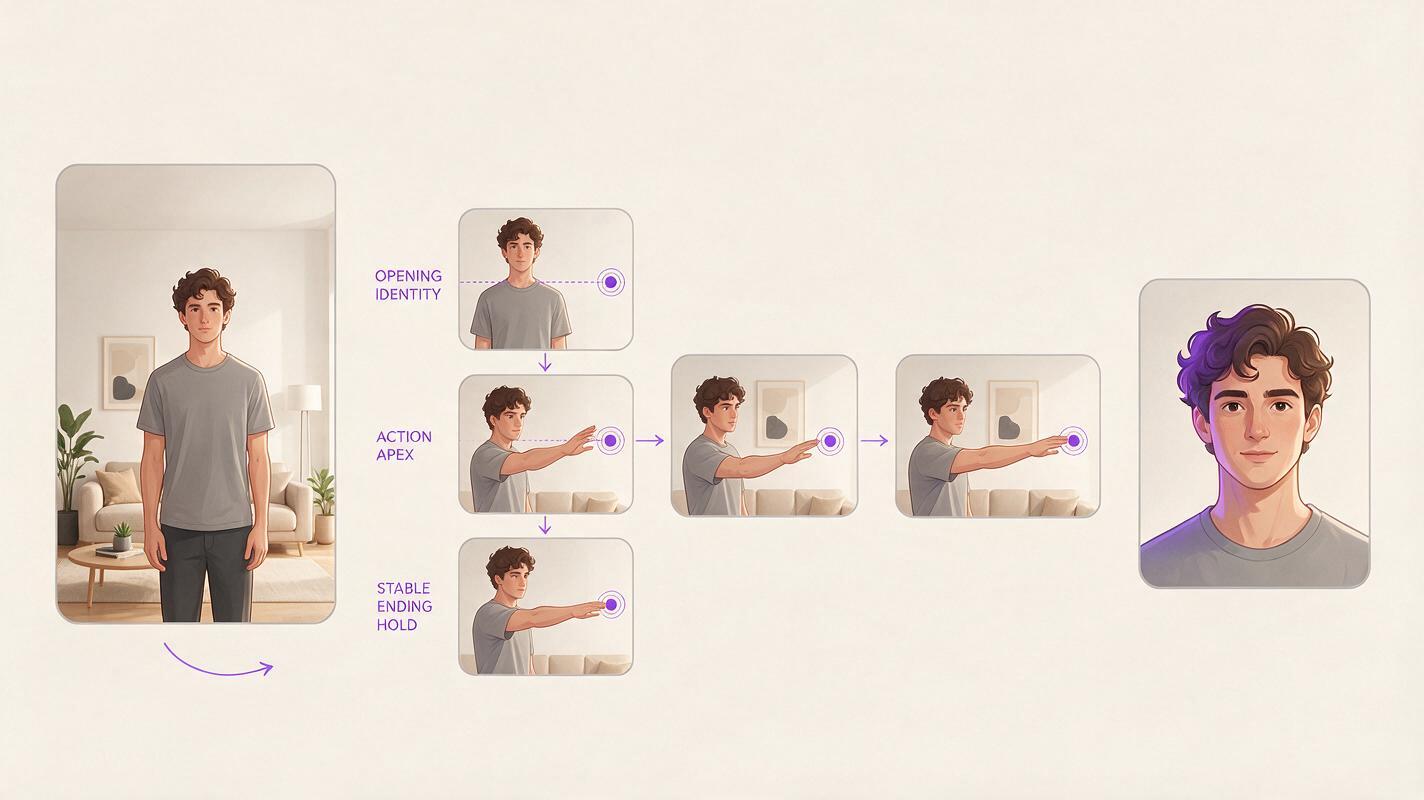
Generate short alternatives rather than extending a flawed clip. Compare the opening identity, the action apex, and the ending hold. A usable take must survive all three checkpoints.
Step 6 — Separate body motion, expression, and camera energy
Do not force every layer into the motion transfer. Let the driving clip control the body performance. Handle a subtle facial reaction, environmental movement, or camera push separately when possible.
| Layer | Best control source | Typical failure |
|---|---|---|
| Body action | Clean driving performance | Extra gestures or unstable limbs |
| Character identity | Locked reference image | Face, hair, or costume drift |
| Facial reaction | Restrained prompt or dedicated performance control | Exaggerated expression |
| Camera | Static source or separately controlled movement | Unrequested zoom and reframing |
| Environment | Stable location plate | Moving walls, props, or lights |
This separation makes repairs cheaper. If the body action works but the camera drifts, regenerate or replace the camera layer rather than redesigning the character.
Step 7 — Cut on stable poses
The cleanest edit points occur before movement begins and after the character settles. Do not cut during a malformed hand pose or while the face is changing identity.
A practical clip structure is:
- Neutral recognition frame.
- Single transferred action.
- Stable emotional hold.
- Cut to evidence, reaction, or the next source of danger.
Reusable visual prompt — performance-to-edit pipeline:
Neutral cinematic process diagram made entirely from realistic film-frame thumbnails and simple unlabelled arrows: a full-body performer beginning in a neutral pose, a clean reaching gesture, the same fictional character reproducing the gesture in an apartment, three isolated checkpoint frames showing opening identity, hand at action apex, and stable ending hold, followed by a vertical close-up reaction frame; no words, no letters, no numbers, no logos, no software interface, no dashboard, pale neutral background, balanced left-to-right layout, landscape 16:9. MANDATORY LAYOUT: five clearly separated visual stages with generous spacing and no overlapping frames.When the character, action, and cut points are ready, try these models for free with the same reference package. Comparing identical inputs is more informative than testing each model with a different scene.
Step 8 — Audit continuity across the episode
A convincing individual clip can still damage an AI series video if it changes screen direction or character state. Before approval, compare the transferred shot with the shots immediately before and after it.
- Does the character enter with the same wardrobe and hairstyle?
- Is the active hand consistent with the previous shot?
- Does the gaze point toward the established object or person?
- Does the final pose create a clean match into the next shot?
- Has the transferred motion changed the position or condition of a story prop?
- Does the vertical crop preserve the active hand and facial response?
Save the character image, performance clip, generation prompt, approved opening frame, and approved ending frame as one reusable shot packet. That packet makes later episode revisions easier than trying to reconstruct a successful transfer from memory.
Final checklist
- Write one visible dramatic intention for the shot.
- Lock the character with a three-view full-body sheet.
- Record a fixed-camera performance with clean edit handles.
- Match camera height, body scale, and movement space.
- Transfer one action rather than an entire scene.
- Inspect identity, hands, props, and background at three checkpoints.
- Cut on stable poses and repair layers separately.
- Archive the approved inputs and boundary frames for later episodes.
FAQ
What is motion transfer in AI video?
Motion transfer uses a source performance to guide the movement of a target character. Depending on the tool, the transferred information may include body motion, gestures, facial performance, or a combination of these elements.
Is motion transfer better than prompting movement?
It is better when timing and physical intention must be specific. Prompted motion may be sufficient for restrained actions such as breathing, glancing, or slowly turning the head.
Can motion transfer work for vertical drama video?
Yes, but the source action must fit the narrow composition. Keep the face, active hands, and important props inside the vertical story column, and avoid broad sideways choreography.
Why does the transferred character grow extra fingers or limbs?
Common causes include self-occlusion, fast gestures, hands crossing the torso, cropped limbs, and insufficient separation from props. Simplify the action and regenerate from a cleaner reference rather than attempting a longer movement.
Can a real person's performance be transferred to any character?
Use only performances, character materials, voices, and likenesses that you created or are authorized to use. Review the tool's current terms and the requirements for the intended distribution channel.
Sources
Keywords
motion transfer ai video, ai microdrama, ai short drama, ai short film generator, ai drama generator, ai series video, vertical drama video