Nano Banana Pro Prompts for Consistent Interior Views
Create a set of room concepts that reads as one design from multiple viewpoints. These Nano Banana Pro prompts help preserve recognizable furniture, finishes, and architectural features while making clear where a generated view needs verification.
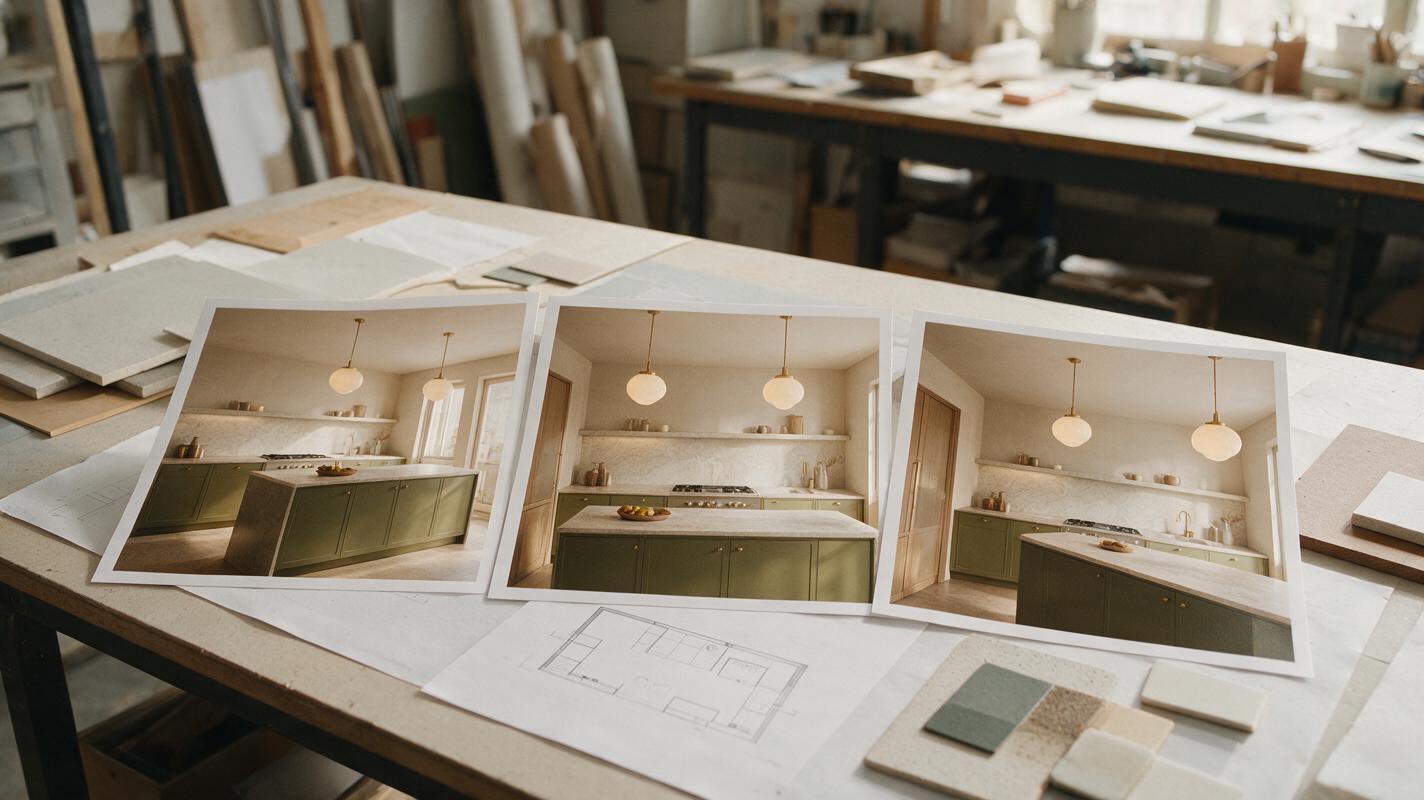
Table of contents
One room, several views—not several different rooms
A client may love a kitchen concept from the doorway, then ask what it looks like from the dining area. The difficult part is not generating another attractive image. It is keeping the same island, cabinet fronts, lighting, and window arrangement in the next view.
Use Nano Banana Pro to develop a small, reference-led set of interior visuals. Start with photographs or verified renders for the viewpoints you need, establish one approved design, and carry its identifiable features into each additional image. Treat the results as concept visuals, not proof of dimensions or construction feasibility.
Build a reference set that shows the actual room
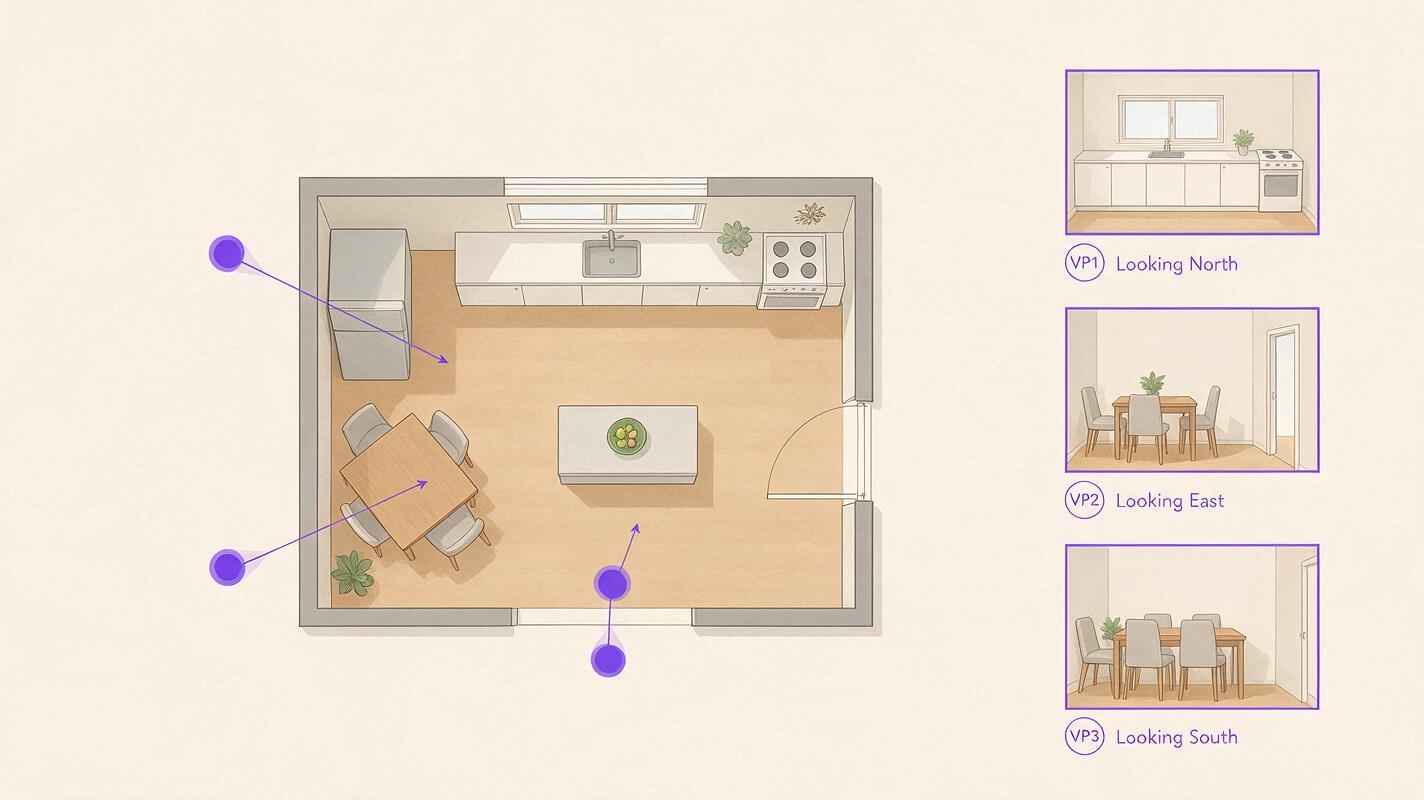
For an existing space, take photographs from the viewpoints you expect to present: for example, the doorway, the opposite corner, and the seating area. Keep the room visible in each frame. A close-up of a cabinet sample cannot tell the model where the kitchen window sits.
Include a floor plan or measured model if you have one, but use it as a check rather than assuming a generated image will follow it exactly. Record a short list of features that must survive every view:
- Architecture: openings, ceiling changes, columns, and visible wall lengths.
- Design decisions: cabinet color, countertop, flooring, hardware, and lighting fixtures.
- Distinctive objects: the island shape, dining table, or a client-owned piece of furniture.
If you have only one photograph, a radically different camera angle requires the model to invent surfaces it cannot see. For client-facing work, photograph those angles first or produce them from a measured 3D model.
Establish a master view before requesting more angles
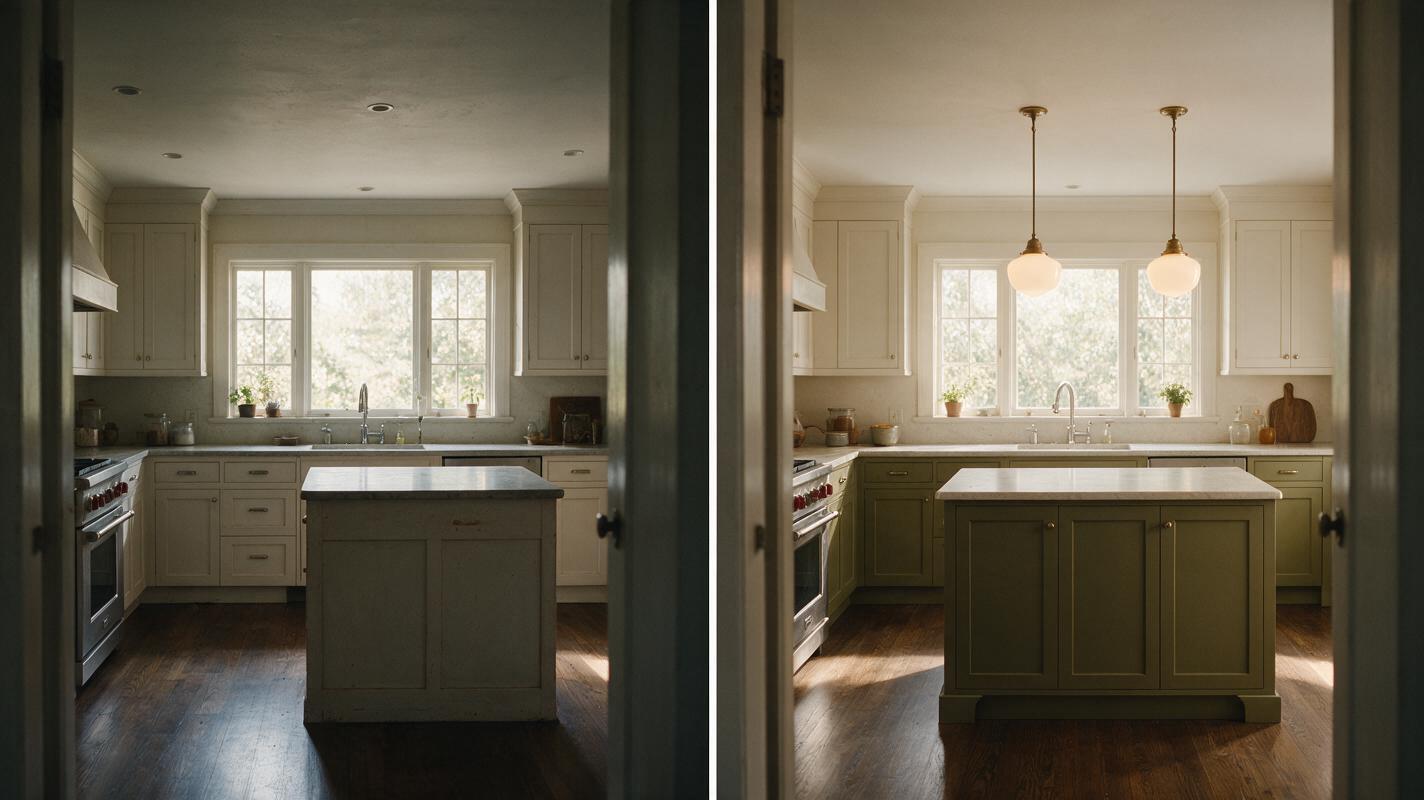
Choose the clearest source photograph as the master view. Make one concept image and approve its design details before generating the rest. A useful request specifies what changes and what stays put; a broad instruction such as “make this kitchen luxurious” gives the model too much freedom.
Use the attached doorway photograph as the architectural reference. Create a warm contemporary kitchen concept. Keep the visible window, door opening, ceiling height, and island position as shown. Apply matte olive base cabinets, warm off-white upper cabinets, a pale stone countertop with subtle veining, brushed brass pulls, and two simple opal-glass pendants above the island. Keep the existing oak floor. Preserve the photograph's camera position. Do not add openings, move the island, or introduce a second window. Photorealistic interior concept image, natural daytime light.Inspect the result at full size. Look beyond its overall appeal: count pendants, check the island ends, and compare the window and door positions with the source. Correct a faulty master view before using it as a design reference.
Transfer the design to a second real viewpoint
Give Nano Banana Pro the approved master concept and a photograph of the room from the next viewpoint, if the interface supports both references. Assign each image a distinct role: the new photograph controls what this camera can see; the master concept controls the proposed finishes and furnishings. If your interface accepts only one reference, combine the references in a clearly labeled sheet where practical, or work from a measured render of the second view.
Reference A is the approved kitchen design. Reference B is a photograph of the same existing room taken from the dining area. Create a concept view from Reference B's camera position. Carry over the matte olive base cabinets, warm off-white upper cabinets, pale subtly veined countertop, oak floor, brushed brass pulls, and two opal-glass island pendants from Reference A. Keep the openings and visible room geometry from Reference B. Show only surfaces reasonably visible from this viewpoint. Do not copy Reference A's camera angle or invent a new window. Match the material colors and fixture designs, not the pixel arrangement.This is where an ai image generator can help you explore a presentation view quickly, but the second photograph remains your spatial reference. If the output changes the island from rectangular to curved, do not try to hide the discrepancy with a crop. Revise the image or the prompt.
Use a design-lock sheet for the third view
By the third image, small substitutions can accumulate: a different pendant shade, thicker countertop edge, or cabinets that shift from olive to gray. Make a compact reference sheet from the approved master view, with crops of the island, cabinet fronts, pendants, and floor. Pair it with the third viewpoint photograph and a brief written specification.
Keep the specification concrete. “Two opal-glass pendants with brass stems” is easier to check than “cohesive lighting.”
Ask for the same finishes and object designs, but avoid demanding that every image show every object. A sofa hidden behind the camera in one view should not be inserted into the frame merely to demonstrate consistency.
If a proposed angle has no photographic or modeled reference, label it as an illustrative angle. Generated views of unseen walls may be useful for discussion, but they should not silently become evidence of the existing room.
Compare the set as a designer, not as a gallery
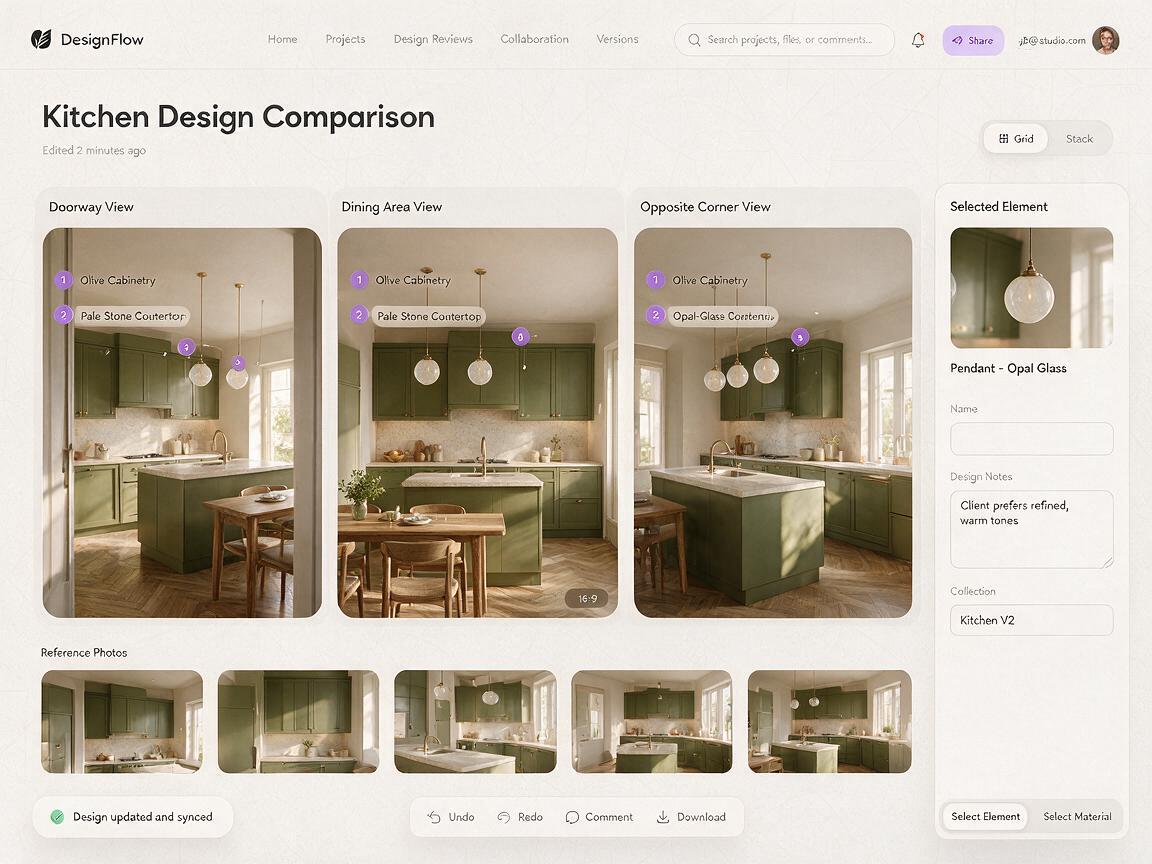
Place the views side by side and review them against the source photographs. A comparison sheet makes drift much easier to spot than opening files one at a time.
| Check | What to look for | If it fails |
|---|---|---|
| Architecture | Window and doorway locations, ceiling changes, island placement | Return to the correct viewpoint photograph; do not present the altered geometry as existing. |
| Design identity | Cabinet colors, countertop character, floor, hardware, fixture shape | Supply a tighter master reference or a detail crop and regenerate that view. |
| Camera logic | Objects appear only where that viewpoint could see them | Clarify the camera source and remove instructions that force hidden objects into frame. |
| Buildability | Clearances, fixture locations, joinery, material transitions | Verify against drawings, specifications, and site measurements before approval. |
Resist correcting the whole set because one frame has a minor issue. Preserve approved images and regenerate the failing view against the same master reference. When you are ready to compare your own room, test this prompt yourself with one master image and one additional photographed angle.
Final checklist
- Collect a real photograph or verified render for each view you intend to show.
- Approve one master concept and record its visible design details.
- Tell the model which reference controls geometry and which controls finishes.
- Check openings, furniture shapes, materials, and fixtures across the full set.
- Label invented viewpoints as illustrative and verify buildability separately.
Keywords
nano banana pro, consistent interior views, room visualization, interior render prompts, reference image editing, room camera angles