How to Turn a Product Sketch Into a Render Without Losing the Design
A convincing AI product render is only useful if it still shows the product you drew. This tutorial explains how to prepare a sketch, write a geometry-first reference prompt, refine the result, and check whether the final image is suitable for a concept presentation.
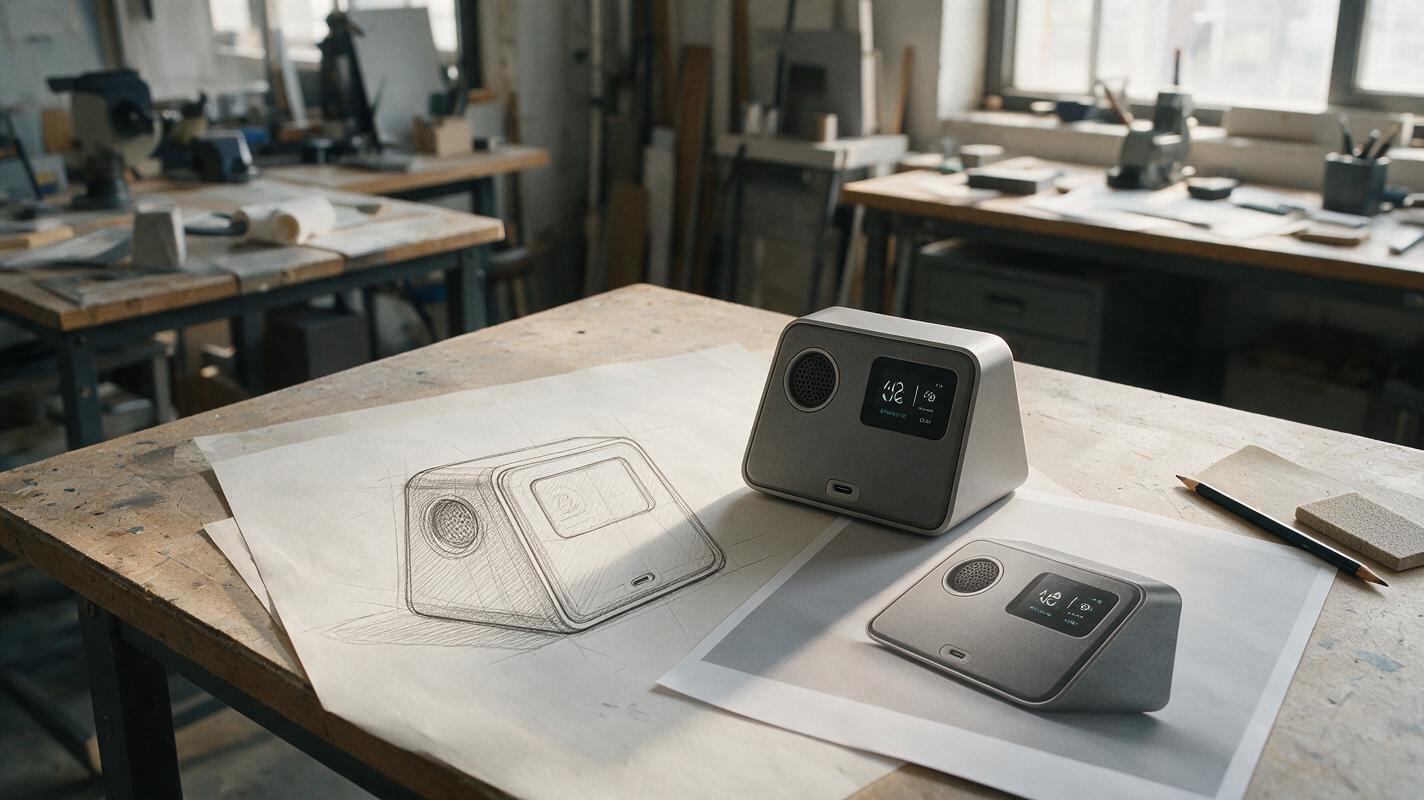
Table of contents
Turn a product sketch into a render without redesigning it
You have a promising product sketch, but the first AI render moves a button, changes the silhouette, or invents a hinge. The result may look polished while misrepresenting the concept. To get a useful presentation image, treat your drawing as a design specification: identify what must remain fixed, ask the model to resolve only what the sketch leaves open, and inspect the output against the original before refining its appearance.
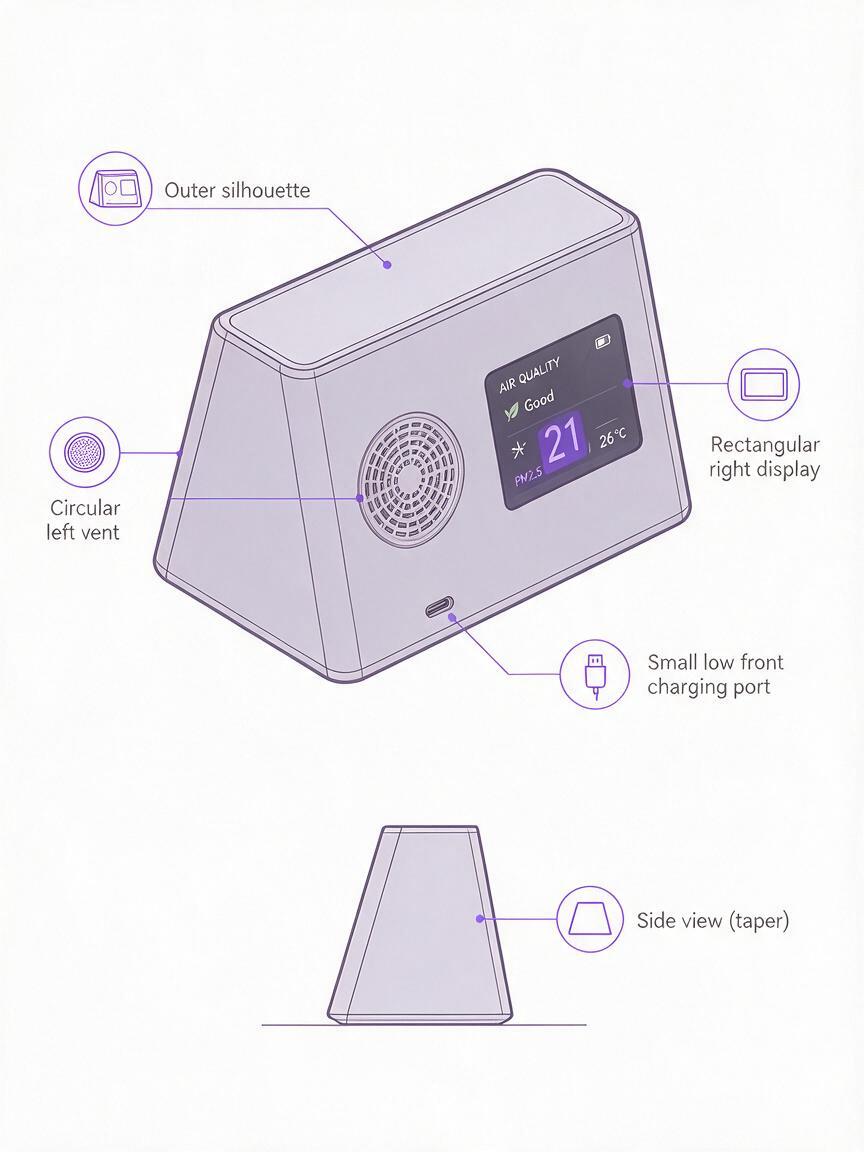
This walkthrough uses a desktop air-quality monitor as an example: a compact trapezoidal housing with a circular vent on the left, a rectangular display on the right, and a charging port low on the front. Substitute your own product and features throughout.
Step 1 — Prepare a sketch the model can read
Start with one clear three-quarter drawing. Make the outer contour, major openings, controls, and visible seams darker than construction lines. If a second view clarifies the shape, place it beside the first and label both views. Avoid mixing several competing concepts into one reference image.
- Show the intended silhouette. Close the outline and make changes in width, taper, or curvature easy to see.
- Mark feature relationships. For the example monitor, indicate that the vent sits left of the display and the port sits below both.
- Distinguish decisions from suggestions. Label fixed features directly on the sketch; leave unresolved surface details unlabeled.
- Crop out distractions. Remove unrelated sketches, notes, and background objects before uploading.
A perspective sketch communicates character, but it does not define exact dimensions. If proportions are critical, supply a dimensioned drawing or CAD view as an additional reference. Do not expect an attractive render to serve as dimensional proof.
Step 2 — Separate fixed geometry from render choices
Before opening an ai image generator, write two short lists. The first describes the design you are unwilling to change. The second describes presentation choices the model may make. This distinction prevents a lighting or styling request from quietly becoming a redesign request.
| Keep fixed | Allow the model to resolve |
|---|---|
| Trapezoidal outer silhouette | Softness and direction of studio lighting |
| Vent left of display | Subtle surface texture |
| Charging port low on front face | Background and ground shadow |
| Camera view shown in the sketch | Realistic reflections and edge highlights |
If material or finish is already part of the design, move it into the fixed column. If it is undecided, select one restrained finish for this first render so you can judge form without comparing multiple variables at once.
Step 3 — Generate a geometry-first render from the reference
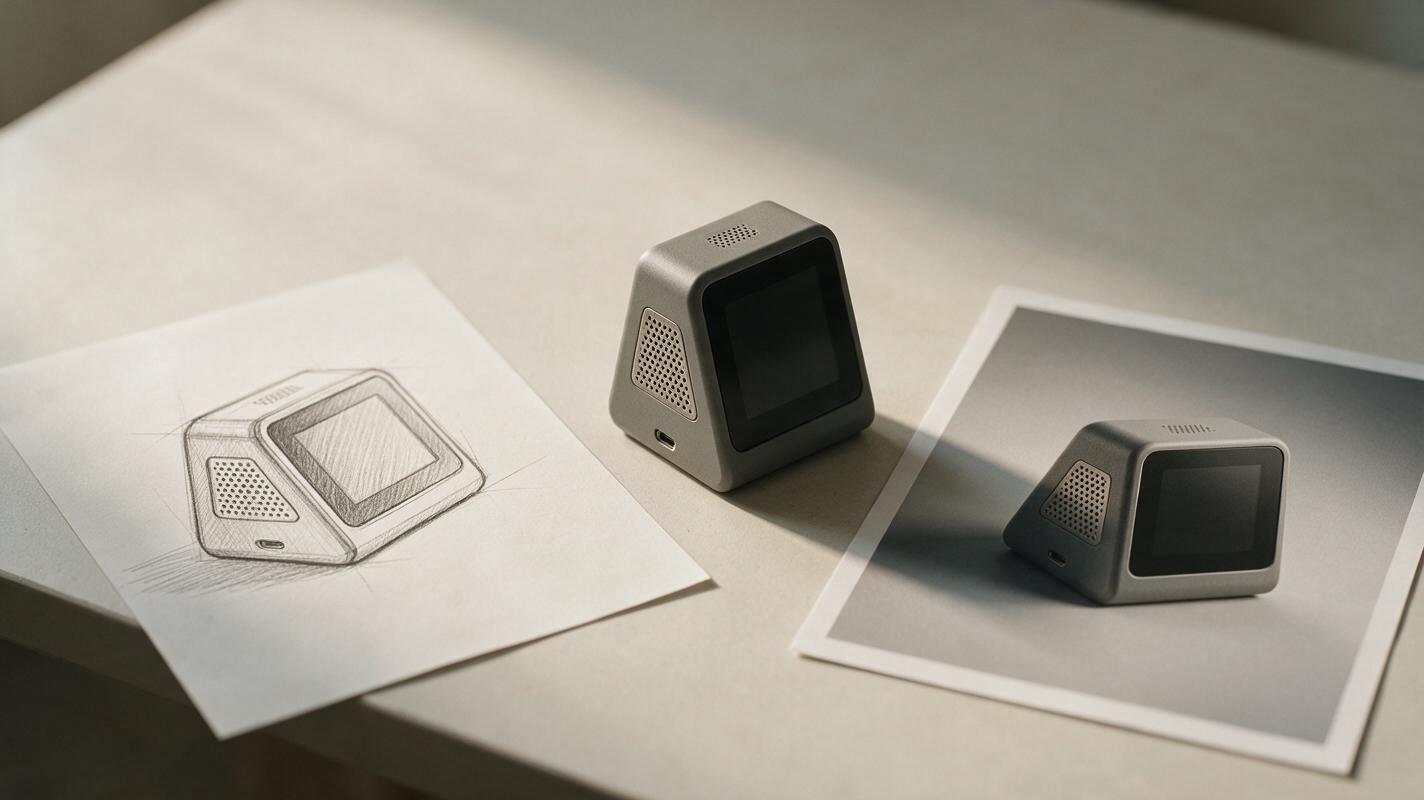
Upload the sketch to an image model or editing workflow that accepts an image reference. Use the sketch as the primary input, not merely as inspiration beside a text to image prompt. The instruction should identify the required features, camera angle, and limits on invention before describing the desired photographic finish.
Using the uploaded product sketch as the primary design reference, create a realistic studio concept render of the SAME desktop air-quality monitor.

Preserve the trapezoidal housing silhouette, the three-quarter camera view, the circular vent on the left side of the front face, the rectangular display to its right, and the small charging port low on the front. Keep their relative sizes and positions consistent with the sketch. Do not add buttons, handles, legs, or new openings.

Resolve sketch lines into plausible manufactured surfaces. Use a matte warm-gray polymer housing, a dark inactive display, restrained edge highlights, a neutral light-gray backdrop, and a soft contact shadow. Show one product only. Prioritize design fidelity over dramatic styling.
Keep the first pass visually quiet. Props, colored lighting, and complex environments make it harder to tell whether the underlying product is correct. If your tool offers reference-strength or image-guidance controls, start with a setting that visibly respects the sketch; controls and their effects differ between tools, so judge the result rather than relying on a particular number.
Useful test: Cover the polished materials with your eyes and compare only the outer contour and feature placement. If those do not match, the render is not ready for presentation.
Step 4 — Correct one mismatch at a time
Pick the closest result, then make a targeted revision. Repeating the full prompt with more adjectives often changes unrelated parts of the product. Where the tool supports localized editing, select only the incorrect region; otherwise, refer back to the original sketch and specify the single correction.
| What went wrong | Next instruction |
|---|---|
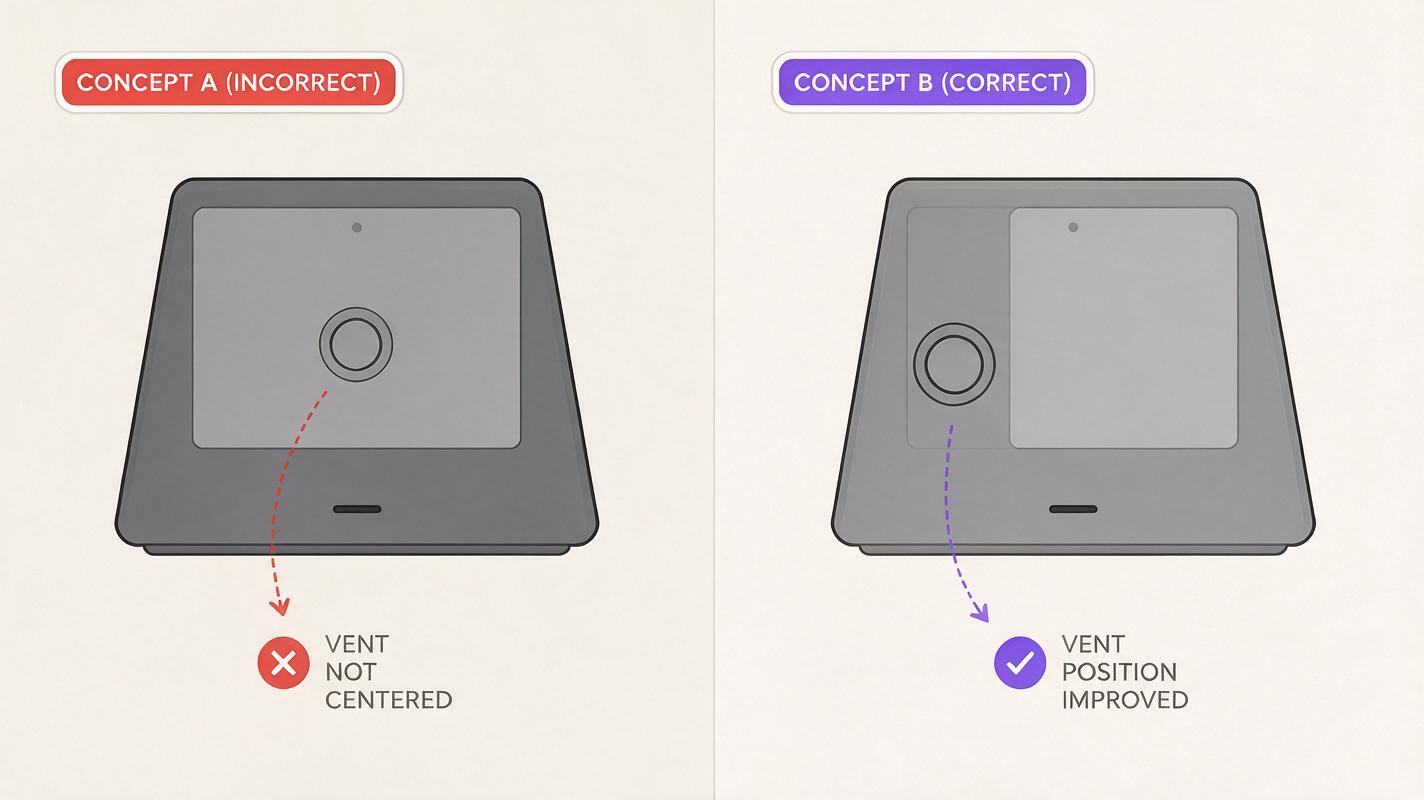
| Vent moved to the center | “Restore the vent to the left of the display, matching the sketch; leave the housing and camera unchanged.” |
| Housing became rounded | “Restore the straight tapered sides and flat upper edge from the reference.” |
| Extra controls appeared | “Remove the invented controls; retain only the openings visible in the reference.” |
| Port is hidden by reflections | “Keep the port in its sketched position and reduce the front-face glare.” |
Save each useful version. If a correction fixes the vent but damages the silhouette, return to the earlier image rather than building more edits on top of the error. A stronger source sketch can also be faster than several rounds of corrective prompting.
Step 5 — Check the render before using it in a concept review
Place the sketch and render side by side at similar sizes. Compare them in this order: silhouette, proportions, feature count, feature placement, seams, then finish. A convincing material treatment cannot compensate for a changed design.
- Can a reviewer identify the same product from both images?
- Are all defining controls, vents, displays, and openings present in the right places?
- Has the model invented any detail that could be mistaken for an approved design decision?
- Are reflections hiding an important feature or implying a shape the sketch does not show?
- Is the image labeled as a concept visualization rather than a validated engineering render?
Once the geometry passes this check, make a cleaner presentation version with the same reference and a controlled change to lighting or background. You can test this prompt yourself with your own sketch, replacing the example’s fixed-feature list with the decisions that define your product.
Final checklist
- Upload one legible sketch, with a second view only when it resolves ambiguity.
- List fixed geometry separately from lighting and material choices.
- Prompt from the reference image and prohibit invented components.
- Revise one mismatch at a time; keep the best earlier version.
- Compare the final render with the sketch before sharing it.
Keywords
sketch to product render, ai product design, product rendering ai, industrial design ai, product design prompts, concept visualization