How to Repair Character Drift in AI Video With Face Swap
Repair a drifting AI video by generating the motion first, identifying only the frames where identity changes, and applying face swap as a targeted correction rather than rebuilding the entire clip. This workflow preserves the original performance, camera movement, lighting, and edit timing while restoring a recognizable character.
Table of contents
Repair the identity without rebuilding the shot
The fastest way to fix a character whose face changes during an AI-generated shot is to treat face swap as a repair pass. Generate the performance first, keep the strongest take, then replace only the unstable identity using a clean reference portrait.
This approach is especially useful when the motion, camera move, setting, and timing already work. Instead of rerunning the entire generation and risking a new problem, you preserve the successful parts of the clip and correct the face afterward.
TL;DR: Use a sharp, neutral identity reference; generate or select the best motion clip; inspect it for drift; and apply face replacement only after the shot is locked. For difficult profile turns, repair the shot in short sections or use a three-view reference sheet.
Why character identity drifts inside a good AI video
A video model must infer a new image for every moment while maintaining motion, lighting, anatomy, perspective, and identity. When the character turns, becomes partially hidden, crosses a shadow, or moves quickly, facial identity may receive less visual emphasis than the action.
Typical symptoms include:
- The nose, jawline, or eye spacing changes midway through the shot.
- A character looks correct when facing forward but becomes a different person in profile.
- Hairline, age, freckles, makeup, or facial hair flicker between frames.
- The face becomes soft during fast motion and returns with altered features.
- A corrected face looks pasted on because its color or sharpness does not match the scene.
Prompting alone cannot always solve these problems. A detailed identity description helps during generation, but text is interpreted afresh rather than functioning as an exact biometric lock. A post-generation repair pass separates two jobs: the video model creates the performance, and the face replacement process restores the intended identity.
Three ways to repair character drift
- Whole-clip repair: replace the face throughout a short shot when pose and visibility remain stable.
- Segmented repair: divide a difficult clip around profile turns, occlusions, or lighting changes and process each usable section separately.
- Frame-led repair: correct a small number of visibly broken frames, then use those repaired images as anchors for a new short animation.
Whole-clip repair is the quickest option. Segmented repair offers more control, while frame-led repair is useful when the source performance contains extreme angles that a direct swap cannot follow cleanly.
How MagicBoat handles identity repair
MagicBoat supports a one-account workflow in which you can test different generation and repair methods without committing the whole project to one model family. Depending on the shot, you can begin with text-driven generation, animate a prepared still with image to video, compare available video models such as Seedance, Kling, or Veo, and then use face replacement as a finishing pass.
| Task | Recommended approach | What to protect |
|---|---|---|
| Create the performance | Text-driven video or an animated keyframe | Body motion, camera path, timing |
| Establish identity | Reference portrait or three-view sheet | Face shape, age, hairline, skin detail |
| Repair drift | Face replacement after generation | Expression, head pose, scene lighting |
| Handle a failed angle | Segment or regenerate from a repaired frame | Continuity at the edit boundary |
The important production decision is order: lock the motion before repairing the identity. If you replace the face and then regenerate the entire shot, the next video pass can introduce drift again.
Step 1 — Build a reference sheet that separates identity from expression
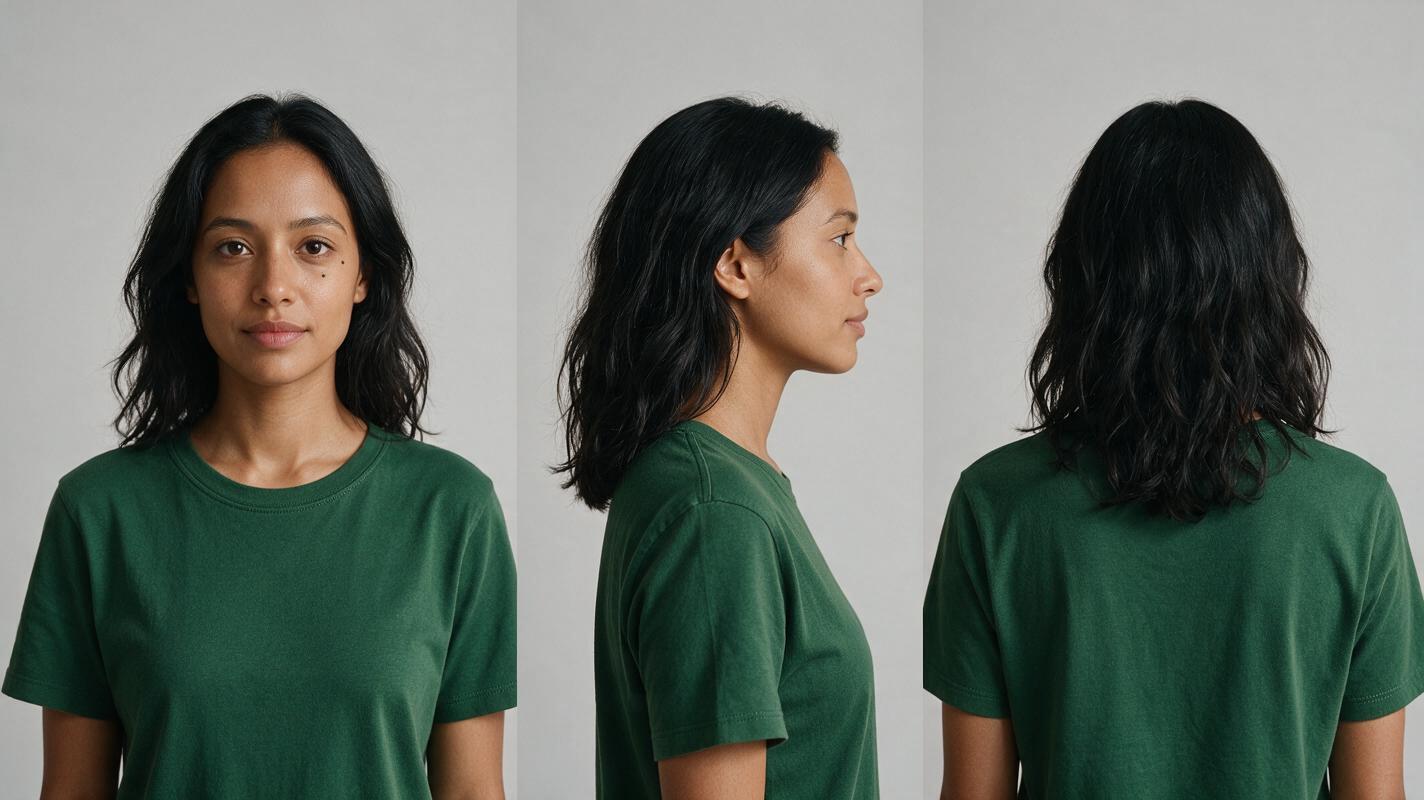
Create a photorealistic three-panel reference showing the same person from the front, side, and back. Use flat, neutral lighting and avoid a dramatic expression. The front view supplies the clearest facial identity, the profile clarifies nose and jaw structure, and the back view records hair length and silhouette.
Do not use a beauty close-up with shallow focus as the only reference. Missing ears, blurred hair edges, colored stage lighting, or an exaggerated smile can make the replacement less stable. Keep the character’s forehead, jaw, and both eyes unobstructed in the main panel.
Reusable visual 1: three-view character reference
Photorealistic three-panel character reference sheet of the same fictional woman, age 32, oval face, warm medium-brown skin, dark brown almond-shaped eyes, straight nose, defined natural eyebrows, small beauty mark beneath the left eye, shoulder-length black wavy hair, wearing a plain forest-green crew-neck shirt. LEFT PANEL: direct front view with neutral relaxed expression. CENTER PANEL: exact right-side profile with hair tucked behind the visible ear. RIGHT PANEL: direct back view showing the complete hairstyle and shoulder line. MANDATORY LAYOUT: three equal vertical panels in one landscape 16:9 image, full head and upper torso visible in every panel, consistent scale and clothing, no overlapping figures. MANDATORY CAMERA: eye-level, 85mm portrait-lens appearance, camera perpendicular to each view, no three-quarter angle. Neutral light-gray seamless studio background, large soft frontal light, realistic skin texture, editorial photography, accurate anatomy, no text, no labels, no accessories, no duplicate facial features.Expected result: one identity source with enough angle information to evaluate both frontal and profile frames. Save the original at the highest available quality and avoid repeatedly compressing it.
Step 2 — Generate a repair-friendly source performance
Start with a short, clearly staged action. Face repair works best when the face is visible, motion blur is moderate, and the head does not spin through an extreme angle in a single instant. For this example, the character walks through a lived-in kitchen, glances toward a window, and gives a restrained smile.
If you are animating a keyframe, use a scene image in which the character already resembles the reference. Face replacement is a correction tool, not a substitute for incompatible head geometry. A source character with a similar apparent age, face width, hairstyle, and head size will blend more naturally.
Reusable visual 2: source scene keyframe
Cinematic editorial-realism still of the same fictional 32-year-old woman from the reference sheet standing in a modest lived-in apartment kitchen at early morning, warm medium-brown skin, shoulder-length black wavy hair, forest-green crew-neck shirt, dark jeans, one hand resting naturally on a wooden counter, ceramic mug and folded dish towel nearby, pale daylight entering through a window on frame right, practical cabinets with subtle wear, realistic skin and fabric texture. MANDATORY CAMERA: true medium-wide three-quarter view, camera near front-left of the character at chest height, 35mm lens appearance, character positioned on the left third, window visible on the right, both hands fully visible, no cropped fingers. MANDATORY LIGHTING: soft window key light with gentle interior shadow, no colored light, no glamour retouching. Landscape 16:9, restrained cinematic color, believable home, no text, no logo, no extra people, no distorted hands.Use a motion prompt that describes visible actions in chronological order rather than stacking style adjectives:
The woman takes two slow steps along the kitchen counter, pauses, turns her head slightly toward the bright window on her right, then gives a small closed-mouth smile. Her shoulders remain relaxed and her hands move naturally. The camera performs a very slow stable push-in. Preserve the kitchen layout, realistic morning light, facial proportions, hairstyle, clothing, and natural body anatomy. No sudden head rotation, no talking, no new objects, no extra people, no rapid camera movement.Expected result: a simple performance with one controlled head turn, readable facial landmarks, and enough temporal stability for a repair pass.

Step 3 — Choose the take by motion, not by face
Review candidate clips with the sound off and temporarily ignore minor identity errors. Select the take with the best body mechanics, hand behavior, camera motion, and environmental continuity. Those qualities are expensive to recreate because every rerun can change the entire shot.
Reject a take if the head becomes physically malformed, disappears behind hair for a long period, or changes size independently of the body. Face replacement can correct identity, but it cannot reliably reconstruct a missing skull, repair a broken neck, or infer facial landmarks hidden for most of the shot.
| Source issue | Repair later? | Reason |
|---|---|---|
| Subtle eye or jaw drift | Usually | Facial structure remains trackable |
| Different-looking profile | Often | A profile reference can support the angle |
| Brief motion softness | Sometimes | The surrounding frames may preserve landmarks |
| Face fully covered by a hand | Not during the occlusion | There is insufficient visible evidence |
| Head shape collapses | No | The underlying geometry is broken |
Expected result: one locked master clip whose performance is worth preserving even though its identity still needs correction.
Step 4 — Mark the drift before applying face swap
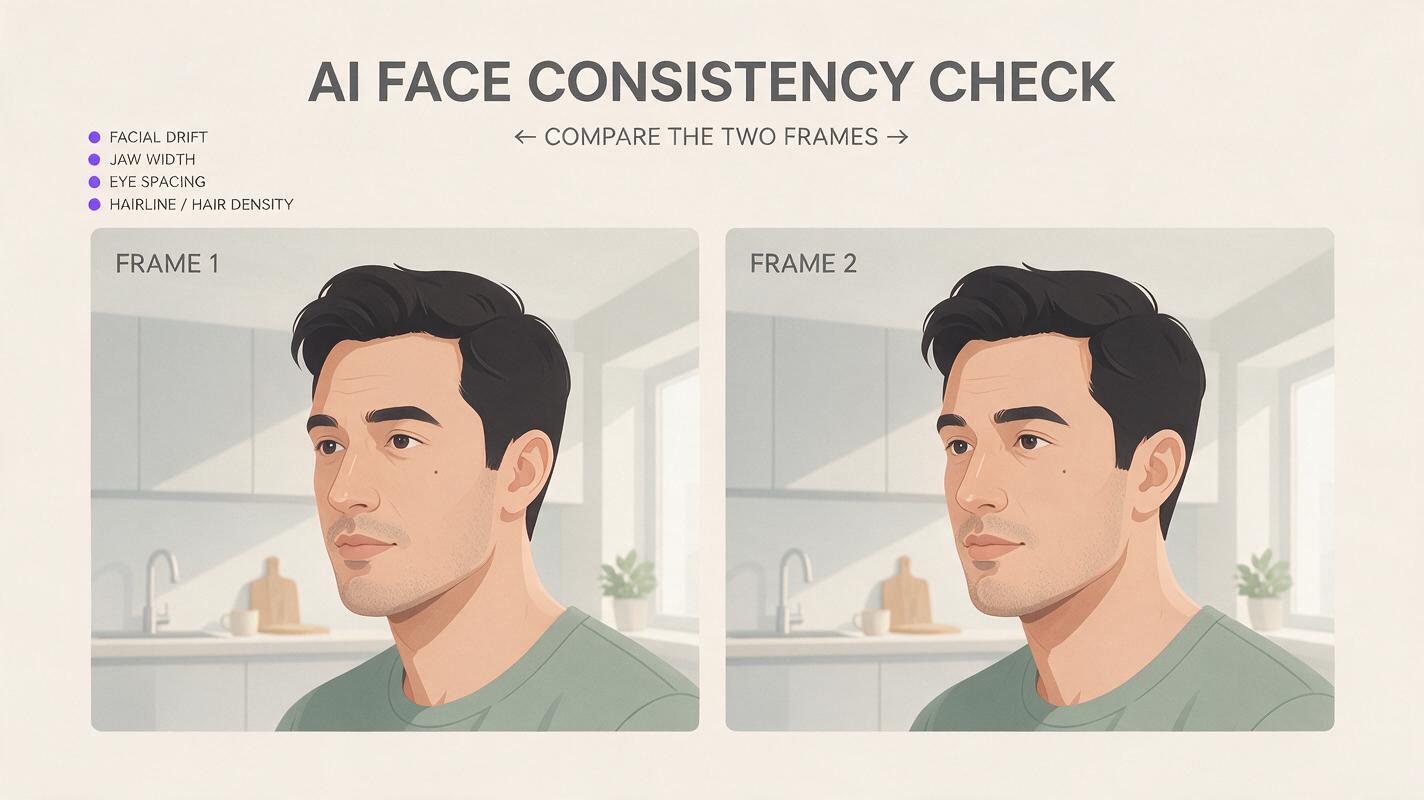
Watch the clip once at normal speed, then inspect the unstable area frame by frame. Note where the character still looks correct, where drift begins, the worst frame, and where identity recovers. Also mark occlusions such as hair, hands, steam, foreground objects, or hard shadows.
This review tells you whether to process the complete clip or split it. A stable five-second shot with a mild head turn may be repaired as one unit. If the face crosses from frontal view to deep profile, disappears, and returns, create separate sections around those events and preserve the covered frames from the original.
Reusable visual 3: failure and corrected-frame comparison
Editorial before-and-after comparison presented as two equal film frames from the same realistic apartment kitchen shot. LEFT FRAME labeled only by composition, not text: the woman at a three-quarter angle with visible identity drift, altered jaw width, inconsistent eye spacing, softened beauty mark, and slightly changed hairline, while body, green shirt, kitchen, and morning light remain realistic. RIGHT FRAME: the exact same pose, crop, expression, clothing, background, and lighting, but with the intended consistent oval face, natural eye spacing, correct jawline, beauty mark beneath the left eye, and coherent hairline. MANDATORY LAYOUT: clean side-by-side split, equal 16:9-derived panels, perfectly matched camera position and background geometry. MANDATORY CAMERA: eye-level medium close-up, 50mm lens appearance, true three-quarter view with camera near front-left. Photorealistic editorial grading, realistic pores, no interface, no decorative graphics, no extra people, no exaggerated deformity, no text.Expected result: a repair map that prevents unnecessary processing and makes the final quality check objective.
Step 5 — Apply the identity reference as a targeted repair
Use the clean frontal portrait from the sheet as the primary identity reference. For a clip dominated by profile angles, test a crop of the matching profile panel instead. Keep the source video unchanged so the replacement inherits its expression, blink timing, pose, and motion rather than imposing the expression from the reference image.
Use the strongest available source image, but do not artificially sharpen skin until pores become crunchy. Excessive sharpening can create a mask-like face that is visibly more detailed than the neck and background.
After processing, compare three areas:
- Boundary: inspect temples, ears, jaw, and hairline for a visible edge.
- Color: check whether facial warmth and exposure match the neck.
- Motion: confirm that blinking, smiling, and head rotation remain synchronized.
If a whole-clip pass fails only during the profile turn, keep the successful frontal section and rerun the problem segment with the profile reference. Join sections on a low-motion frame rather than at the peak of the turn.
Expected result: the original performance with a more stable identity, without changing the scene composition or camera timing.
Step 6 — Match texture and hide the repair boundary
A technically correct replacement can still look artificial if the face is cleaner, sharper, brighter, or less noisy than the original footage. Evaluate the clip at playback size, not only while zoomed into individual frames. Small edge differences may disappear in motion, while fluctuating color remains noticeable.
If editing controls are available in your finishing workflow, make restrained global adjustments rather than heavily modifying the repaired face alone. Match exposure and color first, then add only enough grain or softness to integrate the result. Avoid aggressive skin smoothing; stable facial detail is part of the character’s identity.
Quality rule: The corrected face should inherit the image character of the shot. It should not look like a high-resolution portrait floating over softer video.
Expected result: a repair that survives normal playback without drawing attention to the face boundary.
Keep the same identity across future projects
Archive a compact identity pack rather than relying on a single favorite portrait. Include the three-view sheet, a neutral close-up, one smiling expression, one daylight scene, and the final repaired frame from each approved video. Keep character-defining language unchanged across prompts: apparent age, face shape, complexion, eye color, hairstyle, distinguishing marks, and core wardrobe.
For a new shot, begin from the identity pack and a scene-specific keyframe. Use face replacement as insurance rather than the first creative decision. The closer the initial generation is to the intended person, the less visible the repair will be.
Alternative: regenerate from one corrected frame
If direct replacement cannot survive an extreme head turn, export the strongest drifting frame, correct its identity as a still, and use that corrected frame as the starting image for a shorter animation. Reduce the amount of motion around the difficult angle and cut back to the original clip after the turn.
This method changes more of the source motion than a direct repair, but it gives the video model a clean identity anchor at precisely the point where the original generation failed.
Alternative: preserve performance with motion transfer
When the original character is structurally unusable but the body performance is excellent, motion transfer can move the action onto a better-prepared character image. Use a full-body target with visible limbs, similar framing, and clothing that can plausibly follow the source movement.
This is a broader reconstruction than face replacement. Choose it when the failure affects the whole character—body proportions, wardrobe, or silhouette—not just the face.
Where this workflow falls short
- Long occlusions: a face hidden by hands, hair, objects, or darkness cannot be reliably reconstructed from invisible landmarks.
- Extreme profiles: references that show only a frontal face may not contain enough information for a convincing side view.
- Heavy motion blur: an inserted face can appear unnaturally sharp unless its texture is matched to the shot.
- Changing light: flashing signs, rotating shadows, or colored stage lighting can expose tonal differences.
- Broken anatomy: face replacement does not repair malformed heads, necks, teeth, or body motion.
- Large speaking close-ups: inaccurate lips, teeth, and tongue motion may require a dedicated dialogue or lip-synchronization workflow.
Use face replacement only with media you own or have permission to modify, and do not use it to misrepresent a real person’s actions or identity.
FAQ
Should I face-swap before or after generating the video?
Usually after. Generate and lock the strongest performance first, then repair identity drift. Running another full video generation after replacement may alter the face again.
Is one portrait enough?
It can be enough for a mostly frontal shot. A three-view sheet is safer when the character turns because it records profile structure and hairstyle silhouette.
Can face replacement fix distorted expressions?
It may improve identity, but it cannot always repair poor mouth geometry, malformed teeth, or an anatomically broken expression. Regenerate or shorten the damaged section when the underlying motion is incorrect.
Why does the corrected face look pasted on?
The common causes are mismatched exposure, skin color, sharpness, grain, or face shape. Begin with a reference whose angle and apparent lighting are compatible with the source, then match texture conservatively.
Should I process the entire clip?
Only when tracking remains stable throughout. Segment clips containing deep profile turns, occlusions, or abrupt lighting changes so that one difficult moment does not weaken an otherwise successful pass.
Can I use this workflow for several shots?
Yes. Reuse the same approved identity pack, but process each shot according to its own angle and lighting. Do not assume one reference crop will be optimal for every scene.
Final checklist
- Create a neutral front, side, and back character sheet.
- Generate a short performance with controlled head motion.
- Select the take with the best body and camera movement.
- Mark drift, occlusions, and extreme angles before repair.
- Use the closest reference angle for each difficult segment.
- Check hairline, jaw boundary, color, blink timing, and texture.
- Regenerate from a corrected frame when direct replacement fails.
- Archive approved references and repaired frames for future shots.
Ready to preserve the performance and fix the identity? Create your first ai video free and test this repair workflow on a short, controlled shot.
Keywords
face swap, character consistency, AI video tutorial, image to video, prompt engineering, character drift, AI video workflow