What AI Tools Turn a Script Into a Storyboard and Video?
A script-to-video workflow can lose its lead character between the storyboard and the finished shots. This guide compares tools by production role and shows how to carry one approved character reference through still frames, animation, and the final edit.
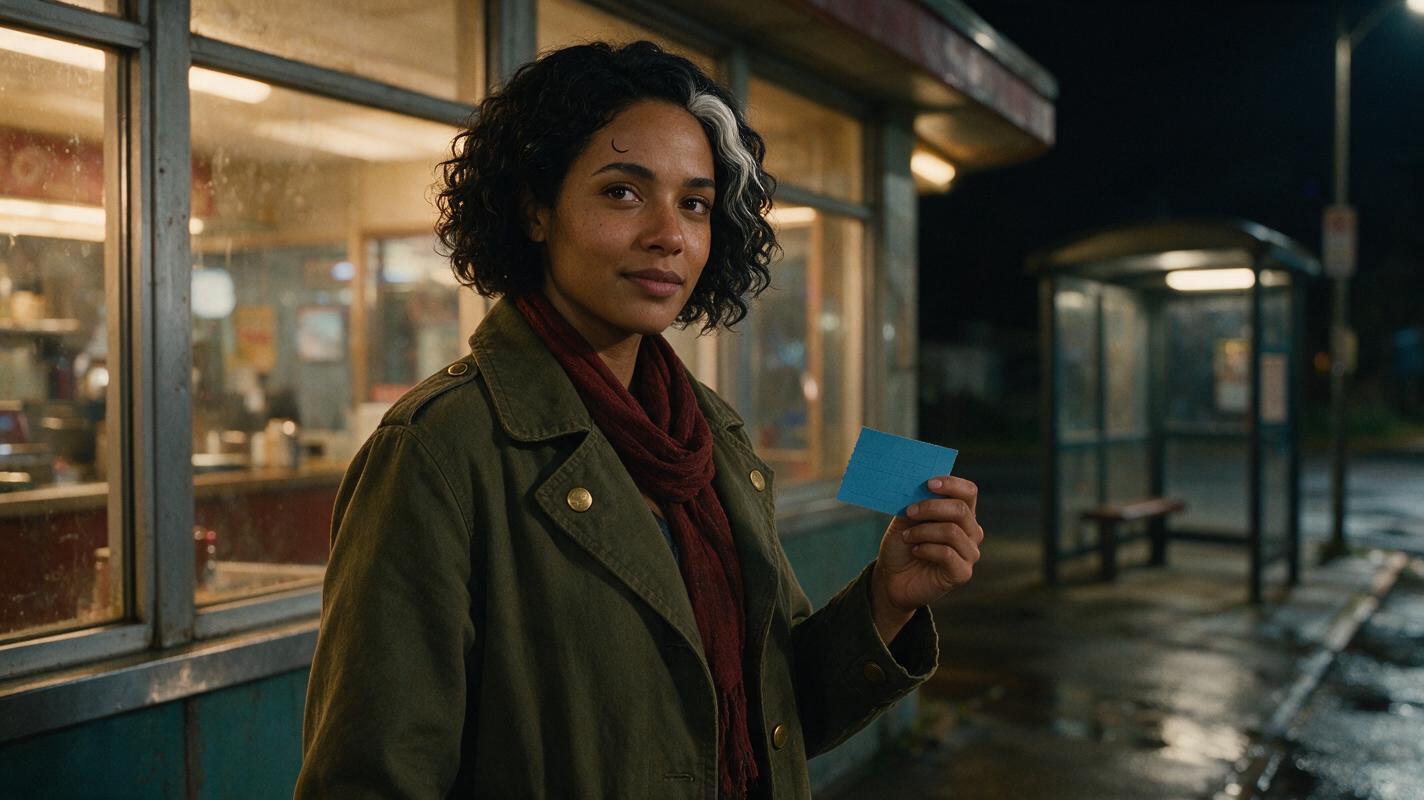
Table of contents
Start with the character, not the video prompt
The most reliable script-to-video workflow is script → character sheet → approved storyboard frames → animated shots → continuity review. A tool can turn a written scene into striking footage, but a recurring character needs approved visual references before the first shot moves.
Consider a two-scene example: Mara leaves a late-night diner carrying a blue paper ticket, then waits beneath a rainy bus shelter. The script is simple. The continuity challenge is keeping Mara’s face, coat, scarf, and ticket recognizable when the location and lighting change. This guide shows where different AI tools fit and what to hand from one stage to the next.
Cover recreation prompt:
Photorealistic editorial photograph, landscape 16:9. A fictional woman in her early thirties with medium-brown skin, short black curls with a silver streak at her left temple, a small crescent scar above her right eyebrow, an olive canvas coat with brass buttons, and a dark-red scarf stands outside a lived-in late-night diner holding a plain blue paper ticket in her left hand. Wet pavement reflects warm window light; an ordinary bus shelter is visible farther down the street. MANDATORY CAMERA: eye-level medium-wide three-quarter view, 35 mm documentary framing, natural proportions, believable practical lighting. No text, logos, screens, interface elements, or brand marks.Step 1 — Extract a continuity brief from the script
Read the script for facts that must survive every cut. Separate identity from scene state: Mara’s facial structure and scar remain stable; her scarf may become damp, and the ticket may move only when the action explains it. Mark the first and last visible state of each shot before generating images.
Character sheet template: Character: Mara. Face: medium-brown skin; oval face; small crescent scar above right eyebrow. Hair: short black curls; silver streak at left temple. Wardrobe: olive canvas coat with brass buttons; dark-red scarf. Prop: plain blue paper ticket. Scene A: dry coat, ticket in left hand, warm diner light. Scene B: damp coat, ticket still in left hand, cool bus-shelter light. Never change: facial structure, scar side, hair streak side, coat design.
If the script contains an intentional wardrobe or prop change, write its cause into the brief. Otherwise, a generator may treat an accidental change as a plausible new design.
Step 2 — Approve a three-view character sheet
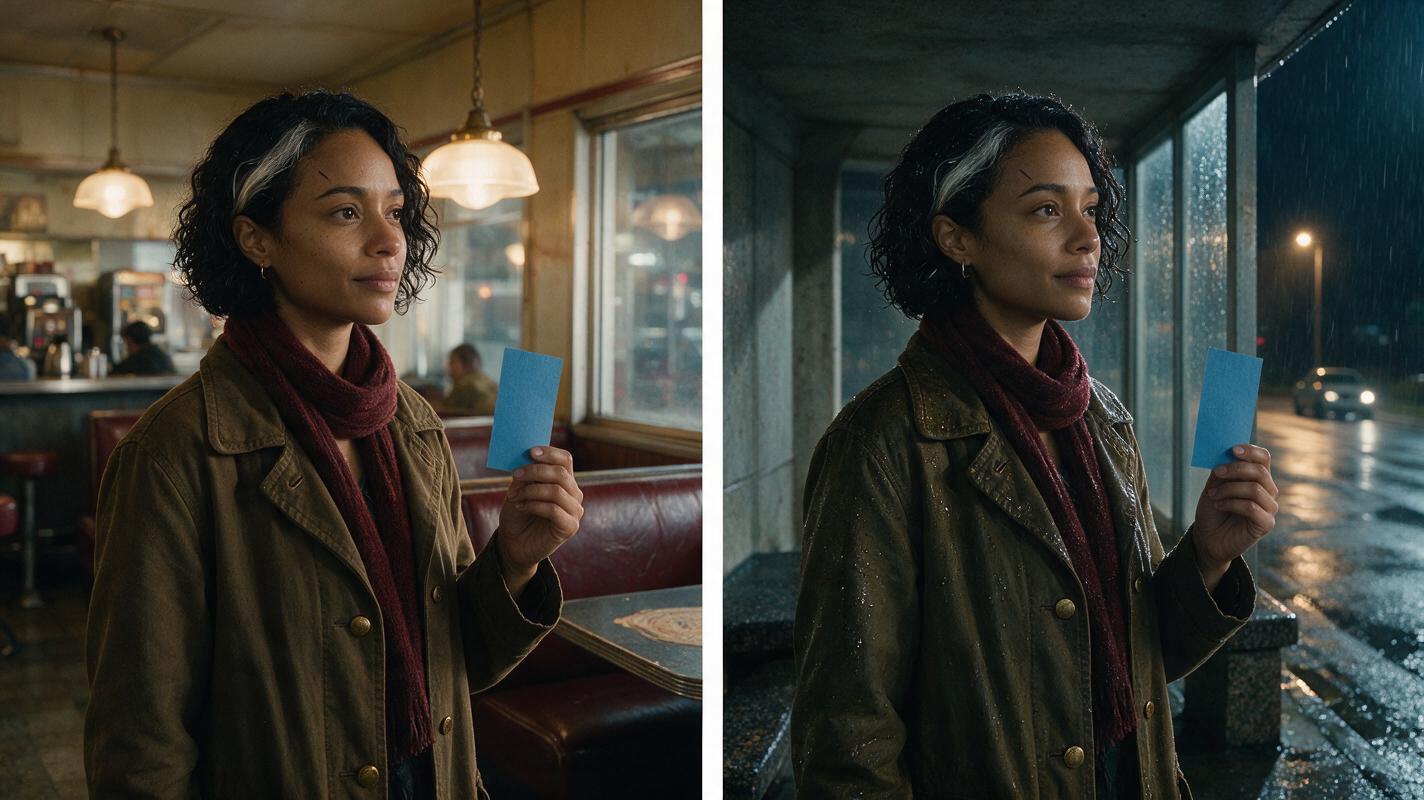
Make one photorealistic sheet for Mara before creating scene images. Inspect front and profile views for facial features, then use the back view to settle hair shape, coat seams, and scarf placement. Keep an approved export outside the generation history so every shot starts from the same source.
Visual prompt — Mara’s reference sheet:
Photorealistic three-panel character reference sheet of ONE fictional woman, Mara, early thirties, medium-brown skin, oval face, small crescent scar above her right eyebrow, short black curls with a silver streak at her left temple, olive canvas coat with brass buttons, dark-red scarf. MANDATORY LAYOUT: three equal panels showing the SAME person and SAME outfit, front view, true side profile, and full back view, in that order. MANDATORY CAMERA: eye-level, full-length, neutral lens, consistent distance and soft even illumination in all panels. Neutral light-gray seamless studio background; landscape 16:9. The profile must show one face, not a three-quarter view; the back panel must show the back of her head and coat. No labels, lettering, logos, UI, or extra people.Reject a sheet if its three panels disagree. A profile with a different nose or a back view with a different haircut is not a usable reference, even if each panel looks good alone.
Step 3 — Turn script beats into storyboard references
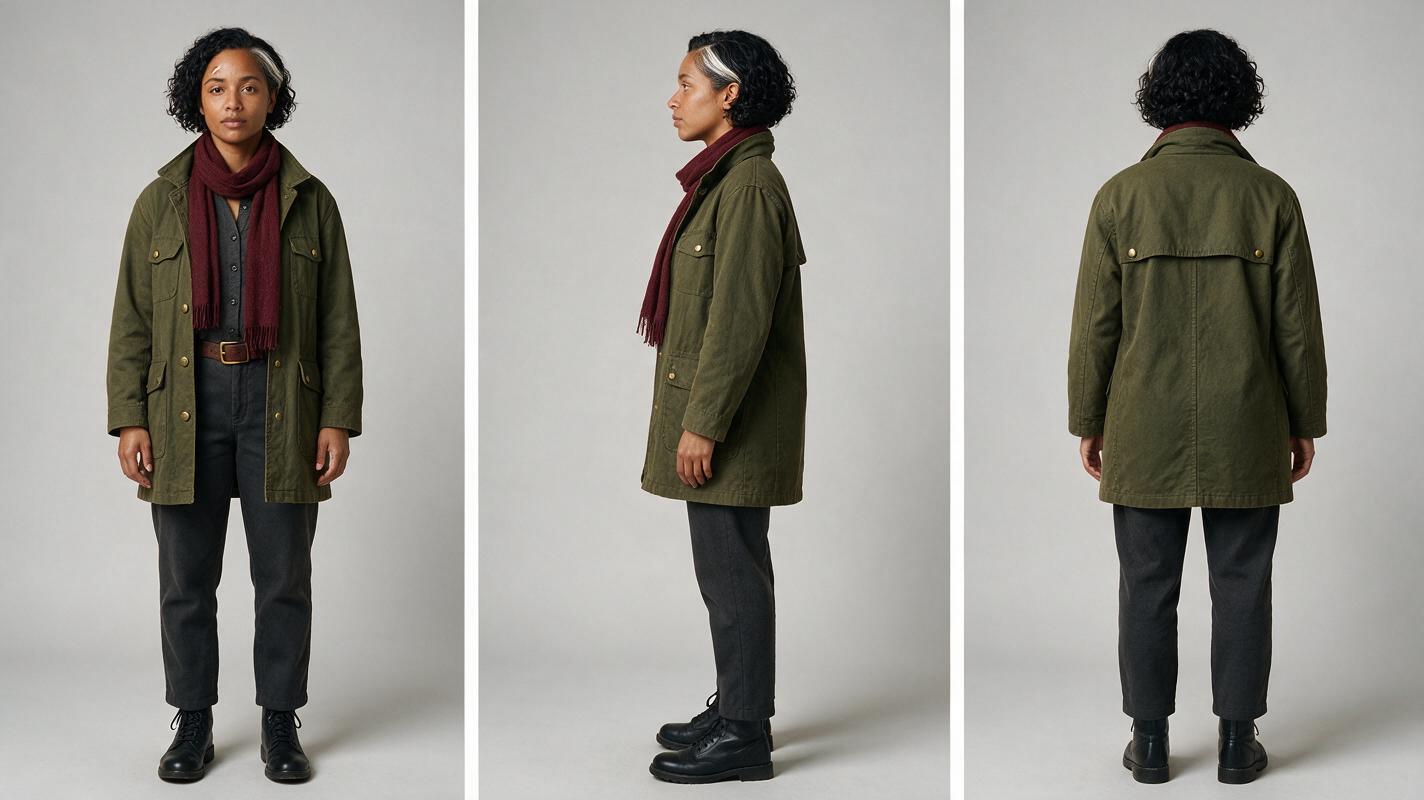
Create a still for each shot that needs a distinct camera position. The diner shot establishes Mara’s left-hand grip on the ticket; the shelter shot preserves that grip while changing location and weather. Use the approved sheet as the identity reference when the image tool accepts one. If it does not, keep the character brief identical across prompts and compare the results manually.
For the diner-to-shelter pair, ask for matching composition and a visible prop rather than two unrelated cinematic portraits:
Visual prompt — scene-reference pair:
Cinematic editorial-realism storyboard reference, landscape 16:9, split into two clean photographic panels with no border labels. The SAME fictional woman appears once in each panel: Mara, medium-brown skin, oval face, small crescent scar above right eyebrow, short black curls with silver streak at left temple, olive canvas coat with brass buttons, dark-red scarf. In the left panel she stands inside a lived-in late-night diner, holding a plain blue paper ticket in her LEFT hand; warm practical lamps, worn booth upholstery, believable reflections. In the right panel she waits beneath an ordinary rainy bus shelter, still holding the SAME ticket in her LEFT hand; damp coat, cool street light, believable wet pavement. MANDATORY CAMERA: matching eye-level medium shots, true three-quarter view of Mara in both panels, consistent face size and anatomy. No duplicated characters, writing, logos, screens, or interface elements.Treat these stills as a storyboard reference, not as proof that the eventual video will preserve every detail. Approve the face, hand, prop, and camera angle in the stills before spending time on motion.
Step 4 — Choose tools by handoff, not by a single promise
A practical stack can combine an image tool for references with a video tool for movement. If you prefer one workspace, an ai storyboard workflow can organize the visual plan before you move to image to video. Check the current model’s input controls before assuming it accepts character references, start frames, or multiple images.
| Tool to evaluate | Useful production role | Continuity question to ask |
|---|---|---|
| Adobe Firefly | Build scene images and evaluate video generation in an Adobe-centered workflow. | Can your selected workflow carry an approved still into the video stage? |
| Runway | Develop and revise moving shots from a visual plan. | Which reference or image inputs are available for the model and plan you select? |
| Luma Dream Machine | Explore cinematic shot alternatives. | How will you supply and compare the approved first frame for each shot? |
Compare tools using the same two approved frames and the same motion brief. Review exported shots, not promotional examples. Price, licensing, input options, and model availability can change, so confirm them on the product pages before committing to a pipeline.
Step 5 — Animate the approved frames and inspect the cut
Animate the diner and shelter frames separately. Keep the motion request narrow: one character, one action, one camera move. A useful shot instruction is:
Use the approved Mara diner storyboard frame as the visual starting point. Mara looks toward the diner door while keeping the blue paper ticket in her LEFT hand. Preserve her facial structure, scar above the right eyebrow, silver streak at the left temple, olive coat with brass buttons, and dark-red scarf. MANDATORY CAMERA: eye-level medium shot, gentle locked-off framing; no camera orbit. One person only. Do not invent writing on the ticket or change hands.Write a separate shelter instruction that names the same identity anchors and updates only the permitted scene state. Review the final frames of the diner shot beside the opening frames at the shelter. If the face changes at the cut, return to the approved still or shorten the moving shot; adding more adjectives to a drifting clip rarely fixes its underlying reference.
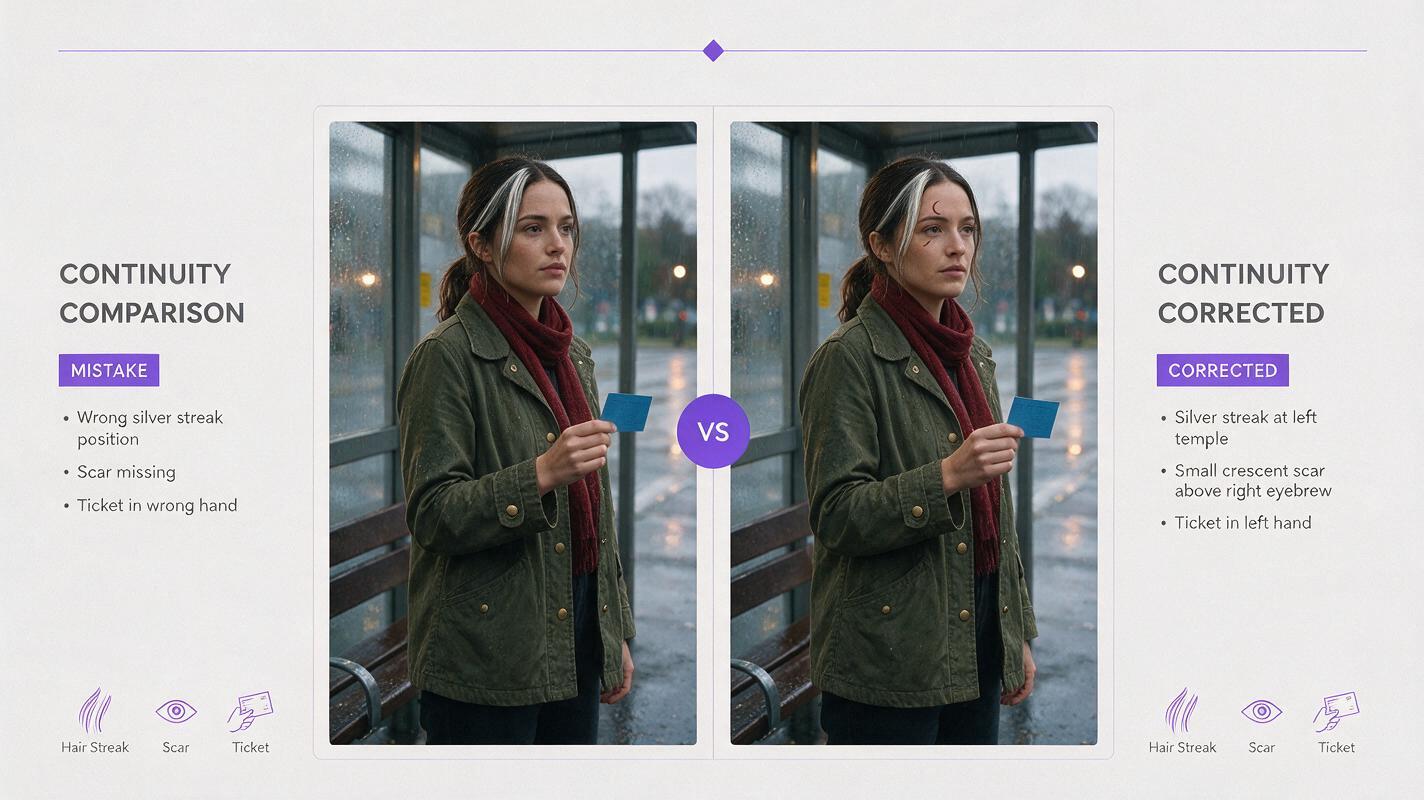
Visual prompt — illustrative failure and correction:
Neutral instructional comparison rendered as two photorealistic cinematic frames side by side, landscape 16:9, with no words or graphic labels. Both frames show a fictional woman waiting at the same rainy bus shelter in the same eye-level medium three-quarter camera view. LEFT FRAME intentionally illustrates a continuity mistake: her silver hair streak has moved to the opposite temple, the small eyebrow scar is missing, and the blue ticket is in her right hand. RIGHT FRAME illustrates the corrected target: Mara has a silver streak at her LEFT temple, a small crescent scar above her RIGHT eyebrow, and the plain blue ticket in her LEFT hand; olive canvas coat with brass buttons and dark-red scarf match the approved reference. Cinematic editorial realism, lived-in street setting, credible rain and anatomy. MANDATORY CAMERA: identical eye-level medium framing and face scale across both panels. One person per panel; no text, arrows, UI, logos, or brand marks.Common failures and targeted fixes
- Face changes between shots: Regenerate the affected storyboard still from the approved sheet; inspect it before animation.
- Scar or hair streak flips sides: Specify the character’s left and right, then compare against the front view rather than a mirrored preview.
- Ticket changes hands: Name the holding hand in both scene briefs and keep it visible at the cut.
- Two Maras appear: Request one person in the shot and remove background descriptions that imply a second subject.
- Wardrobe drifts with lighting: Describe the coat’s construction separately from its wetness or color under the scene lights.
When the two shots pass those checks, try these models for free with your approved frames and compare the resulting cuts. Keeping story planning, image references, and video experiments close together makes it easier to spot which handoff introduced a change.
Final checklist
- The script distinguishes permanent identity traits from changes caused by the story.
- Mara has one approved front, side, and back character sheet.
- Each storyboard still matches the sheet and shows the correct ticket hand.
- Each video shot begins from an approved visual reference where the selected tool supports it.
- The diner’s last frames and shelter’s first frames agree on face, hair, coat, scarf, and prop.
FAQ
Can one AI tool turn a script directly into a consistent multi-shot video?
A tool may offer several stages in one workflow, but do not skip reference approval. Check the character at the storyboard stage and again at every video cut.
Is a character sheet enough to keep the same face across scenes?
It establishes the target identity. Scene-specific stills and cut-point review are also needed because camera angle, expression, motion, and lighting can introduce drift.
What should I fix first when the finished video changes the character?
Find the earliest stage where the detail changed. If the storyboard still is wrong, remake it. If only the moving clip drifts, retry from the approved still with simpler motion.
Sources
Keywords
storyboard reference, character consistency, consistent character video, consistent character across scenes, character reference, multi-shot, ai character design