How to Direct Natural Two-Person Dialogue Scenes With Script to Video AI
Learn how to create believable two-person conversation scenes using script to video AI. This step-by-step guide covers script beat markup, shot/reverse-shot storyboarding, character-locked clip generation, lip sync integration, and editing for natural dialogue rhythm.
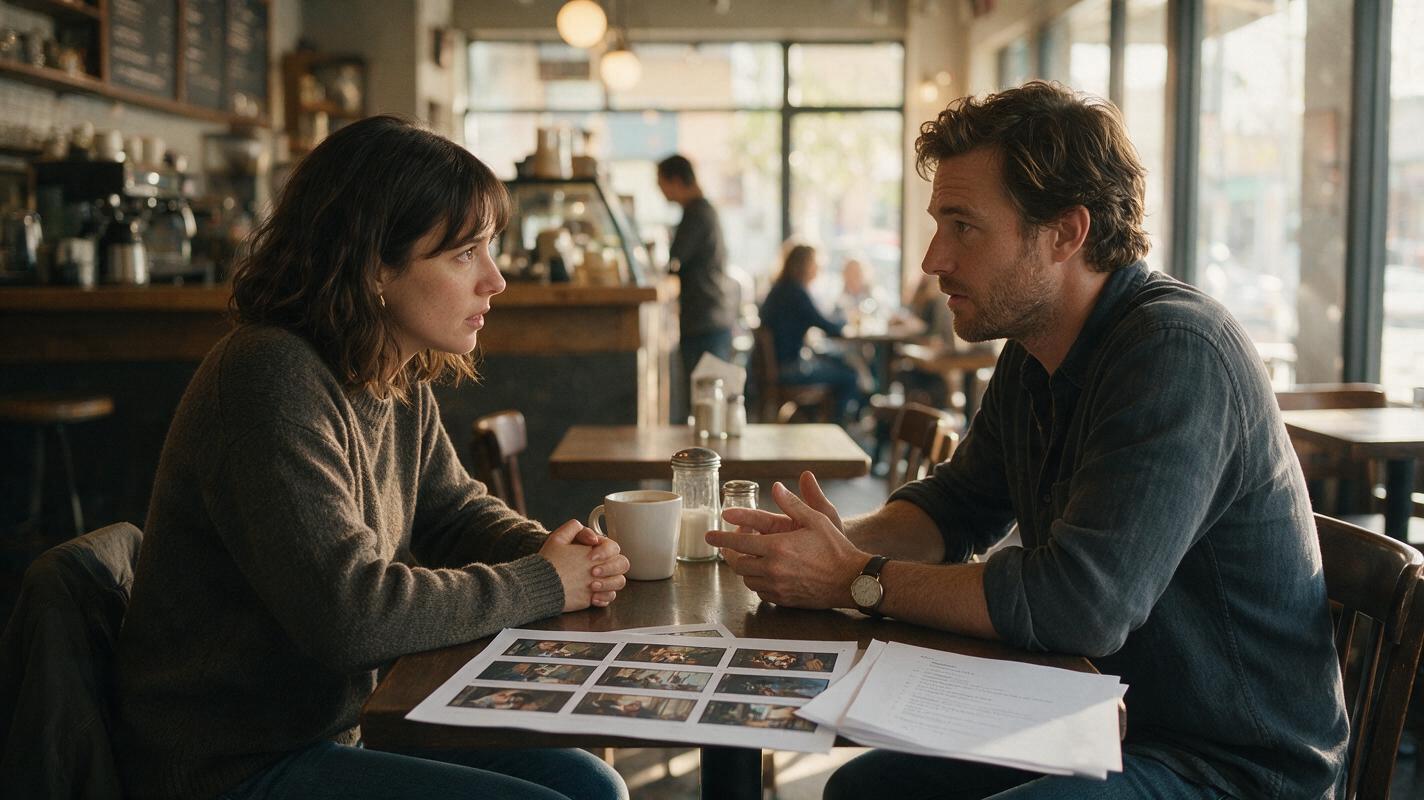
Table of contents
Why Two-Person Dialogue Feels Stiff in AI Video
Two-person conversations are the backbone of nearly every film, but they're also one of the trickiest scene types to generate with AI video tools. You need two consistent characters, natural body language, believable delivery rhythm, and shots that cut together smoothly. Get any of these wrong, and the scene feels stiff, uncanny, or impossible to follow.
The good news: with a structured approach to script markup, storyboarding, and layered clip generation, you can direct dialogue scenes that feel genuinely natural — no film crew required. This guide walks through a production-proven workflow built for any script to video pipeline.
Step 1 — Mark Up Your Script for Conversation Beats
Before you touch any generation tool, prepare your script so every line has a clear visual job. Dialogue scripts written for human actors don't always translate directly to AI video; you need to add visual intent to each beat so the tool knows what to show, not just what to say.
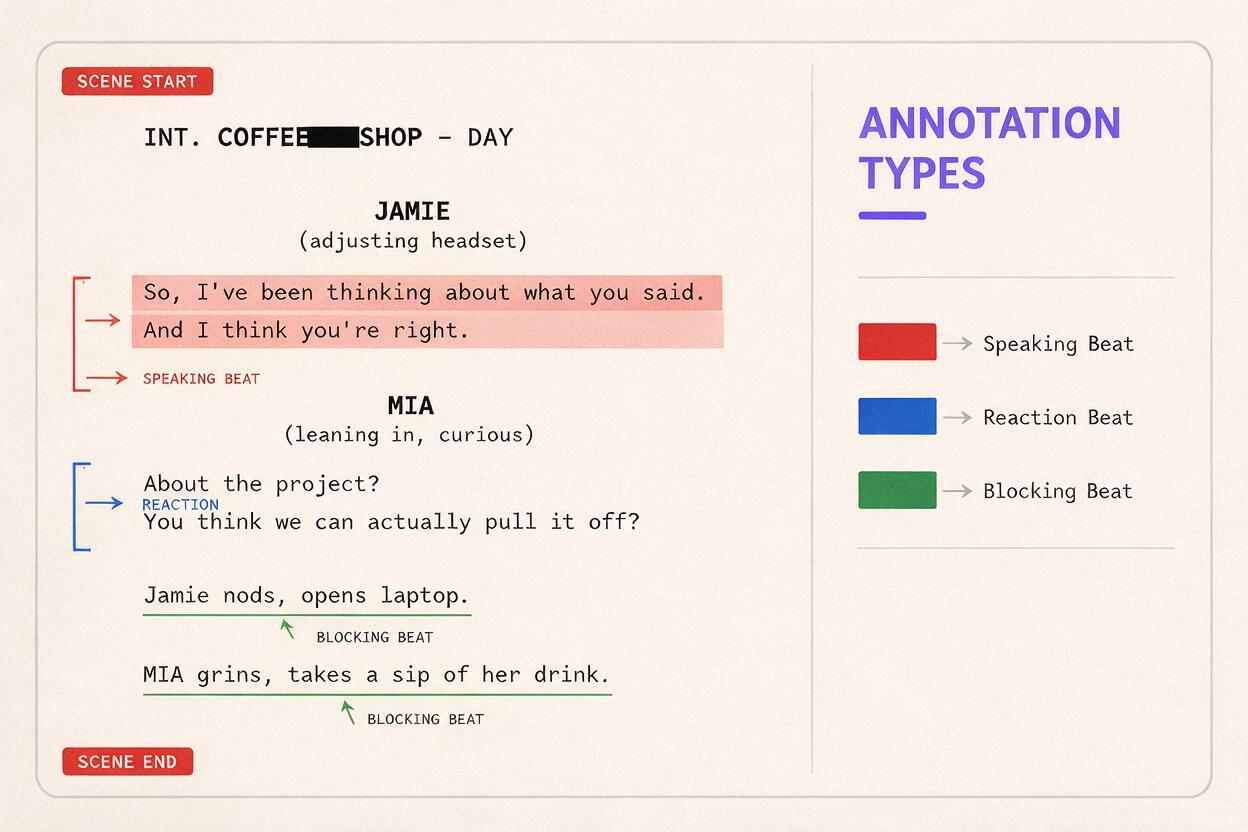
Break each conversation into three layers and mark them in your script:
- Speaking beats: Who is talking, and what emotion are they conveying?
- Reaction beats: What is the listener doing while the other person speaks?
- Blocking beats: Where are the characters positioned, and do they move?
For each line of dialogue, add a parenthetical visual direction that describes what the character is doing physically — not just how they're saying the line. This gives every shot a concrete visual target.
INT. COFFEE SHOP - AFTERNOON

MAYA (20s, leather jacket, leaning forward, elbows on table)
  You're telling me you found the letter
  in a bookstore basement?

(beat — Daniel looks down, fidgets with his cup)

DANIEL (30s, wire-rimmed glasses, hesitant posture)
  Not just any letter. It was addressed
  to you. Postmarked 1998.

MAYA (pulling back, confused, brow furrowed)
  That's impossible. I wasn't even born yet.
Without this level of detail, you'll get generic talking-head frames that don't cut together and don't carry the emotional weight of the scene.
Step 2 — Build a Shot/Reverse-Shot Storyboard
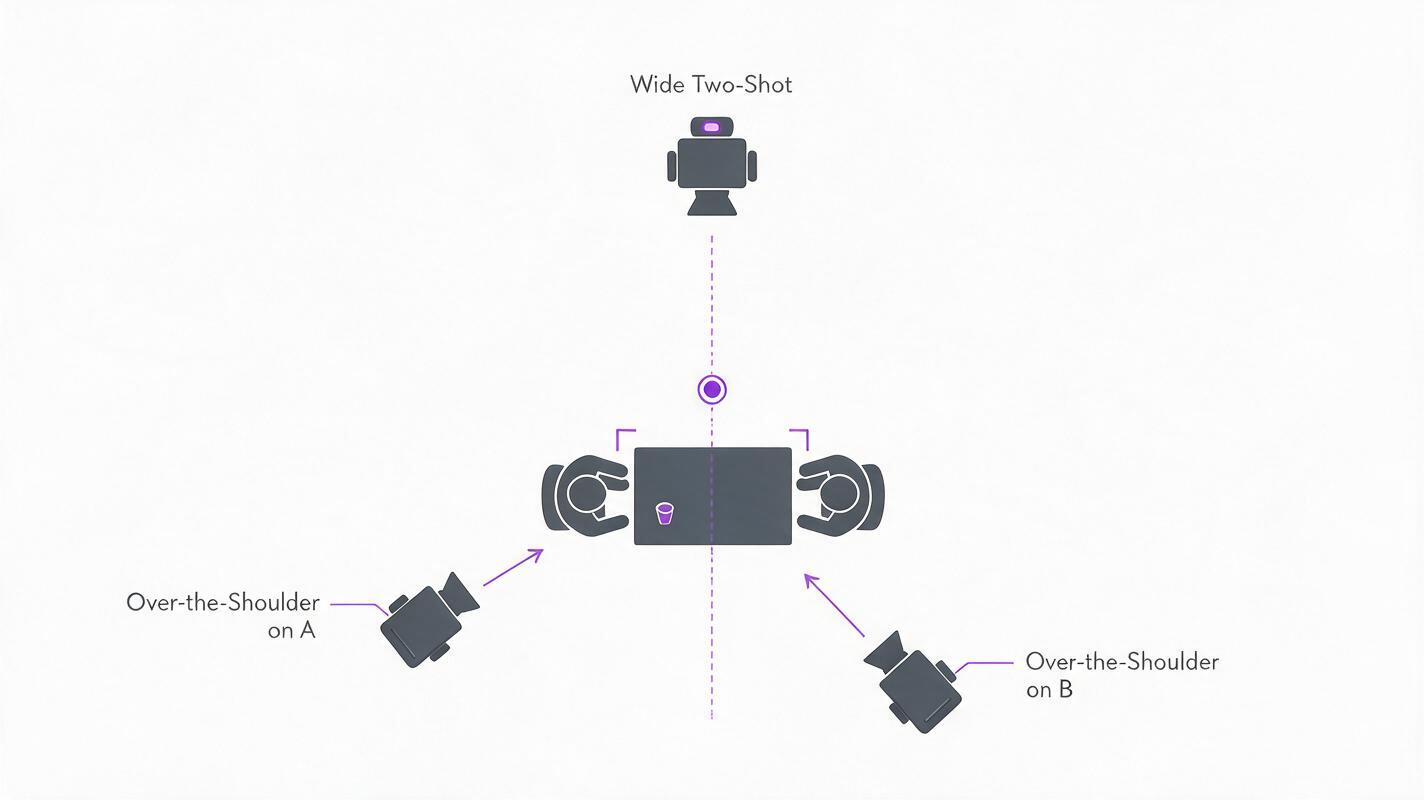
The standard film grammar for two-person dialogue is shot/reverse shot: one angle on character A, then a matching angle on character B, cut back and forth as they speak. This pattern works exceptionally well with ai storyboard tools because each clip only needs one character fully rendered on screen at a time — doubling your consistency and halving your failure rate.
Set up your storyboard with three core shot types:
- Wide two-shot (establishing): Shows both characters and their spatial relationship in the location
- Over-the-shoulder on A: Character A in soft foreground, Character B in sharp focus
- Over-the-shoulder on B: Character B in soft foreground, Character A in sharp focus
For a 10-line conversation, you'll typically need 12-15 storyboard panels: one establishing shot, then alternating close shots for each line or beat change. Plan extra reaction shots — they're the secret to making conversations feel real.
Pro tip: Keep the camera on the same side of the 180-degree line for every shot. If character A is on the left in the wide shot, they stay on the left in every close-up. This prevents spatial confusion when you edit the scene together.
Step 3 — Generate Character-Locked Clips One at a Time
Once your storyboard is solid, generate each clip individually using character reference sheets to lock identities. Trying to generate both characters in motion at once is the number one cause of weird dialogue scenes — faces morph, bodies merge, and consistency falls apart. One character per clip is the safer path.
For each clip, use the storyboard frame as your starting image, feed the corresponding character reference sheet as a consistency reference, and keep motion subtle. Small head tilts, hand gestures, and slight weight shifts read as natural; broad gestures often break into distortion.
Generate 3-4 variants per shot and pick the one with the most natural posture and facial expression. You'll discard more than you keep, especially when you're starting out.
Here's a reusable prompt for a dialogue close-up:
Medium close-up, over-the-shoulder shot of Maya listening intently.
She blinks slowly and tilts her head slightly to her right.
Soft natural window light from the left side.
Shallow depth of field, background slightly blurred.
Cinematic color grading, warm coffee shop tones.
MANDATORY CAMERA: static locked-off shot, no movement, eye level.
Use an ai image generator to create your reference sheets first, then animate them with video tools for maximum consistency across the whole scene. try these models for free to test which combination gives you the most stable character identity.
Step 4 — Add Lip Sync for Spoken Lines
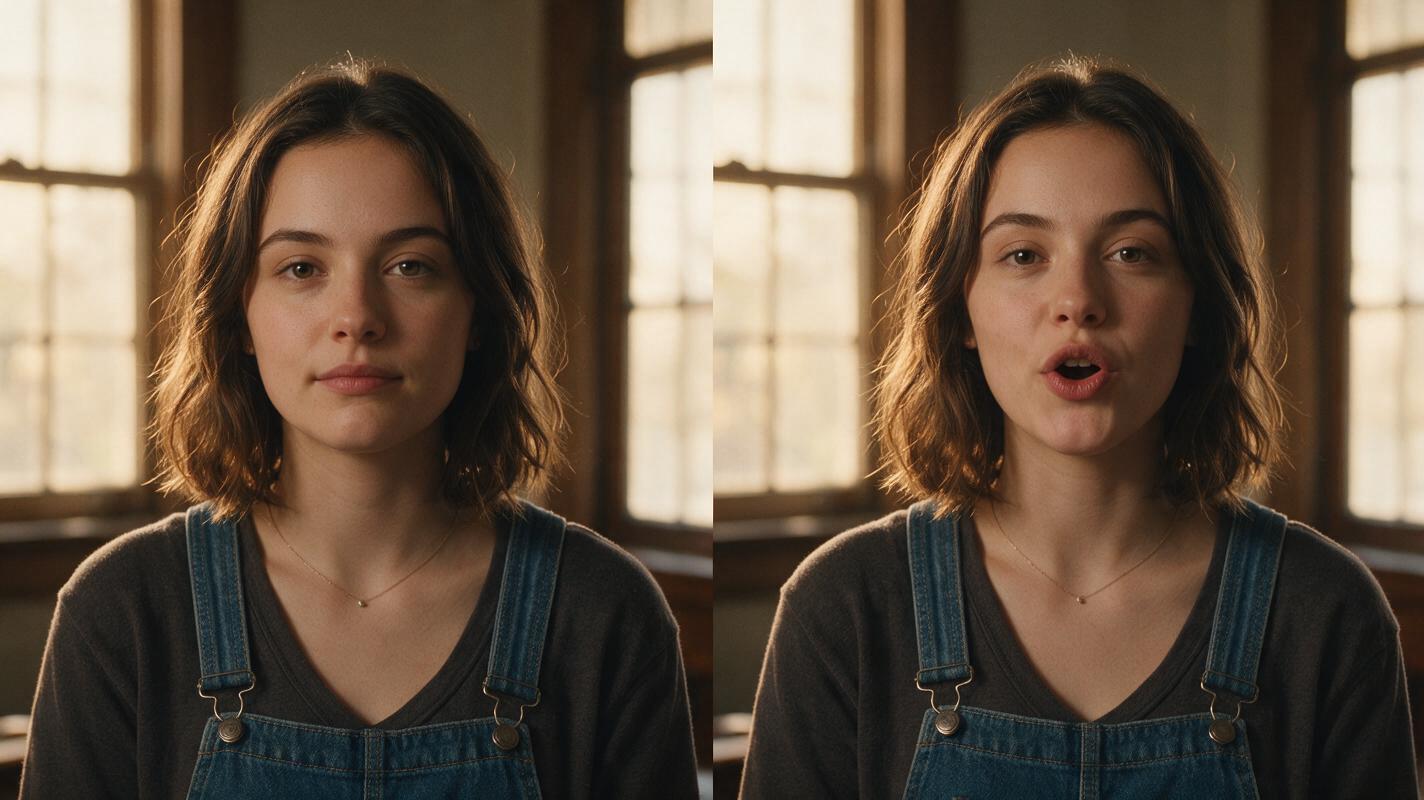
For clips where a character is speaking directly to camera, you'll need to pair the generated footage with dialogue audio and sync the lip movement. Static or slightly moving footage works best for ai lipsync — the less head movement in the base clip, the cleaner the result.
The workflow is straightforward: generate clean dialogue audio for each line, run the clip and audio through a lip sync tool, and check for natural mouth shapes. Pay extra attention to plosive sounds (P, B, M) — if those land correctly, the rest will read as natural to viewers.
Here's what many first-timers miss: you don't need lip sync on every shot. Reaction shots, wide shots, and over-the-shoulder angles where the mouth isn't clearly visible work perfectly fine without it. In fact, mixing synced and unsynced shots makes the conversation feel more natural — real films do this all the time to focus on the listener's reaction instead of the speaker's mouth.
Step 5 — Edit for Conversation Rhythm
The rhythm of a dialogue scene makes or breaks its believability. AI-generated clips tend to have uniform pacing, so you'll need to adjust timing in the edit to make the conversation feel like real people talking instead of robots taking turns.
Use these editing patterns to shape the rhythm:
- Cut on the line: For important lines, cut to the speaker just as they start talking — it feels immediate and direct
- Cut before the line: For reaction-driven moments, show the listener's face while the speaker's voice plays from the previous shot
- Hold on reactions: Sometimes the most interesting thing in a conversation is the person who isn't talking — let those moments breathe
- Leave gaps: Real conversations have pauses, hesitations, and overlapping speech. Don't cut every line back-to-back with zero breathing room
A good rule of thumb: if you can watch the scene with the sound off and still tell who's talking and how they feel, you've directed a successful dialogue scene.
Final Checklist
- Both characters remain visually consistent across every shot in the scene
- Camera stays on the correct side of the 180-degree line throughout
- Lip sync matches dialogue on all direct close-ups where the mouth is visible
- Reaction shots show genuine listening behavior, not blank or frozen faces
- Conversation rhythm includes pauses and natural gaps between lines
- Wide establishing shot clearly shows the spatial relationship between characters
- All clips share matching lighting direction and color tone
Keywords
script to video, ai storyboard, ai movie maker, ai lipsync, create ai video, story to video, ai film generator