Script to Video AI: Keep Props Consistent Across Every Scene
Prop drift can make an otherwise polished AI film feel disjointed. This tutorial explains how to lock a story-critical object across scripts, storyboards, generated clips, inserts, and continuity reviews.
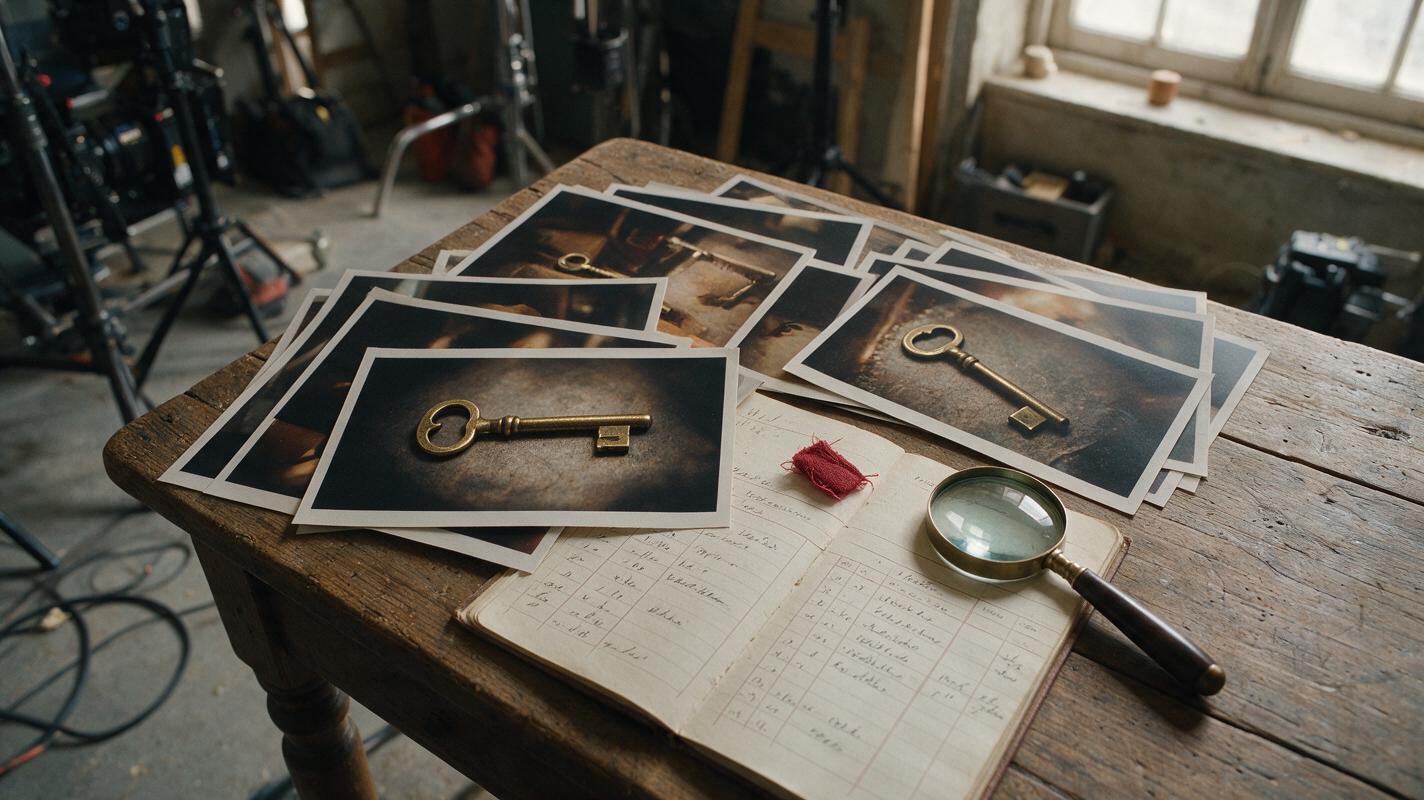
Table of contents
Why prop continuity needs its own workflow
A story-critical prop should be treated like a cast member: define its identity, track its condition, and approve its appearance before generating motion.
AI video scenes can quietly change a prop's color, material, dimensions, damage, orientation, or position. A red leather notebook becomes burgundy cloth. A chipped mug repairs itself. A sealed envelope appears open before the character touches it. These errors are especially distracting when an object carries evidence, triggers a plot turn, or connects two scenes.
The solution is not to repeat “same prop” in every prompt. A reliable script to video workflow gives the object a fixed specification and a scene-by-scene state. The following process uses a weathered brass key as its running example, but it also works for letters, jewelry, weapons, phones, packages, vehicles, and costume accessories.
Step 1 — Build a prop continuity card
Begin with a compact visual specification that separates permanent traits from temporary story states. Permanent traits should survive every scene. Temporary traits may change only when the script causes the change.
| Continuity field | Example definition | Can it change? |
|---|---|---|
| Object | Small antique brass key | No |
| Shape | Round bow, narrow shaft, three asymmetrical teeth | No |
| Surface | Dark oxidation around the bow and teeth | No |
| Unique mark | Shallow crescent scratch on one side | No |
| Attachment | Faded red cotton thread through the bow | Only after scripted removal |
| Condition | Dry, wet, muddy, or clean | Yes, according to the scene |
| Current owner | Mara, the locksmith, or neither | Yes, after a visible handoff |
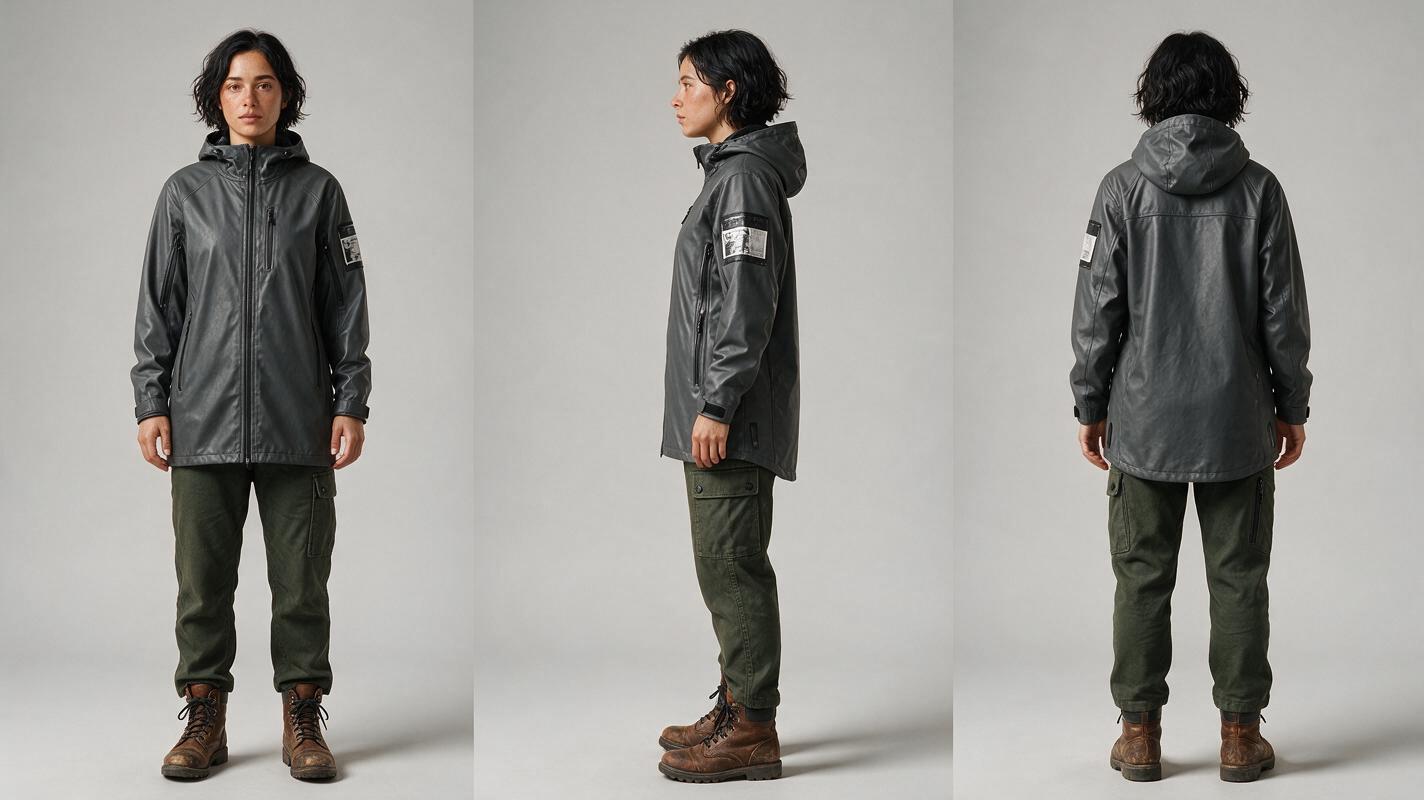
Generate a reference asset before making story frames. Include multiple object angles and, if a recurring character handles the prop, make a separate character sheet so identity and wardrobe are not competing with object design during later generations.
Photorealistic three-panel character reference sheet of Mara, a 32-year-old bicycle courier with an oval face, short black wavy hair, a charcoal rain jacket, dark green trousers, and worn brown boots; the same person and identical clothing in all panels; front view, exact side profile, and back view; relaxed neutral posture, hands visible and empty; neutral light-gray seamless studio background; soft even studio lighting; realistic skin and fabric texture; no text, no logos, no interface elements. MANDATORY LAYOUT: three equal full-body panels arranged left to right. MANDATORY CAMERA: eye-level, 70mm portrait perspective, fixed camera height and distance. Landscape 16:9.Continuity rule: Do not place the key in the character sheet. Keep character identity and prop identity as separate references, then combine them in the storyboard.
Step 2 — Convert the script into a prop-state ledger
Read the screenplay only for object-related actions. Record where the prop begins, who touches it, what changes, and where it ends. This catches impossible transitions before rendering begins.
| Scene beat | Owner | Location | Condition | Required action |
|---|---|---|---|---|
| Mara finds the key | Mara | Rain gutter | Wet, thread attached | Lift with right hand |
| She examines the mark | Mara | Cafe table | Damp, partly dried | Scratch faces camera |
| She gives it to the locksmith | Locksmith | Workshop counter | Dry, thread attached | Visible hand-to-hand transfer |
| The lock opens | Locksmith | Workshop door | Dry, thread removed | Insert teeth-first |
Every change needs an on-screen cause. If the thread disappears between scenes, add a shot of its removal or preserve it. If the key becomes dry, establish elapsed time or show it being wiped. This principle prevents the model from accidentally rewriting the object's history.
Step 3 — Generate locked storyboard anchors
Use an ai storyboard to approve the prop's scale, orientation, screen position, and relationship to the actor before generating clips. The most useful anchors are the first frame, the decisive interaction frame, and the final frame of each beat.
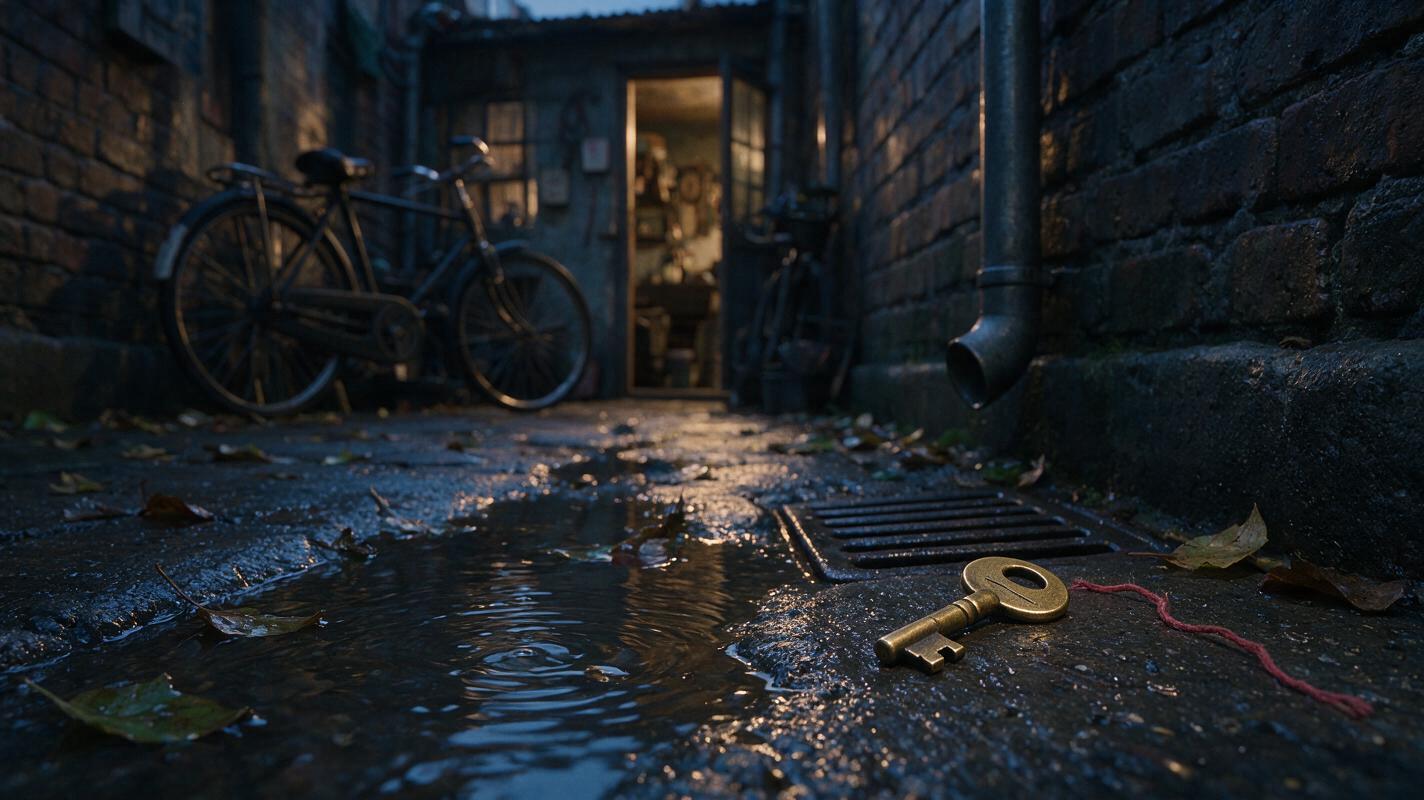
For the discovery scene, create a lived-in location plate that establishes where the key sits before Mara enters. Generate the actor-and-prop frame only after the environment is approved.
Cinematic editorial-realism frame of a narrow rain-soaked alley behind an old bicycle repair shop at blue hour; weathered brick, metal drainpipe, shallow gutter water, scattered wet leaves, warm practical light spilling from a distant doorway; one small antique brass key with a round bow, three asymmetrical teeth, dark oxidation, crescent scratch, and faded red cotton thread resting beside the gutter grate; no people, no text, no logos. MANDATORY CAMERA: low true three-quarter view, camera 35 centimeters above the ground, 50mm lens, key in the lower-right foreground and alley depth extending upper-left. Natural reflections, believable scale, landscape 16:9.Keep the prop description identical across anchor prompts. Add state information after the fixed description rather than rewriting it. For example, append “wet with two visible droplets” or “dry, red thread removed” only when the ledger permits that condition.
Step 4 — Separate handling shots from dramatic coverage
A wide emotional shot asks the generator to solve performance, environment, camera movement, hands, and a small object simultaneously. That is an unnecessarily fragile request. Divide each prop interaction into complementary coverage:
- Establishing frame: confirms the object and its location.
- Approach shot: shows the hand moving toward the object without completing the pickup.
- Contact insert: shows fingers touching or gripping it.
- Reaction shot: prioritizes the character's face while the prop remains still or leaves frame.
- Exit state: confirms where the object ends after the action.
Use the approved storyboard frame as the starting reference for each image to video clip. Prompt one clear physical action per shot: “right hand closes around the key and lifts it vertically” is easier to control than “she grabs the key, stands, examines it, and runs away.”
Preserve the exact character, jacket, alley, brass key design, faded red thread, object scale, and right-hand position from the reference frame. Mara's right thumb and index finger close around the round bow, then lift the key vertically by eight centimeters. The key remains rigid; its three teeth point downward; the red thread moves slightly from gravity. Slow natural hand movement, subtle breathing only. Camera remains locked. No extra fingers, no duplicate key, no shape change, no color change, no new objects.Step 5 — Design handoffs as continuity bridges
A transfer between characters is the highest-risk moment because ownership, hand anatomy, orientation, and screen direction can all change at once. Do not hide the transfer between cuts. Build it as a three-part bridge: the giver presents the object, both hands briefly share contact, and the receiver withdraws with it.
Match the key's orientation across the cuts. If its teeth point left in the outgoing frame, they should not point right in the incoming frame unless the shared-contact shot visibly rotates it. Keep the giver and receiver on stable sides of the frame so the exchange remains readable.
When a direct two-hand transfer remains unstable, use a motivated surface transfer. The giver places the object on a counter, releases it, and the receiver picks it up in a new shot. The counter becomes a clean continuity checkpoint and reduces the need to generate overlapping fingers.
Step 6 — Run a prop-drift quality check
Review clips without sound and pause at the first frame, contact frame, and last frame. Compare them against the reference asset and ledger rather than relying on memory.
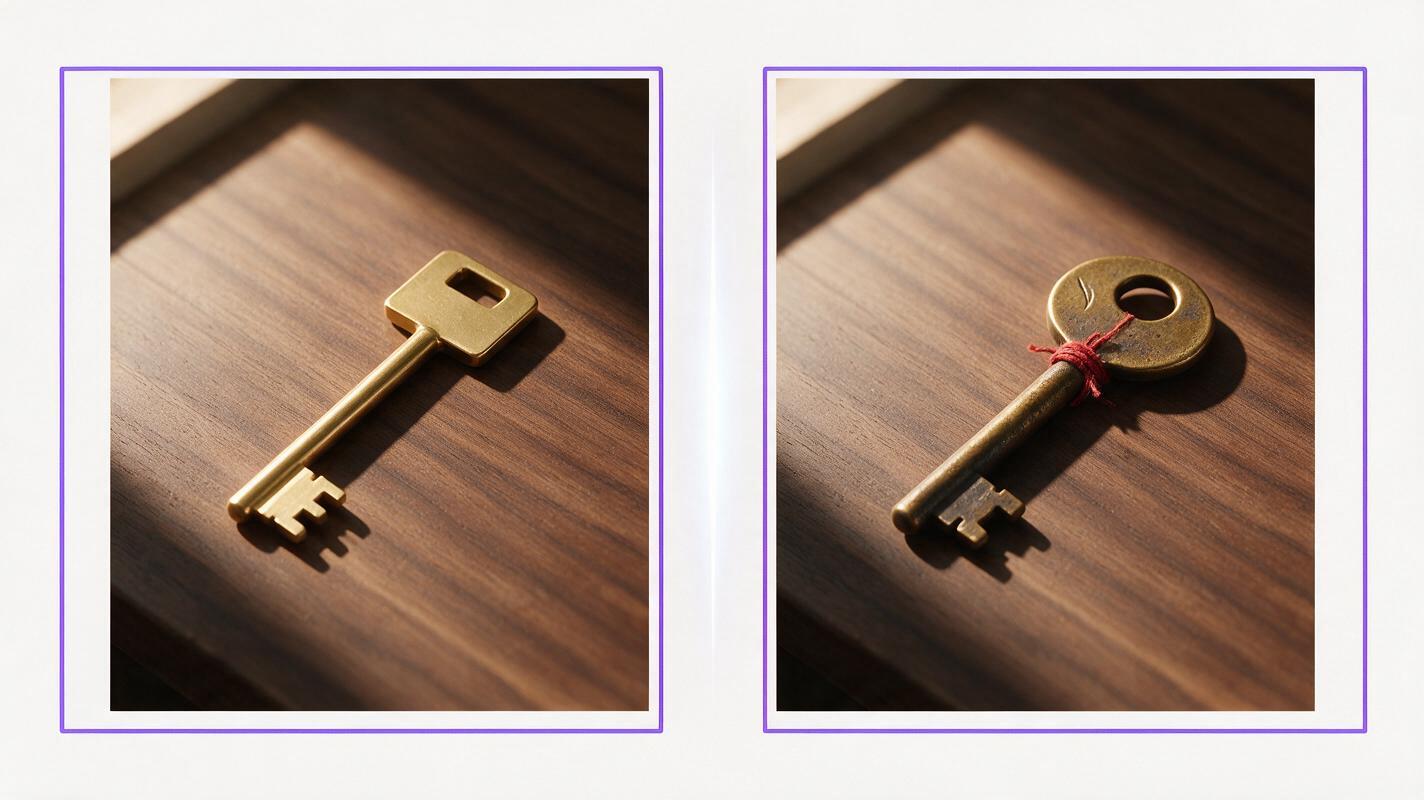
Create a photorealistic side-by-side continuity comparison using the same antique brass key on the same dark wooden workshop counter under identical warm window light. LEFT FRAME: incorrect version with a square bow, polished gold surface, missing red thread, and four symmetrical teeth. RIGHT FRAME: corrected version with a round bow, dark oxidation, shallow crescent scratch, faded red cotton thread, and three asymmetrical teeth. No hands, no text, no labels, no logos, no interface. MANDATORY LAYOUT: two equal cinematic frames separated by a narrow neutral divider. MANDATORY CAMERA: locked overhead three-quarter angle, 65mm lens, identical object scale and placement in both frames. Landscape 16:9.Reject or repair a clip when you see:
- A changed silhouette, tooth pattern, inscription, or attachment.
- An object that grows or shrinks relative to the same hand.
- A duplicate appearing during pickup or transfer.
- Fingers merging into the prop or passing through it.
- A state change that the script has not motivated.
- The prop jumping between hands or reversing orientation across a cut.
Small repair inserts are often cheaper than regenerating a complete performance. Replace a brief contact moment, cut to the character's reaction, or insert a clean close-up that re-establishes the approved object before returning to wider coverage.
Step 7 — Preserve continuity through the final edit
Organize approved clips by scene, shot, take, and prop state. A filename such as S03_SH04_T02_KEY-DRY-THREAD is more useful than a generic export number. Keep the ledger beside the timeline and update it when editorial changes alter the order of events.
Watch the finished sequence once while tracking only ownership and condition. Then watch it again for scale, orientation, and screen position. This focused review catches errors that disappear when dialogue, music, and performance compete for attention.
Once the reference asset, ledger, and storyboard anchors are ready, try these models for free and compare short handling shots before committing to the full scene.
FAQ
Should every prop receive a continuity card?
No. Reserve detailed cards for objects that affect the plot, recur across scenes, identify a character, or must visibly change. Background cups, books, and decorations usually need only broad scene-level consistency.
Can text prompts alone keep a prop consistent?
Text helps define the object, but visual references and approved storyboard anchors provide a clearer target. Use the same fixed descriptor in every prompt and change only the state fields required by the scene.
What is the easiest way to hide a flawed pickup?
Cut before the fingers fully close, use a reaction shot, then return to an exit-state frame in which the prop is already secured. Sound design can complete the perceived action without showing the unstable contact moment.
How should a prop change during the story?
Create a separate approved reference for each intentional state, such as sealed and opened, clean and bloodstained, or intact and broken. Record the exact beat that causes the transition.
Sources
Final checklist
- Define the prop's permanent visual traits and unique identifying mark.
- Track owner, location, orientation, and condition for every relevant beat.
- Approve static storyboard anchors before generating motion.
- Split complex handling into approach, contact, reaction, and exit shots.
- Show the cause of every intentional state change.
- Compare first, contact, and final frames against the reference.
- Run a prop-only continuity review before export.
Keywords
script to video ai, ai storyboard generator, create ai video from script, how to make an ai video from a script, direct an ai short film, ai clip maker