Script to Video AI: Keep Screen Direction Consistent in Action Scenes
Learn how to preserve screen direction when turning an action script into AI-generated video. This practical workflow uses movement beats, location anchors, storyboard checkpoints, and controlled clip prompts to prevent characters from appearing to reverse direction accidentally.
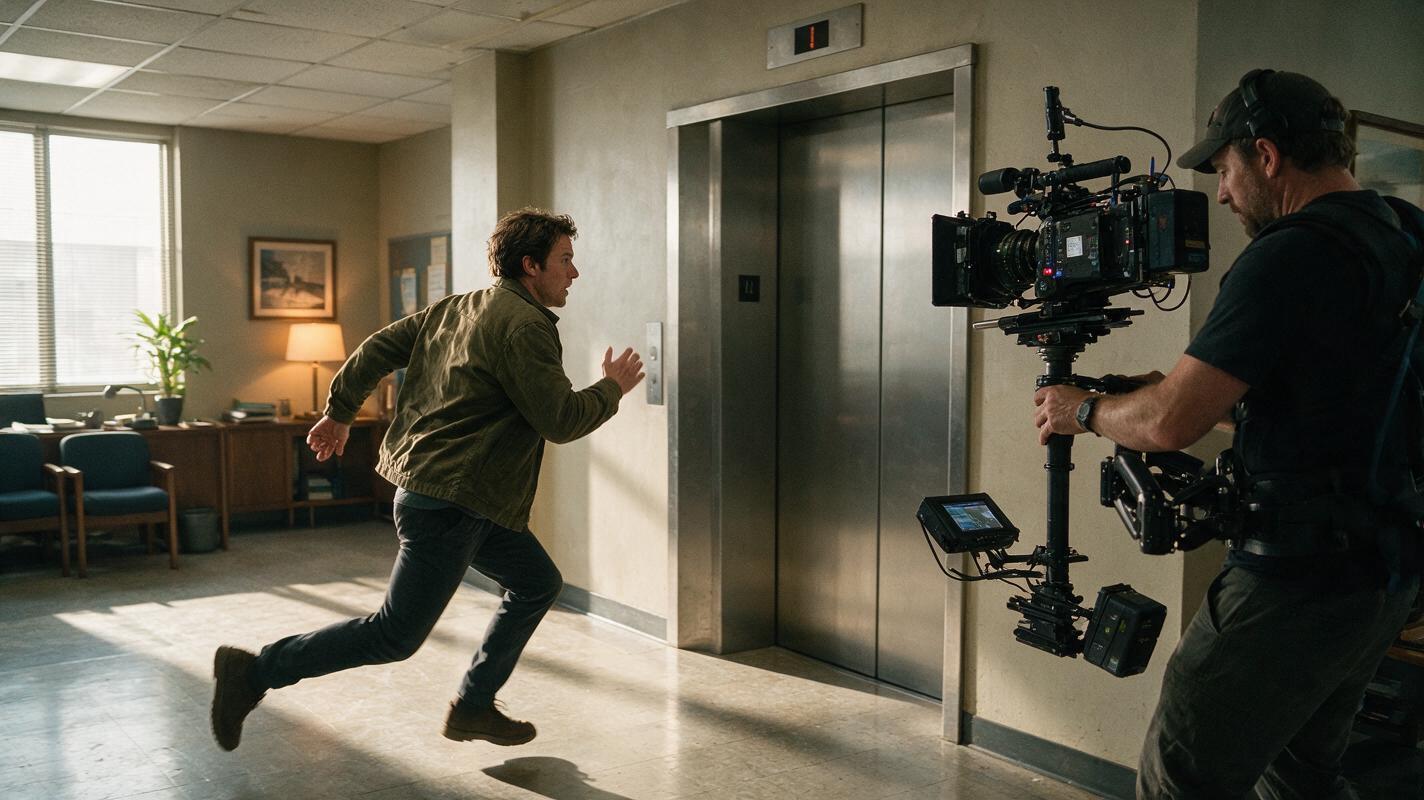
Table of contents
Keep every movement visually understandable
The simplest way to maintain screen direction in an AI action scene is to assign each character a fixed travel direction, establish the line of action before generating clips, and approve storyboard endpoints before adding motion.
This matters whenever a script sends someone through a hallway, across a street, toward an opponent, or between connected rooms. If one shot shows the character moving left to right and the next unexpectedly shows right to left, viewers may assume the character turned around—even when the script says otherwise.
The workflow below turns those spatial decisions into repeatable controls for script to video production.
Core rule: Decide where characters enter, where they exit, and which side of the action axis the camera occupies before generating moving footage.
Step 1 — Translate the script into movement beats
Begin by separating dramatic action from physical movement. A screenplay may say, “Mara spots the closing elevator and races through the lobby.” That sentence contains several visual events:
- Mara notices a destination.
- She changes from stillness to forward motion.
- She crosses the lobby.
- The elevator remains ahead of her.
- She reaches the doors before they close.
Convert these events into a movement ledger. For every beat, record the subject, origin, destination, intended screen direction, and final pose.
| Beat | Physical action | Screen direction | Required endpoint |
|---|---|---|---|
| Recognition | Mara turns toward the elevator | Face turns toward frame right | Eyes and shoulders aligned right |
| Acceleration | She begins running | Left to right | Right foot driving forward |
| Crossing | She passes the reception desk | Left to right | Exits the right edge |
| Arrival | She reaches the doors | Left to right | Stops on the left side of the elevator |
Keep this ledger beside the script. It prevents individual prompts from quietly contradicting the larger sequence.
Step 2 — Lock the character and location anchors
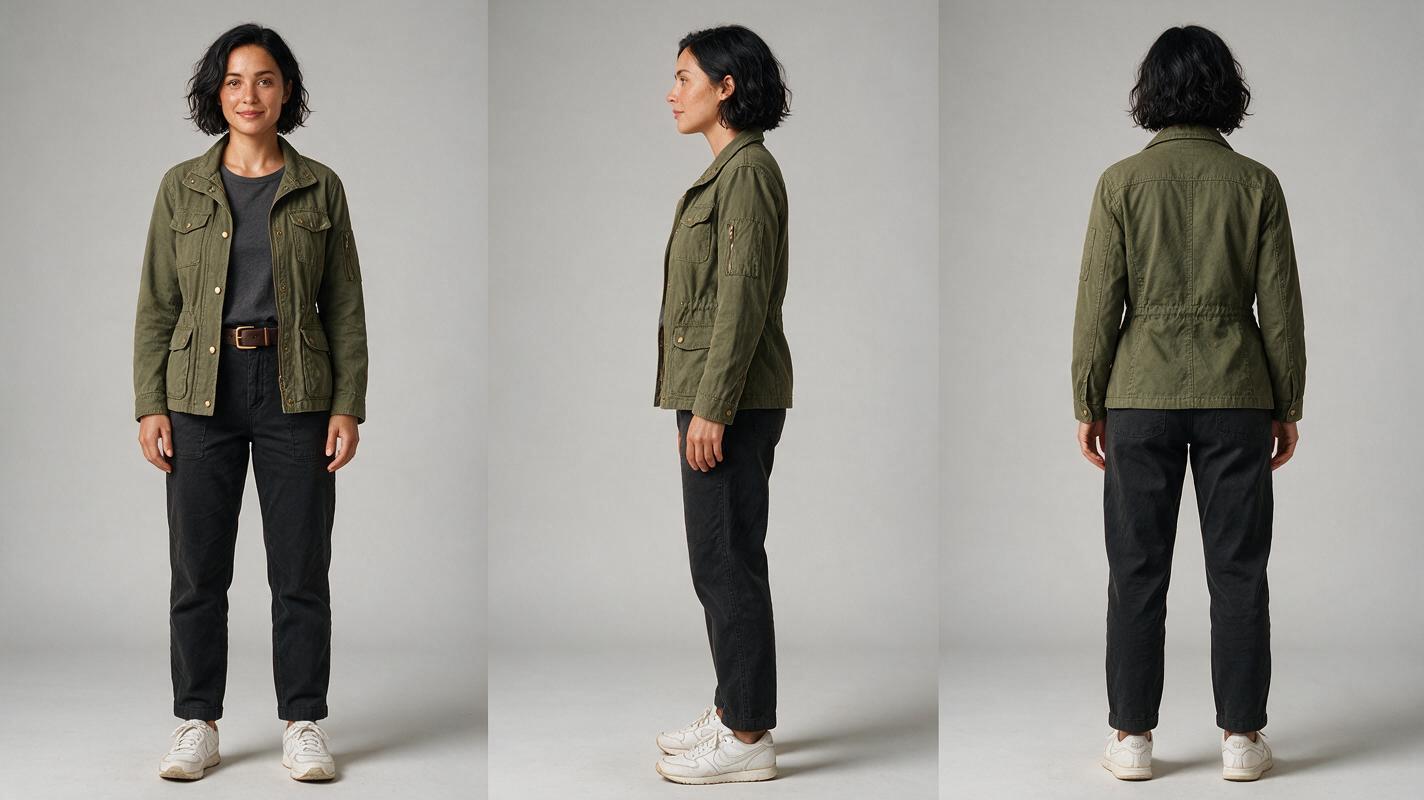
Generate the recurring character before building the action shots. The reference should make costume shape, hair, footwear, and body proportions visible from several angles. These details help distinguish a genuine change of camera angle from unwanted identity drift.
Use a photorealistic three-panel sheet rather than three unrelated portraits. Keep the lighting neutral and remove props that might be reproduced accidentally in later scenes.
Photorealistic three-panel character reference sheet of Mara, a woman in her early thirties with short wavy black hair, an olive field jacket, charcoal trousers, and worn white running shoes; the exact same person and clothing in all three panels; front view, true side view, and back view; relaxed neutral posture, arms naturally separated from torso, full body visible from head to shoes. MANDATORY CAMERA: eye-level orthographic-style full-body framing with minimal perspective distortion. MANDATORY LAYOUT: three evenly spaced vertical panels inside one landscape 16:9 image, front on left, side in center, back on right. Neutral light-gray seamless studio background, soft diffused lighting, realistic skin and fabric texture, no text, no logos, no interface elements, no accessories.Next, create a clean location master. It should reveal the route through the set: entrances, exits, obstacles, destination, and major light sources. For the lobby sequence, that means showing the entrance on one side and the elevator on the other.
Cinematic editorial-realism image of a lived-in downtown office lobby at early evening, glass entrance doors on the far left, reception desk in the middle distance, elevator doors on the far right, polished stone floor with subtle wear, practical ceiling lights mixed with cool window light, believable architecture and clear walking route from entrance to elevator, no people. MANDATORY CAMERA: locked wide shot from a true three-quarter view at standing eye level, 28mm lens appearance, camera positioned on one side of the walking path. MANDATORY LAYOUT: landscape 16:9, entrance visible in left third, reception in center, elevator in right third, no text, no logos, no signage, no UI.These two anchors become the visual source material for the ai storyboard and subsequent clip generation.
Step 3 — Draw the axis before generating frames
The line of action is an imaginary axis running through the principal movement. In the lobby example, it extends from the entrance to the elevator. Keeping the camera on one side of that line makes Mara’s left-to-right travel remain stable across wide, medium, and close shots.
The conventional 180-degree rule is not an absolute creative law, but it provides a reliable baseline for spatial continuity. Crossing the axis without a visual explanation can reverse screen direction. If the story requires a crossing, show the camera moving across the line, use a neutral shot looking directly along the axis, or let the character visibly change direction within one shot.
Create a simple overhead plan before producing cinematic frames. This does not need to resemble software or a production dashboard; a photographed miniature layout is enough.
Photorealistic overhead view of a small practical film-set model representing an office lobby, with a glass entrance miniature on the left, a reception desk at center, elevator doors on the right, one plain human figurine following a clear straight route from left to right, and three unbranded miniature camera objects arranged only along the lower side of the route. MANDATORY CAMERA: exact 90-degree top-down view with no tilt. MANDATORY LAYOUT: landscape 16:9, entire model visible with generous border, route readable through object placement alone, neutral tabletop, soft daylight, no arrows, no labels, no text, no logos, no interface elements.Write a compact spatial rule beneath your shot list:
TRAVEL AXIS: lobby entrance to elevator
MARA'S DIRECTION: screen left to screen right
CAMERA SIDE: reception side of the route
DEFAULT ENTRY: left frame edge
DEFAULT EXIT: right frame edge
AXIS CROSSING: prohibited unless shown on screen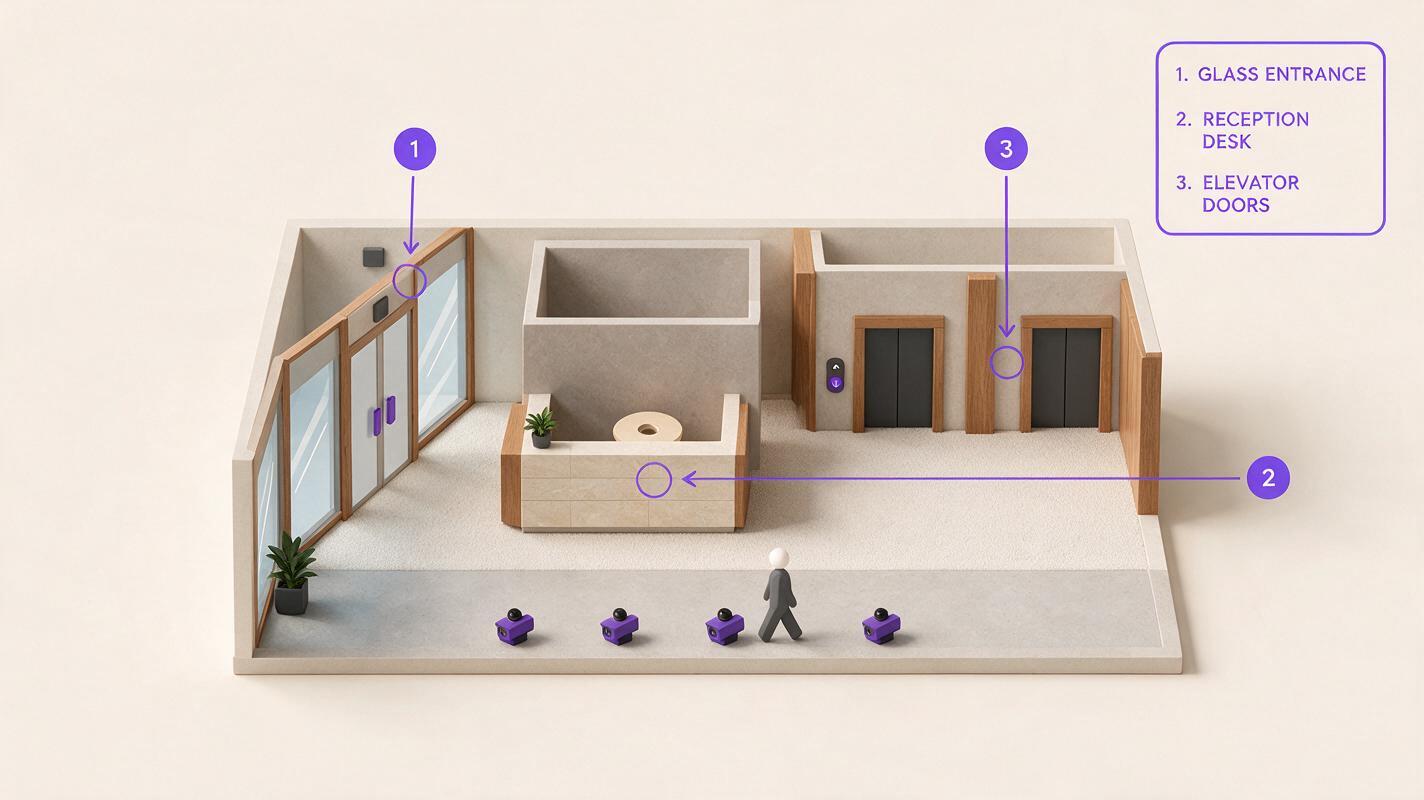
Step 4 — Approve storyboard endpoints before motion
Generate still storyboard frames for the beginning and end of every planned clip. A single attractive frame is not enough: the outgoing pose from one shot must connect to the incoming pose of the next.
For each pair, check:
- Gaze: Is Mara looking toward frame right when the elevator is to her right?
- Body orientation: Do her shoulders and leading foot support the same direction?
- Position: Does a right-edge exit lead logically to a left-edge entrance?
- Background geometry: Do the reception desk and elevator retain their relative positions?
- Progress: Does each frame place her visibly closer to the destination?
Reject continuity errors at the storyboard stage. Regenerating one still is usually more controlled than trying to rescue a moving clip whose framing, body direction, and background are all wrong.
Step 5 — Generate clips with one action and one direction
Motion prompts should reinforce the approved storyboard rather than redesign it. Give each clip one principal action, a defined entry and exit, and a restrained camera instruction.
Use the approved character reference and office-lobby storyboard frame. Mara runs from screen left to screen right toward the elevator, maintaining the same face, short black hair, olive field jacket, charcoal trousers, and white shoes. She passes behind the near edge of the reception desk and exits through the right edge of frame. The elevator remains ahead of her on frame right. MANDATORY CAMERA: locked eye-level medium-wide side view, no orbit, no axis crossing, no camera reversal. Natural running mechanics, stable background geometry, one character only, no duplicated limbs, no sudden turn, no added people.Avoid combining “run, turn, look back, cross the lobby, press the button, and react” in one generation. Divide that material into short clips with inspectable endpoints. An ai clip maker can then assemble the selected passes around the approved spatial plan.
If a model repeatedly reverses the movement, use an image-led pass: create a strong starting frame with the character facing the correct way, then animate from that frame. To compare storyboard and motion options in one workflow, try these models for free before committing the complete sequence.
Step 6 — Edit around direction, not clip novelty
Choose takes according to continuity rather than spectacle. A visually impressive orbit may be unusable if it crosses the axis and reverses the route.
Place the wide establishing shot first, then build the action from clips that preserve the same directional logic. Cut on committed movement: a foot pushing off, a shoulder entering frame, or the body passing an environmental landmark. Matching motion across the cut helps the separate generations read as one continuous journey.
If one necessary clip has the wrong direction, horizontally flipping it is only safe when the environment, costume asymmetry, lighting, and readable objects remain plausible. Regeneration is preferable when a flip moves the elevator to the wrong side or changes a distinctive garment detail.
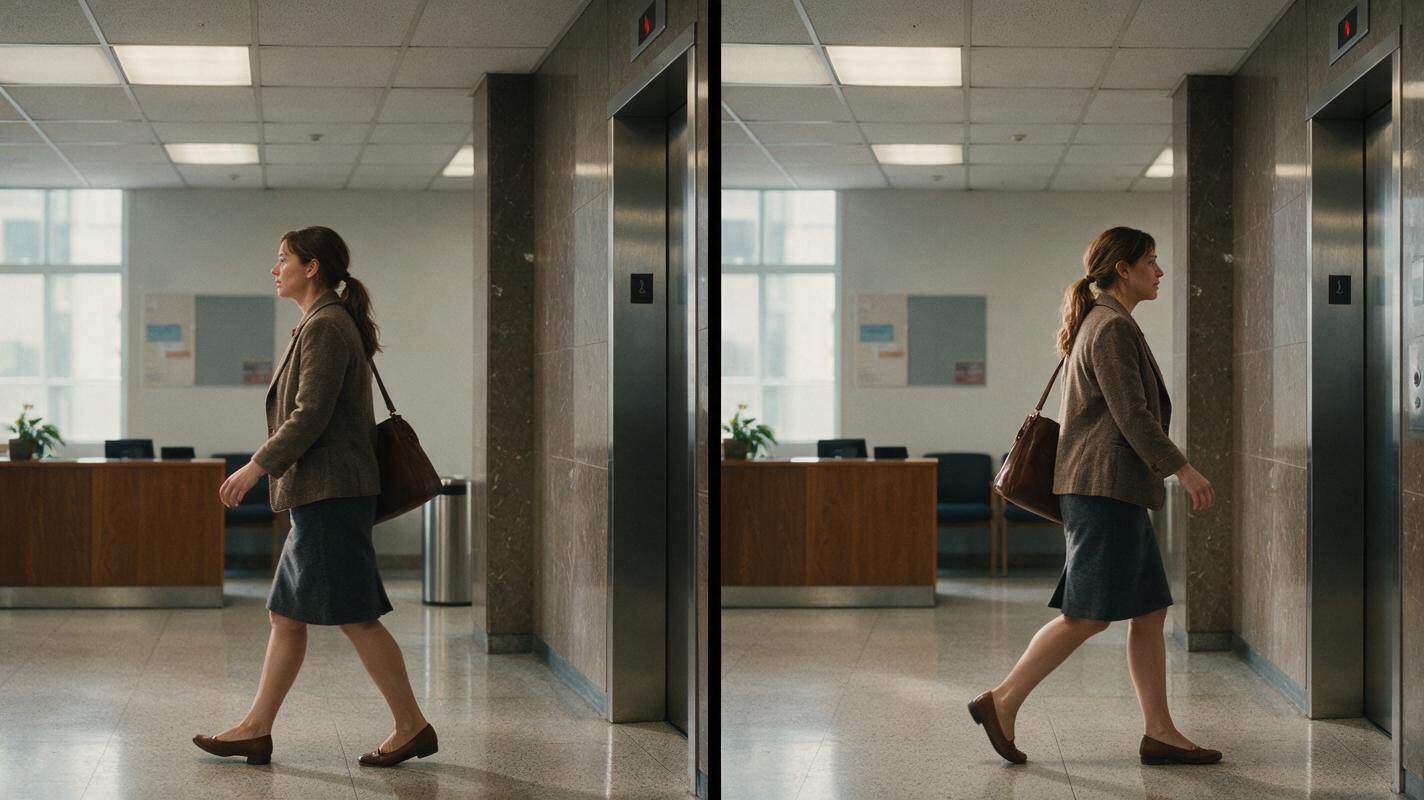
Failure check: accidental reversal versus intentional turn
An accidental reversal shows the same action continuing while the character suddenly travels in the opposite screen direction. An intentional turn shows the change within the frame, allowing viewers to update their mental map.
Create a photorealistic side-by-side continuity comparison using the same woman, costume, and office lobby in both halves. Left half: an incorrect cut where she exits toward frame right but appears in the following composition still moving from right to left without turning, creating a clear spatial discontinuity. Right half: the corrected version where she enters from frame left and continues toward frame right, with elevator placement and body orientation consistent. MANDATORY CAMERA: eye-level medium-wide side views with matching focal length and height. MANDATORY LAYOUT: two equal landscape frames combined into one 16:9 comparison, consistent lighting and identity, no captions, no arrows, no text, no logos, no UI, no distorted hands, no duplicate character.FAQ
Can the camera ever cross the 180-degree line?
Yes. Show the crossing as a continuous camera move, insert a neutral angle along the axis, or let the character visibly turn. The audience needs visual evidence that the spatial relationship has changed.
Should every running shot use the same camera angle?
No. Wide shots, side profiles, close details, and forward-facing shots can coexist. They should preserve compatible gaze, geography, and travel logic.
What should I do if a generated clip changes direction halfway through?
Shorten the requested action, strengthen the start frame, state the entry and exit edges explicitly, and remove competing camera movement. If the reversal remains, split the action into two clips with approved endpoint frames.
Does screen direction matter in a single-shot scene?
It matters less when the entire change is visible. The main continuity problem occurs when separate clips hide the turn or camera crossing between cuts.
Sources
Final checklist
- Convert the script into discrete movement beats.
- Lock the character sheet and location master before action frames.
- Define the travel axis, camera side, entry edge, and exit edge.
- Approve both endpoints of every storyboarded clip.
- Use one principal movement per generation.
- Reject unexplained reversals before editing.
- Show intentional turns or axis crossings on screen.
Keywords
script to video ai, ai storyboard generator, create ai video from script, turn a script into an ai storyboard, how to make an ai video from a script, direct an ai short film, ai clip maker