How to Create Stable AI Crowd Scenes with Image to Video
Create stable AI crowd scenes by designing one readable anchor frame, dividing people into motion zones, and animating only short, bounded actions. This image-to-video workflow reduces merged faces, duplicated limbs, sliding pedestrians, and unwanted changes to the main character.
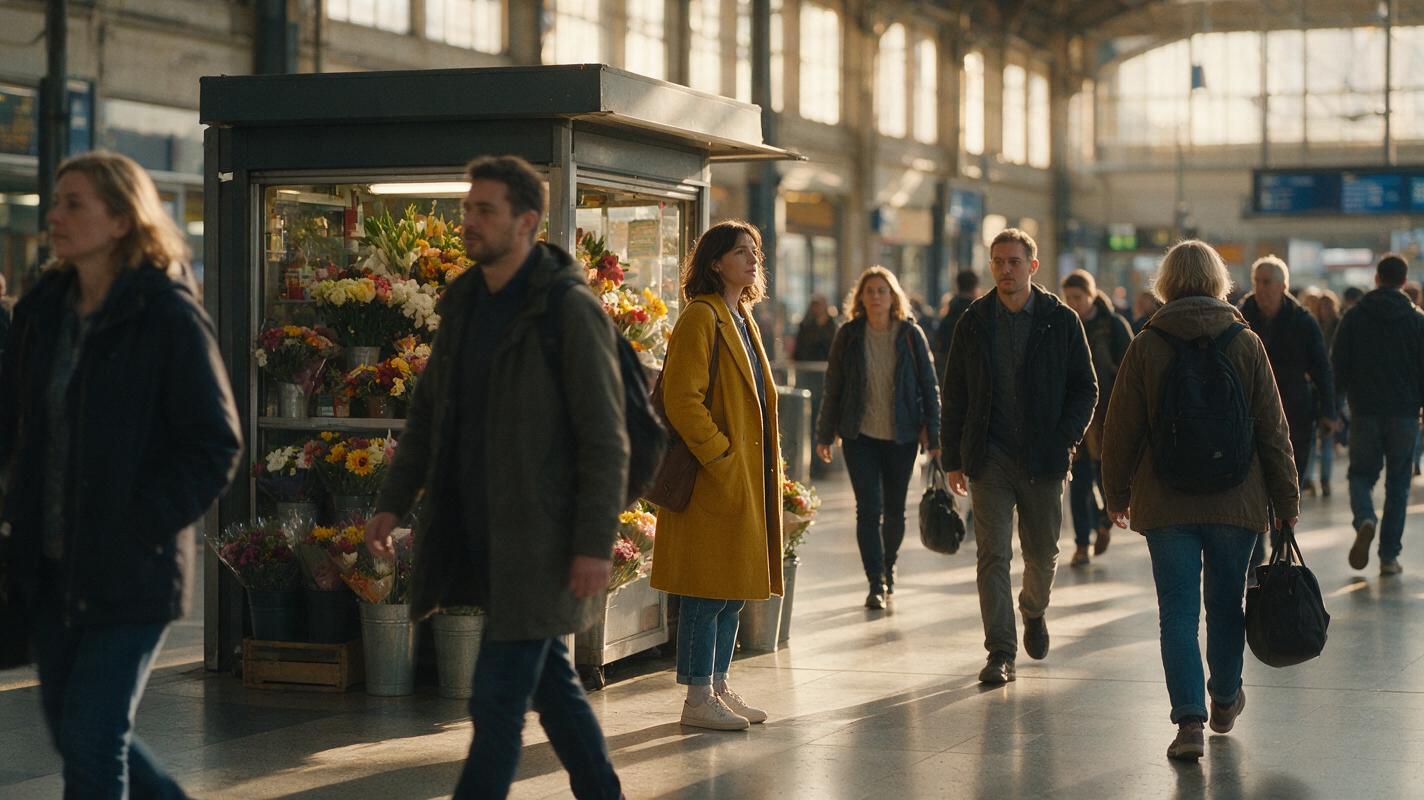
Table of contents
TL;DR: Build the crowd before you animate it
The most reliable way to generate a busy AI crowd scene is to create one clean anchor image, separate the people into foreground, middle-ground, and background motion zones, and then animate the frame with restrained movement. Instead of asking every person to perform a different action, use image to video for one dominant action, a few secondary gestures, and ambient background motion.
Keep each generation short, inspect faces and limbs frame by frame, and cut away before instability appears. If a scene needs more activity, create several controlled shots rather than forcing an entire sequence into one generation.
Why crowd scenes break in AI video
Crowd scenes are difficult because the model must preserve many partially visible bodies while also estimating depth, occlusion, motion, and camera perspective. A prompt such as “a lively market full of people walking in every direction” sounds natural, but it leaves too many simultaneous decisions unresolved.
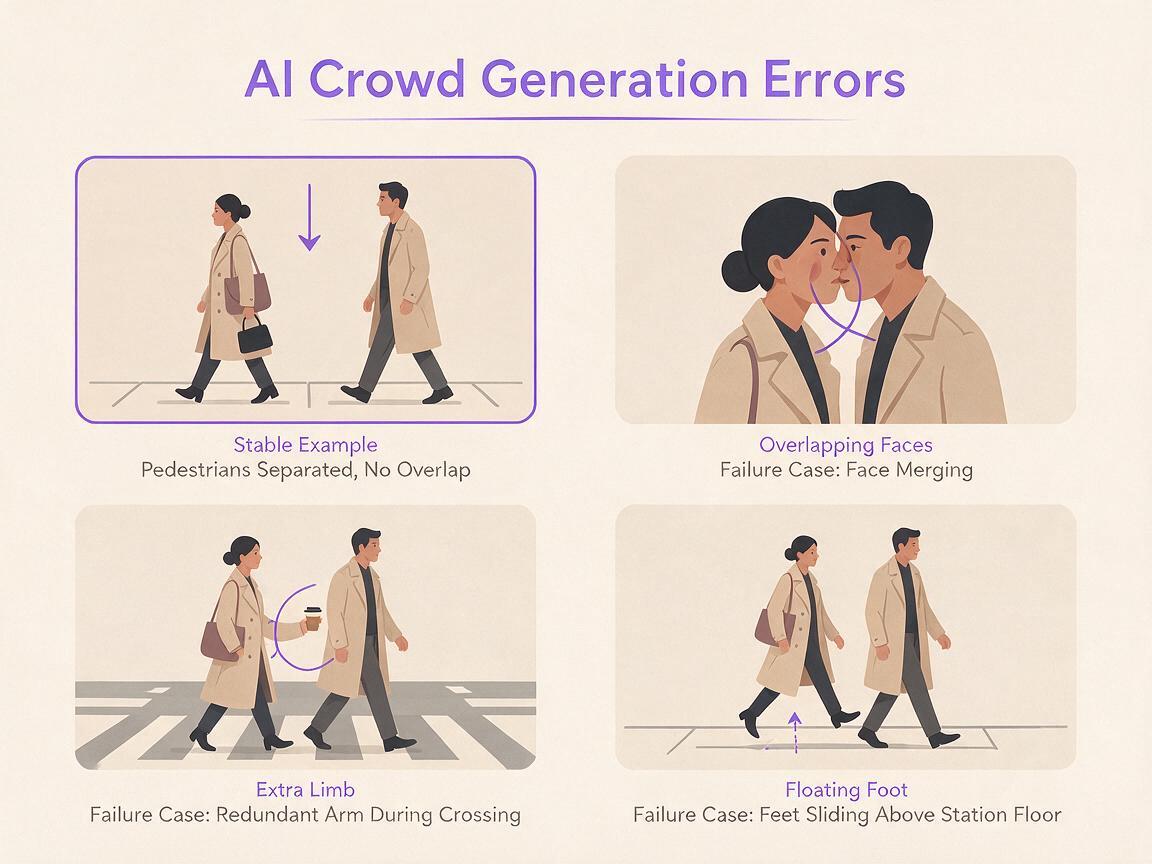
Common failures include:
- Faces merging at intersections: two pedestrians pass close together and their profiles briefly become one face.
- Duplicated or missing limbs: an arm appears behind the wrong body, or a background walker gains an extra leg.
- Sliding feet: people move across the ground without a believable walking cycle.
- Identity drift: the featured character’s hairstyle, clothing, age, or facial structure changes while the crowd moves.
- Unstable population: background people appear, disappear, or transform into different figures between frames.
- Depth collapse: a distant pedestrian suddenly becomes as large as someone in the foreground.
A stable crowd is not necessarily a motionless crowd. It is a scene in which motion is distributed according to depth, importance, and visibility.
The biggest mistake is giving equal narrative importance to everyone. Viewers normally follow one subject or one localized event. The rest of the crowd can provide atmosphere through smaller actions: turning a head, shifting weight, browsing a stall, or crossing the distant background.
Three ways to generate an AI crowd scene
- Anchor-frame animation: generate a complete still image first, then animate it. This offers the strongest control over composition, costume, crowd density, and the featured character.
- Text-led establishing shot: generate the whole scene from a text prompt. This is useful for exploration, but individual identities and exact crowd placement are less predictable.
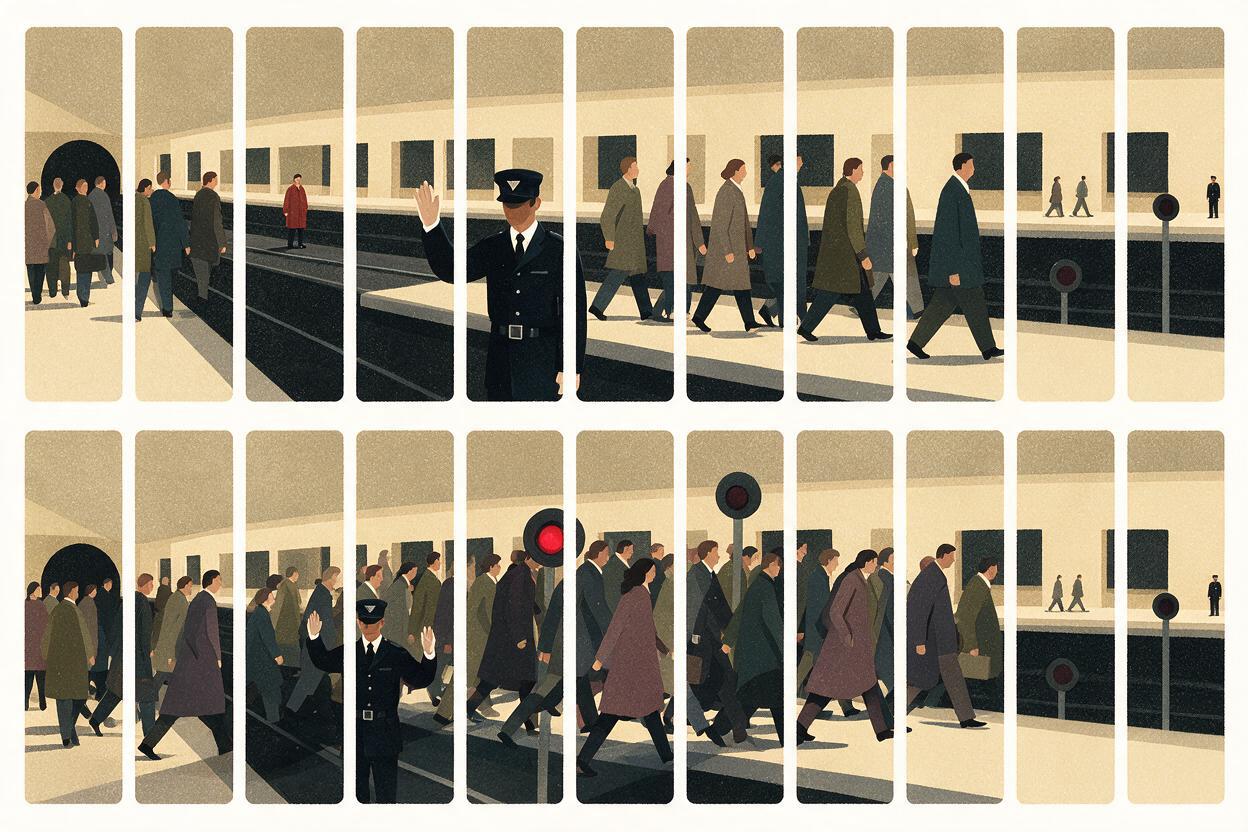
- Layered editorial coverage: generate a wide crowd shot, a medium character shot, and several detail inserts separately. Editing creates the impression of a larger event without requiring every person to remain perfect in one clip.
This tutorial uses the first method as the main workflow and adds layered coverage when one crowded generation becomes too unstable.
How MagicBoat handles a multi-model crowd workflow
MagicBoat brings image generation and video generation models into one account, making it practical to test the same scene at several stages. Seedream, Flux, or GPT Image can be used to explore the anchor frame, while Seedance and Kling can be compared for animation. A text to video pass can also help discover camera angles before you commit to a detailed reference image.
The important advantage is not choosing one model permanently. Crowd scenes have several separate problems, and different models may handle composition, human detail, or motion differently. Keep the prompt, reference image, aspect ratio, and intended action consistent when comparing outputs. That turns model selection into a controlled test rather than a sequence of unrelated guesses.
| Production task | Suggested approach | Main evaluation |
|---|---|---|
| Explore the location | Text-led image or video generation | Depth, lighting, camera angle |
| Lock the crowd composition | Generate a detailed anchor image | Body separation, readable silhouettes |
| Animate restrained activity | Seedance or Kling image-to-video test | Face stability, foot contact, occlusion |
| Repair the edit | Generate alternate coverage | Continuity around unstable frames |
Step 1 — Define one visual priority
Decide what the viewer must notice first. It could be a courier moving through a station, a singer entering a festival, or a chef serving food at a night market. Write one sentence that describes the story without listing every background action.
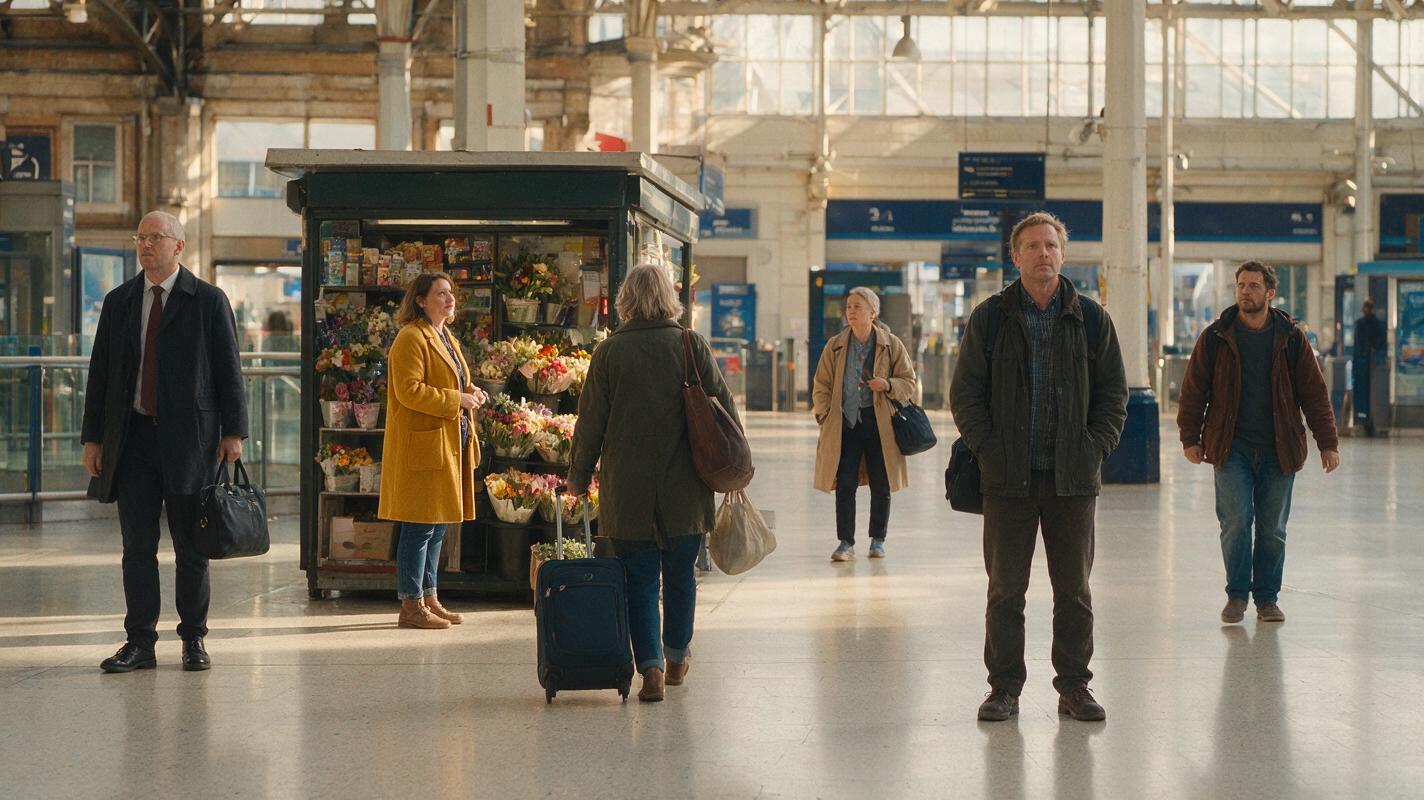
Primary story beat: A woman in a mustard-yellow coat pauses beside a flower stall while commuters continue moving behind her.Then divide the cast into three priority levels:
- Hero subject: one person whose appearance and action must remain readable.
- Supporting figures: two to four people performing simple, distinct actions.
- Ambient crowd: distant figures represented mainly by silhouettes, spacing, and low-detail movement.
Expected result: a clear hierarchy that prevents the prompt from treating twenty pedestrians as twenty lead actors.
Step 2 — Build one crowd-safe anchor frame
Generate the still image before requesting motion. Favor a camera angle with visible depth, open space between nearby heads, and minimal overlap around the hero subject. Three-quarter views are often easier to read than a flat wall of people facing the camera.
Use a composition prompt like this:
Documentary-style wide shot inside a sunlit railway concourse, one woman in a mustard-yellow coat standing beside a flower kiosk in the left middle-ground, clearly separated silhouette, five nearby commuters spaced at different depths, additional distant travelers rendered as small natural figures, realistic floor perspective, visible walking lanes, warm window light, restrained color palette, 35mm lens, natural human proportions, no one looking at the camera.If the first result is too dense, do not merely add “no overlapping people.” Reduce the count and specify open lanes or visible gaps. Avoid placing the hero subject directly in front of a person wearing similar colors, because their outlines can become difficult for the video model to separate.
Check the frame at full size:
- Are both of the hero’s hands understandable?
- Can you trace each nearby person’s torso and legs?
- Do heads remain separated where possible?
- Does the floor provide clear perspective and contact points?
- Are background figures smaller than foreground figures?
Expected result: a still image that already looks believable without relying on animation to fix anatomy or composition.
Step 3 — Convert the frame into motion zones
Before writing the video prompt, assign different motion intensities to different parts of the image. This creates the impression of a living crowd without demanding complex choreography from every body.
| Zone | Recommended motion | Avoid |
|---|---|---|
| Hero subject | One deliberate gesture or short movement | Walking, turning, waving, and speaking at once |
| Nearby figures | Slow crossing, browsing, weight shift | Intersecting paths close to the hero |
| Distant crowd | Subtle lateral flow and small head movement | Individually described performances |
| Environment | Gentle fabric, steam, foliage, or light change | Large structural transformations |
Write the plan as a short beat map:
0–2 seconds: the woman remains still and looks toward the flower stall.
2–4 seconds: she reaches slightly toward one bouquet.
Throughout: two commuters cross slowly in the far background; other travelers make only subtle natural movements.
Camera: locked wide shot with barely perceptible handheld breathing.
Expected result: a bounded motion plan in which the hero action remains easy to recognize and background movement never competes with it.
Step 4 — Write a prompt that describes motion, not the still image
The reference frame already contains the location, clothing, lighting, and crowd arrangement. Repeating all of those details in the motion prompt can introduce conflicting instructions. Concentrate on what changes over time and what must remain fixed.
The woman in the mustard-yellow coat pauses, turns her gaze slightly toward the flower display, and makes one small reaching motion with her right hand. Two distant commuters walk slowly from right to left behind her. The remaining crowd makes subtle weight shifts and natural head movements. Preserve every person’s clothing, facial appearance, body proportions, and position in depth. Keep the flower kiosk and station architecture unchanged. Locked wide camera, realistic restrained motion, no sudden entrances or exits.For a Kling prompt, direct physical wording is a useful starting point: identify who moves, the direction, and the size of the action. For a Seedance prompt, the same temporal beat structure can be tested. These are not rigid model formulas; the goal is to keep the comparison fair by preserving the same motion brief.
If unwanted transformations persist, simplify the positive prompt before adding a long list of prohibitions. “The hero makes one small reaching motion” is clearer than requesting a crowded sequence and then forbidding dozens of possible failures.
Expected result: a motion-focused prompt that preserves the anchor image instead of asking the model to reinterpret it.
Step 5 — Generate short, bounded crowd motion
Run at least two tests from the same anchor frame, preferably with the same intended duration and framing. Keep the first attempt short enough that one action can finish naturally. Longer clips create more opportunities for people to cross, merge, or drift away from their original designs.
Test two motion levels:
- Conservative test: locked camera, one hero gesture, subtle ambient crowd movement.
- Moderate test: the same gesture plus one distant pedestrian crossing and slight camera breathing.
Do not judge only by how exciting the preview feels. Inspect the hero’s face, hands, coat edges, and contact with the floor. Then inspect nearby pedestrians at moments of maximum overlap.
The best take is usually the clip with the cleanest story beat, not the clip with the largest amount of movement.
Expected result: two directly comparable clips that reveal how much movement the composition can support before visual stability declines.
Step 6 — Audit the clip in three passes
Reviewing everything at once makes small defects easy to miss. Use three separate passes:
- Identity pass: watch only the hero’s face, hair, clothing, and body proportions.
- Interaction pass: inspect crossings, hands, feet, occlusions, and gaps between bodies.
- Environment pass: check signs, architecture, kiosk edges, shadows, and floor perspective.
Record the first frame where a defect becomes distracting. A clip does not need to remain usable to its generated endpoint. If the first three seconds are clean and the fourth second introduces a merged pedestrian, trim before the failure.
Expected result: a precise usable range rather than a vague judgment that the entire generation succeeded or failed.
Step 7 — Expand the scene with coverage, not extra chaos
If the story needs more scale, create separate shots instead of increasing the number of simultaneous actions. A practical sequence could contain:
- A wide shot establishing the crowd and location.
- A medium shot of the hero beginning the key gesture.
- A detail shot of the flowers or the hero’s hand.
- A reverse angle showing distant commuters.
- A short environmental insert, such as a departure board or rolling suitcase.
Reuse the hero reference, clothing description, lighting direction, and location language across the anchor images. The background population does not need to match person for person unless a supporting figure has a narrative role.
Expected result: an edited sequence that feels densely populated while each generated shot carries a manageable visual task.
Keep the same featured character across crowd shots
Save a neutral portrait and a full-body reference of the hero before producing additional angles. Reuse a compact identity block that separates fixed features from shot-specific actions:
Fixed identity: woman in her early thirties, oval face, short dark wavy hair, small silver hoop earrings, mustard-yellow wool coat, charcoal trousers, black leather ankle boots.
Shot action: pauses beside the flower kiosk and looks toward a bouquet.
Continuity: same face, hairstyle, coat, proportions, and age as the reference.
Do not rewrite the identity description with synonyms in every shot. A “mustard wool coat” should not become a “golden oversized jacket” unless the wardrobe is intentionally changing.
Alternative: use motion transfer for a foreground performance
When the hero needs a recognizable dance, presentation, or full-body gesture, motion transfer can be more controllable than describing the performance entirely in text. Record one performer against a clear background with the full body visible, stable framing, and no other people crossing in front.
Transfer that motion to the featured character first, then use separately generated crowd shots as cutaways or backgrounds. Complex motion transfer and dense pedestrian interactions in one frame may still create occlusion problems, so keep the performance lane visually open.
Alternative: replace a drifting face with face swap
If the body motion, clothing, and crowd interaction are successful but the hero’s face drifts, face swap can preserve the useful motion without regenerating the entire clip. Use a clear, authorized reference image and apply the correction only where identity repair is necessary.
Face replacement cannot fix merged bodies, incorrect depth, disappearing limbs, or poor choreography. Those issues require a cleaner anchor frame, less movement, or a different edit.
Where this workflow falls short
- Close pedestrian crossings remain risky. When two large figures overlap for several frames, boundaries and identities may still blend.
- Small background faces are not reliable portraits. Treat them as ambient figures rather than recognizable recurring characters.
- Readable text can mutate. Signs, boards, labels, and printed clothing may change during animation.
- Complex group choreography needs decomposition. Coordinated dances, fights, or sports plays are better divided into focused shots or approached with motion references.
- A perfect first frame is not a guarantee. Every clip still needs frame-level inspection because temporal errors can appear after a clean opening.
FAQ
How many people should I include in the anchor image?
Use only the number required to communicate the setting. Keep nearby figures limited and clearly separated; distant figures can imply greater scale without requiring individually readable faces.
Should the camera move in a crowd scene?
Start with a locked camera or a very restrained push. Large camera moves change occlusion and perspective across every person, increasing the chance of anatomy and depth errors.
Can I make everyone walk at the same time?
You can request it, but synchronized full-body motion increases the workload substantially. A better approach is one or two readable walkers plus subtle ambient motion elsewhere.
Should I use Seedance or Kling?
Test both with the same anchor frame and motion brief. Select the result based on identity stability, clean occlusion, natural foot contact, and preservation of the environment rather than model preference alone.
How do I stop new people from appearing?
Use a fixed anchor frame, bounded camera movement, and wording such as “preserve the existing crowd arrangement” and “no sudden entrances or exits.” If the problem continues, shorten the clip and reduce environmental motion.
Can face swap repair every person in the crowd?
No. It is best reserved for a clearly visible featured subject using an authorized reference. Background crowd defects are usually better hidden through trimming, alternate coverage, or regeneration.
Create your first stable crowd scene
Start with one readable anchor frame, one hero action, and restrained background movement. Create your first AI video free, compare compatible models with the same prompt, and keep the take that preserves people rather than merely adding the most motion.
Final checklist
- Choose one hero subject and one primary story beat.
- Separate nearby bodies and preserve open walking lanes.
- Build a clean anchor frame before generating motion.
- Assign different motion levels by depth and importance.
- Describe one dominant action in the video prompt.
- Compare conservative and moderate motion tests.
- Inspect identity, interactions, and environment separately.
- Trim before the first unstable frame.
- Use additional coverage instead of overloading one clip.
Keywords
image to video, AI crowd scenes, character consistency, AI video tutorial, Seedance prompts, Kling prompts, prompt engineering