How to Create Stable Hand-Object Interactions with Image to Video
Create believable AI hand-object interactions by starting from a clear contact-state image, splitting the action into short physical beats, and animating each beat with restrained motion. This reference-first image-to-video workflow reduces fused fingers, floating props, changing grip positions, and objects that deform during contact.
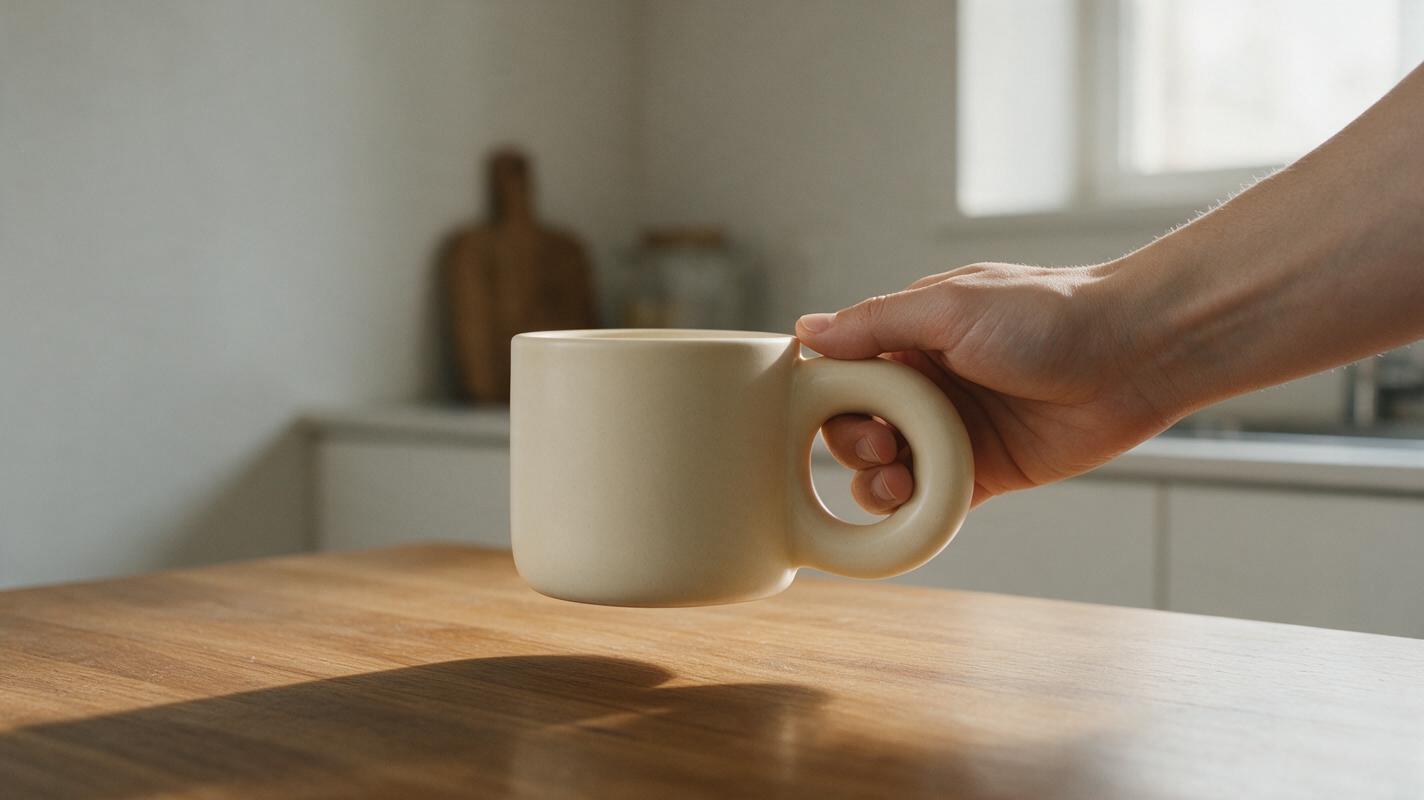
Table of contents
TL;DR
The fastest way to create a stable hand-object interaction is to establish the correct grip in a still image, then use image to video to animate one small action at a time. Do not ask a single generation to invent the reach, finger placement, grasp, lift, and release simultaneously; divide the interaction into short clips with visible contact states.
This tutorial builds a repeatable workflow around a simple example: a person picks up a ceramic mug from a wooden table. The same method works for phones, tools, packages, product demonstrations, and many other hand-held objects.
Why AI Hand-Object Interactions Break
A hand approaching an object is not one motion. It is a sequence of changing spatial constraints: the fingers open, the palm approaches, the fingertips touch, the grip closes, the object becomes attached to the hand, and the arm carries the combined mass.
Video generators must keep the anatomy, object geometry, depth, and contact relationship coherent through every frame. Common failures include:
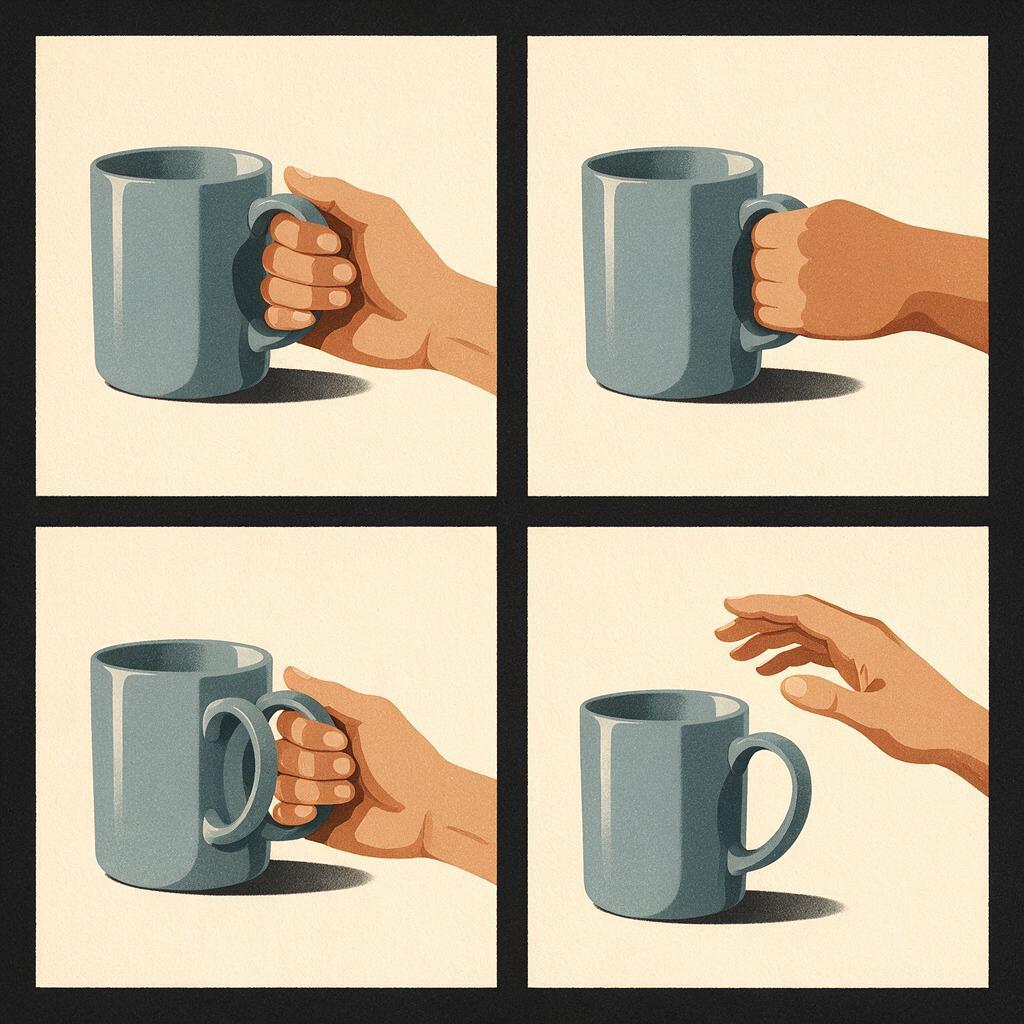
- Premature attachment: the mug starts moving before the fingers touch it.
- Grip sliding: the hand begins on the handle but drifts onto the body of the mug.
- Geometry changes: the handle shrinks, rotates, or merges with a finger.
- Finger multiplication: hidden fingers reappear as extra shapes during motion.
- Floating contact: the hand follows the object without visibly supporting it.
- Scale drift: the object becomes larger or smaller after it is lifted.
These problems become more likely when the object is tiny, partially hidden, reflective, transparent, or surrounded by visual clutter. A vague prompt such as “a woman naturally picks up her mug” describes the story, but it does not define the physical sequence the model must preserve.
Core rule: establish the most important contact state before animation. Motion generation is more reliable when it preserves a visible grip instead of inventing one from scratch.
Three Ways to Create a Hand-Object Interaction
- Contact-first image animation: generate a still frame in which the hand already holds the object correctly, then animate the lift or placement. This is the most controllable approach.
- Multi-clip beat construction: create separate approach, contact, and carry clips, then join them around matching frames. Use this when the full pickup action must remain visible.
- Motion-guided performance: record a clean physical action and use motion transfer when the exact timing matters more than a fully generated gesture.
The tutorial combines the first two methods. Motion transfer appears later as an alternative for difficult actions.
How MagicBoat Handles This Workflow
MagicBoat supports a one-account, multi-model text to video and image-led workflow. You can develop anchor images with integrated image-generation options such as Seedream, Flux, or GPT Image, then test suitable video inputs with models such as Seedance and Kling without rebuilding the creative plan for each model.
The practical advantage is comparison. Use the same source image, aspect ratio, duration, and motion prompt wherever the selected model allows those inputs. A model that struggles with the reach may still perform the lift well, so judge each physical beat rather than choosing one model for the entire sequence by default.
| Production task | Recommended mode | Main constraint |
|---|---|---|
| Design the character, mug, table, and grip | Image generation | Readable fingers and unobstructed contact |
| Animate a stable lift | Image to video | Preserve grip and object geometry |
| Create the approach before contact | Short text-led or image-led clip | Stop at the first touch |
| Reproduce exact body timing | Motion transfer | Clean source footage and compatible framing |
| Repair identity after a successful motion pass | Face swap | Authorized, suitable reference material |
Step 1 — Define the Interaction as Physical Beats
Write the action as observable states before generating anything. For a mug pickup, use four beats:
- The open hand approaches the handle.
- The thumb and fingers close around the handle.
- The mug rises vertically while remaining level.
- The arm carries the mug toward the character.
Each beat changes only one important relationship. That makes failures easier to diagnose and lets you regenerate the broken segment instead of losing the entire shot.
Action: pick up a ceramic mug
Beat A: open right hand approaches the handle
Beat B: thumb and fingers form a secure grip around the handle
Beat C: hand lifts the mug vertically by 10 centimeters
Beat D: hand carries the level mug toward the chest
Fixed details: mug shape, handle orientation, table position, right-hand identity
Expected result: a shot plan that separates approach, attachment, and transport. If your description contains several verbs joined by “and,” split it again.
Step 2 — Build a Contact-State Anchor Image
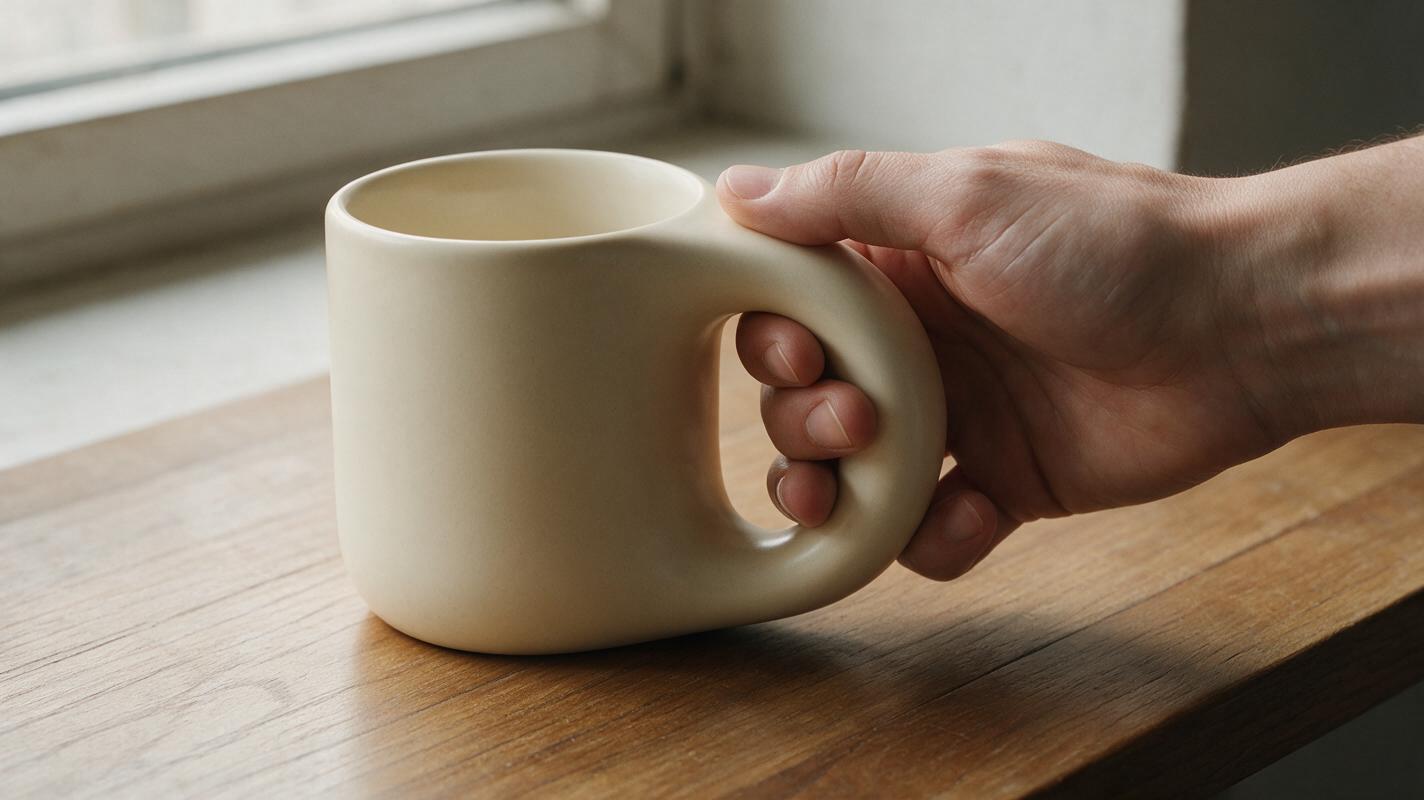
Create the frame immediately after the grip closes but before the object moves. This is usually the hardest and most valuable state because it defines the exact relationship between fingers and object.
Use a three-quarter side angle rather than a straight-on view. The camera should see the thumb, at least two fingers, the handle opening, and the point where the mug meets the table. Avoid placing the hand directly between the camera and the object.
Photorealistic medium close-up, three-quarter side view of an adult seated at a wooden kitchen table, right hand securely holding the handle of a matte cream ceramic mug, thumb visible on top of the handle, index and middle fingers visible through the handle opening, natural relaxed wrist, mug still resting flat on the table, soft window light, uncluttered background, realistic anatomy, clearly separated fingers, consistent mug geometryIf negative instructions are supported in the selected workflow, keep them concrete:
no extra fingers, no fused fingertips, no duplicated handle, no deformed mug, no floating hand, no text, no jewelry covering the gripGenerate several candidates and reject any image with ambiguous finger count, a closed handle opening, or a wrist that would need to bend unnaturally during the lift.
Expected result: a clean still image where a viewer can immediately explain how the hand supports the mug.
Step 3 — Simplify the Composition Before Animation
Hand interactions become harder when the frame contains competing edges and occlusions. Remove unnecessary items near the contact area. A spoon crossing the handle, patterned sleeve, stacked dishes, or strong reflection can be interpreted as part of the hand or object.
Use these composition constraints:
- Keep the object large enough to inspect without making the hand fill the entire frame.
- Use a plain or gently textured surface behind the fingers.
- Keep sleeve cuffs away from the wrist and palm.
- Avoid motion blur in the anchor image.
- Choose matte objects before attempting glass, polished metal, or transparent plastic.
- Leave visible space above the object for the planned lift.
A cup with a large handle is easier than a tiny espresso cup. A thick tool handle is easier than a thin key. Start with forgiving geometry, validate the workflow, and then introduce difficult props.
Expected result: an animation-ready frame with clear silhouettes and room for motion.
Step 4 — Animate Only the Lift
Use the contact-state image as the video input. Ask for a short, restrained vertical lift while explicitly preserving the grip, wrist, and object orientation.
The right hand slowly lifts the ceramic mug straight upward from the table by a small distance. The existing grip remains unchanged. The fingers stay wrapped around the same part of the handle, the wrist remains relaxed, and the mug stays level with no rotation. The camera is locked off. Natural subtle arm motion, realistic weight, no change to the mug shape or size.The most important phrases are not cinematic adjectives. They are physical constraints: existing grip remains unchanged, straight upward, mug stays level, and camera is locked off.
Do not add steam movement, a camera orbit, dialogue, facial expression changes, and a body turn during the same test. Secondary motion may be added after the basic interaction works.
Expected result: a short clip in which the object begins moving only because the hand moves, with no visible jump in grip position.
Step 5 — Generate the Approach as a Separate Clip
If the complete pickup must be shown, generate the pre-contact action separately. Use an anchor frame with the open hand a short distance from the handle. End the movement at first contact rather than asking the hand to complete the grasp.
The open right hand moves slowly toward the ceramic mug handle. The palm and fingers maintain natural anatomy. The fingertips gently reach the handle and stop at first contact. The mug remains completely stationary on the table. Locked camera, restrained motion, no grasping, no lifting, no object movement.The repeated exclusions matter: no grasping and no lifting. They prevent the model from compressing the whole story into the final frames.
In the edit, cut from the approach clip at or just before first contact to the contact-state lift clip. A short cut at the moment of touch is usually less noticeable than a distorted, fully generated grasp.
Expected result: two controllable clips: one ends at contact, and the other begins with an established grip.
Step 6 — Compare Seedance and Kling on the Same Input
Run a controlled comparison rather than rewriting the prompt after every output. Keep the anchor image, prompt, aspect ratio, intended duration, and motion scope as consistent as the available model controls permit.
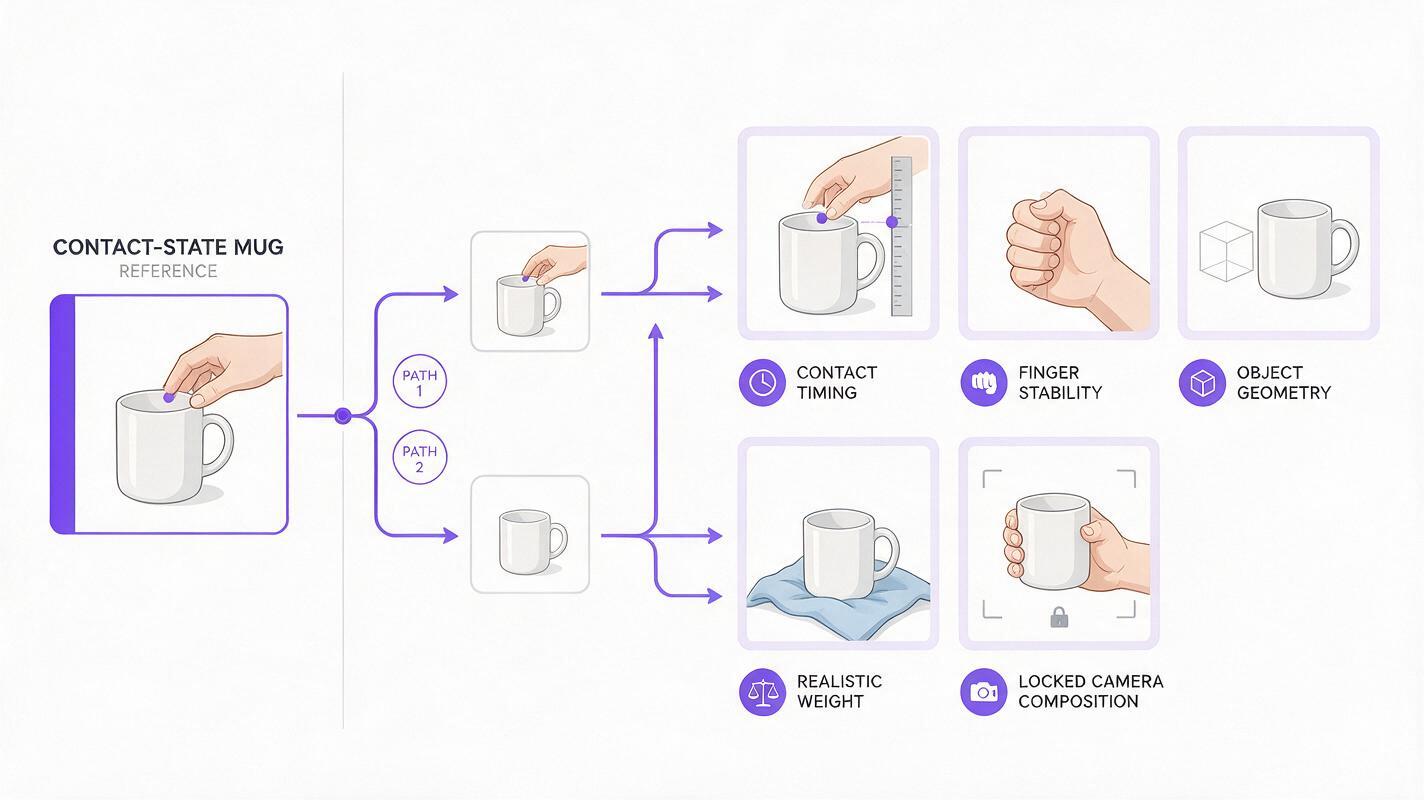
| Check | Pass condition | Failure condition |
|---|---|---|
| Contact timing | Object moves with the hand | Object moves before or after the hand |
| Finger stability | Visible fingers retain their positions | Fingers merge, multiply, or slide |
| Object geometry | Handle and rim remain consistent | Handle closes or body changes shape |
| Weight | Wrist and arm respond naturally | Object appears weightless |
| Camera | Framing remains stable | Unrequested zoom or orbit hides errors |
Review the outputs frame by frame around three moments: the first frame, the instant the mug leaves the table, and the final settled frame. Choose the clip with the cleanest contact relationship, not necessarily the clip with the most dramatic movement.
Expected result: a model choice based on the specific interaction rather than a general assumption that one model is always best.
Step 7 — Edit Around the Contact Frame
Place the approach and lift clips next to each other. Find the frame in each clip where the fingertips and handle have the most similar position. Trim to those frames and remove duplicated pauses.
A clean edit follows this rhythm:
- Approach remains visible long enough to establish intention.
- The cut occurs at the first touch or during the fastest small finger movement.
- The lift begins without a frozen hold.
- The object accelerates gently rather than jumping upward.
Use sound to reinforce causality. A quiet fingertip contact, ceramic scrape, or table release sound can make the cut feel physically continuous. Sound cannot repair obvious deformation, but it can clarify the exact moment when the hand takes control of the object.
Expected result: one believable pickup assembled from simpler generations, with the edit hidden by contact and motion.
Keep the Same Object Across Projects
Save a compact reference package containing the approved object image, dimensions visible in relation to the hand, material description, color, markings, and preferred handle orientation. Reuse the same language whenever the object returns.
Recurring object: matte cream ceramic mug
Geometry: straight cylindrical body, rounded rim, one large C-shaped handle
Scale: body approximately the height of the character's palm
Surface: non-reflective glaze, no printed text or logo
Handling rule: right hand grips the center of the handle; mug remains level
For recurring shots, preserve more than appearance. The same character should hold the object in a compatible way unless the story intentionally changes the grip.
Alternative: Use Motion Transfer for Precise Timing
Use motion transfer when the exact reach, pause, lift, or tool movement is essential. Record a short reference clip with one performer, a static camera, clear lighting, and no hand occlusion. Keep the source object similar in size and grip style to the generated object.
Motion guidance can improve the broader arm and body performance, but it does not remove the need to inspect fingers and contact. A target character with oversized sleeves, nonhuman hands, or very different proportions may not map cleanly to the recorded action.
Alternative: Preserve Motion and Repair the Face
If the hand action succeeds but the character's facial identity drifts, avoid regenerating the whole interaction immediately. A face-swap pass using authorized reference material may preserve the successful hand motion while correcting the visible face.
This fallback is most suitable when the face is clear, not heavily occluded, and not turning through an extreme angle. It should not be used to imitate a real person without permission.
Where This Workflow Falls Short
- Transparent objects: glass creates changing refraction and overlapping finger shapes.
- Tiny props: coins, keys, needles, and jewelry leave too few pixels for stable contact.
- Finger-by-finger actions: typing, knot tying, and instrument fingering require many rapidly changing constraints.
- Heavy occlusion: the model cannot preserve a grip it cannot see clearly.
- Long uninterrupted actions: every added beat creates another chance for anatomy or geometry to drift.
- Unusual anatomy: stylized or nonhuman hands may require custom references and more experimentation.
For these cases, use closer coverage, shorter clips, practical inserts, motion guidance, or an edit that implies part of the action rather than showing every mechanical detail.
FAQ
Should I generate the hand open or already gripping the object?
For the most reliable result, begin the main animation with the grip already established. Generate the open-hand approach separately only when the story requires it.
How long should each interaction clip be?
Keep it only as long as necessary to show one physical beat. Shorter clips generally make it easier to identify and replace the exact segment where contact fails.
Do negative prompts fix extra fingers?
They can clarify intent, but composition and a strong anchor image matter more. Visible fingers, simple backgrounds, large objects, and limited motion provide better structural guidance than a long exclusion list.
Should the camera move during the pickup?
Start with a locked camera. Add a subtle camera move only after the interaction works, because camera motion changes perspective while the model is also solving anatomy and contact.
Can text to video create the whole action without an image?
It can produce useful concepts and wide shots, but an image-led workflow gives you more control over the starting grip, object design, character appearance, and composition.
What should I regenerate first when the object warps?
First inspect the anchor image. If its handle, finger placement, or silhouette is ambiguous, rebuild the still before spending more generations on animation. If the still is clean, shorten the motion and remove secondary actions.
Final Checklist
- Break the interaction into approach, contact, lift, and carry beats.
- Create a clear contact-state anchor before animation.
- Keep fingers, handle openings, and support points visible.
- Use one primary action per generated clip.
- State which details must remain unchanged.
- Compare models with the same source image and prompt.
- Inspect the first frame, release frame, and final frame closely.
- Cut at contact instead of forcing a complex grasp into one generation.
- Create your first ai video free and test the contact-first prompt now.
Keywords
image to video, AI hand interaction, prompt engineering, Seedance prompts, Kling prompts, AI video workflow, motion transfer