How to Create Stable Mirror Reflections with Image to Video
Create stable AI mirror shots by designing a reflection-safe anchor frame, limiting motion, and testing identical inputs across video models. This workflow uses image-to-video generation for the main shot, then applies selective repairs only when the reflection drifts.
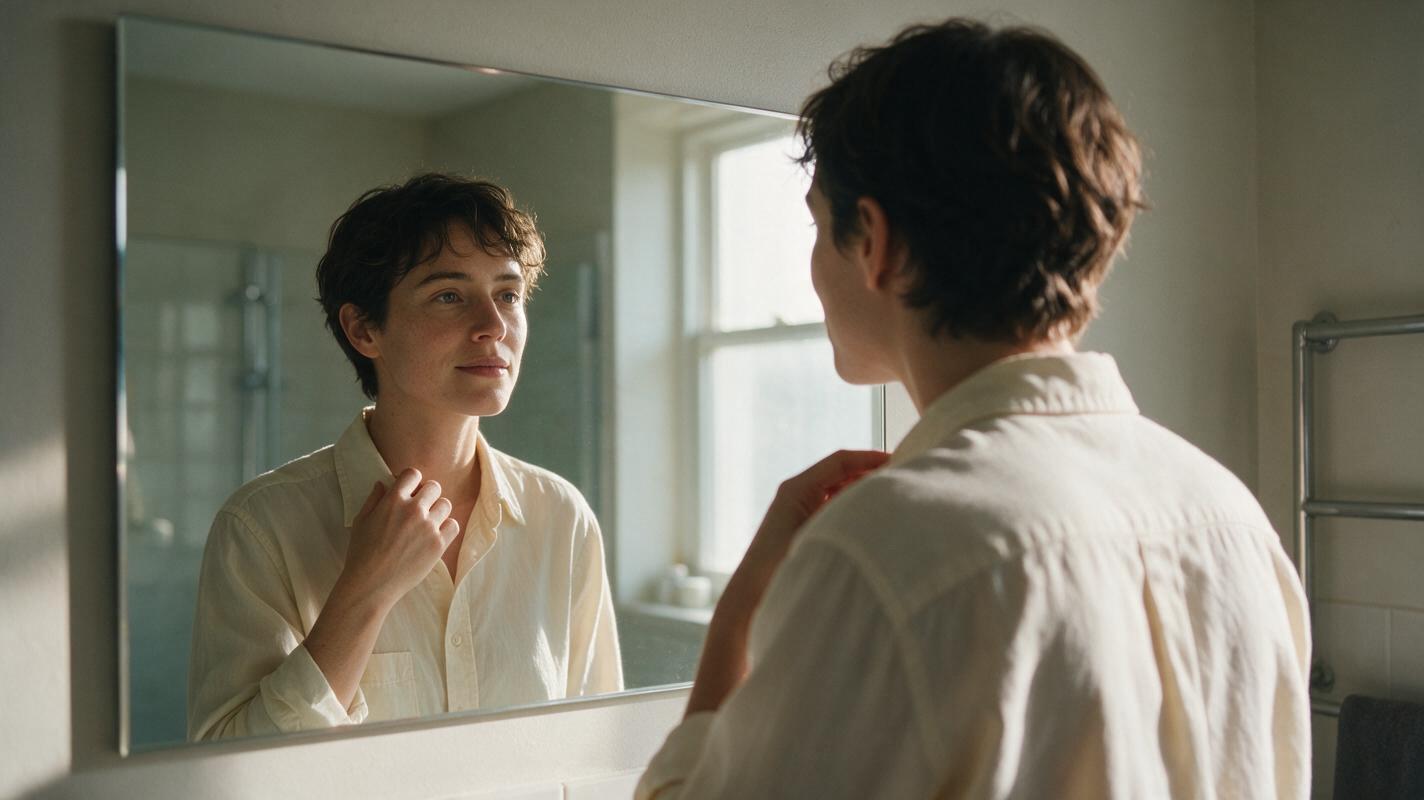
Table of contents
TL;DR
The most reliable way to create a stable AI mirror scene is to begin with a carefully composed still image, then animate it through image to video using small, synchronized movements. Keep the camera nearly fixed, describe the person’s action rather than the reflection’s action, and reject clips as soon as the reflected face, hands, clothing, or timing diverges.
For the fastest result, use a waist-up composition, one person, one simple gesture, and a mirror that stays fully visible. Generate short candidates in Seedance and Kling, compare them from the same anchor frame, and repair only the strongest clip.
Why mirror shots fail in AI video
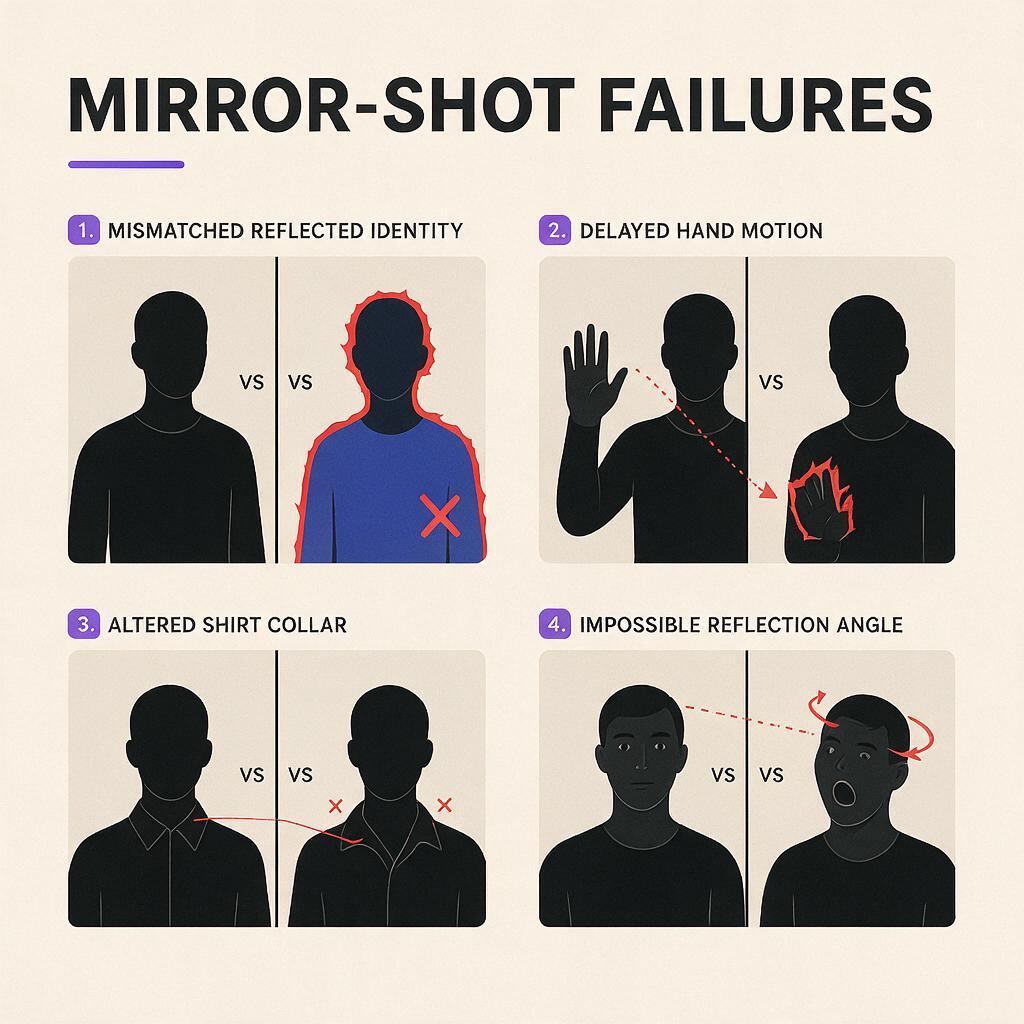
A mirror scene asks a video model to maintain two visually similar figures while preserving a strict geometric relationship between them. The person and reflection must share the same identity, clothing, pose, timing, and expression, but their screen-space movement must appear reversed. A plausible-looking frame is not enough; that relationship must remain coherent throughout the clip.
Common failures include:
- Identity drift: the reflected face becomes a similar but different person.
- Timing mismatch: the reflection begins turning, blinking, or raising a hand before the real subject.
- Extra anatomy: reflected fingers multiply or a second arm appears near the mirror edge.
- Wardrobe disagreement: buttons, collars, jewelry, or patterns change inside the reflection.
- Broken mirror geometry: the reflected body sits at an impossible angle or no longer aligns with the subject.
- Camera disagreement: a strong camera move changes the visible reflection in a physically implausible way.
The risk rises when a prompt combines a moving camera, a full-body subject, hand contact, changing facial expressions, and a complicated background. Stability improves when the anchor image already solves the spatial relationship and the animation prompt requests only one bounded action.
Core principle: treat the mirror image as constrained scene geometry, not as a second character who needs separate direction.
Three ways to build an AI mirror shot
| Approach | Best for | Main risk |
|---|---|---|
| Text-first generation | Exploring compositions quickly | The initial reflection may already contain identity or geometry errors |
| Reference-first animation | Controlled cinematic shots | Large motion can still break synchronization |
| Motion-led replacement | Specific gestures or performances | The target design must match the source pose and framing |
This tutorial concentrates on the reference-first approach because it separates two difficult tasks. First, you create one correct mirror composition. Second, you ask the video model to preserve that composition while adding restrained motion.
How MagicBoat handles a mirror-reflection workflow
MagicBoat provides a one-account workflow for testing multiple integrated image and video models. You can create or refine an anchor frame with image generators such as Seedream, Flux, or GPT Image, then test that same image in Seedance and Kling without rebuilding the creative plan for every model.
This is particularly useful for mirror scenes because no single generation should be treated as proof that the prompt works. A model may preserve facial identity well but misread hand geometry, while another may handle the reflection correctly but introduce excessive camera motion. Comparing the same source, aspect ratio, and motion instructions inside one ai video workflow makes those differences easier to identify.
The exact models available can evolve, so focus on the transferable method: one approved anchor image, one compact motion prompt, identical comparison inputs, and a frame-by-frame quality check.
Step 1 — Plan one reflection-safe action
Choose an action that can be described as a single physical beat. Suitable first tests include a slow head turn, one controlled breath, a hand lifting toward the collar, or a brief change of gaze from the reflection to the sink.
Avoid beginning with hair brushing, makeup application, object handoffs, dancing, or a fast push-in. Those actions create several simultaneous contact and synchronization problems.
Write a compact shot specification before generating anything:
Subject: one adult standing at a bathroom mirror
Framing: waist-up, camera behind and slightly beside the subject
Mirror: rectangular, fully visible, clean edges
Action: subject slowly raises the right hand to adjust the collar
Camera: locked-off tripod
Duration: one continuous short shot
Lighting: soft morning window light
Continuity rule: reflection matches the subject exactly
Keep visual asymmetry to a minimum. Plain clothing is easier than text, stripes, dense prints, or highly reflective accessories. If jewelry matters to the story, use one distinctive item rather than several small pieces.
Expected result: a shot plan with one subject, one action, one camera behavior, and one clear continuity rule.
Step 2 — Build a reflection-safe anchor frame
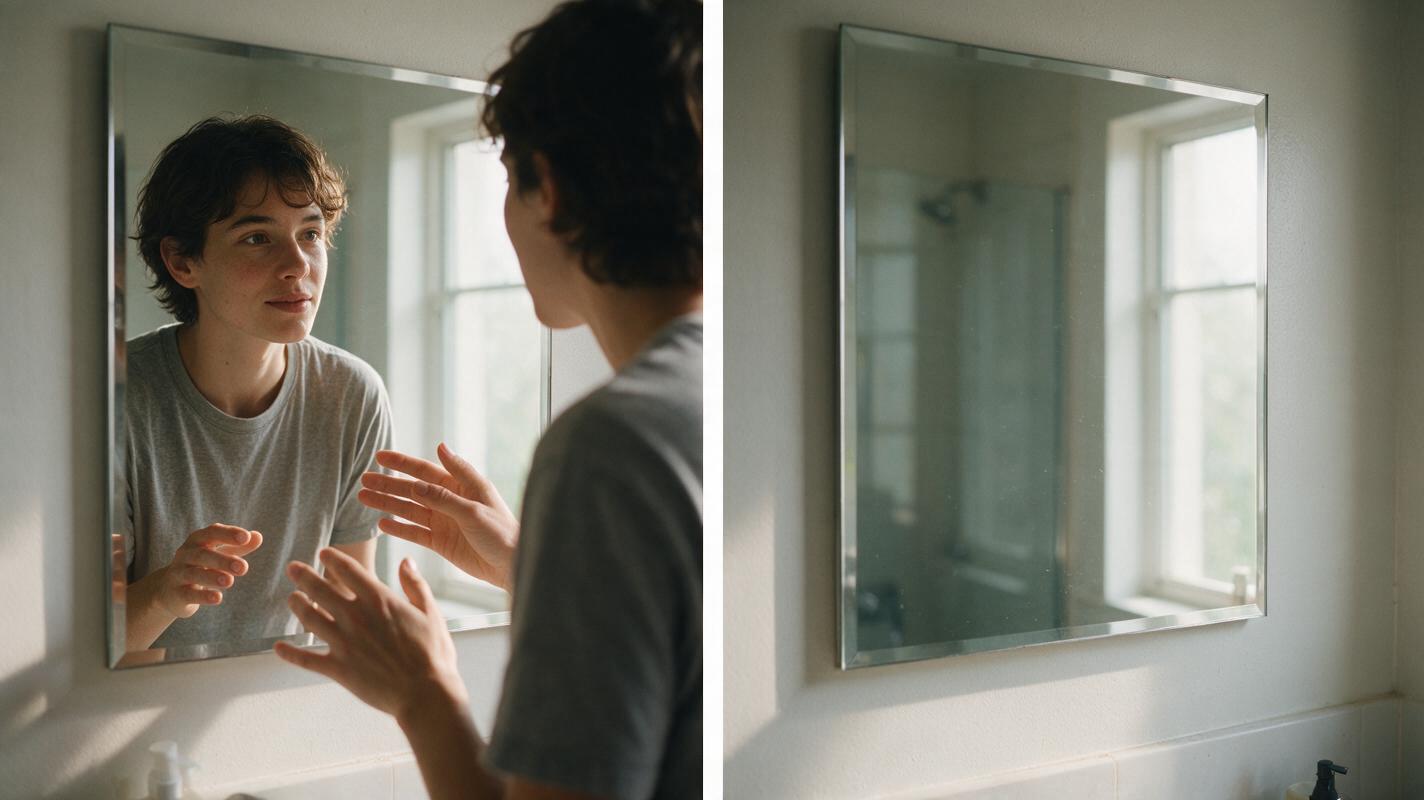
Create the starting image before asking for motion. The strongest composition shows enough of the real subject and the reflected face to verify identity, but not so much that the model must solve an entire room and full-body reflection.
Use a three-quarter rear view rather than placing the camera directly behind the subject. This creates visible depth between the foreground body and reflected face. Keep both hands visible if they will move later, and avoid cropping a hand exactly at the mirror boundary.
Reusable anchor-frame prompt:
Photorealistic cinematic bathroom interior in soft natural morning light. One adult with short dark wavy hair stands waist-up at a rectangular wall mirror, viewed from behind at a slight three-quarter angle. The mirror clearly shows the same person's face, hairstyle, cream cotton shirt, collar, and right hand. Physically plausible reflection geometry, accurate anatomy, realistic skin texture, uncluttered counter, restrained neutral color palette, 50mm lens look, locked composition. No writing, no duplicated person, no extra limbs, no additional mirrors.If your chosen image model supports reference images, use an authorized portrait to establish the subject. A front-facing identity reference can guide facial appearance, but the generated anchor must still show the pose and camera angle required by the video.
Inspect the still at full size. Compare the hairline, ear shape, collar structure, sleeves, jewelry, finger count, and direction of light. Reject the image if it only looks correct as a small thumbnail.
Do not animate a nearly correct mirror image. Motion usually amplifies an existing mismatch rather than repairing it.
Expected result: one high-quality still in which the subject and reflection clearly represent the same person and obey believable mirror geometry.
Step 3 — Simplify the image before animation
Remove details that compete with the reflection. A second mirror, glass cabinet, framed photograph, chrome fixture, or glossy shower panel can be interpreted as another reflective surface. Busy objects near a moving hand also increase the chance of warped fingers or disappearing props.
Use an image-editing pass to correct localized defects rather than regenerating the whole composition. Preserve the camera position and subject pose while asking for a narrow change:
Keep the person, reflection, pose, facial identity, clothing, lighting, lens, and composition unchanged. Remove the small round magnifying mirror and the bottles beside the right hand. Replace them with a simple matte stone counter. Preserve realistic shadows and mirror geometry.For a commercial or narrative sequence, also save a clean master copy before each edit. The approved anchor can later be reused for alternate gestures, reaction shots, or model comparisons.
Expected result: a visually clean anchor with no unnecessary reflective surfaces and adequate empty space around the moving body part.
Step 4 — Animate the subject, not the reflection
Upload the approved image as the starting frame for video generation. The prompt should direct the visible physical action while stating that the reflection remains synchronized. Do not give the reflection a separate sequence of verbs; that can encourage the model to animate it independently.
Seedance or Kling prompt:
Locked-off cinematic shot. The person slowly lifts the right hand and gently adjusts the shirt collar, then becomes still. The movement is subtle, natural, and continuous. The mirror reflection remains perfectly synchronized with the person, preserving the same face, hairstyle, clothing, hand anatomy, lighting, and physically correct reflection geometry. Minimal background movement. No camera movement, no scene change, no additional people.Prompt order matters. Begin with camera behavior, describe one action in chronological order, then state continuity constraints. Keep style language short because the source image already defines the appearance.
If the model tends to add motion, reduce the prompt further:
Locked camera. One subtle action only: the person slowly adjusts the right side of the collar. The reflection matches the action exactly. Preserve identity, anatomy, clothing, lighting, and mirror geometry. Everything else remains still.A negative instruction can discourage obvious failure modes, but it cannot override an overloaded scene. Simplifying the action is more effective than appending a long list of prohibitions.
Expected result: several short clips with restrained subject motion, a stationary camera, and a reflection that follows the same performance.
Step 5 — Compare motion models with the same input
Test the same approved image and motion prompt in at least two suitable video models, such as Seedance and Kling. Keep the framing, wording, and intended action unchanged during the first comparison. Otherwise, you will not know whether a difference came from the model or from your revised instructions.
| Review category | What to inspect | Reject when |
|---|---|---|
| Identity | Eyes, jawline, hairline, age, expression | The reflection becomes a different person |
| Synchronization | Start, speed, and end of the gesture | Either figure leads or continues alone |
| Anatomy | Hands, elbows, shoulders, neck | Fingers merge or joints bend unnaturally |
| Wardrobe | Collar, sleeve, buttons, fabric folds | Reflected details appear, vanish, or switch sides inconsistently |
| Geometry | Mirror edges, body alignment, room depth | The reflected body slides independently |
| Camera | Framing and lens behavior | An unrequested pan, zoom, or orbit begins |
Review the opening frame, the moment of fastest movement, and the final frame first. If all three are coherent, inspect the full clip at normal speed and then frame by frame. Pay special attention to the transition into and out of the gesture; drift frequently appears while the hand is accelerating or settling.
Expected result: one preferred clip selected for reflection integrity rather than for the most dramatic movement.
Step 6 — Repair the smallest possible region
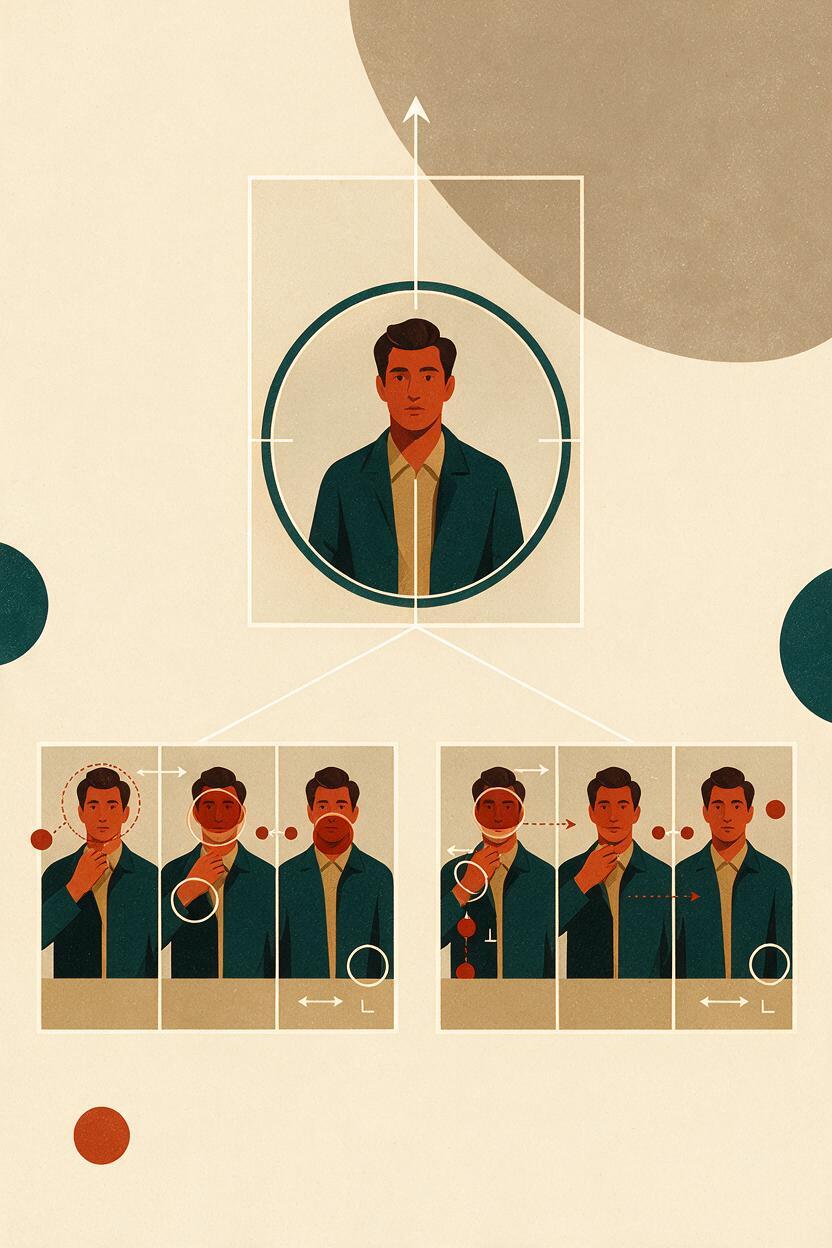
If the best clip contains a brief defect, decide whether it can be hidden editorially. Trimming several unstable frames from the beginning or end is safer than applying a broad identity change. A cutaway can cover a damaged middle section without forcing the model to reconstruct the entire reflection.
For a face-only identity mismatch, an authorized face reference and a conservative face-swap pass may help. Apply it only when head pose, lighting, expression, and occlusion are already plausible. Face replacement does not repair incorrect shoulders, hand timing, mirror perspective, or body geometry.
When both the real and reflected faces are visible, check them independently after repair. They should still share the same identity, but brightness and sharpness may differ naturally because the reflection is farther from the camera and affected by the mirror surface.
If the hand or mirror geometry fails for more than a few frames, return to generation with less motion. Do not attempt to hide a structural error with face correction.
Expected result: a clean final clip produced through trimming or a narrow repair, without replacing successful motion or scene structure.
Keep the same mirror setup across projects
Save a small continuity package whenever a mirror shot succeeds:
- The untouched anchor frame.
- The final animation prompt.
- A short fixed description of the character.
- The approved wardrobe and location wording.
- The aspect ratio and camera description.
- Still frames from the start and end of the selected clip.
For a sequence, generate variations from the same anchor rather than rebuilding the bathroom each time. One version can contain a gaze shift, another a controlled breath, and another a hand lowering from the collar. Separate clips are easier to edit than one generation containing three consecutive actions.
You can also create a clean reverse angle without the mirror and intercut it with the reflection shot. The reverse angle reduces the amount of time the difficult geometry remains onscreen while giving the editor reaction coverage.
Alternative: use motion transfer for a precise gesture
When the exact rhythm matters, record a simple source performance with a fixed phone camera. Match the target composition as closely as possible: waist-up framing, visible hands, limited head rotation, and no objects crossing the face.
Use motion transfer to carry the performance into the designed character, but treat the mirror as a separate stability test. The transferred body motion may be convincing while the generated reflection still drifts. Select a slow source action with clear silhouettes and avoid rapid finger articulation.
This route is useful for a recognizable pause, breath, or collar adjustment that is difficult to describe temporally. It is less suitable when the source performer repeatedly blocks the face or exits the intended frame.
Alternative: replace residual identity drift with face swap
Use face swap only with a person’s permission and an authorized reference. It works best as a final identity correction after the motion, head angle, expression, and lighting have already succeeded.
Mirror scenes require restraint because two visible faces may need to remain consistent. Inspect edge blending around the hairline, cheeks, ears, and mirror boundary. If correction makes the reflection unnaturally sharp or bright, keep the original clip or use a less aggressive repair.
Where this workflow falls short
Even a strong anchor frame does not guarantee perfect temporal geometry. Mirrors combine identity preservation, symmetry, depth, anatomy, and synchronized movement, so small errors remain possible.
- Fast hand motion: fingers can smear or separate between the subject and reflection.
- Multiple mirrors: repeated reflections multiply the continuity problem.
- Text and logos: readable clothing details may reverse, mutate, or disappear.
- Complex camera moves: parallax changes what should be visible in the mirror and can expose geometric errors.
- Occlusion: a hand crossing the face may cause temporary identity drift in either image.
- Long clips: small inconsistencies have more time to accumulate.
For a demanding production, combine short AI-generated shots with conventional editing. A stable two-second reflection insert is often more usable than a longer take that begins well and collapses near the end.
FAQ
Should I describe the reflection as a second person?
No. Describe one person in front of a mirror and state that the reflection remains synchronized. Calling it a second person can encourage independent movement or identity separation.
Is text to video enough for a mirror scene?
It can be useful for concept exploration, but reference-first animation gives you a chance to verify identity and geometry before motion begins. Use text-first results as candidates, not automatically as final shots.
Which camera angle is easiest?
A waist-up three-quarter rear view is a practical starting point. It shows the foreground subject and reflected face clearly while avoiding the complexity of a full-body reflection.
Why does the reflected hand fail more often than the face?
The hand changes shape quickly and may overlap clothing, the face, or the mirror edge. Slow the gesture, keep the fingers together, and leave visual space around the hand.
Can I add a camera push-in?
Yes, but test the gesture with a locked camera first. Once the reflection is stable, try a very subtle push-in as a separate generation. Combining strong subject motion and camera motion raises the failure risk.
When should I regenerate instead of repairing?
Regenerate when body geometry, synchronization, or mirror perspective is wrong across several frames. Repair is better reserved for trimming, isolated facial drift, or a brief edge artifact.
Final checklist
- Choose one slow action and one person.
- Use a waist-up composition with the mirror fully visible.
- Approve identity, hands, clothing, and geometry in the still image first.
- Remove extra mirrors, reflective clutter, and unnecessary objects.
- Keep the camera locked during the initial motion test.
- Describe the subject’s action once; require synchronized reflection.
- Compare identical inputs across Seedance and Kling.
- Inspect the opening, peak-motion, and final frames.
- Repair facial identity only after motion and geometry succeed.
- Create your first image to video clip free and test the reflection prompt now.
Keywords
image to video, AI mirror reflection, AI video tutorial, prompt engineering, Seedance prompts, Kling prompts, face swap