How to Control Camera Movement in Text-to-Video AI
Control AI camera movement by giving each shot one clear subject action, one camera move, and one visual anchor. This tutorial shows how to write reliable text-to-video prompts, test them across Seedance, Kling, and Veo, and switch to image-to-video when composition needs tighter control.
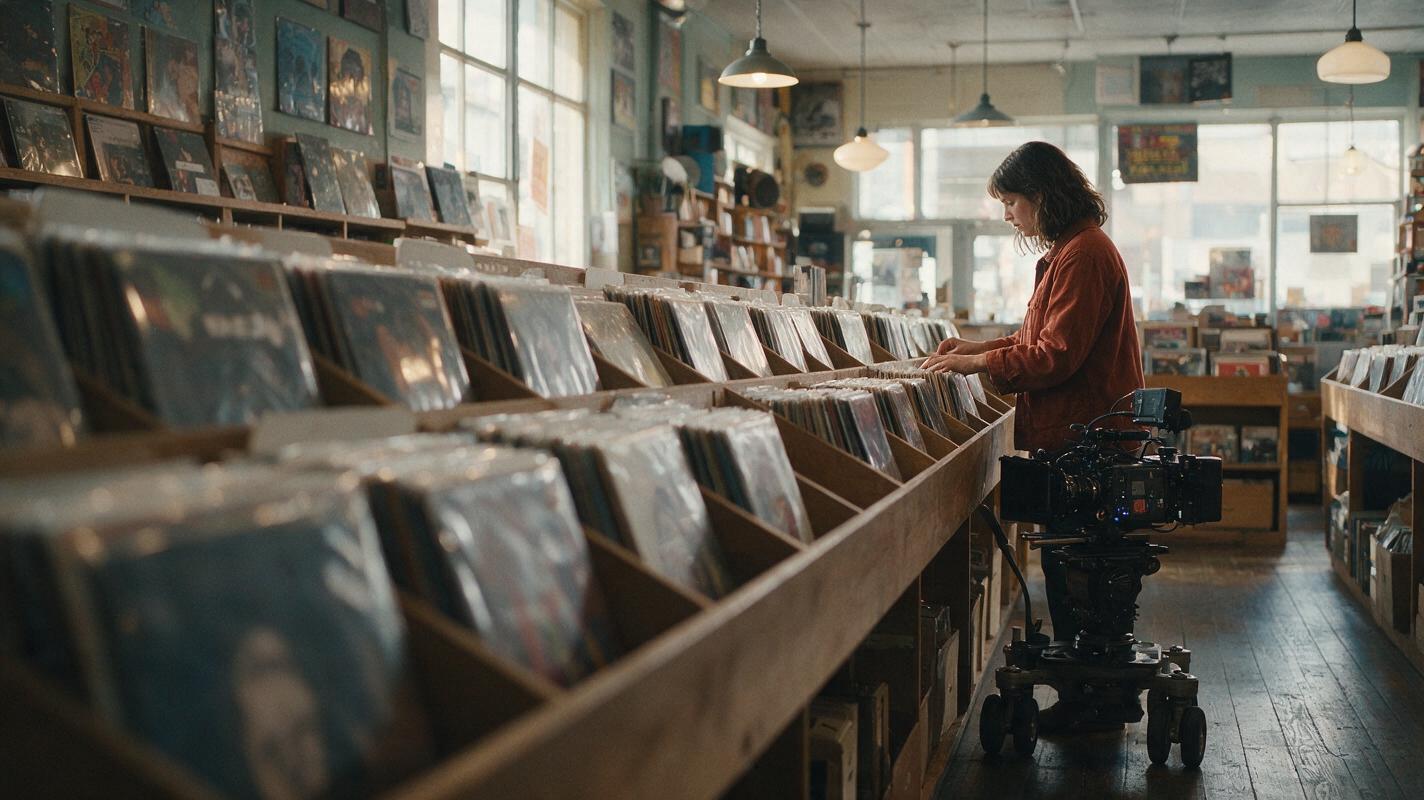
Table of contents
TL;DR: Separate subject motion from camera motion
The fastest way to control camera movement in text to video is to describe one subject action, one camera move, and one fixed visual anchor per shot. Start with restrained moves such as a slow push-in or lateral tracking shot, compare the same prompt across models, and use a reference frame when text alone cannot preserve the composition.
This workflow focuses on camera choreography rather than character continuity. You will build a short cinematic sequence in a lived-in record store: an establishing push-in, a side-tracking search through vinyl, and a controlled orbit around a discovered album.
Why AI camera movement often goes wrong
Video prompts frequently mix several kinds of motion into one sentence. A prompt may ask a character to walk, turn, pick up an object, smile, and look into the lens while the camera cranes downward, orbits, zooms, and changes focus. A human cinematographer can interpret those instructions as a shot plan. A generation model may treat them as competing visual changes.
The resulting failures are recognizable:
- The subject slides instead of walking. The model moves the background but does not create convincing body mechanics.
- A push-in becomes a digital zoom. The field of view changes without the natural parallax expected from physical camera movement.
- An orbit changes the room. Shelves, doors, and furniture appear or disappear as the unseen side of the location is invented.
- The camera reverses direction. A left-to-right tracking shot drifts backward or crosses to the opposite side.
- The final composition is lost. The camera performs the movement but ends on an unusable crop or an altered subject.
The practical fix is not simply adding more cinematic vocabulary. It is reducing ambiguity and assigning every sentence a job.
Three ways to control an AI video camera
- Direct text prompting: Describe the starting composition, subject action, camera move, speed, direction, and ending composition in that order.
- Reference-first animation: Generate a strong still image, then animate it so the camera has a stable spatial starting point.
- Shot decomposition: Split an elaborate move into two or three simpler clips and edit them together instead of demanding one perfect continuous take.
The first approach is fastest. The second offers better framing control. The third is usually the most dependable choice when the scene combines complex action with a large camera move.
How MagicBoat handles multi-model camera tests
MagicBoat brings multiple generation models into one account, making it practical to test the same shot concept with Seedance, Kling, Veo, and other available video workflows. That matters because camera instructions are not interpreted identically by every model: one may preserve the actor well during a push-in, while another may create stronger environmental parallax during a tracking shot.
You can begin with text generation, compare outputs, and then move to image to video without rebuilding the creative plan. Seedream, Flux, or GPT Image can be used to create reference frames when a shot needs a precise location, wardrobe, lens perspective, or ending composition.
Working rule: Keep the creative intent constant when comparing models. Do not rewrite the prompt after every generation, or you will not know whether the improvement came from the model or the wording.
Step 1 — Write a shot specification before writing the prompt
Reduce the idea to six fields. This prevents decorative language from hiding contradictory instructions.
| Field | Record-store example | Why it matters |
|---|---|---|
| Starting frame | Wide view from the entrance | Defines initial geography |
| Subject action | Shopkeeper flips the sign and walks inside | Separates performance from camera motion |
| Camera move | Slow dolly push-in | Names one physical movement |
| Direction | Forward along the center aisle | Prevents sideways drift |
| Speed | Slow and steady | Reduces sudden acceleration |
| End frame | Medium-wide view at the counter | Gives the shot a destination |
Use this compact base structure:
STARTING COMPOSITION: [shot size, viewpoint, subject placement].
SUBJECT ACTION: [one continuous action].
CAMERA: [one move], traveling [direction] at [speed].
VISUAL ANCHOR: [stable object or line in the scene].
END FRAME: [final shot size and subject position].
STYLE: [lighting, realism, atmosphere].
CONSTRAINTS: continuous shot, stable geometry, no cuts, no camera reversal.
Expected result: A prompt plan in which the performance and the camera can be evaluated separately.
Step 2 — Establish the location with a restrained push-in
Begin with the easiest move in the sequence: a slow physical push-in through a location with clear depth cues. Shelves, floorboards, ceiling lights, and the aisle create visible parallax, making it easier to judge whether the camera is actually traveling forward.
Use this generation prompt:
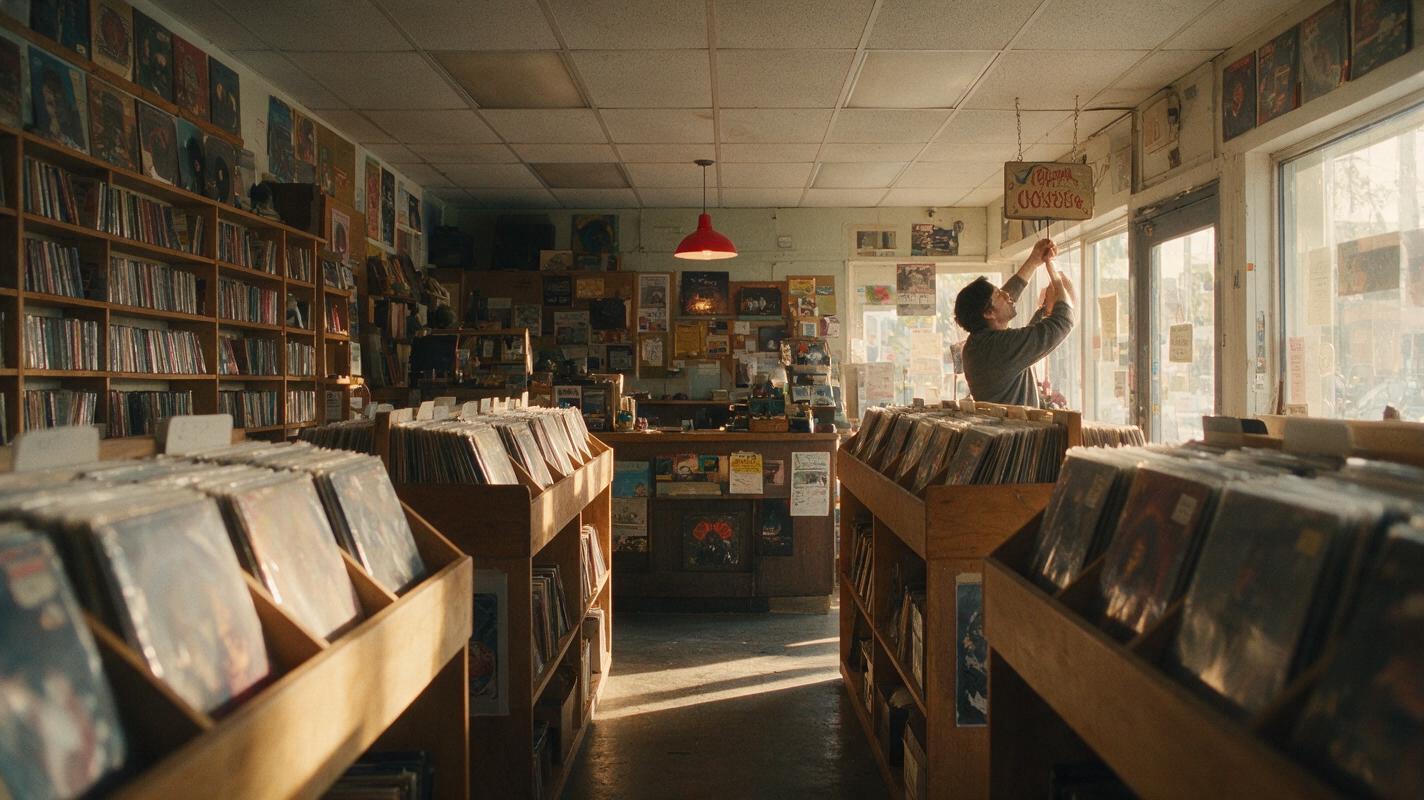
STARTING COMPOSITION: wide cinematic view from just inside the entrance of a small independent record store, symmetrical center aisle, wooden vinyl shelves on both sides, shopkeeper standing beside the front door in the left third of frame. SUBJECT ACTION: the shopkeeper turns the hanging sign from CLOSED to OPEN, then walks calmly toward the counter. CAMERA: slow physical dolly push-in, traveling straight forward along the center aisle at a steady walking pace, with natural foreground-to-background parallax. VISUAL ANCHOR: keep the long center aisle and the red pendant lamp above the counter fixed on the central axis. END FRAME: medium-wide composition with the shopkeeper arriving behind the counter, pendant lamp still centered. STYLE: photorealistic cinematic editorial realism, warm morning sunlight through the front windows, subtle film grain, believable lived-in store, natural colors. MANDATORY CAMERA: eye-level camera, 35mm lens appearance, straight forward movement only, no orbit, no pan, no digital zoom. CONSTRAINTS: one continuous shot, stable shelves, stable architecture, no cuts, no text mutation, no camera reversal.Expected result: The aisle expands naturally at the frame edges while the pendant lamp remains near the center. If the shelves stretch without parallax, the output is behaving more like a zoom than a dolly.
Step 3 — Build a precise reference frame for lateral tracking
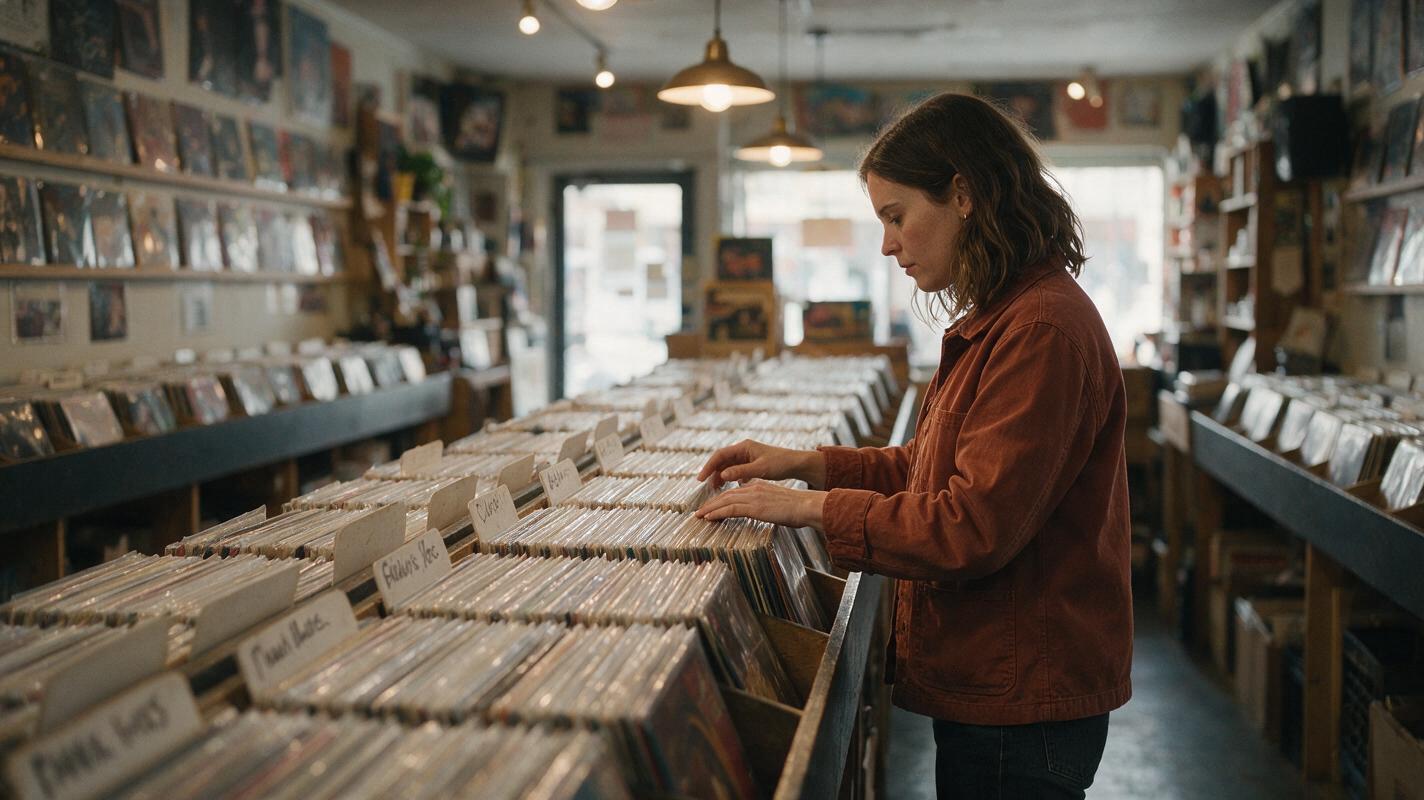
A side-tracking shot is harder because the model must reveal new parts of the environment while preserving the visible shelves and the subject’s body. Create a reference image before animation so the starting pose, aisle spacing, wardrobe, and camera height are already resolved.
Reusable visual prompt:
Photorealistic cinematic editorial frame inside a narrow independent record store, a woman in her early thirties wearing a rust-colored work jacket and dark jeans browsing vinyl records with both hands, long waist-high record bins extending from foreground to background, handwritten genre dividers, warm practical pendant lights and soft overcast daylight, believable scuffed wooden floor and densely stocked shelves, no visible brand logos. MANDATORY LAYOUT: landscape 16:9, woman positioned in the right third, clear negative space in the direction she will move, parallel shelf lines showing strong depth, hands fully visible above the record bin. MANDATORY CAMERA: true side three-quarter view, camera near the front-left of the subject, eye-level height, 40mm lens appearance, no wide-angle distortion. STYLE: natural film still, restrained color grade, realistic skin and fabric texture, lived-in location, no surreal elements, no duplicated people, no malformed hands.Choose the frame with the clearest silhouette and most stable shelf geometry. Avoid a starting image in which the hands overlap heavily or disappear behind album covers; animation will have less visual information to preserve.
Expected result: A clean 16:9 keyframe that establishes the tracking axis and leaves room for the subject to move.
Step 4 — Animate the tracking shot with screen direction locked
Animate the reference frame using one directional phrase consistently. Do not alternate between terms such as “camera moves right,” “subject moves left,” and “track alongside her” unless those relationships are deliberate.
SUBJECT ACTION: the woman walks slowly from left to right beside the record bins while lightly running her fingers across the album dividers, then stops at the jazz section. CAMERA: smooth lateral tracking movement from left to right, matching her walking speed and maintaining the same side three-quarter distance. VISUAL ANCHOR: the top edge of the record bin remains level and the woman stays in the right third of frame. END FRAME: she stops with one hand resting on a blue album sleeve, framed from mid-thigh upward. MOTION QUALITY: restrained natural walking, realistic arm timing, subtle fabric movement. MANDATORY CAMERA: eye-level tracking shot, constant camera height, constant subject distance, no push-in, no orbit, no handheld shake. CONSTRAINTS: preserve the reference-image wardrobe, face, shelf structure, lighting, and screen direction; one continuous shot; no camera reversal; no extra people.Expected result: The background passes horizontally while the woman’s framing remains relatively constant. If she grows rapidly larger, the model has added an unwanted push-in.
Step 5 — Use a controlled orbit only after the scene is stable
Orbit shots are visually impressive but structurally demanding. The model must invent surfaces that were not visible in the starting frame, including the back of the subject and the opposite side of the room. Limit the arc and give the orbit a clear center.
For the final shot, the shopper lifts an album from the bin and examines its cover:
STARTING COMPOSITION: medium side three-quarter shot of the woman holding a blue vinyl album at chest height beside the record bin. SUBJECT ACTION: she lifts the album slightly, studies the cover, and gives a small satisfied smile. CAMERA: slow clockwise arc of approximately one quarter-circle around the woman, pivoting around her upper torso while maintaining constant distance. VISUAL ANCHOR: the blue album remains centered between her hands throughout the move. END FRAME: front three-quarter medium shot with her face, both hands, and the complete album cover visible. STYLE: photorealistic cinematic editorial realism, warm store lighting, subtle background falloff, natural skin detail. MANDATORY CAMERA: true three-dimensional orbit beginning near her left side and ending near her front-right, eye-level camera, 50mm lens appearance, no zoom and no full rotation. CONSTRAINTS: stable facial identity, exactly two hands, rigid rectangular album geometry, unchanged rust jacket, no cuts, no duplicated arms, no changing store layout.Expected result: A modest arc that changes the visible background while keeping the album and torso stable. A quarter-circle is generally a more practical target than asking for a dramatic full rotation.
Step 6 — Compare models with a motion scorecard
Generate the same shot concept with more than one available model before changing the prompt. Evaluate motion mechanics rather than choosing the output with the most attractive single frame.
| Check | Pass condition | Common failure |
|---|---|---|
| Direction | Movement stays on the requested axis | Drift or reversal |
| Speed | Acceleration is smooth and motivated | Sudden lurch near the end |
| Parallax | Near objects move faster than distant objects | Flat digital zoom |
| Framing | Subject finishes at the requested size | Unexpected close-up |
| Geometry | Shelves and album remain coherent | Melting or duplication |
| Performance | Action remains readable during the move | Sliding feet or fused fingers |
Expected result: A model choice based on the needs of a specific shot. The best model for the push-in does not have to be the best model for the orbit.
Step 7 — Diagnose failures by changing one variable
When a generation fails, simplify it methodically. Changing the model, camera move, action, framing, and style simultaneously destroys useful feedback.
Reusable failure-mode comparison prompt:
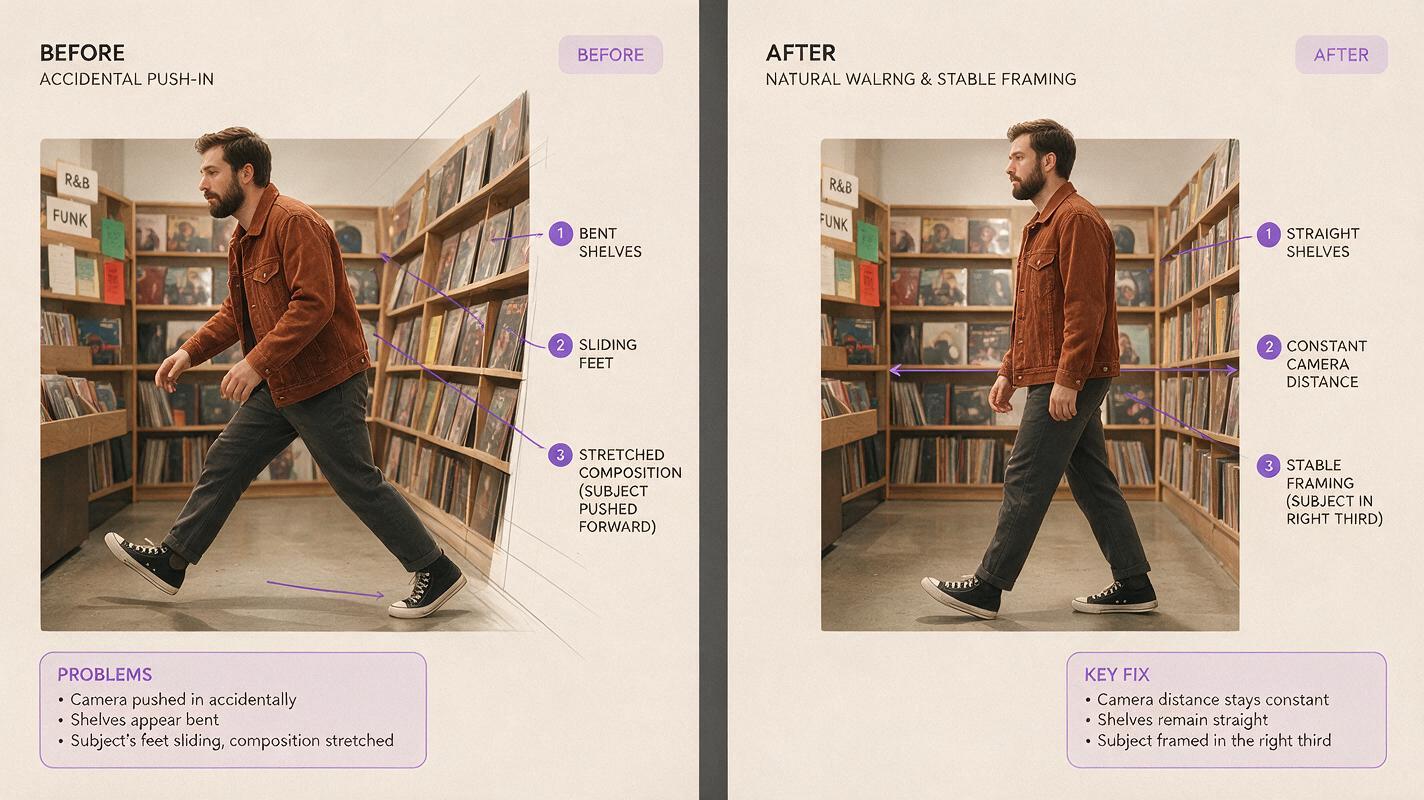
Create a photorealistic editorial contact sheet comparing two cinematic frames from the same independent record-store tracking shot. LEFT FRAME labeled only with a small plain caption BEFORE: the shopper is unnaturally stretched, the record shelves bend toward the center, her feet appear to slide, and the camera framing drifts into an accidental close-up. RIGHT FRAME labeled only with a small plain caption AFTER: the same shopper walks naturally beside straight stable record bins, remains in the right third, and keeps a constant camera distance. MANDATORY LAYOUT: landscape 16:9 split-screen with two equal panels, matching woman, matching rust jacket, matching lighting, and matching store location in both panels. MANDATORY CAMERA: eye-level side three-quarter view, 40mm lens appearance, camera near the subject’s front-left, identical framing baseline in both panels. STYLE: believable film-production review image, photorealistic editorial realism, no software interface, no logos, no decorative graphics.Use this correction order:
- Remove secondary subject actions.
- Reduce the camera’s travel distance or orbit angle.
- Replace vague speed words such as “dynamic” with “slow and steady.”
- Add one visible anchor that should remain centered or level.
- Move from pure text generation to a reference-frame workflow.
- Split the shot if geometry still changes halfway through.
Expected result: Each retry answers a specific question instead of becoming another uncontrolled variation.
Keep the same camera language across a project
Create a small camera bible for the sequence. Record recurring lens appearance, camera height, movement speed, and stabilization style. Reusing these choices makes separately generated clips feel as if they belong to the same production.
PROJECT CAMERA BIBLE
Lens appearance: 35mm for wide location shots; 50mm for medium detail shots
Camera height: eye level unless a shot explicitly requires otherwise
Movement: slow, physically motivated, steady acceleration
Stabilization: controlled dolly or gimbal; no handheld shake
Color: warm practical lights, natural daylight, restrained film grain
Continuity rule: maintain left-to-right browsing direction
Also keep a still of the location from each important angle. An orbit or reverse angle exposes parts of the set that the first image did not define, so additional location references can reduce improvisation.
Alternative: use motion transfer for performance-heavy shots
If precise body timing matters more than camera travel, record or prepare a clear movement source and use motion transfer for the performance. Keep the generated camera relatively static, then add a modest crop or editorial push during post-production.
This is useful for choreography, gestures, repeated hand movements, or full-body blocking. Asking one generation to solve exact body motion and a complex orbit at the same time increases the chance that one of them will break.
Alternative: replace one complex shot with three simple shots
A continuous crane-to-orbit-to-close-up may sound cinematic, but three controlled clips are easier to direct:
- A wide static or slow push-in to establish the store.
- A medium tracking shot for the browsing action.
- A close detail shot of the album being lifted.
Cut on movement so the action carries across the edit. The viewer experiences intentional visual progression without requiring the model to preserve an entire location through a complicated uninterrupted path.
Where this workflow falls short
- Large orbits require invented scenery. A reference image cannot define every hidden surface, so background continuity may still fail.
- Hands touching props remain difficult. A stable camera does not guarantee perfect fingers, album edges, or contact physics.
- Lens terms are interpretive. Writing “35mm” guides the visual appearance but does not reproduce a calibrated physical camera system.
- Long shots accumulate errors. Identity, architecture, and object geometry can degrade as motion continues.
- Text labels may mutate. Signs and album lettering should not be treated as reliable continuity anchors.
For a shot with critical product geometry, readable text, or an exact final frame, build stronger image references and consider shorter clips rather than relying on text instructions alone.
FAQ
What is the easiest camera movement for text-to-video AI?
A slow push-in is a practical starting point. It has one direction, works well with centered compositions, and can be evaluated through visible parallax.
Should I say dolly, zoom, or push-in?
Use “slow physical dolly push-in with natural parallax” when you want the camera to travel through space. Use “optical zoom” only when you intentionally want the field of view to change from a fixed position.
How many camera movements should one prompt contain?
Start with one. If a shot must combine a pan and a push, define their order clearly, but splitting the result into separate clips is often more reliable.
Do negative prompts stop unwanted camera motion?
Constraints such as “no orbit” or “no camera reversal” can clarify intent, but the positive instruction should remain dominant. Clearly state what the camera should do before listing what it should avoid.
When should I switch from text to image-to-video?
Switch when the starting composition, wardrobe, prop geometry, or location layout matters more than broad creative variation. A reference frame gives the model a concrete spatial baseline.
Can face swap repair a bad camera move?
No. Face replacement may address local identity drift, but it cannot fix broken parallax, warped architecture, incorrect framing, or a reversed tracking direction. Regenerate structural failures.
Final checklist
- Describe one primary subject action per shot.
- Request one camera move with a clear direction and speed.
- Define both the starting composition and ending frame.
- Include a visible anchor such as an aisle, lamp, or prop.
- Use reference-first animation when framing is critical.
- Compare models before rewriting the prompt.
- Change only one variable during troubleshooting.
- Split ambitious continuous shots into simpler edited clips.
Ready to direct the camera instead of leaving it to chance? Create your first ai video free on MagicBoat and test these prompts across the available models now.
Keywords
text to video, camera movement prompts, Seedance prompts, Kling prompts, prompt engineering, image to video, AI video workflow