How to Keep Two Characters Consistent in One AI Video Scene
The most reliable way to preserve two characters in one AI video is to design them in a single reference image, lock their positions and identifying traits, then animate that image with restrained motion. This tutorial shows how to build the reference, write separation-aware prompts, compare video models, and repair identity drift with MagicBoat.
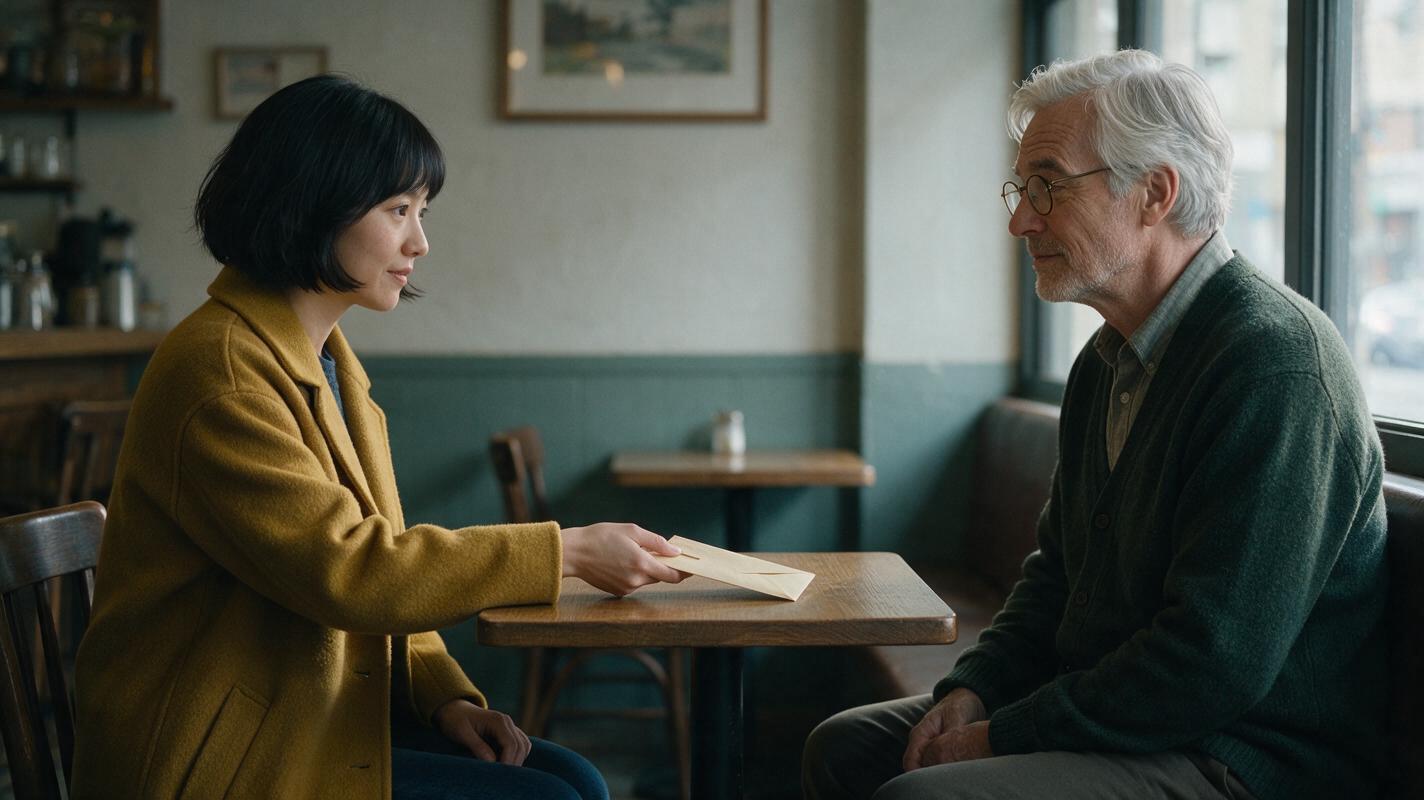
Table of contents
TL;DR: Start with one frame containing both characters
For reliable two-character consistency, create one clean reference image in which both people already have distinct faces, clothing, positions, and silhouettes. Then turn that frame into an ai video with low-complexity motion, a stable camera, and prompts that assign one action to each character.
Do not ask a text-only video prompt to invent two detailed identities and complex choreography at the same time. Separating character design from animation gives the model fewer decisions to make in every frame.
Why two-character consistency breaks
A video model does not treat names such as “Mara” and “Jon” as permanent identity records. It interprets the current frame, prompt, motion, and visual context together. When two people share similar features or cross each other, the model may redistribute those features between them.
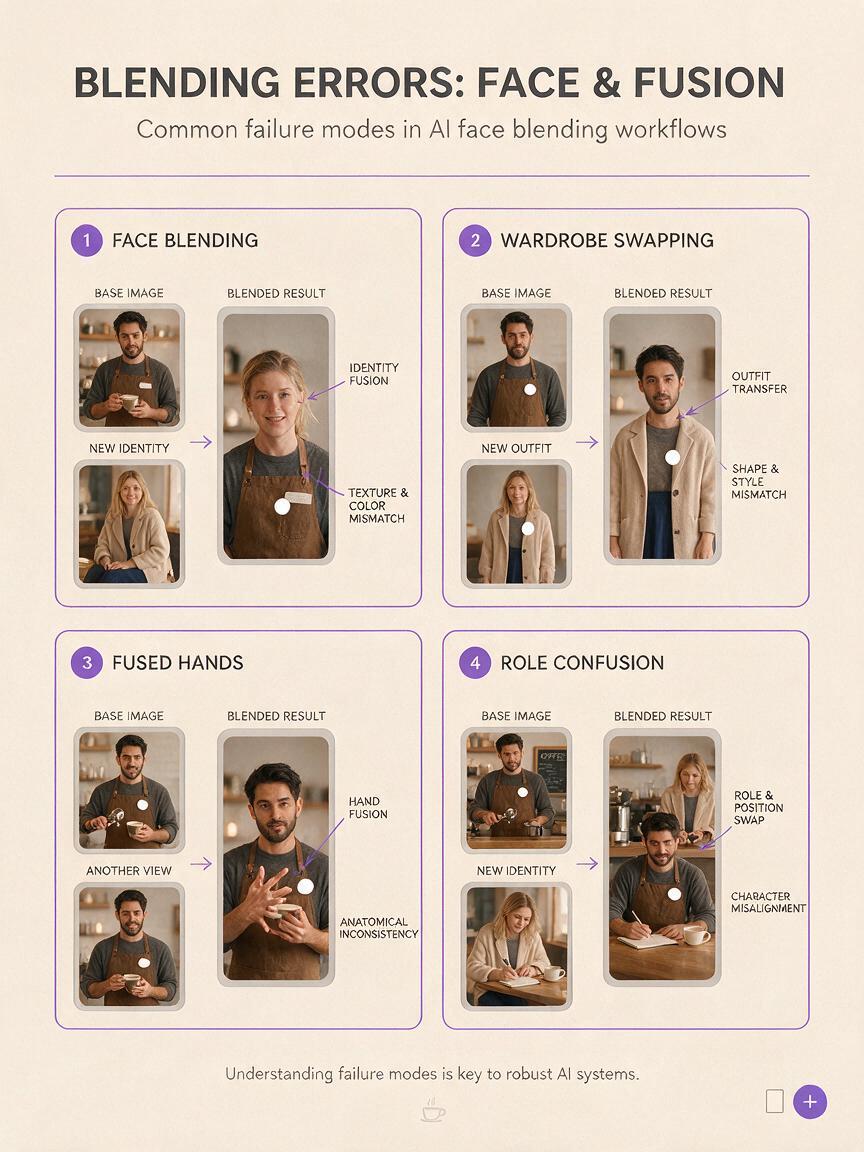
Common failures include:
- Face blending: one character gradually acquires the other character’s eyes, hairstyle, or face shape.
- Wardrobe swapping: a red jacket moves from the left character to the right character after a cut, turn, or occlusion.
- Body merging: shoulders, hands, or arms fuse when the characters stand too close.
- Role confusion: the wrong person performs an action because the prompt uses ambiguous pronouns.
- Style drift: one character becomes more realistic, illustrated, younger, or older than the other.
- Continuity loss: a character changes appearance when the camera moves behind an object or reveals a profile view.
The core rule is simple: make identity visually obvious before asking for motion. Clothing color, position, silhouette, age, hairstyle, and accessories should all help separate the characters.
3 ways to create a two-character scene
| Approach | Best use | Main risk |
|---|---|---|
| Text to video | Fast concept tests and distant characters | The model must invent both identities and the scene simultaneously |
| Single reference image to video | Dialogue, reactions, product scenes, and controlled blocking | Large movement can still alter faces or clothing |
| Separate character assets plus compositing | Recurring characters and precise production work | Requires more preparation and editing |
This tutorial focuses on the second approach because it offers the strongest balance of speed, visual control, and repeatability. The separate-assets method appears later as an advanced alternative.
How MagicBoat handles a multi-model character workflow
MagicBoat brings image and video generation models into one account, so you can develop a still with an image model and test it across multiple video models without rebuilding the concept from scratch. Depending on current availability, the workflow can involve image-generation options such as Seedream, Flux, or GPT Image and video-generation options such as Seedance, Kling, or Veo.
The practical sequence is: generate the two-character keyframe, inspect it at full size, pass it into image to video, and compare how available models interpret the same motion prompt. Model availability and supported controls can change, so use the options shown in MagicBoat when you create the project rather than relying on a fixed model list.
A Runway-style workflow is useful here as a general production pattern: establish a strong source frame, animate a short shot, select the best result, and assemble several controlled shots instead of expecting one long generation to deliver an entire scene.
What you need before generating
- A short description of each character’s permanent visual traits.
- A simple location with enough room between the characters.
- One action per character.
- A planned camera angle and aspect ratio.
- A reason for both characters to remain visible in the same shot.
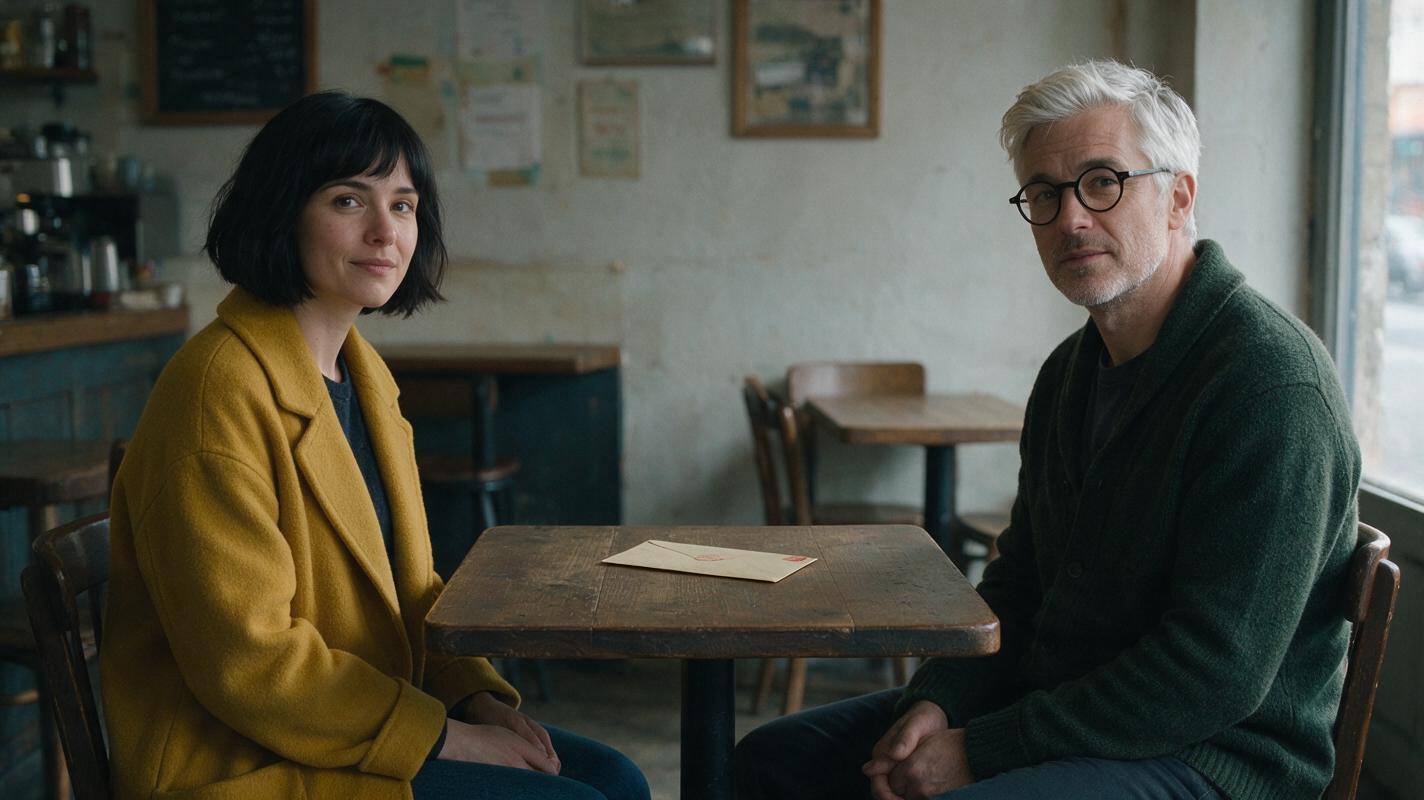
For the example below, Character A is a woman with a short black bob and mustard coat. Character B is a man with silver hair, round glasses, and a dark green cardigan. They sit on opposite sides of a small café table while Character A slides a sealed envelope toward Character B.
Step 1 — Write a compact character lock
Define each identity with three to five visible traits. Prefer features that remain readable in a medium shot. Tiny jewelry, subtle eye colors, and hidden tattoos are weak identifiers; silhouette, hair, outerwear, and glasses are strong identifiers.
CHARACTER A
Woman in her early thirties, short straight black bob,
mustard-yellow wool coat, narrow face, no glasses.
Always positioned on screen left.

CHARACTER B
Man in his late forties, short silver hair,
round black glasses, dark green cardigan, broad face.
Always positioned on screen right.
Avoid loading the character lock with personality, biography, or invisible facts. “Former detective who distrusts authority” may guide a screenplay, but it does not stabilize a face. Translate personality into visible behavior later, such as a guarded posture or hesitant hand movement.
Expected result: two descriptions that cannot easily be mistaken for each other, even when the faces are small.
Step 2 — Build a locked reference image
Use an available image model to generate both characters together. A medium two-shot is safer than an extreme close-up because it establishes clothing, body position, table geometry, and spatial separation.
Cinematic medium two-shot inside a quiet neighborhood café
in soft overcast morning light. On screen left, a woman in
her early thirties with a short straight black bob and a
mustard-yellow wool coat sits upright. On screen right, a man
in his late forties with short silver hair, round black glasses,
and a dark green cardigan sits opposite her. A small wooden
café table separates them. Both faces are fully visible, distinct,
and natural. Consistent realistic photography, 50mm lens,
neutral expressions, restrained color palette, no other people
in the foreground.
If the model supports exclusions or negative prompting, add a concise constraint rather than a long list:
No duplicate people, no blended faces, no matching outfits,
no extra hands, no overlapping bodies, no text.
Generate several candidates and choose the one with the clearest separation—not merely the most attractive lighting. Reject any frame containing partially hidden hands, overlapping shoulders, inconsistent scale, or similar-looking faces.
Expected result: one production-ready keyframe in which viewers can identify both characters instantly.
Step 3 — Validate the frame before animation
Inspect the selected image at full resolution. Animation tends to amplify small defects, so a warped pair of glasses or an extra finger in the still may become more obvious once it moves.
Check the following areas:
- Face boundaries: hairlines, ears, glasses, and jawlines should be clean.
- Hands: keep them visible and separate if the planned action uses them.
- Wardrobe: verify that each color and garment belongs to only one character.
- Depth: the table and chairs should have believable geometry.
- Screen direction: Character A must already be left and Character B right.
- Action readiness: the envelope should be present if it will move during the shot.
If an important prop is absent, regenerate or edit the still instead of asking the video model to create it mid-motion. Newly appearing objects often cause hand deformation and continuity changes.
Expected result: a reference frame that requires motion, not structural repair.
Step 4 — Animate the reference with controlled motion
Pass the reference into an available video model. Start with a short clip, a fixed or gently moving camera, and one clearly assigned action. The first test should establish whether the model can protect both identities.
The woman on screen left slowly slides the sealed envelope
across the table with her right hand. The man on screen right
remains seated, watches the envelope, and gives one subtle nod.
Both characters keep the same facial features, hairstyles,
clothing, age, and screen positions as the reference image.
Natural restrained movement. Locked medium two-shot.
No camera cut, no body crossing, no new people.
This prompt uses nouns and screen positions instead of “she” and “he” after the initial description. That redundancy is intentional. It continuously reminds the model which person owns each action.
For a Seedance prompt or Kling prompt, retain the same structure: subject assignment, action, identity lock, camera instruction, and exclusions. Do not assume that identical wording will produce identical motion across models; compare outputs and keep the version that best preserves the reference.
Expected result: a simple exchange in which both characters remain recognizable and the envelope moves without a cut.
Step 5 — Add camera movement only after identity holds
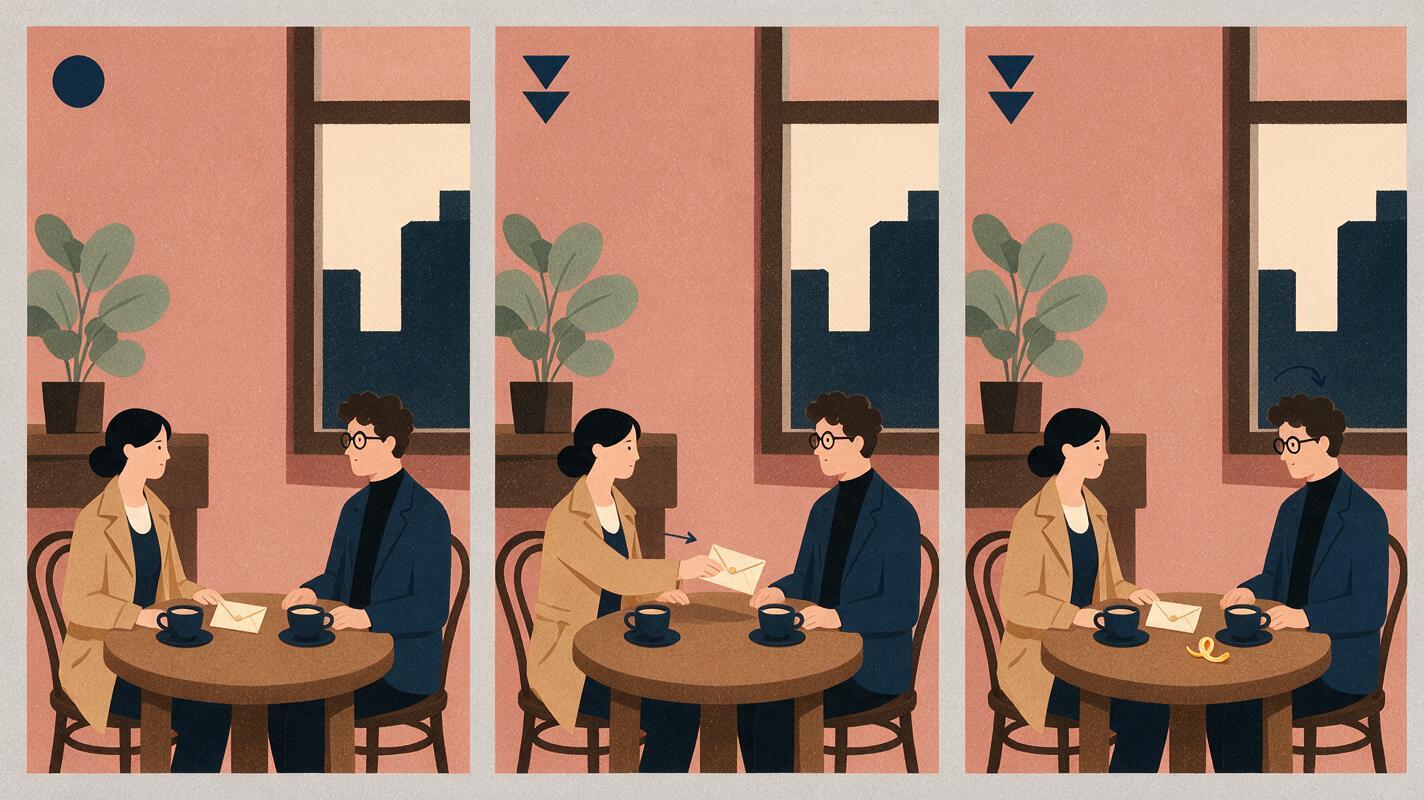
Once the locked shot works, test a second version with one mild camera instruction. Suitable choices include a slow push-in, a slight lateral slide, or subtle handheld breathing. Avoid an orbit, rapid zoom, whip pan, and character movement in the same first pass.
The woman on screen left slides the sealed envelope toward the
man on screen right. He looks down at it and then back at her.
Very slow cinematic push-in, keeping both faces visible for the
entire shot. Preserve their exact faces, hair, glasses, clothing,
body proportions, and left-right positions. Continuous shot,
no cuts, no occlusion, no background people crossing the frame.
The camera clause should describe both movement and framing protection. “Slow push-in” alone can end as a close-up that crops out one character. “Keeping both faces visible” gives the movement a boundary.
Expected result: a more cinematic shot without sacrificing the two-shot composition.
Step 6 — Generate targeted variations instead of rewriting everything
If the result is close, preserve the character block and change only one variable per generation. This makes failures easier to diagnose.
| Problem | Change to test | Keep unchanged |
|---|---|---|
| Faces drift during the push-in | Return to a locked camera or reduce camera movement | Reference image and character descriptions |
| Hands deform around the envelope | Shorten the sliding distance or begin with a hand already touching it | Faces, wardrobe, framing, lighting |
| Characters swap actions | Repeat screen-left and screen-right assignments | Camera and scene design |
| One character disappears | Request a continuous medium two-shot with both faces visible | Core action and identities |
| Motion feels lifeless | Add one micro-reaction such as a nod or glance | Main hand action and camera |
Save the successful reference image and the exact prompt together. Character consistency is easier to reproduce when the image, wording, framing, and motion design remain a matched package.
Expected result: a small set of comparable clips that reveal which model and motion level best protect identity.
Keep the same characters across projects
Create a reusable character sheet containing a neutral front view, three-quarter view, profile, full-body view, and close-up for each person. Keep lighting plain and wardrobe unchanged. These images can guide future keyframes, although support for multiple references varies by model.
Also store a brief continuity record:
Permanent: face shape, age, hairstyle, hair color, glasses,
height relationship, signature outerwear.

Scene-specific: location, emotion, prop, camera angle, lighting.

Never change together: hairstyle plus wardrobe plus age.
Change only when required: expression, pose, background.
For a longer sequence, build separate reference frames for wide, medium, and close shots. Trying to transform one wide image into every camera angle can force the video model to invent unseen facial detail.
Alternative: use motion transfer for complex performance
When the scene depends on dancing, fighting, or precise body timing, record or obtain a clean driving performance and use motion transfer where available. A source performance can provide clearer timing than a long verbal description.
Keep the two performers separated in the driving footage, avoid crossed limbs, and use clothing with contrasting silhouettes. Motion transfer can improve choreography, but it does not automatically solve identity drift; strong character source images are still essential.
Alternative: repair one identity with face swap
If the motion is good but one face changes, face swap can be a finishing option. Use a clear, authorized source image with a similar angle and lighting. Apply it only after selecting the final motion clip so that you do not repeat the repair across discarded versions.
Face replacement is less reliable during heavy blur, full profiles, face occlusion, or rapid head turns. It also cannot repair swapped clothing, fused bodies, or malformed hands. Use only images and footage you have permission to process, and do not use face replacement deceptively.
Where the workflow falls short
- Long occlusions remain difficult. If one person walks behind the other, the model may reconstruct the hidden face incorrectly.
- Complex hand contact raises failure rates. Handshakes, hugs, wrestling, and passing tiny objects combine anatomy with identity tracking.
- Profiles expose missing information. A front-facing reference does not fully define ears, nose projection, or the back of a hairstyle.
- Long clips accumulate drift. Several short controlled shots are usually easier to manage than one continuous scene with many actions.
- Model behavior varies. The same reference and prompt can produce different facial stability, motion strength, or camera interpretation across models.
- A name is not an identity lock. Repeating a fictional name helps prompt readability but cannot replace visual references.
FAQ
Can text to video keep two characters consistent without a reference?
It can work for simple or distant scenes, especially when the characters look very different. For dialogue, close-ups, or recurring identities, a shared reference frame is usually more controllable because both appearances and their spatial relationship are already defined.
Should I generate each character separately?
Generate them separately when you need reusable character assets or precise compositing. For one short shared scene, generating both in the same keyframe often produces more coherent lighting, scale, perspective, and eye lines.
How far apart should the characters be?
Leave visible negative space between their heads, shoulders, and hands. A table, doorway, aisle, or foreground object can reinforce separation, but avoid objects that hide faces during motion.
Do character names improve consistency?
Names help organize a prompt, but visual descriptors and screen positions do more practical work. Repeat “woman in the mustard coat on screen left” when assigning an action instead of relying only on a name or pronoun.
Which model should I use?
Test the same source frame and prompt with the available video models in MagicBoat. Select based on the actual shot: one model may preserve faces better, while another may produce more natural motion or follow the camera instruction more closely.
Can I create a conversation with alternating close-ups?
Yes, but generate it as separate shots. Make a two-shot reference, then create dedicated close-up references for each speaker while preserving the same character descriptions, wardrobe, lighting, and environment.
Create your two-character scene
Build one strong reference, animate the simplest version first, and increase motion only after both identities remain stable. Create your first AI video free and compare the available models with the same reference and prompt.
Final checklist
- Give each character a different silhouette, hairstyle, and wardrobe color.
- Place both characters in one clean reference image.
- Use screen-left and screen-right labels instead of ambiguous pronouns.
- Assign one main action to each character.
- Start with a locked camera and a short clip.
- Add camera movement only after identity remains stable.
- Change one prompt variable at a time when testing variations.
- Use motion transfer or face swap only when the base workflow needs a targeted fix.
Keywords
character consistency, ai video tutorial, image to video, seedance prompts, kling prompts, prompt engineering, ai video workflow