How to Make a Vertical AI Short Drama Without Awkward Cropping
A vertical AI short drama should be designed for 9:16 before frames are generated, not cropped after production. This tutorial shows how to convert a script into vertical shot cards, lock character-safe compositions, direct controlled motion, and test every cut on a phone-sized preview.
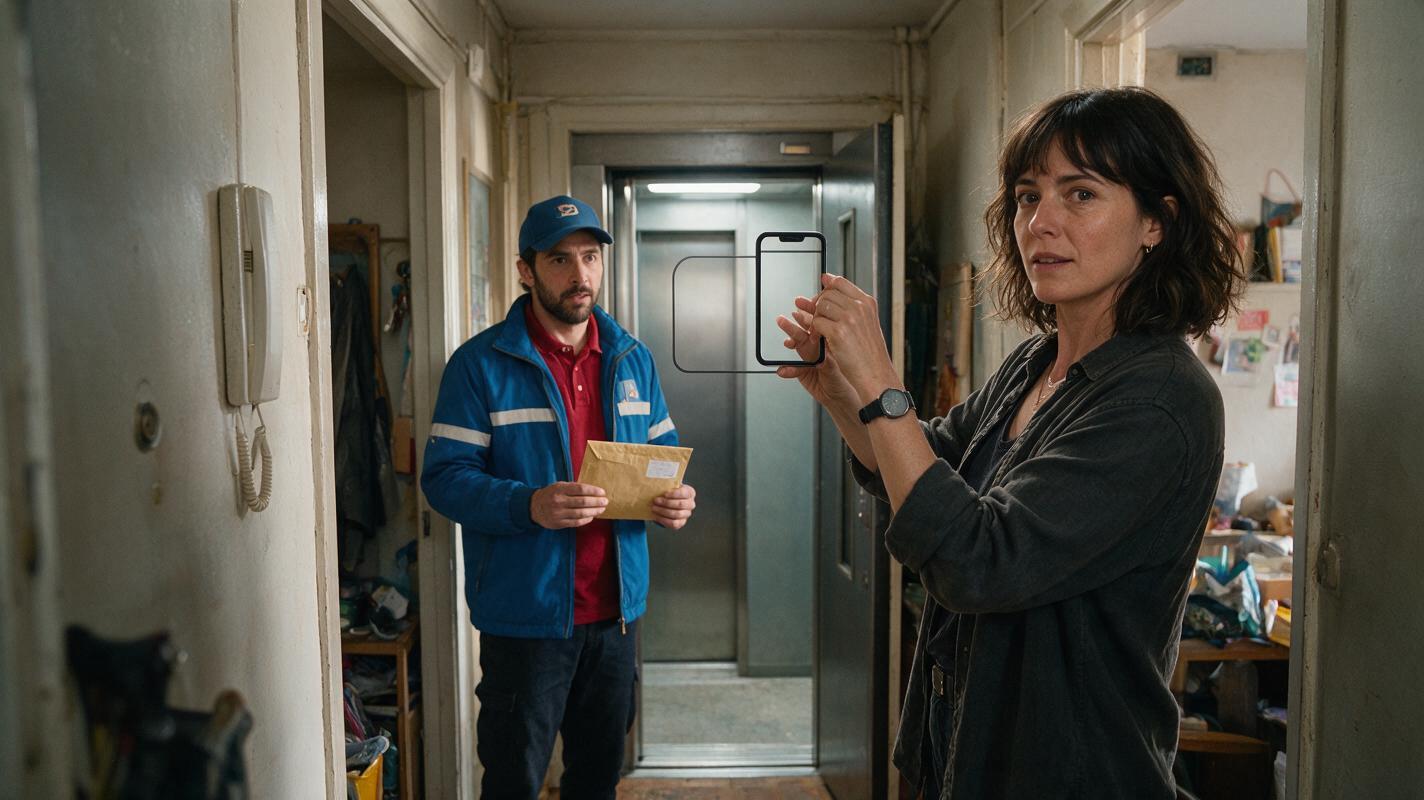
Table of contents
Design for 9:16 Before You Generate
The safest way to make a vertical drama video is to treat 9:16 as a directing constraint from the first shot card. Do not generate a widescreen episode and expect an automatic center crop to preserve faces, props, eyelines, and entrances.
Vertical framing favors layered depth, clear subject priority, and movement that stays inside a narrow visual corridor. The workflow below turns a short drama from script into vertical anchor frames and controlled clips while protecting the story information in every cut.
Core rule: every shot should have one dominant subject, one readable action, and one protected story detail.
Step 1 — Convert Each Beat Into a Vertical Shot Card
Break the scene into beats based on changes in information rather than lines of dialogue. A useful shot card records the subject, action, story detail, screen zone, depth layer, and intended cut point.
| Beat | Primary subject | Protected detail | Vertical composition |
|---|---|---|---|
| The courier arrives | Mara | Sealed envelope | Medium shot, envelope held above the lower interface-safe area |
| She recognizes the seal | Mara's face | Red wax symbol | Face in upper-middle zone, insert shot follows |
| The lift opens behind her | Mara and doorway | Unseen arrival | Mara foreground low, lift doors visible above and behind |
Use foreground, middle ground, and background to fit multiple facts into the tall frame. Avoid placing two equally important faces side by side; they will either become too small or compete for attention.
A compact shot-card prompt can expose framing problems before image generation:
Rewrite this scene as vertical 9:16 shot cards.
For every story beat, provide:
- primary subject
- visible action
- protected story detail
- foreground, middle-ground, and background elements
- camera size and angle
- entrance and exit direction
- final frame required for the next cut
Use one dominant action per shot. Keep all essential faces, hands, and props away from the extreme top, bottom, and side edges.
Reusable visual prompt:
Create a photorealistic cinematic sequence of four separate vertical 9:16 frames arranged left to right on a neutral dark-gray background, with no words, labels, logos, interface elements, or decorative borders. The same young female courier stands in a lived-in apartment corridor: first approaching a lift, then examining a sealed envelope, then reacting to the lift opening, then turning toward the unseen arrival. MANDATORY LAYOUT: each frame must preserve the courier's face, both hands, the envelope, and the lift doorway within a narrow central action corridor. Editorial realism, practical ceiling lights, restrained teal-and-amber color grade, consistent wardrobe and facial identity.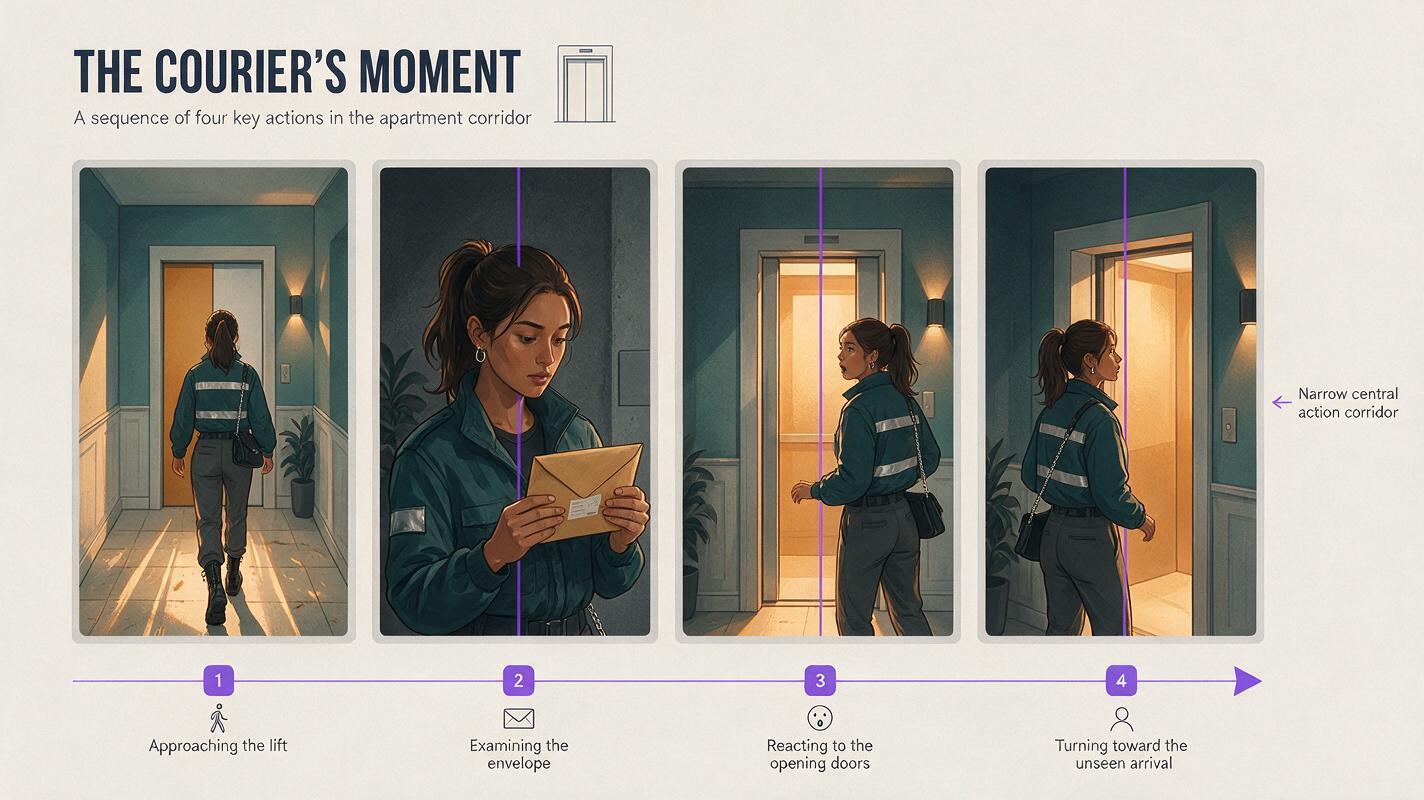
Step 2 — Lock a Character Sheet for Vertical Coverage
Create a reference sheet before generating scene frames. Record facial structure, hair, wardrobe layers, footwear, and one distinctive accessory. Full-body references matter because vertical coverage frequently reveals more of the costume than a landscape close-up.
For the courier, define immutable details such as a charcoal raincoat, dark green sweater, silver ear cuff, black ankle boots, and a low braided ponytail. Keep temporary scene states—wet sleeves, torn pocket, blood stain—outside the permanent identity description.
You can build the locked identity with an ai image generator, then reuse the approved sheet as the visual reference for every location frame.
Reusable visual prompt:
Photorealistic three-panel character reference sheet of the same 28-year-old female courier, shown in exact front view, exact left-side profile, and exact back view. She has an oval face, dark brown eyes, a low braided black ponytail, a small silver ear cuff, a charcoal knee-length raincoat over a dark green sweater, straight black trousers, and black ankle boots. Neutral expression, relaxed arms, flat even studio lighting, neutral light-gray seamless background. MANDATORY CAMERA: eye-level full-body orthographic-style views with identical scale in all three panels. MANDATORY LAYOUT: landscape 16:9, three evenly spaced figures, no text, no labels, no logos, no UI, no extra people, no props.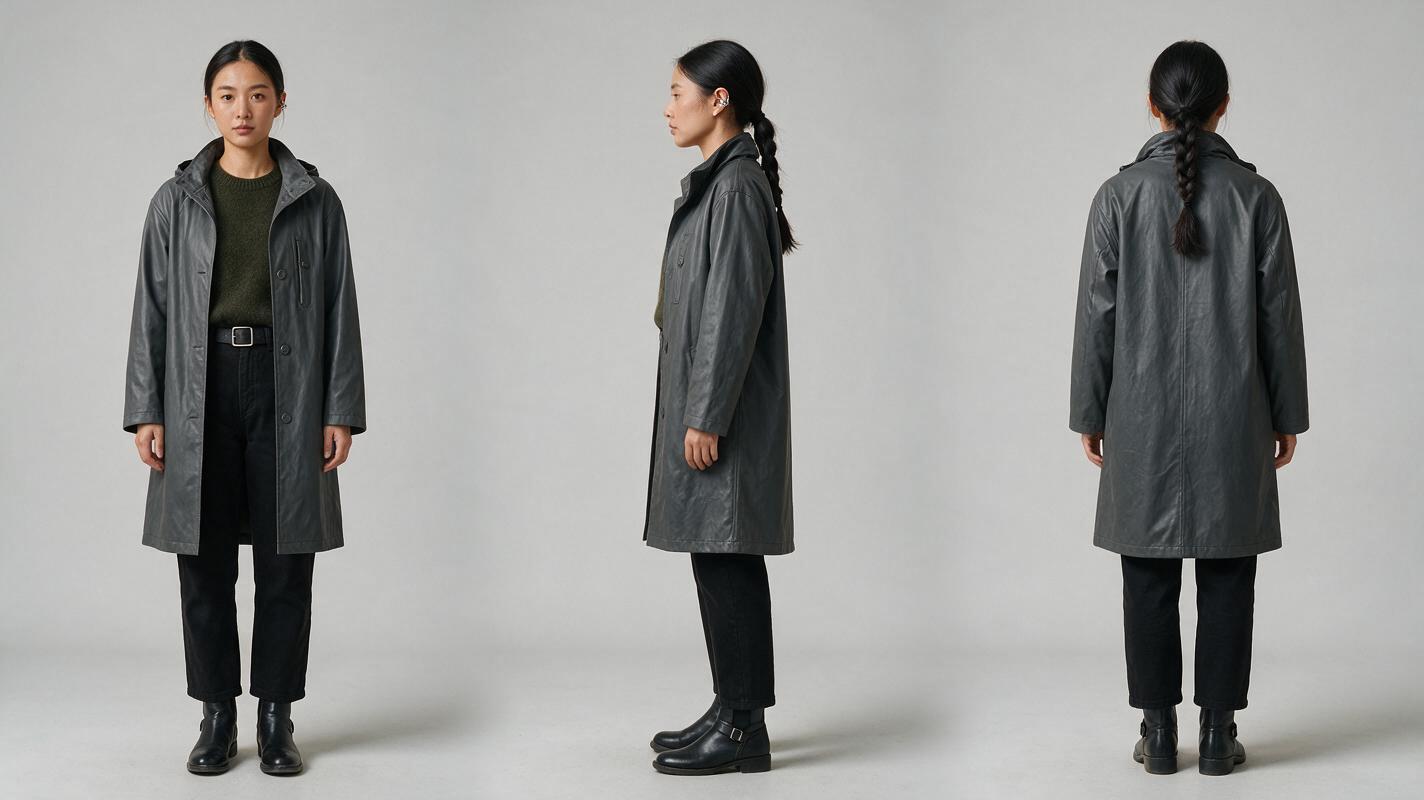
Step 3 — Build Tall Compositions With Depth
A vertical frame does not have to feel cramped. Place story elements at different depths instead of forcing them into a horizontal line. In the corridor scene, the envelope can occupy the foreground, Mara can hold the middle ground, and the opening lift can remain readable in the background.
- Close-up: reserve space below the chin when hands or a prop must enter.
- Medium shot: keep elbows visible when the action depends on gestures.
- Full shot: simplify the background so the character does not disappear into vertical architecture.
- Two-person shot: stagger the actors by depth or height rather than placing both faces on one horizontal line.
Generate the location as a stable anchor frame before adding movement. This makes it easier to diagnose whether a failed clip comes from composition, character identity, or animation.
Reusable visual prompt:
Cinematic editorial-realism photograph inside a narrow, believable apartment corridor at night, worn cream walls, scuffed dark floor, practical ceiling lamps, brushed-metal lift doors at the far end, a small fire extinguisher cabinet and several ordinary apartment doors. The female courier from the approved reference stands in the middle ground holding a sealed envelope while the lift opens behind her. MANDATORY CAMERA: eye-level true three-quarter view from chest height, 40mm documentary lens appearance. MANDATORY COMPOSITION: vertical 9:16, envelope in lower-middle foreground, courier's face in upper-middle area, lift doorway fully readable in the background, generous separation between silhouette and walls, no text, no signage, no logos, no UI.Step 4 — Animate One Controlled Movement Per Clip
Once the anchor frame works, use image to video to add one main movement. Asking for a head turn, hand action, camera push, opening doors, coat movement, and background activity in one generation gives the model too many opportunities to alter the composition.
Separate the scene into short motion units:
- Mara raises the envelope and recognizes the seal.
- The lift doors open while Mara remains nearly still.
- Mara turns toward the lift without leaving her screen zone.
Describe what must remain stable as clearly as the intended action:
Animate this approved vertical anchor frame.
Primary motion: the lift doors open slowly behind the courier.
Character motion: she remains still except for one shallow breath and a subtle eye movement toward the sound.
Camera: locked, no zoom, no pan, no reframing.
Preserve her face, braided ponytail, charcoal coat, silver ear cuff, envelope shape, corridor geometry, and lighting.
Do not add people, duplicate limbs, move the envelope, or change the lift interior.
End on a stable frame with the doors fully open and the courier still facing forward.
Step 5 — Repair Shots Instead of Cropping the Whole Episode
Review the episode as a sequence of first frames and last frames. A shot can look attractive by itself and still fail because the next cut changes head size, screen direction, prop position, or background geometry.
The most common repair is not regeneration of the entire scene. Repair only the layer that failed:
| Problem | Likely cause | Targeted repair |
|---|---|---|
| Face is cut off | Subject began too close to the top edge | Regenerate the anchor frame with more headroom |
| Hands leave the frame | Gesture was added after composition | Change to a wider medium shot |
| Background reveal is unreadable | Character blocks the depth axis | Shift the character to a lower foreground position |
| Character changes at the cut | Next shot was generated independently | Use the previous endpoint as the next visual reference |
Reusable visual prompt:
Create a photorealistic side-by-side vertical framing comparison using the same female courier and the same apartment corridor, no text or labels. Left frame: intentionally poor composition with the top of her hair cropped, envelope partly outside the bottom edge, and lift doorway hidden behind her body. Right frame: corrected composition with complete headroom, both hands and envelope visible, courier offset in the middle ground, and open lift clearly visible behind her. MANDATORY CAMERA: identical eye-level camera position and 40mm lens appearance in both frames. MANDATORY LAYOUT: landscape 16:9 containing two equal 9:16 frames, realistic practical lighting, exact identity and wardrobe consistency, no logos, no UI.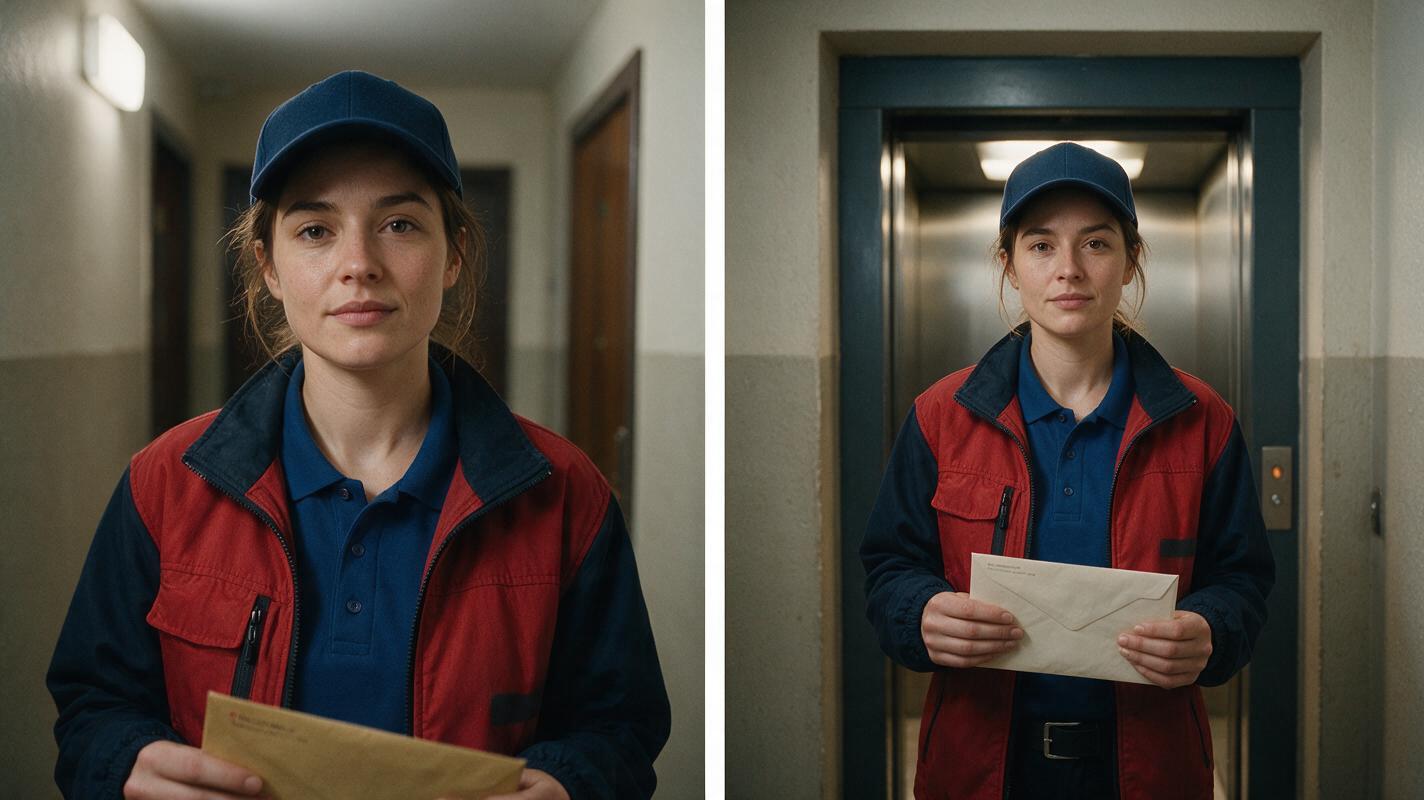
Step 6 — Test the Episode at Phone Size
Export a draft in the intended vertical canvas and watch it at approximately the size viewers will encounter it. Do not rely only on a large editing monitor. Check whether the seal, facial reaction, doorway reveal, and subtitles remain immediately readable.
- Pause at every cut and compare character scale.
- Confirm that captions do not cover hands, props, or reaction details.
- Watch once without sound to test visual causality.
- Listen once without watching to identify missing sound cues.
- Check the opening and closing frames of every episode in an AI series video.
If your approved references and shot cards are ready, try these models for free and compare the same vertical anchor frame across several generation paths before committing to the full scene.
FAQ
Should I generate in landscape and crop to vertical later?
Only when the original frame was deliberately composed with a protected vertical region. Otherwise, cropping can remove gestures, props, entrances, and spatial relationships. Native vertical anchor frames are safer for story-critical coverage.
How many characters can fit comfortably in a vertical AI short drama shot?
There is no fixed limit, but visual priority becomes harder as more faces share the narrow frame. For dialogue, use staggered depth, over-the-shoulder coverage, or separate reaction shots instead of compressing everyone into one row.
Why do hands disappear in vertical clips?
The initial frame may be too tight for the requested gesture. Compose enough room for the full motion path before animation and keep the action away from the bottom edge.
Can the same workflow support an AI microdrama series?
Yes. Reuse character sheets, location anchors, screen-direction rules, and episode boundary frames. These references help the next episode begin from the exact visual state established by the previous ending.
Sources
- Adobe — Understanding video aspect ratios
- YouTube Help — Three-minute YouTube Shorts
- TikTok Creative Center — Creative best practices
Final Checklist
- Write vertical shot cards before generating images.
- Protect one subject, one action, and one story detail per shot.
- Create a three-view sheet for every recurring character.
- Use depth instead of squeezing subjects into a horizontal row.
- Animate one dominant movement per clip.
- Compare the first and last frames across every cut.
- Review captions and visual evidence at phone size.
Keywords
vertical drama video, AI short drama, AI microdrama, AI short film generator, AI drama generator, AI series video, short drama from script