Video to Anime: Stylize a Cosplay Clip Without Flicker
Learn how to convert a short cosplay performance into anime-style video while controlling facial drift, unstable outlines, and background flicker. This practical video-to-video AI workflow covers shot preparation, prompt design, restrained stylization, evidence-based review, and final cleanup.
Table of contents
Turn a Cosplay Performance Into Stable Anime Footage
A convincing anime conversion should preserve the performer’s movement and costume design—not redraw the character differently in every frame.
Video-to-anime tools can transform live-action cosplay clips into illustrated sequences, but the hardest part is temporal consistency. Fine costume details may pulse, eyes can change shape, and background lines may crawl as the model interprets each moment.
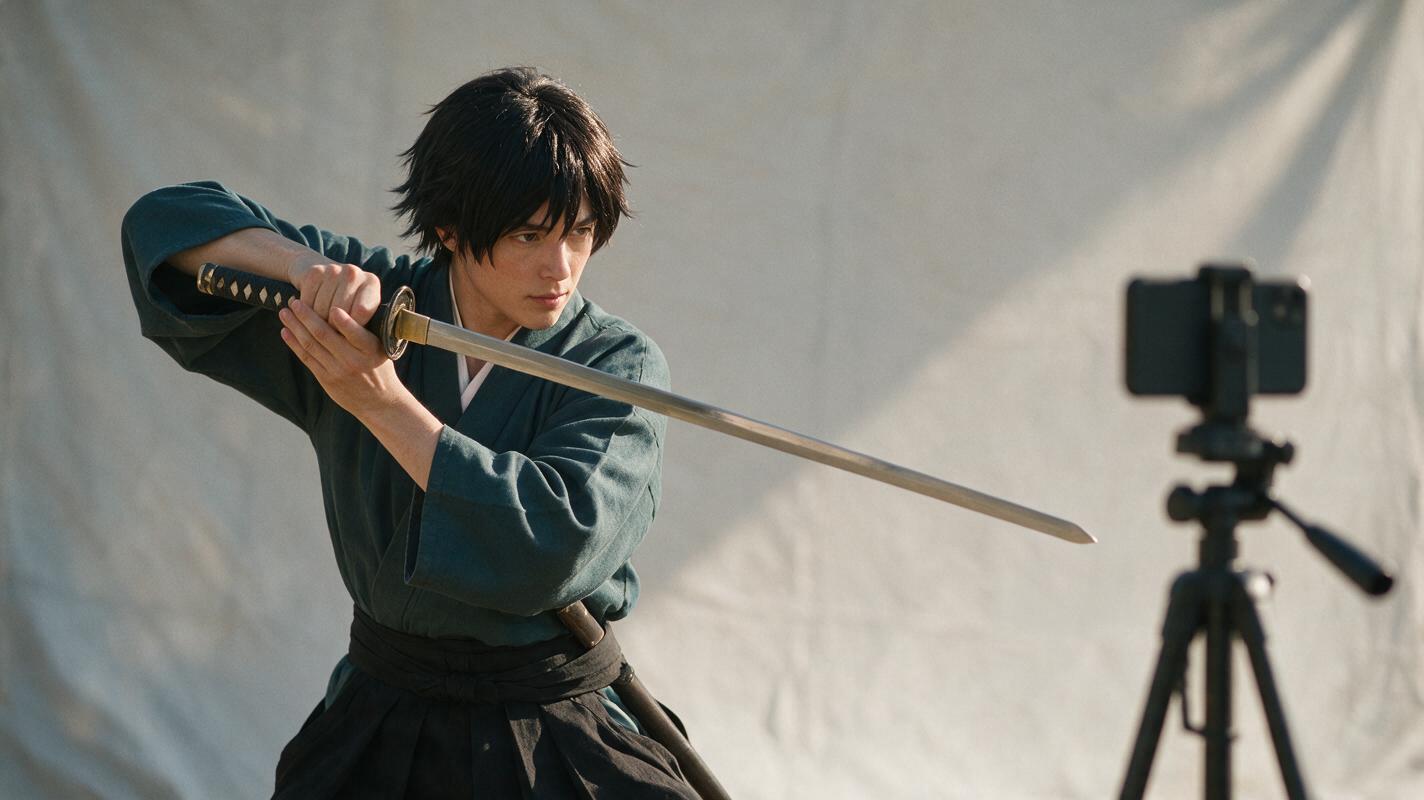
This tutorial uses a short vertical cosplay performance as its realistic scenario. The workflow applies to video-to-video AI tools that accept a source clip and a text prompt. Tool controls differ, so use the closest available settings rather than assuming every platform offers the same options.
Best starting material: a three- to eight-second shot with one visible performer, controlled camera movement, even lighting, and limited background clutter.
Step 1 — Choose a Clip the Model Can Follow
Start with a shot whose motion is easy to read. A slow turn, sword pose, hand gesture, or short walk is safer than rapid spins, hair whipping across the face, or several people crossing one another.
Review the source clip frame by frame and look for conditions that may become unstable:
- Motion blur: blurred fingers or props give the model uncertain shapes to redraw.
- Occlusion: hands crossing the face can cause the eyes, mouth, or jawline to reappear incorrectly.
- Reflective costume parts: highlights that move quickly may become animated symbols or inconsistent trim.
- Busy scenery: leaves, crowds, patterned curtains, and LED walls create thousands of small edges that can flicker.
- Camera shake: unstable framing makes it harder to distinguish camera motion from subject motion.
Trim the clip to one continuous action. Do not begin with a complete montage: each cut introduces a new composition and usually needs its own prompt and settings.
Step 2 — Prepare a Clean Source Before Stylization
Correct obvious technical problems before applying an anime look. Video-to-video AI may exaggerate noise, compression blocks, over-sharpened edges, and color banding because it treats them as visual details.
If the clip is noisy, apply conservative denoising rather than aggressive smoothing. Keep the eyes, wig strands, costume seams, and prop edges visible. A waxy source can produce flat illustrated faces with weak expressions.
Make only restrained exposure and white-balance corrections. Avoid extreme contrast, crushed shadows, or a strong color grade at this stage. The stylization model needs readable facial planes and costume colors.
| Source issue | Preparation choice | What to avoid |
|---|---|---|
| Low-light grain | Light temporal denoise | Plastic skin and smeared hair |
| Camera shake | Gentle stabilization and a small crop | Warped frame edges |
| Mixed lighting | Neutral white-balance correction | Removing intentional costume colors |
| Long recording | Trim one clear action | Processing unrelated shots together |
Step 3 — Define the Anime Treatment Precisely
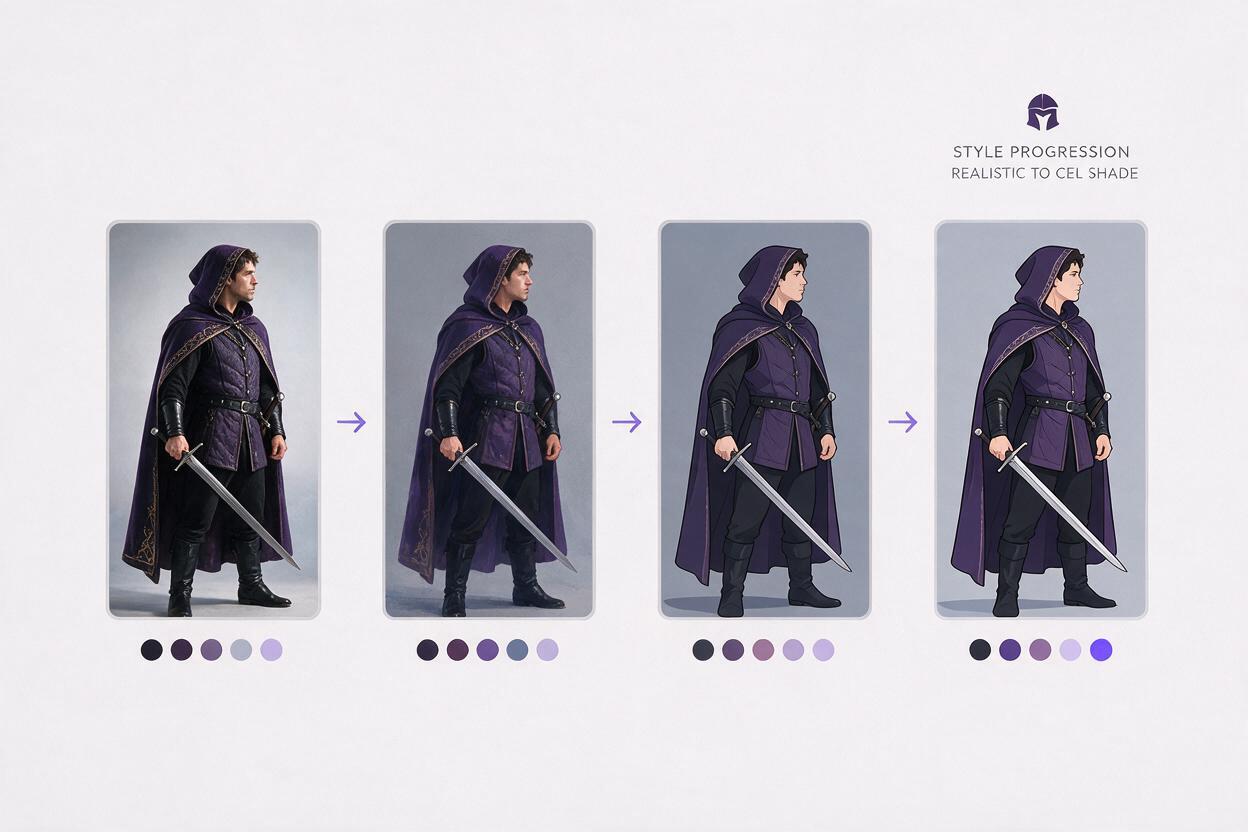
Generic instructions such as make it anime leave too many decisions to the model. Describe the line treatment, shading, palette, movement, and identity features that must remain stable.
Begin with a restrained prompt:
Transform the source into polished 2D anime footage.
Preserve the performer’s identity, facial expression, costume silhouette,
prop shape, body proportions, original movement, and camera motion.
Use clean dark outlines, restrained cel shading, soft painted highlights,
and a cohesive color palette. Keep the face and costume design consistent
across every frame. Preserve the original background composition.
If the tool accepts a negative prompt, use it to identify visible failure modes rather than adding a long list of unrelated quality words:
facial drift, changing eye shape, extra fingers, missing fingers,
warped prop, changing costume details, crawling outlines, background flicker,
frame-to-frame color shifts, duplicate limbs, text, logo, watermark
A specific visual direction can be added without naming a living artist or copying a protected franchise:
Graphic action-anime treatment, crisp tapered linework, two-level cel shading,
muted indigo shadows, warm skin tones, controlled highlights, cinematic depth,
stable character design, consistent line weight across frames.
Step 4 — Run a Low-Stylization Test First
Use the shortest useful test range and begin with moderate transformation strength. The goal of the first pass is not maximum illustration. It is to learn whether the system can retain the face, costume, prop, and motion.
When controls are available, prioritize source-video adherence or structural consistency. Apply one preset at a time. Stacking several AI video presets can make it impossible to identify which treatment caused an unstable face or changing costume pattern.
Inspect the beginning, middle, and end of the result, then scrub through difficult moments such as a blink, head turn, hand crossing, or prop swing. Normal-speed playback can hide one-frame defects that become distracting after editing or looping.
Adjustment rule: if identity changes, reduce stylization before rewriting the entire prompt. If the result is stable but too realistic, increase stylization gradually.
Public video-to-video AI options change frequently. Examples worth checking include Runway and Luma Dream Machine, but confirm current input requirements, clip limits, controls, and usage terms on their official pages before starting a project. Use MagicBoat only when its current tool selection explicitly supports the transformation needed for your source.
Step 5 — Separate Character and Background Problems
Do not respond to every defect by raising prompt strength. First determine where the instability occurs.
When the character changes
- Shorten the source around the unstable movement.
- Reduce transformation strength or increase source adherence.
- Simplify the style description.
- Repeat essential identity anchors once: hair color, costume silhouette, prop, and facial expression.
- Choose a frame with an unobstructed face if the tool supports reference frames.
When the background flickers
- Use a cleaner crop or simplify the background before conversion.
- Ask to preserve the original background geometry.
- Avoid prompts that request drifting particles, moving light streaks, or atmospheric effects.
- Consider stylizing the performer separately when a real video matting workflow is available.
When props bend or disappear
Name the prop and its defining geometry. For example, replace weapon with one straight silver sword held in the right hand, unchanged length and shape. Clear spatial language gives the system a stronger constraint.
Step 6 — Build Honest Before-and-After Evidence
Evaluate the result with matching frames, not a flattering source frame beside an unrelated output frame. Export stills from the same timestamps in the original and transformed clips. Include at least one easy pose and one difficult movement.
| Evidence frame | What to compare | Pass condition |
|---|---|---|
| Opening frame | Face, costume colors, composition | Character is recognizable and correctly framed |
| Fastest movement | Hands, hair, prop, limb count | No major duplication or structural break |
| Head turn or blink | Eye shape, jawline, expression | Identity remains coherent through motion |
| Final frame | Palette, line weight, background | Style matches the opening without a visible jump |
Keep generation settings, prompt text, crop, duration, and input version with the comparison. This turns the before-and-after sheet into reproducible evidence instead of a subjective claim.
Source file:
Clip duration:
Output version:
Prompt version:
Stylization setting:
Source-adherence setting:
Observed success:
Observed defect:
Next single change: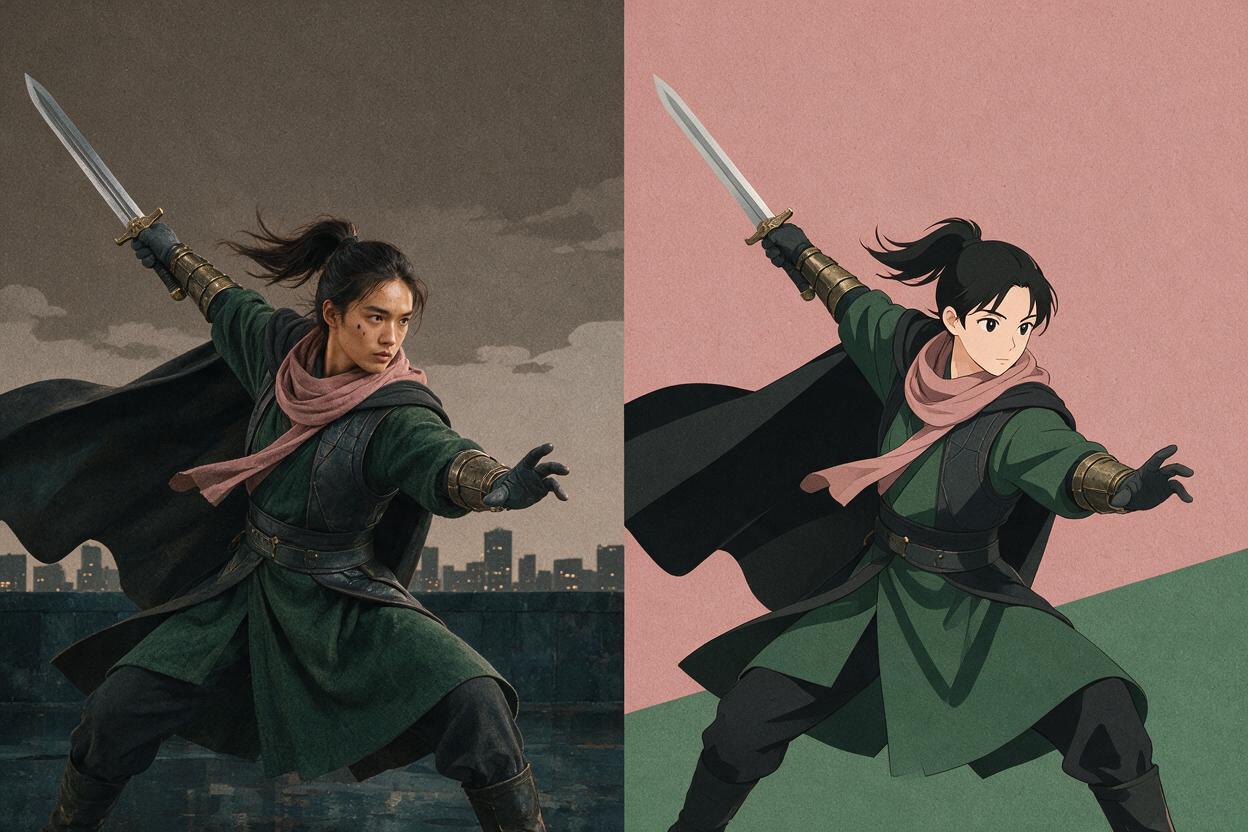
Step 7 — Repair Only What the Final Edit Reveals
Choose the most stable generation as the master, even if another version looks more dramatic in a single frame. Temporal coherence matters more than isolated detail in moving footage.
Small defects can be hidden with a cutaway, a brief crop, or a shorter edit. If one section fails completely, regenerate only that segment and place the cut at a natural motion boundary. Trying to repair a long unstable passage frame by frame is rarely efficient.
Apply an AI video enhancer only after stylization and editing, and use it conservatively. Heavy sharpening can turn clean anime outlines into halos or make compression noise resemble intentional texture. Review the exported file at actual playback size before publishing.
Final Checklist
- The source contains one clear action and minimal motion blur.
- Noise and exposure were corrected without erasing facial detail.
- The prompt defines linework, shading, palette, motion, and identity anchors.
- The first test uses restrained stylization and only one preset.
- Face, hands, costume, props, and background were reviewed frame by frame.
- Before-and-after frames use identical timestamps and framing.
- The final export was checked for flicker, outline halos, and color shifts.
FAQ
Why does a video-to-anime result flicker?
Flicker appears when the generated interpretation changes between frames. Fine textures, motion blur, complicated backgrounds, strong stylization, and ambiguous shapes can all contribute. Shorter clips, cleaner sources, moderate settings, and more precise prompts can reduce the problem.
Should I upscale the source before converting it?
Only if the source is too small for the chosen tool’s input workflow. Upscaling cannot restore genuinely missing facial or costume detail, and aggressive sharpening may introduce edges that later flicker. In many cases, conservative enhancement after stylization is easier to judge.
Can I convert an entire cosplay montage in one generation?
Process separate shots individually. Changes in location, framing, lighting, and costume visibility usually require different prompts or settings. Assemble the approved results in an editor afterward.
Can presets replace a detailed prompt?
A preset can establish a broad aesthetic, but it may not describe what must remain unchanged. Add concise anchors for identity, costume, props, background geometry, and original motion.
What is the most important quality check?
Watch the face, hands, and defining costume elements through the fastest movement. A beautiful still frame is not sufficient evidence of a stable video result.
Sources
- Runway — Official Product Page
- Luma Dream Machine — Official Product Page
- FFmpeg — Official Filter Documentation
Keywords
video to anime, video to video ai, ai video tools, ai video presets, ai video enhancer, denoise video