Video Matting for Flyaway Hair: A Clean Background Swap Workflow
Learn a practical video matting workflow for replacing a presenter's background without cutting off flyaway hair, fingers, or motion blur. This tutorial covers clip preparation, matte generation, edge repair, temporal review, compositing, and honest before-and-after evidence.

Table of contents
Clean Edges Matter More Than a Dramatic New Background
A convincing background replacement depends on the moving edge around the subject—not on how impressive the replacement scene looks.
Consider a familiar creator workflow: a presenter records a vertical product explanation in a small bedroom, but the final video needs a cleaner studio-style background. The presenter has curly hair, gestures frequently, and occasionally holds the product close to her face. Those details make this a demanding video matting task.
The workflow below is designed for AI video tools, rotoscoping applications, and text-guided segmentation systems that can produce an alpha matte or foreground cutout. Interface names vary, but the order matters: stabilize the source, generate a conservative matte, repair difficult frames, test it in motion, and only then build the final composite.
A matte can look accurate on one paused frame and still fail during playback. Always inspect edges over time.
Step 1 — Choose a Stress-Test Clip
Do not begin with the easiest frame. Choose a short section that contains the edge conditions most likely to break:
- Flyaway or backlit hair
- Fast hand gestures and separated fingers
- Motion blur around wrists or clothing
- A foreground object crossing the face or torso
- Areas where clothing resembles the original background
A five- to ten-second test is usually more useful than processing the entire recording immediately. Keep the source frame rate and resolution unchanged during this test so that the motion you evaluate matches the original footage.
Also preserve an untouched copy of the source. If the matte fails later, you need to know whether the problem came from the original recording, preprocessing, segmentation, or compositing.

Step 2 — Prepare the Source Without Erasing Fine Detail
Compression blocks and low-light noise can make foreground boundaries unstable, but aggressive cleanup can erase the same hair strands you want to retain. If the source needs preprocessing, use the lightest correction that makes the subject easier to distinguish.
| Source problem | Conservative preparation | Avoid |
|---|---|---|
| Heavy chroma noise | Apply mild chroma-focused denoising | Strong spatial smoothing over hair |
| Dark subject edges | Lift exposure or shadows slightly | Crushing blacks to hide noise |
| Camera shake | Use gentle stabilization if necessary | Large automatic crops that change framing |
| Low-resolution footage | Test the native clip first | Assuming an AI video upscaler will reconstruct every strand |
If you denoise video before matting, compare the processed clip with the original at 100% scale. Look specifically for hair that merges into a smooth mass and motion blur that becomes a hard outline. Either artifact can make the final cutout feel artificial.
Step 3 — Generate a Conservative Base Matte
Import the stress-test clip into a real matting or rotoscoping tool. Adobe After Effects provides Roto Brush and Refine Matte controls, while the open-source Robust Video Matting project offers a reference workflow for human video matting. Other applications may use terms such as subject isolation, foreground extraction, person mask, or magic mask.
Begin on a frame where the full subject is clearly visible. Mark definite foreground areas such as the face, torso, and arms before dealing with translucent hair. If the tool accepts text instructions, adapt this prompt:
Isolate the presenter as the foreground subject.
Keep the full head, curly flyaway hair, both hands, separated fingers,
clothing edges, and the product held in front of the body.
Exclude the walls, furniture, doorway, floor, and background shadows.
Preserve natural motion blur and semi-transparent hair edges.
Maintain temporal consistency across adjacent frames.
A prompt cannot replace visual review. Words such as “hair” and “hands” help define intent, but the tool still has to interpret ambiguous pixels. Start with a slightly inclusive matte rather than a tight cut that removes legitimate foreground detail.
Step 4 — Repair Hair, Hands, and Motion
Review the matte itself as a grayscale image whenever possible: white represents foreground, black represents background, and gray represents partial transparency. This view reveals defects that the replacement background can hide.
Work on isolated problem ranges instead of repainting the entire clip. Use positive foreground strokes to restore missing curls, fingers, or product edges. Use negative strokes to remove wall patches trapped between the arm and torso. For hair, prefer edge-refinement controls over a solid painted mask because individual strands often require partial transparency.
| Artifact | Likely cause | Repair direction |
|---|---|---|
| Hair looks cut from paper | Matte edge is too hard | Restore partial transparency and reduce edge contraction |
| Bright or dark halo | Original background color remains on the edge | Use restrained decontamination or spill correction |
| Fingers merge together | Small gaps were classified as foreground | Add background corrections between fingers |
| Edge flickers during gestures | Frame-to-frame propagation is unstable | Add correction points around the failure range |
| Motion blur disappears | Matte was forced into a binary shape | Preserve gray, semi-transparent boundary pixels |
Do not chase every single strand. The objective is a temporally coherent silhouette with believable softness. Excessive edge sharpening can turn subtle hair detail into crawling pixels.
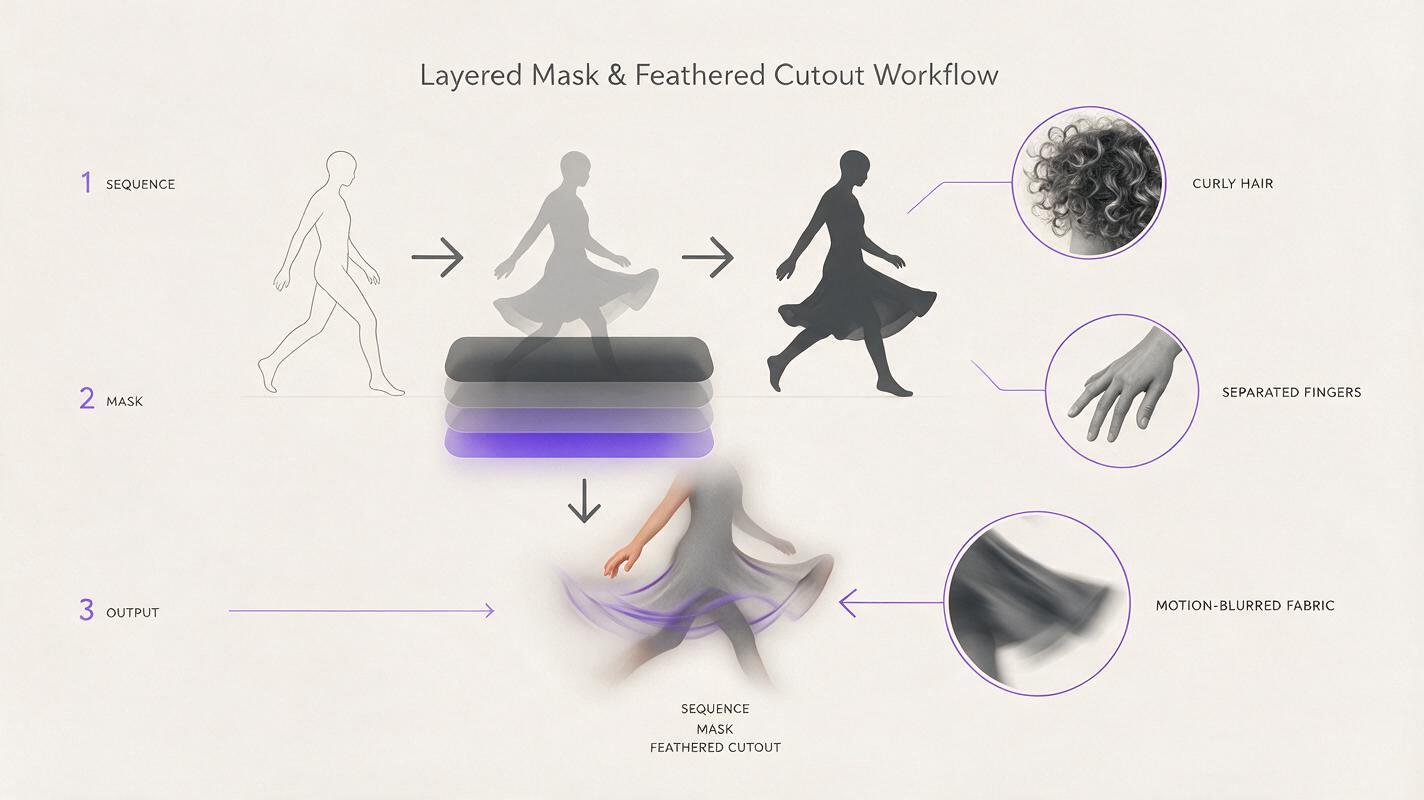
Step 5 — Test the Matte Against Three Backgrounds
A cutout should be tested against more than the intended replacement. Use a temporary black background, a white background, and a saturated color that contrasts with the subject. Each reveals a different weakness:
- Black exposes pale halos and over-bright contamination.
- White exposes dark fringes and missing transparent edges.
- Saturated color makes holes, leaks, and unstable boundaries easy to spot.
Then place the subject over the intended scene and match the composite rather than treating the matte as an isolated technical object. Check scale, perspective, light direction, contrast, color temperature, and depth of field. A technically clean cutout can still look pasted on when the foreground is sharp but the background is heavily blurred, or when their lighting comes from opposite directions.
If your system supports a video-to-video AI background generator, create or select the background separately before compositing. Avoid regenerating the presenter when identity, clothing, product shape, or spoken delivery must remain unchanged.
Step 6 — Build Honest Before-and-After Evidence
Evidence should make faults visible rather than disguising them. Export the same time range in four versions:
- Untouched source footage
- Grayscale alpha matte
- Foreground over a high-contrast diagnostic background
- Final foreground and replacement-background composite
Keep frame rate, duration, crop, and playback speed identical. Choose at least one comparison frame with hair movement and another with separated fingers or an overlapping object. A still image shows edge detail; a short looping clip shows temporal stability. You need both.
Do not evaluate only a reduced social-media preview. Inspect the exported file at 100% scale, then watch it once at normal viewing size.
Record corrections in a simple review table rather than relying on memory:
Time range: 00:03.10–00:03.22
Problem: background leak between index and middle finger
Visible on: white and saturated test backgrounds
Repair: add negative correction on first failure frame
Retest: forward playback, reverse playback, frame-by-frame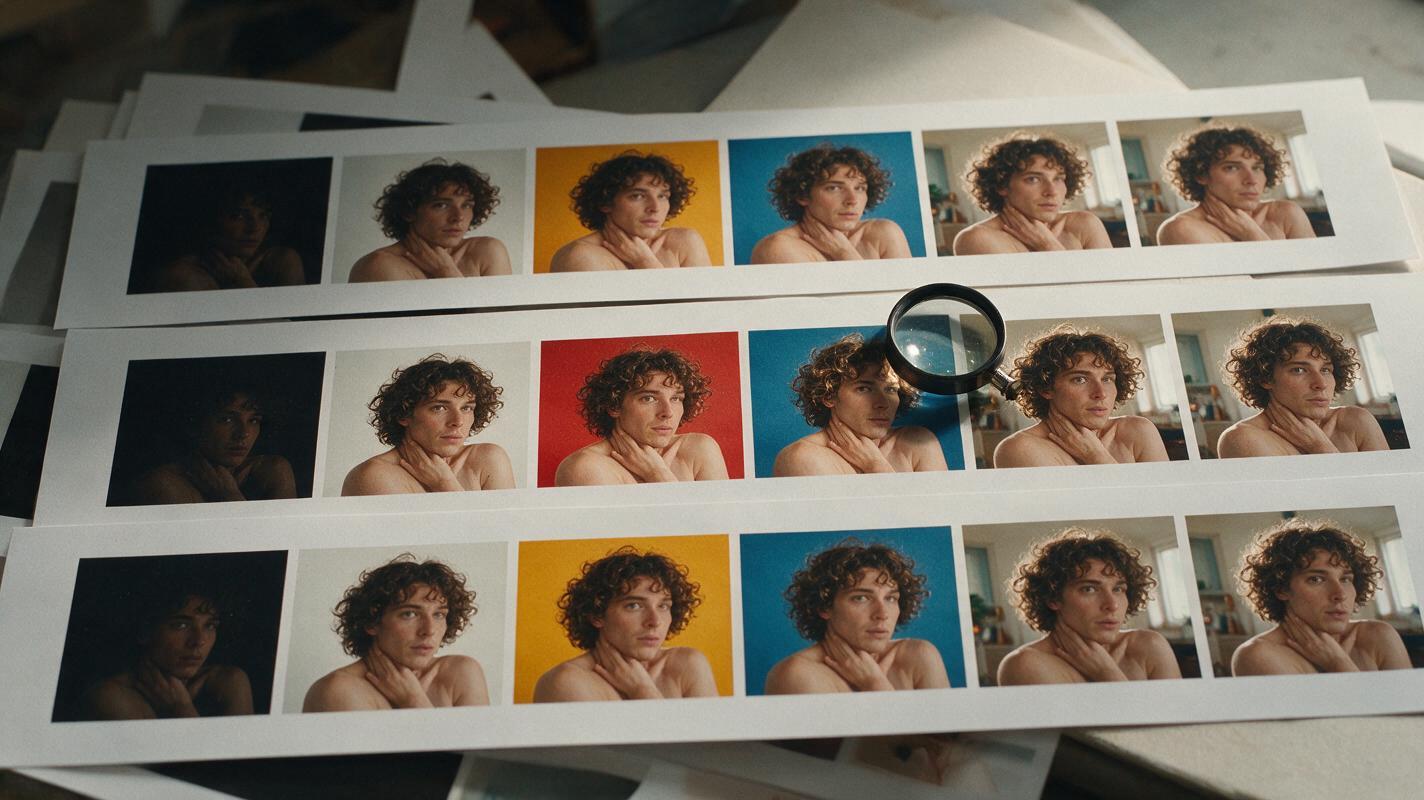
Step 7 — Export Without Creating New Edge Problems
If the foreground will be composited in another application, export a format that preserves an alpha channel and confirm whether the receiving software expects straight or premultiplied alpha. A mismatch can create dark or bright fringes even when the underlying matte is good.
If the composite is already complete, export the finished video normally and compare it with the timeline preview. Check hair during head turns, hands at peak motion, and the product boundary when it crosses the body. Compression can simplify fine edges, so judge the actual delivery file rather than assuming the preview represents the final result.
Upscaling or additional enhancement should happen only after the matte has passed inspection. An AI video enhancer may make an existing halo sharper instead of correcting it.
Final Checklist
- The test range contains hair, hands, motion blur, and overlap.
- Preprocessing has not smoothed away fine foreground detail.
- The base matte is inclusive without capturing large background regions.
- Hair retains partial transparency instead of becoming a hard helmet shape.
- Finger gaps and object boundaries remain stable during motion.
- The matte passes black, white, and saturated-background tests.
- Foreground lighting, sharpness, and color fit the replacement scene.
- Before, matte, diagnostic, and final exports use identical timing.
- The delivered file has been reviewed at full scale and normal viewing size.
FAQ
Is video matting the same as removing a background?
Background removal describes the desired result. Video matting estimates the foreground subject and its transparency over time, producing an alpha matte that can preserve soft details such as hair, fabric, glass, and motion blur.
Can video matting work without a green screen?
Yes, modern rotoscoping and AI matting tools can isolate people from ordinary footage. Results still depend on visible separation, motion, occlusion, compression, and edge complexity. A controlled background and good lighting generally reduce manual repair.
Should I denoise before or after creating the matte?
Test the original first. Apply mild preprocessing before matting only when noise prevents stable segmentation, and confirm that it does not remove hair or blur finger gaps. Cosmetic denoising can be performed later on the composite if necessary.
Why does a clean still matte flicker in the exported video?
Each frame may contain a slightly different edge. Playback turns those small changes into visible crawling or pulsing. Review the matte forward, backward, and frame by frame around rapid motion, then correct the first frame where propagation begins to fail.
Sources
- Adobe Help Center: Roto Brush and Refine Matte in After Effects
- Robust Video Matting: Official open-source project repository
- W3C: Compositing and Blending Level 1
Keywords
video matting, ai video tools, video to video ai, video background removal, alpha matte, hair matting, ai video enhancer, denoise video
Decision: PUBLISH — The tutorial covers a distinct background-matting task with a reproducible edge-repair and evidence workflow.